2 layers91.4 × 91.4 mm

 alustig3/unitron1
Kitchen tool for working with important cooking units
Unitron is an open-source printed circuit board by alustig3, from the alustig3/unitron repository on GitHub, published under the CERN-OHL-P-2.0 licence. It is a 2-layer board of 80.3 × 155 mm with 83 parts on 94 nets, routed with 977 tracks and 144 vias.
It is built around the AS1115-BSST, LTC-4727JR and LTC-4727JS, with the MCP73831, WS2812B and TSM-116-01-T-SV among its other parts. Its parts include 24 resistors, 17 switches, 9 diodes, 8 ICs and 4 connectors. It belongs with the keyboards and input boards of this library.



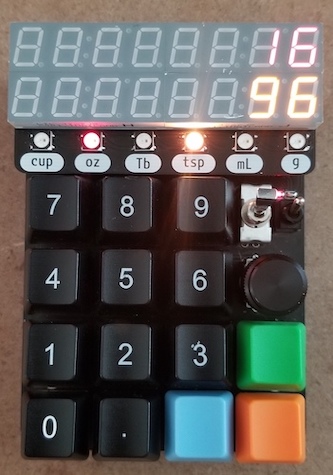
Unitron is a kitchen tool for working with important cooking units -- time, space, and mass -- using tactually-pleasing switches, knobs, and buttons, non-intrusive beeps, and exciting lights.
Unitron allows you to convert between common volume units (cups, ounces, tablespoons, teaspoons and milliliters). It can also convert from volume to mass (and vice-versa), taking into account the density of common cooking ingredients. This makes measuring ingredients for volume-based recipes with a kitchen scale a breeze. It also functions as a handy countdown timer!
Watch the demo video here.
Unitron was developed by Andy Lustig.
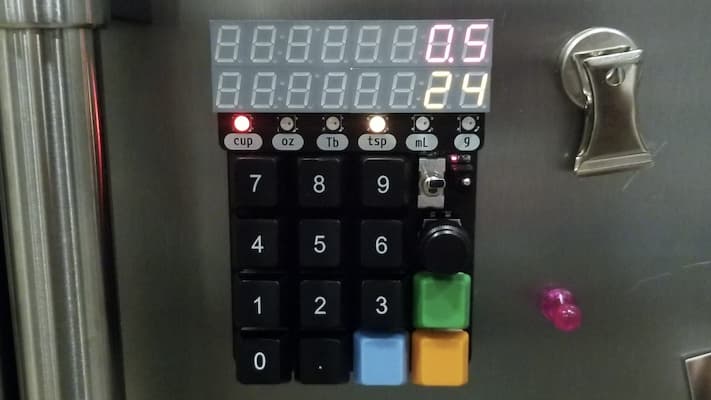
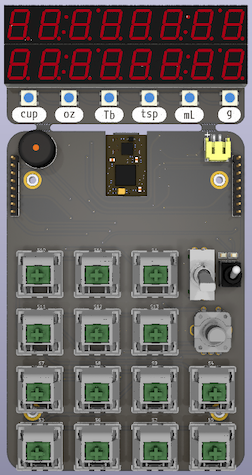
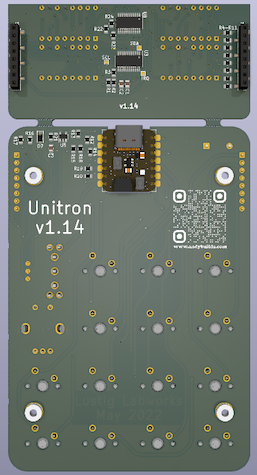
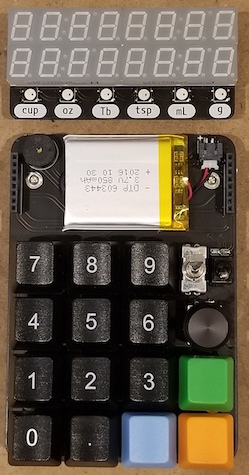
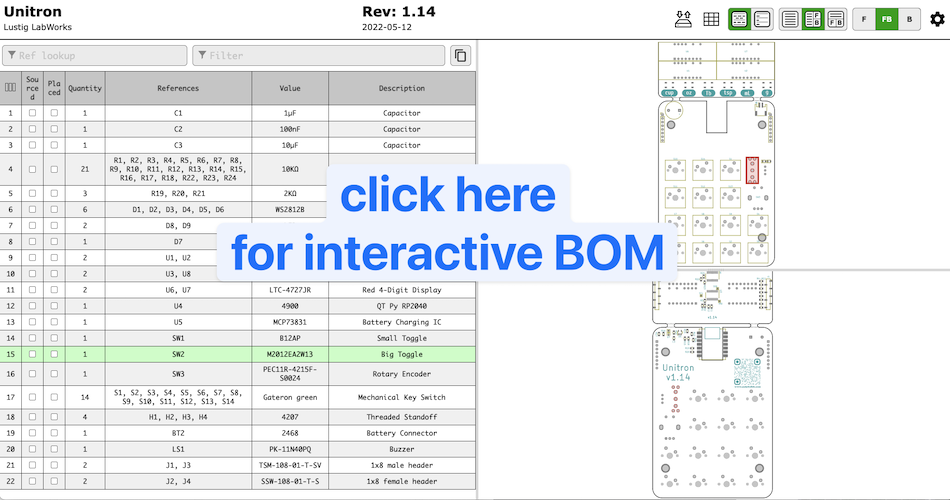
| Qty | Reference | Description | Value/MPN |
|---|---|---|---|
| 1 | BT2 | Battery Connector | 2468 |
| 1 | C1 | 0805 Capacitor | 1µF |
| 1 | C2 | 0805 Capacitor | 100nF |
| 1 | C3 | 0805 Capacitor | 10µF |
| 6 | D1-6 | Addressable RGB LED | WS2812B |
| 1 | D7 | Diode | SM5817PL-TP |
| 2 | D8, D9 | 0805 Indicator LED | Red and Yellow |
| 4 | H1-4 | Threaded Standoff | 4207 |
| 2 | J1, J3 | 1x8 male header | TSM-108-01-T-SV |
| 2 | J2, J4 | 1x8 female header | SSW-108-01-T-S |
| 1 | LS1 | Buzzer | PK-11N40PQ |
| 21 | R1-18, R22-24 | 0805 Resistor | 10KΩ |
| 3 | R19, R20, R21 | 0805 Resistor | 2KΩ |
| 14 | S1-14 | Mechanical Key Switch | Gateron green |
| 1 | SW1 | Small Toggle | B12AP |
| 1 | SW2 | Big Toggle | M2012EA2W13 |
| 1 | SW3 | Rotary Encoder | PEC11R-4215F-S0024 |
| 2 | U1, U2 | Yellow 4-Digit Display | LTC-4727JS |
| 2 | U6, U7 | Red 4-Digit Display | LTC-4727JR |
| 2 | U3, U8 | 7-Segment Display Driver | AS1115-BSST |
| 1 | U4 | QT Py RP2040 | 4900 |
| 1 | U5 | Battery Charging IC | MCP73831 |
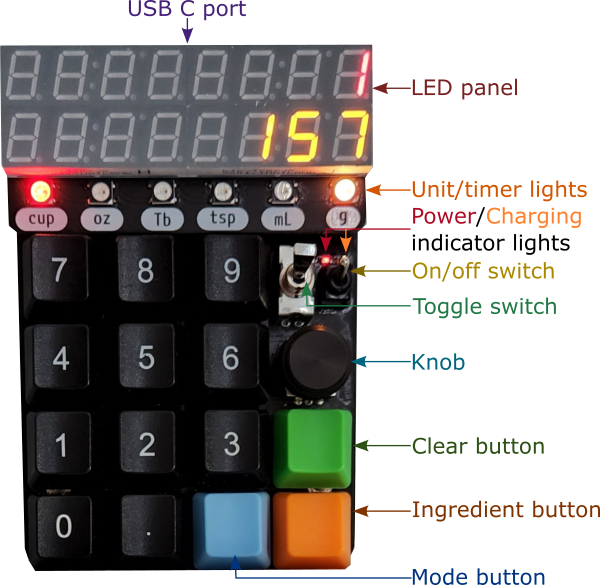
The first step to using your Unitron is to turn it on with the smaller, right-most On/Off switch. When Unitron is on, the LED panel and the red Power indicator light will be lit up. Turn it off to save power.
Unitron has a countdown timer mode and converter mode.
To switch to modes, click the blue Mode button.
Unitron will startup in the start_mode specified in your settings.py file (see Modifying Unitron functionality).
If the blue Mode button is pressed down when turning on Unitron, it will startup in the opposite mode.
To set the timer, use the number keys. To specify minutes and seconds, you can use the decimal key, e.g. 20.30 corresponds to 20 minutes and 30 seconds, while 20 corresponds to 20 seconds.
To start the timer, flip the Toggle switch. To pause the timer, flip the Toggle switch again. The top, red row of the LED panel shows the time remaining, and the bottom orange row shows the original time requested.
To clear the timer, pause the timer (if necessary), then push the green Clear button.
As the timer counts down to 0, a bar of Timer lights will progressively light up. When the timer reaches 0, it will beep three times.
Unitron converts from blinking to solid units in the Unit light row.
You can enter the amount of the blinking "from" units with the number keys. This will be shown in the LED panel. The corresponding amount in the solid "to" units will be shown in the other row of the LED panel.
You can change units using the Knob. Turning the knob changes the blinking "from" units. Turning the knob while holding it down changes the solid "to" units.
You can swap the "from" and "to" units with the Toggle switch. If you find it difficult to hold down the Knob while turning it, you can use the Toggle switch to swap, turn the knob, then flip the Toggle switch back.
Conversions between volume and mass require knowing the density of the ingredient. You can specify cooking ingredients by holding down the orange Ingredient button while turning the Knob. Note that the ingredient button only functions when the two units selected are mass and volume -- ingredient type does not matter when converting from mass to mass or volume to volume.
Unitron is rechargeable. To charge it, plug a USB C cable into the USB port at the top. The yellow charging indicator will be on while charging and will turn off when the battery is full.
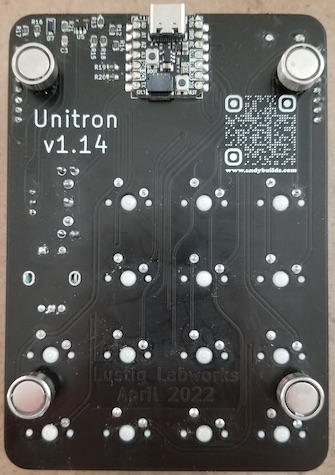
The back of Unitron has four strong magnets. It is meant to be placed on a metallic refrigerator.
Unitron uses CircuitPython.
You can modify the code it is running by connecting it to your computer via the USB C port and mounting it as a disk drive.
Basic settings can be adjusted by editing the settings.py file.
Change the mode that Unitron starts up in when turned on by editing start_mode.
Adjust the number of beeps for when the timer expires by editing beep_num.
To add new ingredients to Unitron, modify ingredients. Specify the density in grams per teaspoon. You can try to measure these densities yourself, or you can trust the internet. Here's one site with information.
Make sure to eject Unitron before disconnecting.
Connect Unitron to a computer via the USB C port.
To enter bootloader mode, hold down the BOOT button, and while continuing to hold it, press and release the RST button. Continue to hold the boot select button until the bootloader drive appears on your computer as RPI-RP2.
Download adafruit-circuitpython-adafruit_qtpy_rp2040-en_US-9.0.4.uf2 file from the release page and drag it onto the bootloader drive. The RPI-RP2 drive will disappear, and a new drive called CIRCUITPY will appear.
If you have trouble, take a look at the official CirtcuitPython installation instructions here.
Connect Unitron to a computer via the USB C port.
It should appear as CIRCUITPY.
Download the latest software release.
Unzip the download and copy the files onto the CIRCUITPY drive.
| Qty | Value | Footprint | References |
|---|---|---|---|
| 21 | 10KΩ | Resistor_SMD:R_0805_2012Metric | R1, R2, R3, R4, R10, R11, R12, R13, R14, R15, R16, R17, R18, R22, R23, R24 +5 |
| 14 | Gateron green | asl_footprints:SW_Cherry_MX_1.00u_PCB | S1, S2, S3, S4, S5, S6, S7, S8, S9, S10, S11, S12, S13, S14 |
| 6 | WS2812B | LED_SMD:LED_WS2812B_PLCC4_5.0x5.0mm_P3.2mm | D1, D2, D3, D4, D5, D6 |
| 4 | Threaded_Standoff | asl_footprints:standoff_nut | H1, H2, H3, H4 |
| 3 | 2KΩ | Resistor_SMD:R_0805_2012Metric | R19, R20, R21 |
| 3 | TestPoint | TestPoint:TestPoint_Pad_1.0x1.0mm | TP1, TP2, TP3 |
| 2 | AS1115-BSST | Package_SO:QSOP-24_3.9x8.7mm_P0.635mm | U3, U8 |
| 2 | Conn_01x10_Female | Connector_PinHeader_2.54mm:PinHeader_1x08_P2.54mm_Vertical | J2, J4 |
| 2 | LED | LED_SMD:LED_0805_2012Metric | D8, D9 |
| 2 | LTC-4727JR | asl_footprints:LTC-4727 | U6, U7 |
| 2 | LTC-4727JS | asl_footprints:LTC-4727 | U1, U2 |
| 2 | TSM-116-01-T-SV | Connector_PinSocket_2.54mm:PinSocket_1x08_P2.54mm_Vertical_SMD_Pin1Right | J1, J3 |
| 2 | VAL** | asl_footprints:mouse-bite-2.54mm-slot-long | MB*, MB* |
| 1 | 100nF | Capacitor_SMD:C_0805_2012Metric | C2 |
| 1 | 10µF | Capacitor_SMD:C_0805_2012Metric | C3 |
| 1 | 1µF | Capacitor_SMD:C_0805_2012Metric | C1 |
| 1 | 2468 | Connector_JST:JST_PH_S2B-PH-SM4-TB_1x02-1MP_P2.00mm_Horizontal | BT2 |
| 1 | 4900 | asl_footprints:QT_Py | U4 |
| 1 | Diode | asl_footprints:D_SOD-123F | D7 |
| 1 | G*** | kibuzzard-6260D796 | kibuzzard-6260D796 |
| 1 | G*** | kibuzzard-6260D857 | kibuzzard-6260D857 |
| 1 | G*** | kibuzzard-6260D976 | kibuzzard-6260D976 |
| 1 | G*** | kibuzzard-6260D7DE | kibuzzard-6260D7DE |
| 1 | G*** | kibuzzard-6260DA5E | kibuzzard-6260DA5E |
| 1 | G*** | kibuzzard-6260D82F | kibuzzard-6260D82F |
| 1 | LOGO | LOGO | G*** |
| 1 | M2012EA2W13 | asl_footprints:switch_nkk_reinforced_pc_pin | SW2 |
| 1 | M2012EA2W13 | asl_footprints:encoder_PEC11R | SW3 |
| 1 | MCP73831 | Package_TO_SOT_SMD:SOT-23-5 | U5 |
| 1 | SPST | asl_footprints:switch_toggle | SW1 |
| 1 | Speaker | Buzzer_Beeper:Buzzer_12x9.5RM7.6 | LS1 |
It measures 80.3 × 155 mm and has 2 copper layers, 1.6 mm thick.
83 parts, built around the AS1115-BSST, LTC-4727JR, LTC-4727JS and MCP73831. The full list of its parts is on this page, with links to each part's symbol and footprint where PCBKit's library has them.
From the alustig3/unitron repository on GitHub, at the commit this page was made from: the board is pcb/unitron.kicad_pcb and its schematic pcb/unitron.kicad_sch. PCBKit opens the board in the browser, with nothing to install.
Its repository publishes it under the CERN-OHL-P-2.0 licence: you may reuse it on that licence's terms (keep the author's notice, and for a copyleft licence share your changes alike).


bbokser/persuasive_waker
An open source hardware alarm clock that can't be snoozed or turned off.

mickdassive/usbc_car_module
This project is a USB 3.1x1 hub designed with KiCad 8.0 and developed with PlatformIO. It features two USB-C ports (one downstream and one upstream) capable of delivering up to 100W power, along with four regular…


Diegolox/MOUNTAIN_IN_THE_POCKET
Un dispositivo que va ayudar a muchos montañeros en sus expediciones.


samcwitte/PCB-Design-Battle
This is a repository containing my PCB designs for a 2-hour PCB battle I participated in with Predictable Designs on YouTube.