2 layers135 × 101.5 mm

 adriencarbonaro/irrigation-controller2
Irrigation System Controller
Irrigation controller is an open-source printed circuit board by adriencarbonaro, from the adriencarbonaro/irrigation-controller repository on GitHub. It is a 2-layer board of 148 × 61 mm with 40 parts on 36 nets, routed with 149 tracks and 11 vias.
It is built around the BT136-600E, HLK-10M12 and MOC3041M, with the XIAO ESP32C3, IRL540NPBF and BC547 among its other parts. Its parts include 18 resistors, 5 transistors, 5 connectors, 3 ICs and 2 capacitors. It belongs with the ESP32 and RISC-V boards of this library.


This controller is used to remotely control a drip irrigation system.
It controls up to 3 irrigation zones and, optionally, a submersible pump.
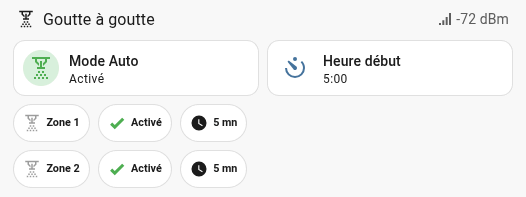
Home Assistant controls the watering sequences:
A button makes the controller active (watering according to the zone parameters) or inactive (no watering).
Start time: HH:MM [0:00 to 23:59], when the watering sequence shall start.
The behavior of each zone is defined in Home Assistant with the following parameters:
Sequence definition: at the start time, zone 1 is operated for the given duration if it is activated, then zone 2, then zone 3.
Huge thanks to PCBWay for sponsoring the PCB manufacturing for this project. Their support, help and advices helped make this project physically real.
If you're looking for high-quality PCB fabrication or assembly services, check them out:

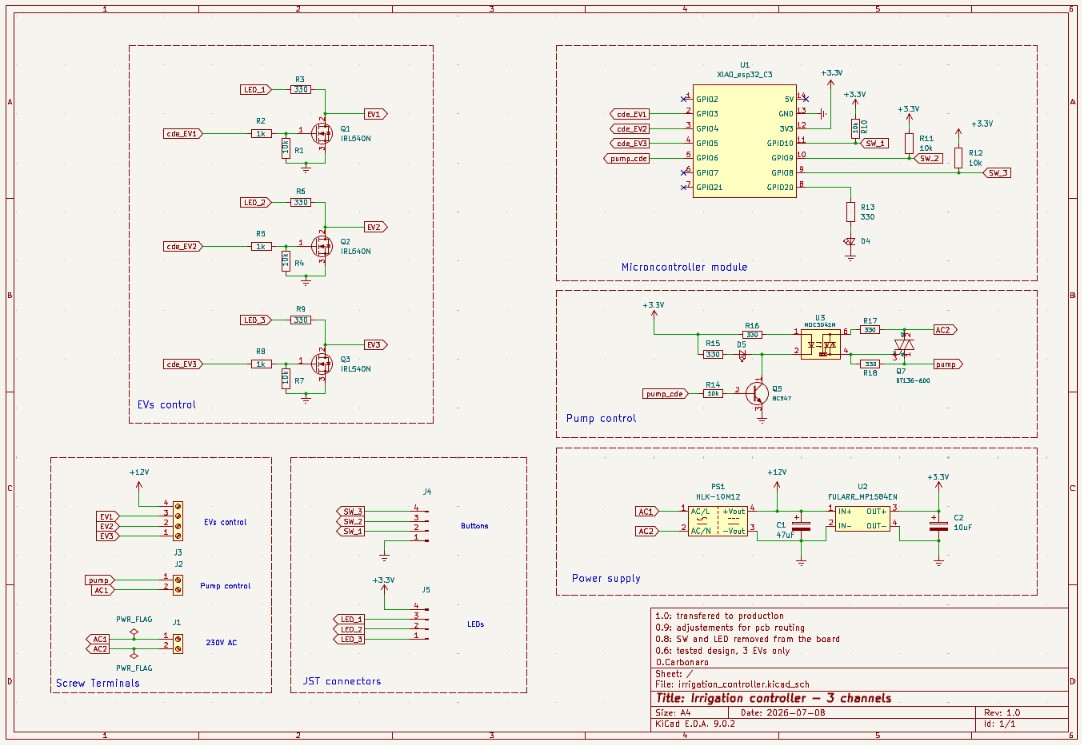
Schematic & PCB designed using KiCad 9
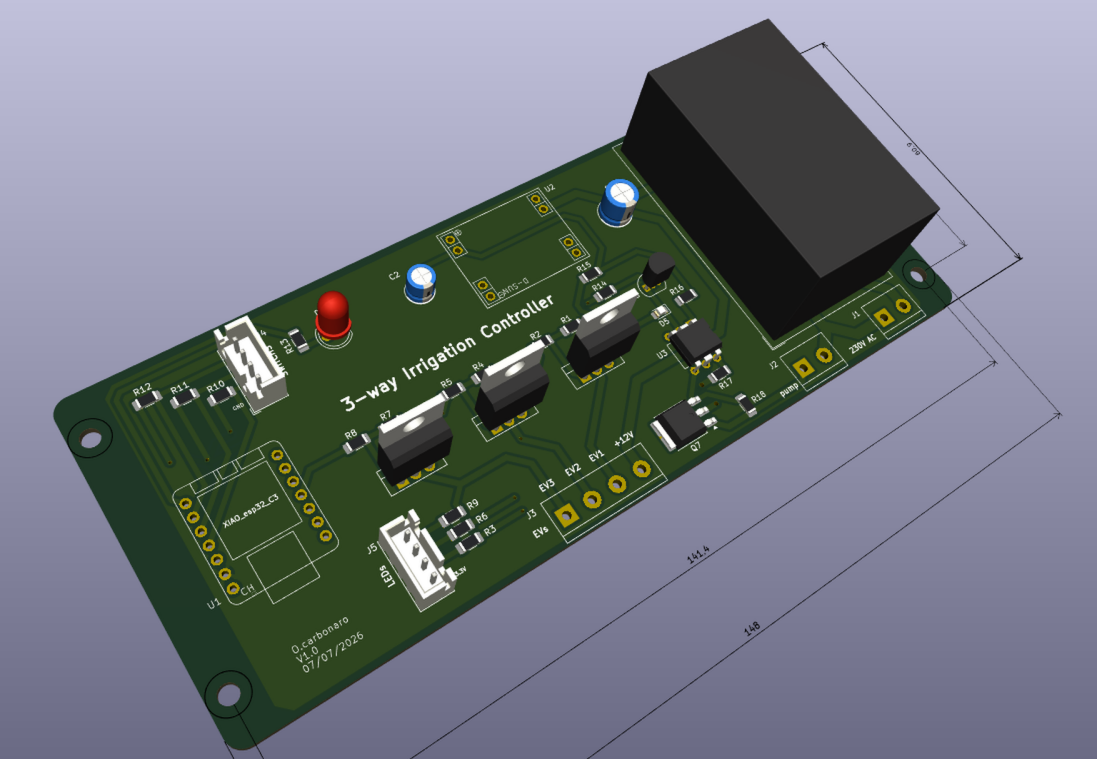
Final design
PCB dimensions 148 × 61 mm, 4 mounting holes (141.4 × 45 mm)
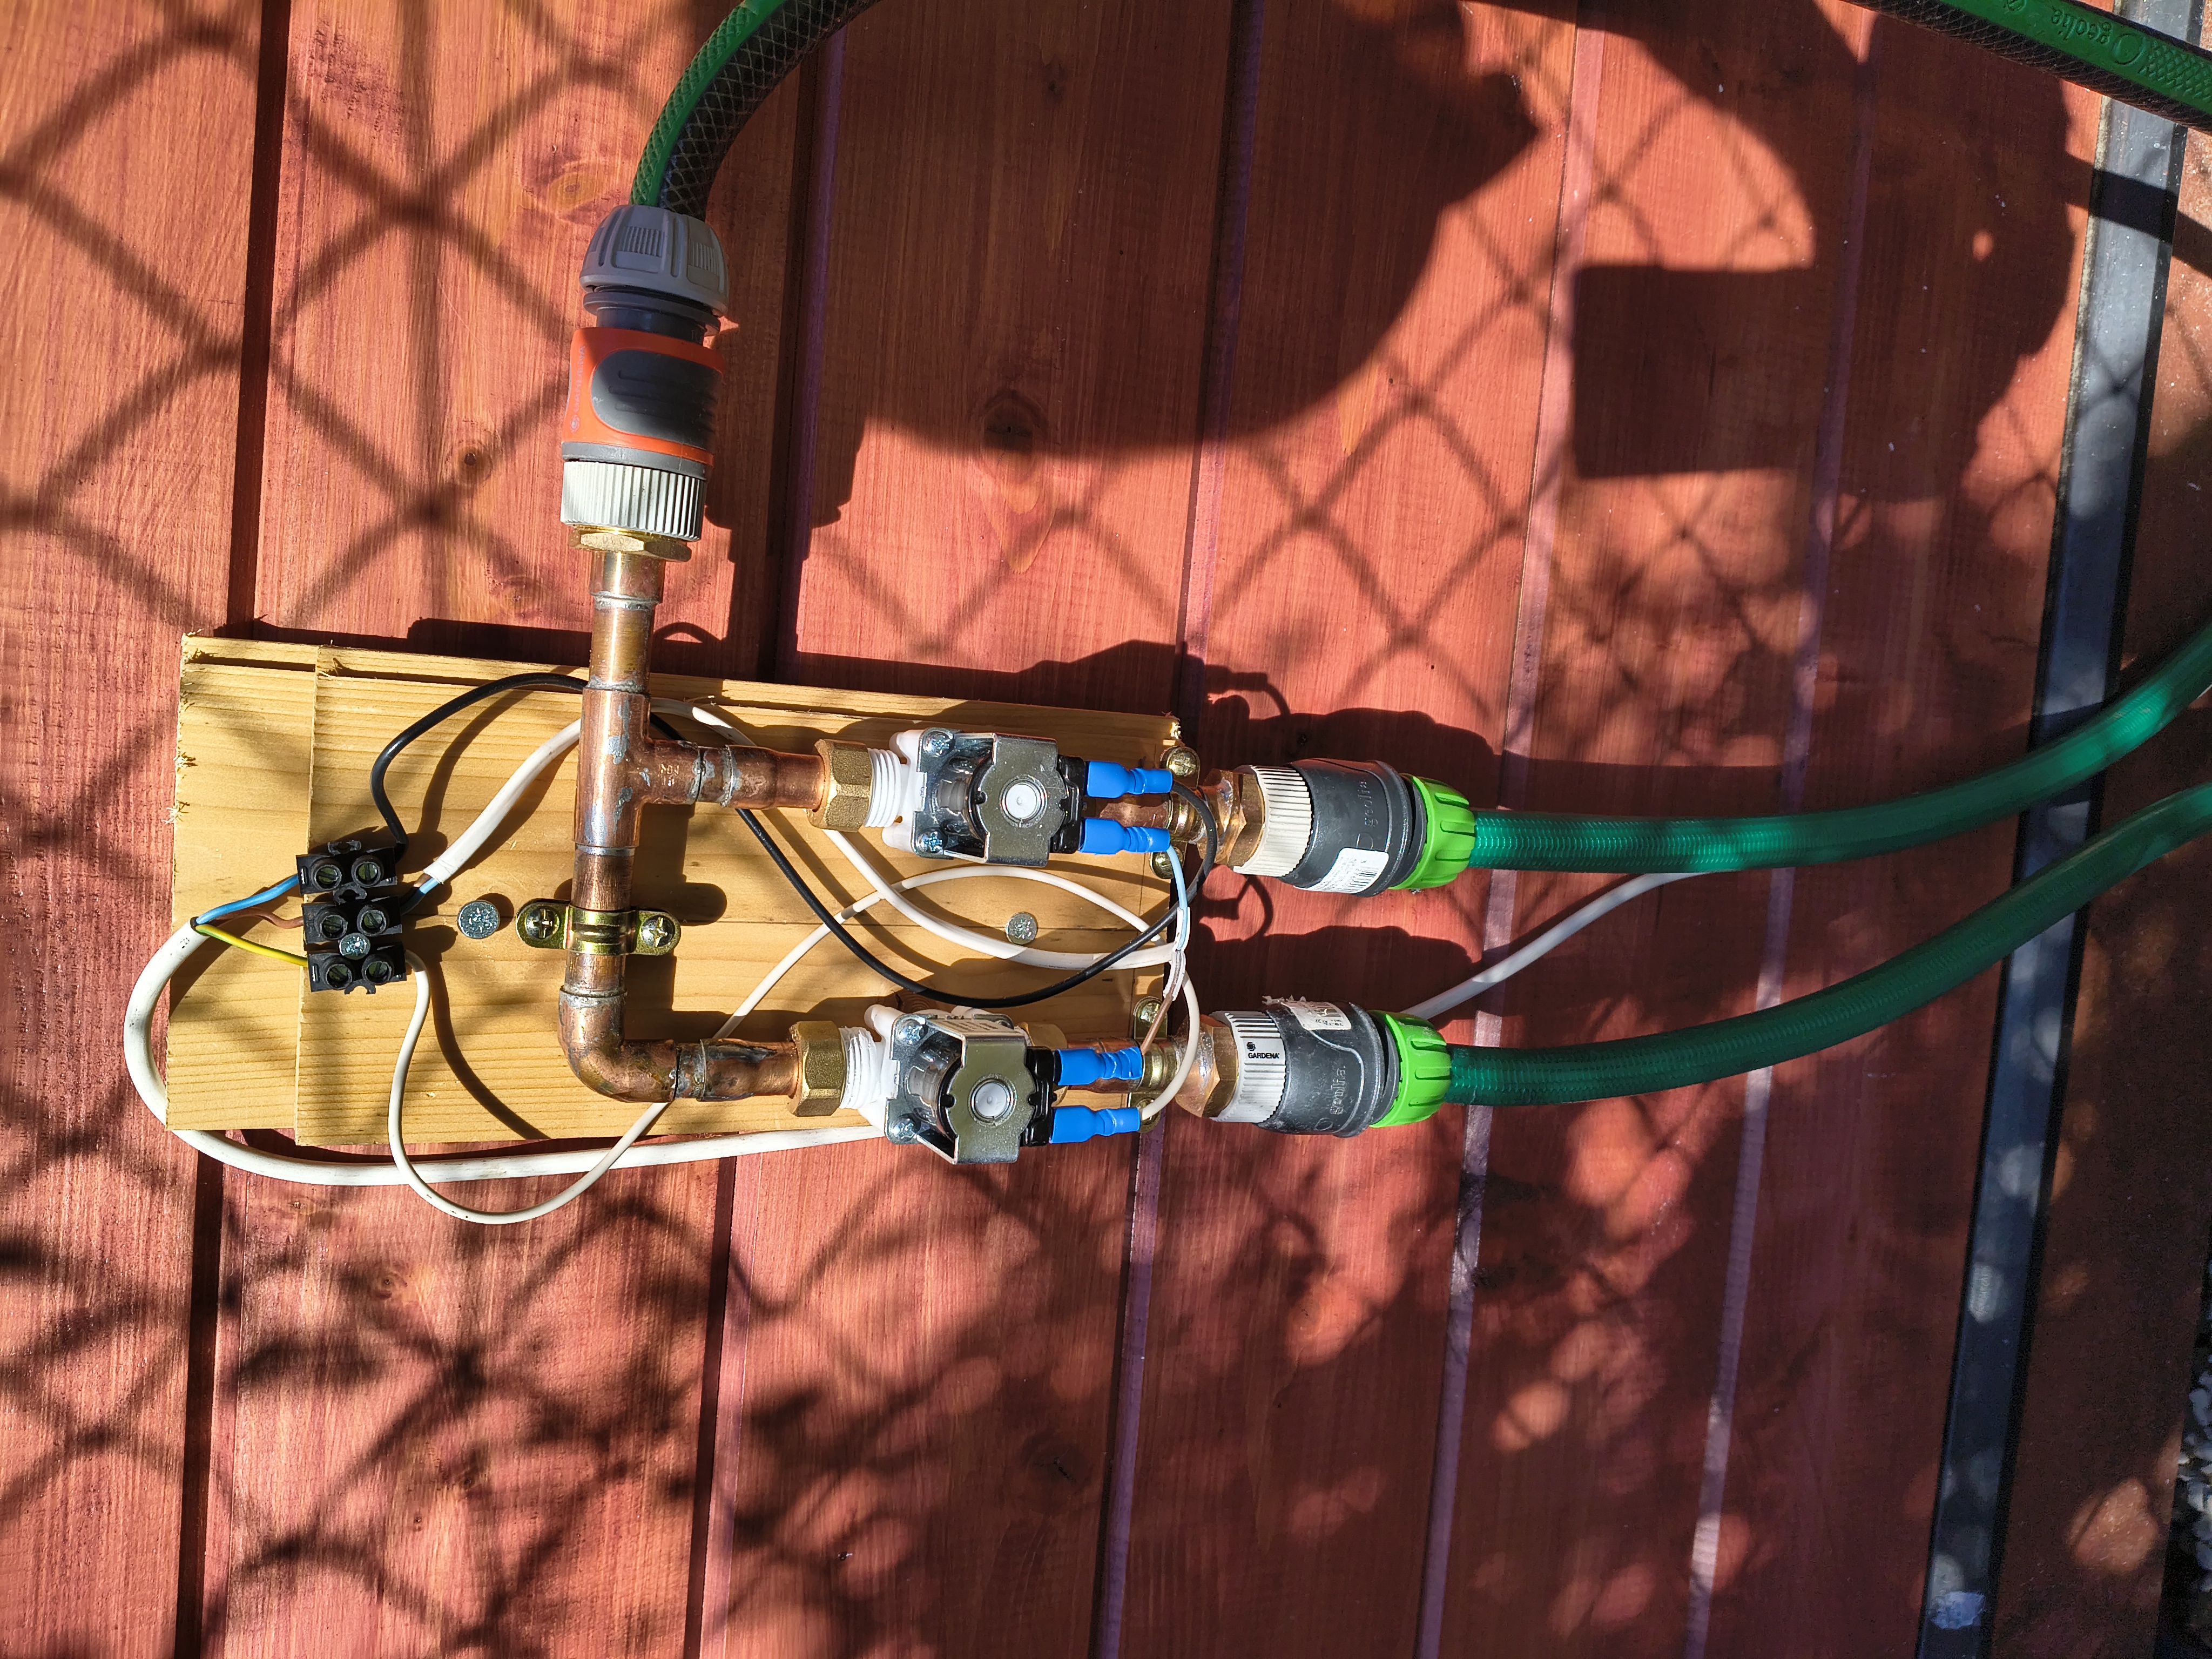
Various configurations are available
a) 2 valves + 1 pump
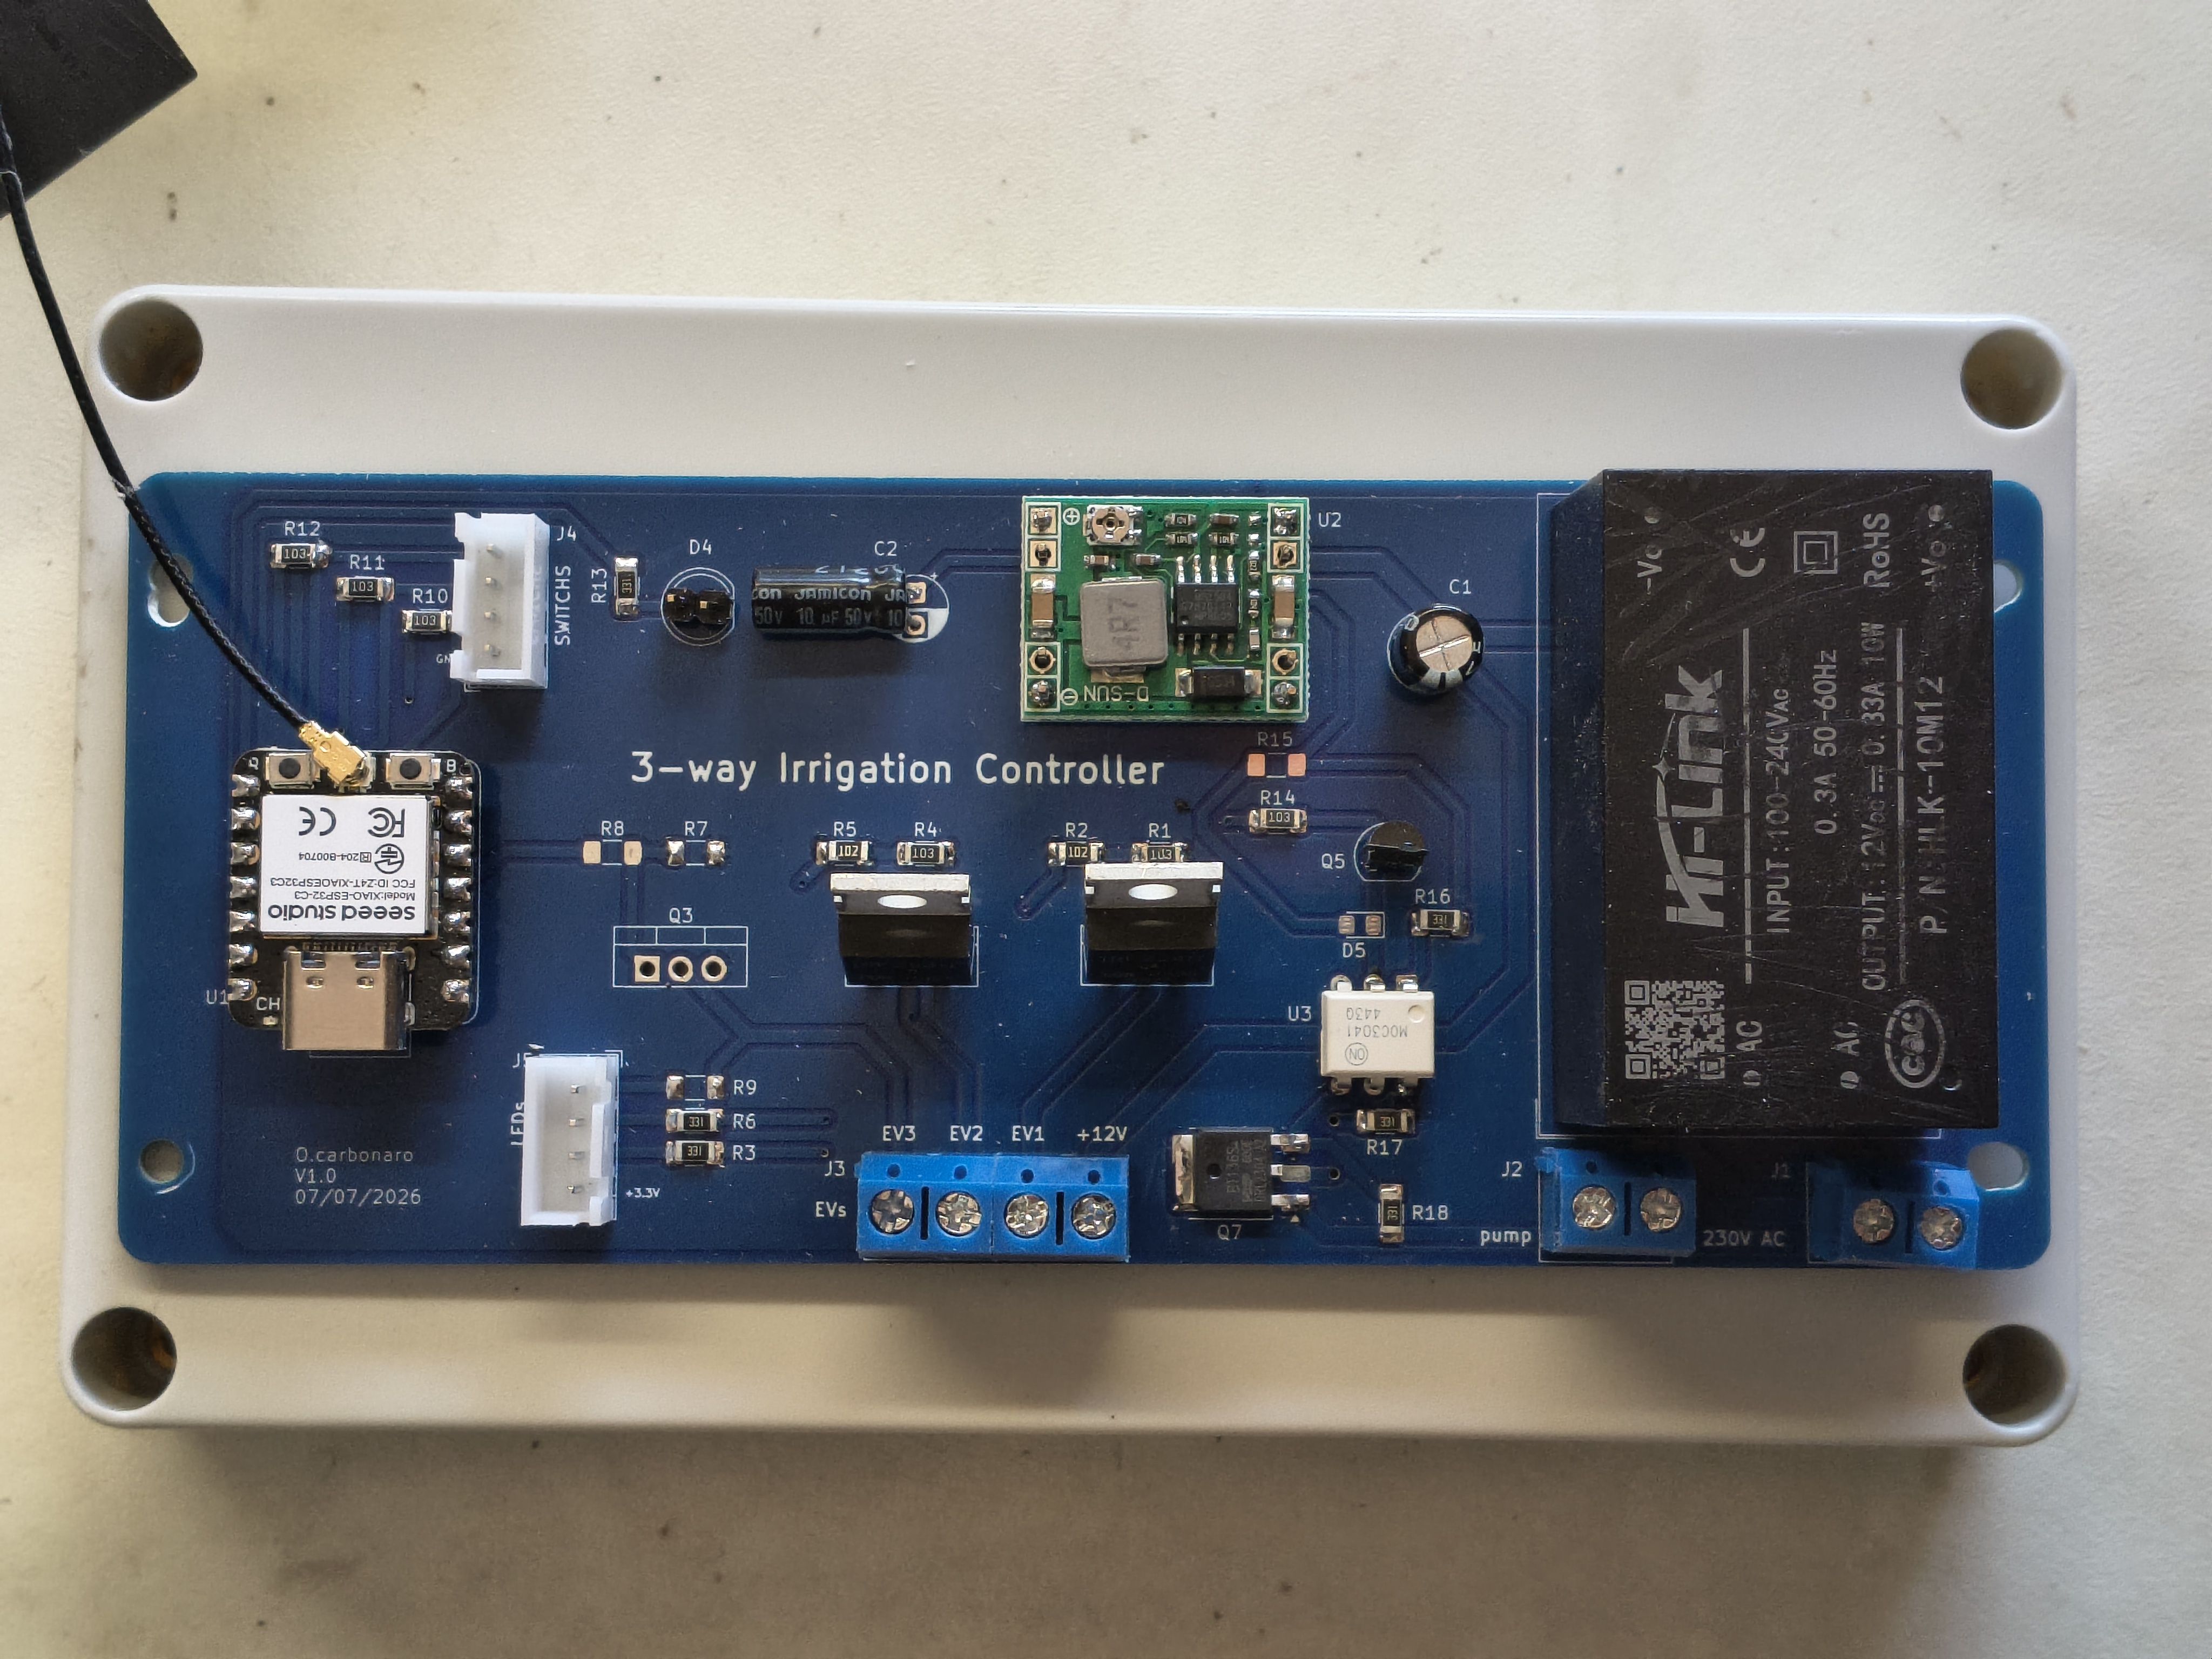 The D5 LED (= TRIAC is active) is optional.
b) 3 valves, no pump
Yet to come
binary sensor:
switch: ON/OFF command
output:
sensor:
button:
wifi:
light: (The binary light platform creates a simple ON/OFF-only light from a binary output component.)
script:
All the elements linked to the irrigation controller are found under the label "irrigation".
The actionable entities are:
toggle_EViswitch_toggle pumpswitch_toggle solenoid valve iirrigation_auto: enables the automatic watering programirrigation_heure_debut (watering start time): the time at which watering startsirrigation_active_zonei: enables the watering program on zone iirrigation_duree_zonei (watering duration zonei): the watering duration of zone ilancer_goutteAgoutte_1 (run drip irrigation): executes commande_EVi if irrigation_active_zonei is true, for the duration irrigation_duree_zoneiDémarrage irrigation (Start irrigation): at irrigation_heure_debut, executes the script lancer_goutteAgoutte_1 if irrigation_auto is set to truea) 2 valves version, french language
| Qty | Value | Footprint | References |
|---|---|---|---|
| 8 | 330 | Resistor_SMD:R_1206_3216Metric_Pad1.30x1.75mm_HandSolder | R3, R6, R9, R13, R15, R16, R17, R18 |
| 7 | 10k | Resistor_SMD:R_1206_3216Metric_Pad1.30x1.75mm_HandSolder | R1, R4, R7, R10, R11, R12, R14 |
| 3 | 1k | Resistor_SMD:R_1206_3216Metric_Pad1.30x1.75mm_HandSolder | R2, R5, R8 |
| 3 | IRL540N | Package_TO_SOT_THT:TO-220-3_Vertical | Q1, Q2, Q3 |
| 2 | Conn_01x04_Pin | Connector_JST:JST_XH_B4B-XH-A_1x04_P2.50mm_Vertical | J4, J5 |
| 2 | Screw_Terminal_01x02 | TerminalBlock:TerminalBlock_bornier-2_P5.08mm | J1, J2 |
| 1 | 10uF | Capacitor_THT:CP_Radial_D5.0mm_P2.50mm | C2 |
| 1 | 47uF | Capacitor_THT:CP_Radial_D6.3mm_P2.50mm | C1 |
| 1 | BC547 | Package_TO_SOT_THT:TO-92_Inline | Q5 |
| 1 | BT136-600 | Package_TO_SOT_SMD:TO-252-3_TabPin2 | Q7 |
| 1 | FULARR_MP1584EN | Carbonaro:FULARR_MP1584EN | U2 |
| 1 | HLK-10M12 | Converter_ACDC:Converter_ACDC_Hi-Link_HLK-10Mxx | PS1 |
| 1 | LED_Small | LED_SMD:LED_0805_2012Metric_Pad1.15x1.40mm_HandSolder | D5 |
| 1 | LED_Small | LED_THT:LED_D5.0mm | D4 |
| 1 | MOC3041M | Package_DIP:DIP-6_W7.62mm | U3 |
| 1 | Screw_Terminal_01x04 | TerminalBlock:TerminalBlock_bornier-4_P5.08mm | J3 |
| 1 | XIAO_esp32_C3 | Carbonaro:XIAO_ESP32_C3 | U1 |
The 36 most common of 40 parts.
It measures 148 × 61 mm and has 2 copper layers, 1.6 mm thick.
40 parts, built around the BT136-600E, HLK-10M12, MOC3041M and XIAO ESP32C3. The full list of its parts is on this page, with links to each part's symbol and footprint where PCBKit's library has them.
From the adriencarbonaro/irrigation-controller repository on GitHub, at the commit this page was made from: the board is hardware/irrigation_controller_2/irrigation_controller.kicad_pcb and its schematic hardware/irrigation_controller_2/irrigation_controller.kicad_sch. PCBKit opens the board in the browser, with nothing to install.
Its repository states no licence, so its author keeps all rights: ask adriencarbonaro before reusing the design.

julianschick/fallblatt-schematics-ep2
Fallblattanzeige der S-Bahn Berlin (Leiterplattenlayout)


trieuhuyduc/Clean_room_slave
ESP32-based slave controller board for cleanroom equipment — RS485/Modbus, isolated I/O, 220V mains control (KiCad)


kbssrikar7/esp32-energy-meter-pcb
KiCad PCB design for an ESP32-based single-phase energy meter (ATM90E26 metering AFE) — DRC/ERC-clean, SPICE-validated, fab-ready


electromotif208/pcb-portfolio
👨💻 Electronics Engineer 📺 YouTube: ELECTROMOTIF 🔧 Tools: KiCad, EasyEDA 📡 Domains: Power Supply, ESP32, IoT, Embedded Hardware