
4 layers57 × 74.3 mm
CM4
ybabs/H745FCS
Quadcopter Flight Controller based on the dual core STM32H745 Microcontroller
101 parts6
 Sriram-Cheedi/Two_Defuse_Or_Not_Two_Defuse_
This project aims to create an innovative and tense cooperative experience for players by utilising custom hardware.
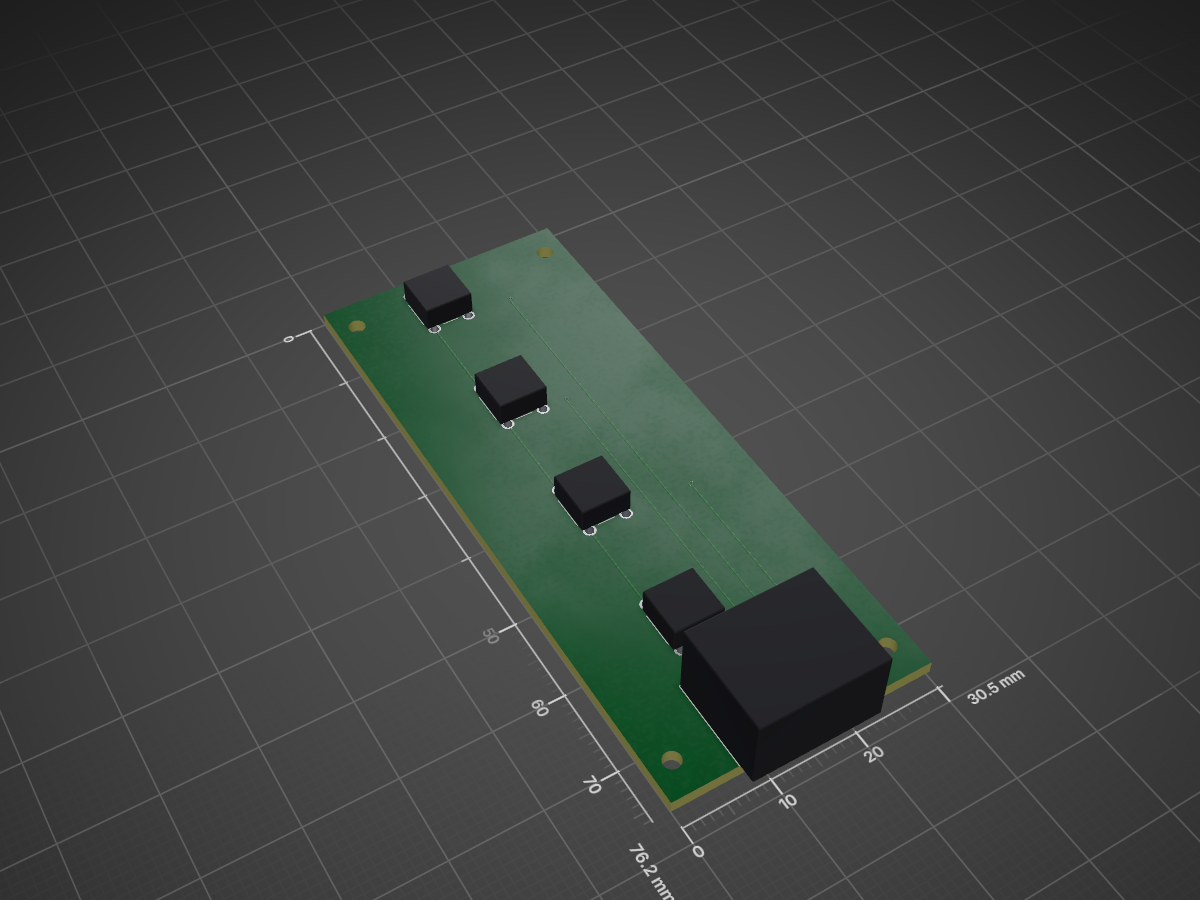
Buttons Circuit is an open-source printed circuit board by Sriram-Cheedi, from the Sriram-Cheedi/Two_Defuse_Or_Not_Two_Defuse_ repository on GitHub. It is a 2-layer board of 30.5 × 76.2 mm with 5 parts on 13 nets, routed with 20 tracks and 6 vias.
It is built around the TL1105CF160Q. Its parts include 4 switches and 1 connector.
Created by The Barbies | COMS30043 2025 Team Project
This project aims to create an innovative and tense cooperative experience for players by utilising custom hardware.
The application runs on an asymmetric two-input system: one player operates within the Unity game world created for the project, while the other operates a custom physical hardware controller to communicate and defuse the bomb.
Technical report on the project can be found here (May require downloading due to file size).
Watch the technical video and trailer here.
To fully experience this project, a physical 'hardware bomb' controller is required.
Hardware/ControllerV0.1 folder in Visual Studio Code.Team_Project folder in the Unity Editor and import any required packages.Note: If you do not have the required custom hardware, the level will still open and assign a Mock API. However, the game will not be playable, as the physical interactions required to navigate and access the game states will be absent.
├── Games Project Pitch Design Documents.pdf
├── Hardware
│   ├── Circuit_Designs
│   ├── ControllerV0.1
│   ├── Example Code
│   └── Manufacturing Drawings
├── Hardware-Software_Interaction.md
├── README.md
├── Team_Project  (Unity Project Root)
│   ├── Assets
│   ├── Packages
│   ├── ProjectSettings
│   └── ... (Builds and project files)
└── The Barbies - Team Project Pitches.pdf| Qty | Value | Footprint | References |
|---|---|---|---|
| 4 | TL1105CF160Q | SamacSys_Parts:TL1105CF160Q | S1, S2, S3, S4 |
| 1 | S05B-XASS-1N-BN_LF__SN_ | SamacSys_Parts:S05BXASS1NBNLFSN | J1 |
ybabs/H745FCS
Quadcopter Flight Controller based on the dual core STM32H745 Microcontroller

ybabs/PorpDAQ
Design Files for a STM32-Based Underwater Acoustics data acquisition board for harbour porpoises


joypad-ai/joypad-os
Universal controller firmware for building adapters, dongles, and custom controllers.

OLIMEX/OLINUXINO
OLINUXINO is Open Source / Open Hardware, low cost from EUR 24 Linux Industrial grade Single Board Computer capable to operate -25+85C

jamro/tiny-engineer
A small desktop robot that brings an AI coding assistant to life, physically acting out when it reads files, thinks, writes code, and finishes work.

hackclub/OnBoard
💡 Join 1,000 teenagers and make your first PCB with a $100 grant!
It measures 30.5 × 76.2 mm and has 2 copper layers, 1.6 mm thick.
5 parts, built around the TL1105CF160Q. The full list of its parts is on this page, with links to each part's symbol and footprint where PCBKit's library has them.
From the Sriram-Cheedi/Two_Defuse_Or_Not_Two_Defuse_ repository on GitHub, at the commit this page was made from: the board is Hardware/Circuit_Designs/Buttons-Circuit/Buttons-Circuit.kicad_pcb and its schematic Hardware/Circuit_Designs/Buttons-Circuit/Buttons-Circuit.kicad_sch. PCBKit opens the board in the browser, with nothing to install.
Its repository states no licence, so its author keeps all rights: ask Sriram-Cheedi before reusing the design.