


2 layers24 × 27.3 mm

Quantum Random Number Generator
Qrng is an open-source printed circuit board by Spooky-Manufacturing, from the Spooky-Manufacturing/QRNG repository on GitHub, published under the GPL-3.0 licence. It is a 2-layer board of 44 × 20.5 mm with 29 parts on 22 nets, routed with 650 tracks and 29 vias.
It is built around the AMS1117 and B5819W. Its parts include 13 capacitors, 4 resistors, 3 ICs, 2 diodes and 1 connector. It belongs with the STM32 boards of this library.
Quantum Random Number Generator
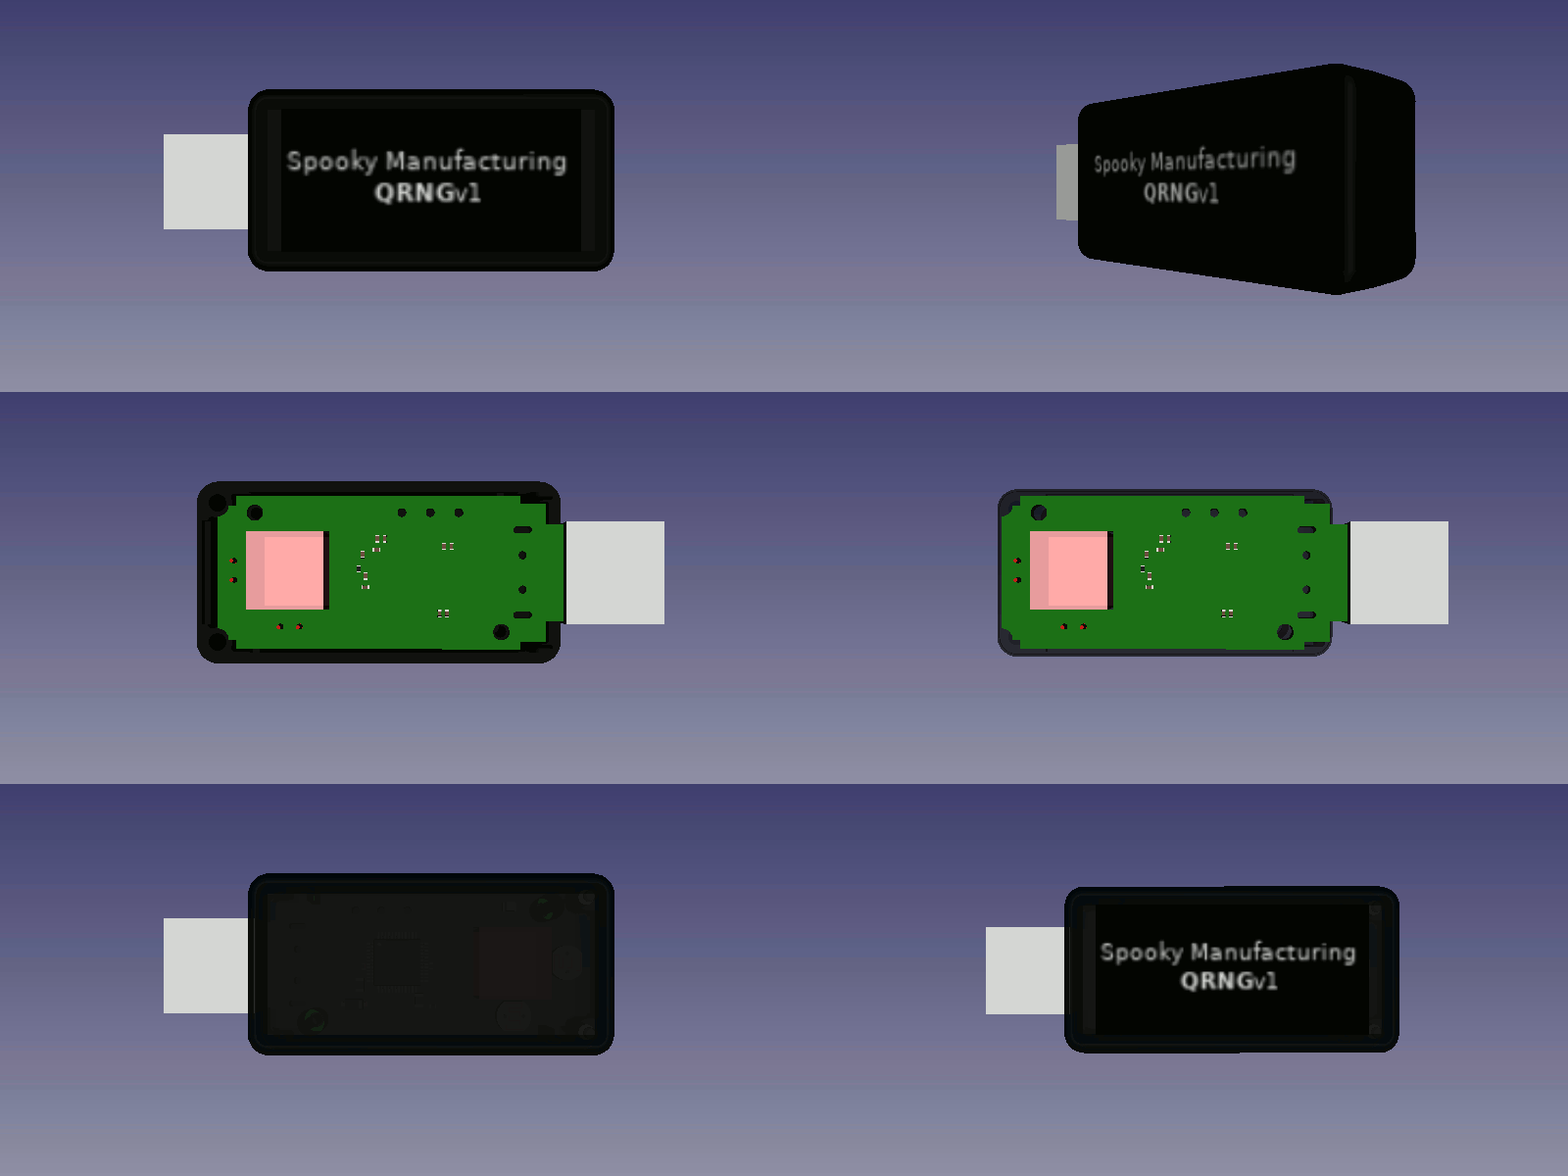
The QRNGv1 (Now QRNG_BASIC) was originally a proof of concept for quantum technology applications, specifically in this case for the generation of entropy which has a broad range of uses from generating graphics to encryption keys.
The device uses a polarizing beam splitter to split a laser pulse into two beams with a 50/50 probability of a photon in the beam traveling either path. The photons actually travel as a wave, meaning they both pass through and are reflected by the beam splitter. This creates what's known as the superposition of light where the light remains in both paths able to interfere with itself until it is measured and collapses out of superposition.
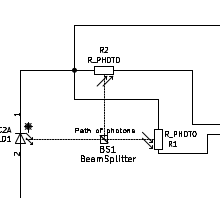
The equivalent quantum logic gate would be the Hadamard gate, in QASM code:
creg c0[1];
h q[1];
measure q[1] -> c0;Firmware can be found in the respective design folders labelled according to version. The schematics as well are labelled with the version of firmware which supports them.
Currently the QRNG arduino operates via the Arduino Serial Monitor, you can issue single letter commands to it. We plan to add support for the device with our Qubit Controller in the near future.
| Qty | Value | Footprint | References |
|---|---|---|---|
| 7 | 100nF | Capacitor_SMD:C_0402_1005Metric | C2, C3, C4, C5, C6, C7, C10 |
| 2 | 100ohm @ 100mHz | Inductor_SMD:L_0805_2012Metric | FB1, FB2 |
| 2 | 10uF | Capacitor_SMD:C_0402_1005Metric | C8, C9 |
| 2 | 30pF | Capacitor_SMD:C_0603_1608Metric | C12, C13 |
| 2 | MountingHole | MountingHole:MountingHole_2.2mm_M2 | H1, H2 |
| 2 | R_PHOTO | OptoDevice:R_LDR_4.9x4.2mm_P2.54mm_Vertical | R2, R3 |
| 1 | 100 | Resistor_SMD:R_0603_1608Metric | R5 |
| 1 | 10nF | Capacitor_SMD:C_0402_1005Metric | C11 |
| 1 | 270 | Resistor_SMD:R_0603_1608Metric | R4 |
| 1 | 4.7uF | Capacitor_SMD:C_0402_1005Metric | C1 |
| 1 | 8 MHz | Crystal:Crystal_SMD_5032-2Pin_5.0x3.2mm_HandSoldering | Y1 |
| 1 | AMS1117 | Package_TO_SOT_SMD:SOT-223-3_TabPin2 | U1 |
| 1 | B5819W | Diode_SMD:D_SOD-123 | D1 |
| 1 | LED | LED_SMD:LED_0805_2012Metric | D2 |
| 1 | Macro-Beam-Splitter | Quantum:Macro-Beam-Splitter | BS1 |
| 1 | STM32F103C8Tx | Package_QFP:LQFP-48_7x7mm_P0.5mm | U2 |
| 1 | USB_A | Connector_USB:USB_A_CNCTech_1001-011-01101_Horizontal | J1 |
| 1 | W25N01GV | Package_SON:WSON-8-1EP_6x5mm_P1.27mm_EP3.4x4mm | U3 |

VectorLabsTechnology/Pegasus-Motor-Controller
Projeto de um inversor para um motor PMSM com FOC


wijdanmkh-insk/Tasks
This is my backups from my exercises and for fun coding. I don't like my files that messing around my main drive so instead save them in my computer, I save them here. It's just for fun.

zaidh-mech/PROJECTS
Engineering, robotics, embedded systems, CAD, and PCB projects

AlessandroAU/Chorus32-ESP32LapTimer
This is an ESP32 port of the popular Chorus RF Laptimer


uli/basicengine-pcb
Schematics and PCB layout for the BASIC Engine home computer
It measures 44 × 20.5 mm and has 2 copper layers, 1.6 mm thick.
29 parts, built around the AMS1117 and B5819W. The full list of its parts is on this page, with links to each part's symbol and footprint where PCBKit's library has them.
From the Spooky-Manufacturing/QRNG repository on GitHub, at the commit this page was made from: the board is v1/qrng.kicad_pcb. PCBKit opens the board in the browser, with nothing to install.
Its repository publishes it under the GPL-3.0 licence: you may reuse it on that licence's terms (keep the author's notice, and for a copyleft licence share your changes alike).