2 layers140.5 × 30 mm
Type e
google/mozc-devices
Circuit diagrams and firmware source code for Gboard DIY keyboards
16 parts3kApache-2.0

 RobertGawron/PiWeatherShield
Temperature, humidity, and air pressure monitoring with an easy-to-solder Raspberry Pi shield.
PiWeatherShield is an open-source printed circuit board by RobertGawron, from the RobertGawron/PiWeatherShield repository on GitHub, published under the MIT licence. It is a 2-layer board of 52 × 61 mm with 16 parts on 31 nets, routed with 510 tracks and 76 vias.
Its parts include 4 capacitors, 4 ICs, 2 resistors and 2 connectors. It belongs with the home automation and IoT boards of this library.

Low-cost, easy-to-build hat Raspberry Pi that turns it into an indoor weather station. On the hardware side, it's a simple PCB with sensors I2C parts (BME280 and Si7021) and a small OLED screen to show the meassurements: temperature, humidity, and air pressure. On the software side there is a Rust app that handles the data and can send them via MQTT for furthr processing (using tools like Graphana and Home asistant).
The project can be integrated with the Home Environment Monitor, adding real-time graphs of the meassurements accessible from phone or PC.
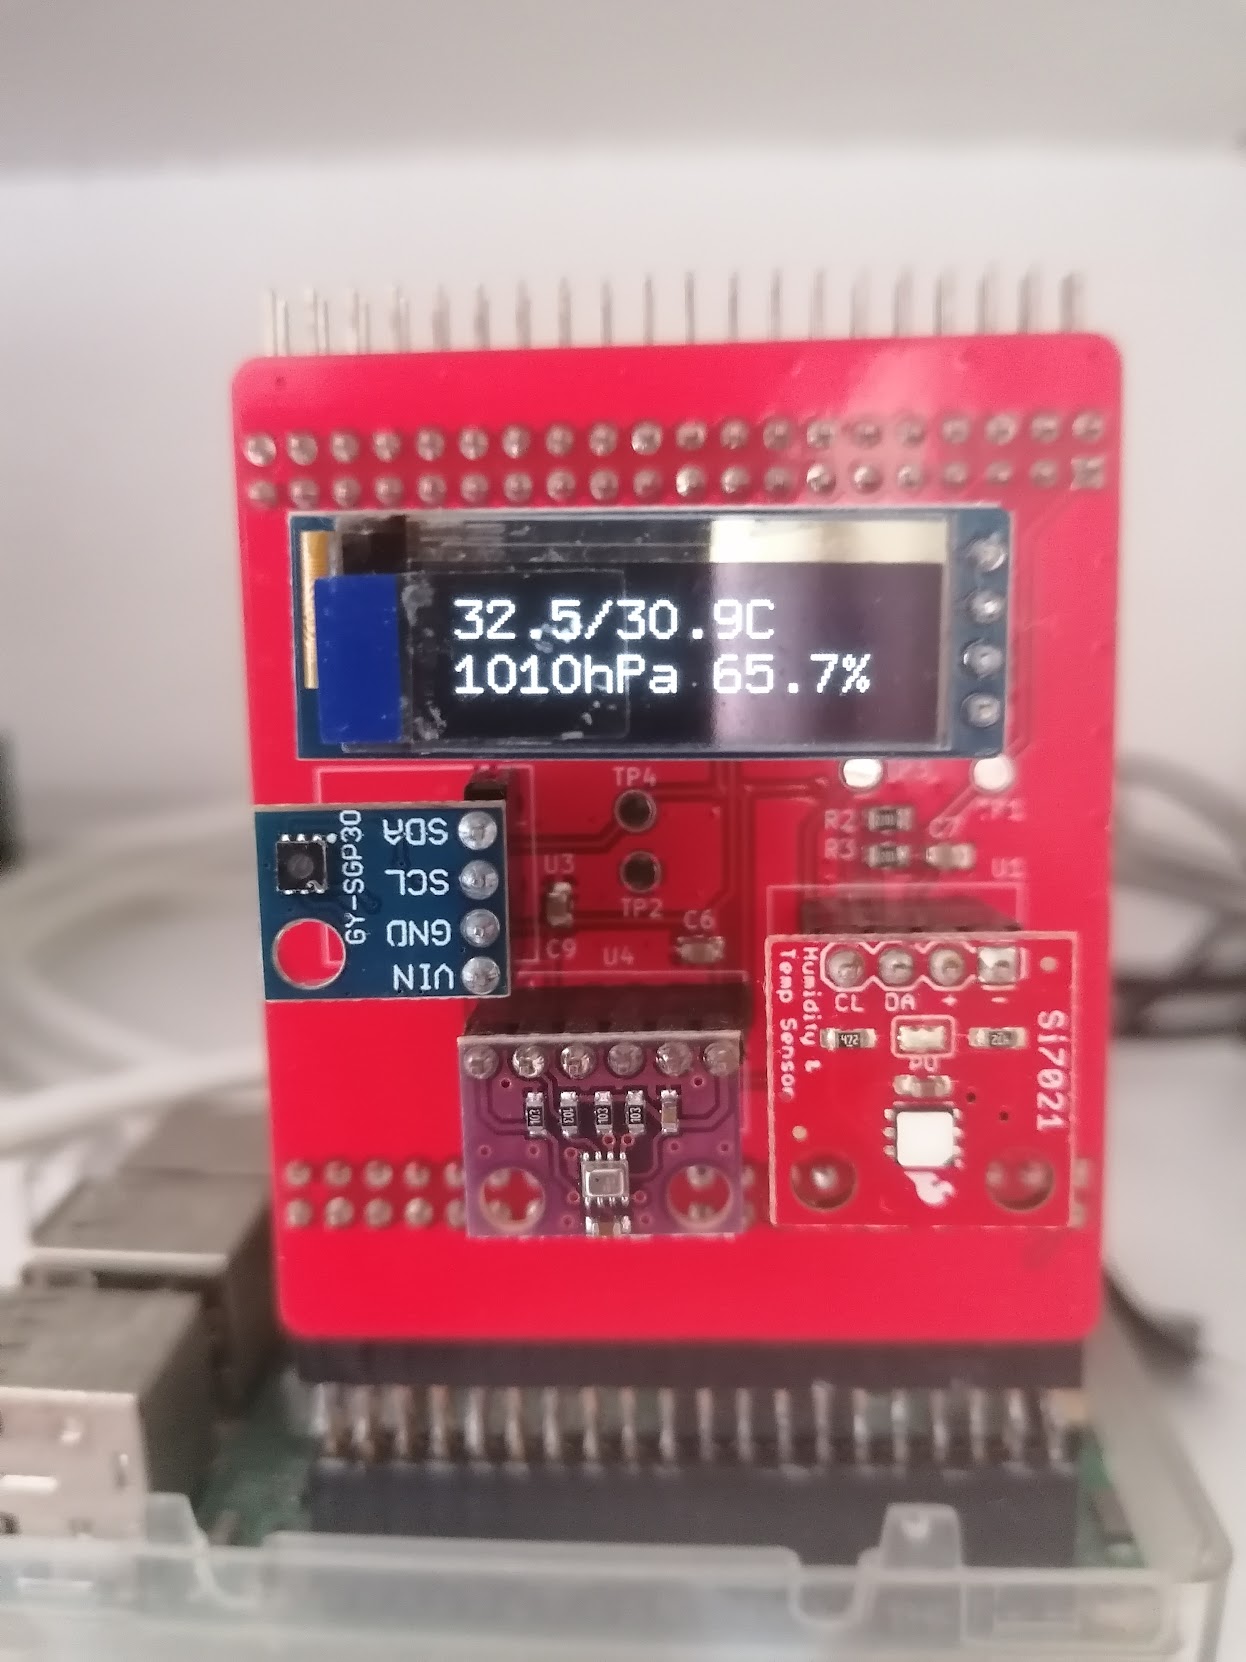
This project is straightforward and includes the following I2C components:
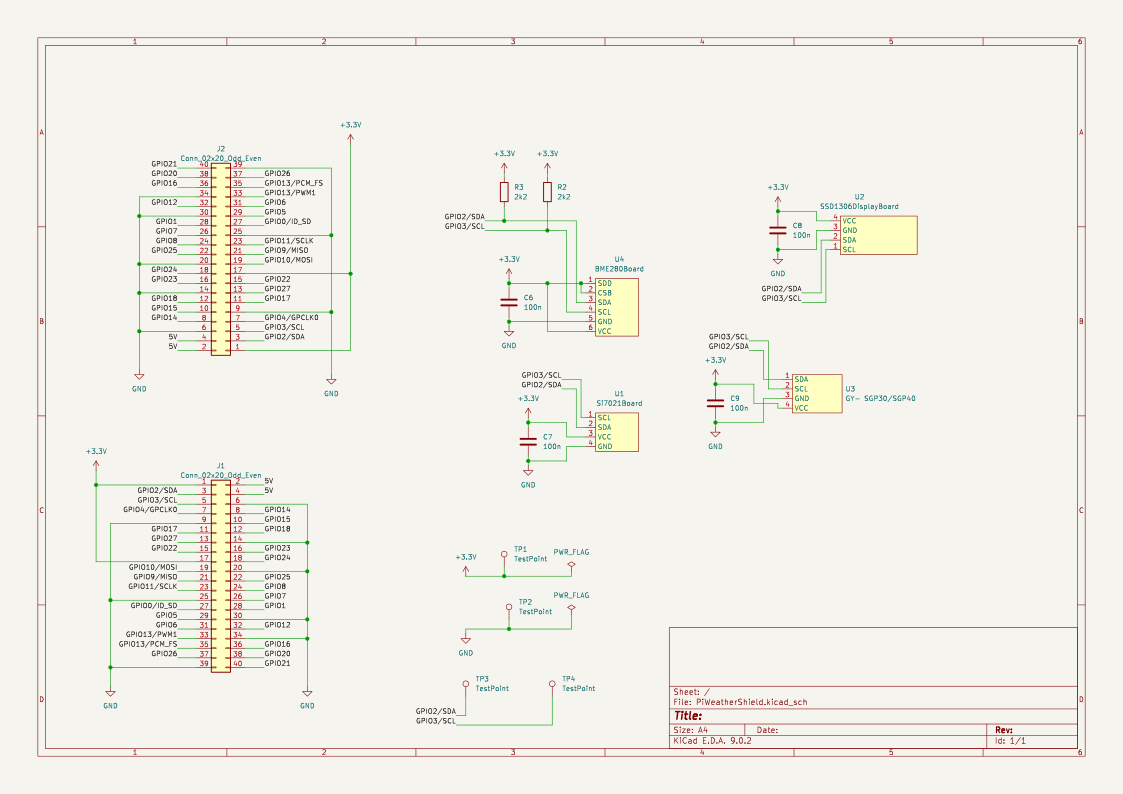
Tools: KiCad.
The application is quite simple (just a couple of Python scripts) and could easily be developed directly on the Raspberry Pi, which is probably what most people would do for a small project like this. However, I’ve chosen a different approach -one that might seem like overkill- but it allows me to learn and apply DevOps.
We'll set up a local Docker environment capable of cross-compiling Docker images that contain our application, which will then be deployed to the Raspberry Pi.
Using Ansible, we will preconfigure the Raspberry Pi (install Docker, enable I2C, etc.) and deploy the Docker images to the Pi automatically.
| Qty | Value | Footprint | References |
|---|---|---|---|
| 4 | 100n | Capacitor_SMD:C_0805_2012Metric | C6, C7, C8, C9 |
| 4 | TestPoint | TestPoint:TestPoint_Pad_D2.0mm | TP1, TP2, TP3, TP4 |
| 2 | 2k2 | Resistor_SMD:R_0805_2012Metric | R2, R3 |
| 1 | BME280Board | PiWeatherShield:BME280Board | U4 |
| 1 | Conn_02x20_Odd_Even | Connector_PinHeader_2.54mm:PinHeader_2x20_P2.54mm_Horizontal | J2 |
| 1 | Conn_02x20_Odd_Even | Connector_PinSocket_2.54mm:PinSocket_2x20_P2.54mm_Horizontal | J1 |
| 1 | GY- SGP30/SGP40 | PiWeatherShield:GY- SGP30SGP40 | U3 |
| 1 | SSD1306DisplayBoard | PiWeatherShield:SSD1306DisplayBoard | U2 |
| 1 | Si7021Board | PiWeatherShield:SIP-4 | U1 |
google/mozc-devices
Circuit diagrams and firmware source code for Gboard DIY keyboards

conorpp/u2f-zero
U2F USB token optimized for physical security, affordability, and style

rusefi/rusefi
rusefi - GPL internal combustion engine control unit

VoronDesign/Voron-Hardware
Cool Hardware designed by the Voron Design group

hoglet67/RGBtoHDMI
Bare-metal Raspberry Pi project that provides pixel-perfect sampling of Retro Computer RGB/YUV video and conversion to HDMI

hackclub/OnBoard
💡 Join 1,000 teenagers and make your first PCB with a $100 grant!


It measures 52 × 61 mm and has 2 copper layers, 1.6 mm thick.
16 parts. The full list of its parts is on this page, with links to each part's symbol and footprint where PCBKit's library has them.
From the RobertGawron/PiWeatherShield repository on GitHub, at the commit this page was made from: the board is Hardware/PiWeatherShield/PiWeatherShield.kicad_pcb and its schematic Hardware/PiWeatherShield/PiWeatherShield.kicad_sch. PCBKit opens the board in the browser, with nothing to install.
Its repository publishes it under the MIT licence: you may reuse it on that licence's terms (keep the author's notice, and for a copyleft licence share your changes alike).