
12 layers180 × 150 mm
Marble
BerkeleyLab/Marble
Dual FMC FPGA carrier board developed for general purpose use in particle accelerator electronics instrumentation.
1,006 parts35

 RevLmt/camboard-uno-q7
shield for uno q
Camboard uno q is an open-source printed circuit board by RevLmt, from the RevLmt/camboard-uno-q repository on GitHub, published under the CERN-OHL-P-2.0 licence. It is a 4-layer board of 70 × 53.3 mm with 15 parts on 111 nets, routed with 1,176 tracks and 200 vias.
It is built around the TXS0108EPWR. Its parts include 4 capacitors, 1 resistor and 1 IC.
This camera and display module for the Arduino UNO Q. It breaks out the 2 MIPI-CSI cameras and a single MIPI-DSI display interace. All use a 22-pin cable (similar to compute boards for the Raspberry Pi).
You can purchase a this camera board here.
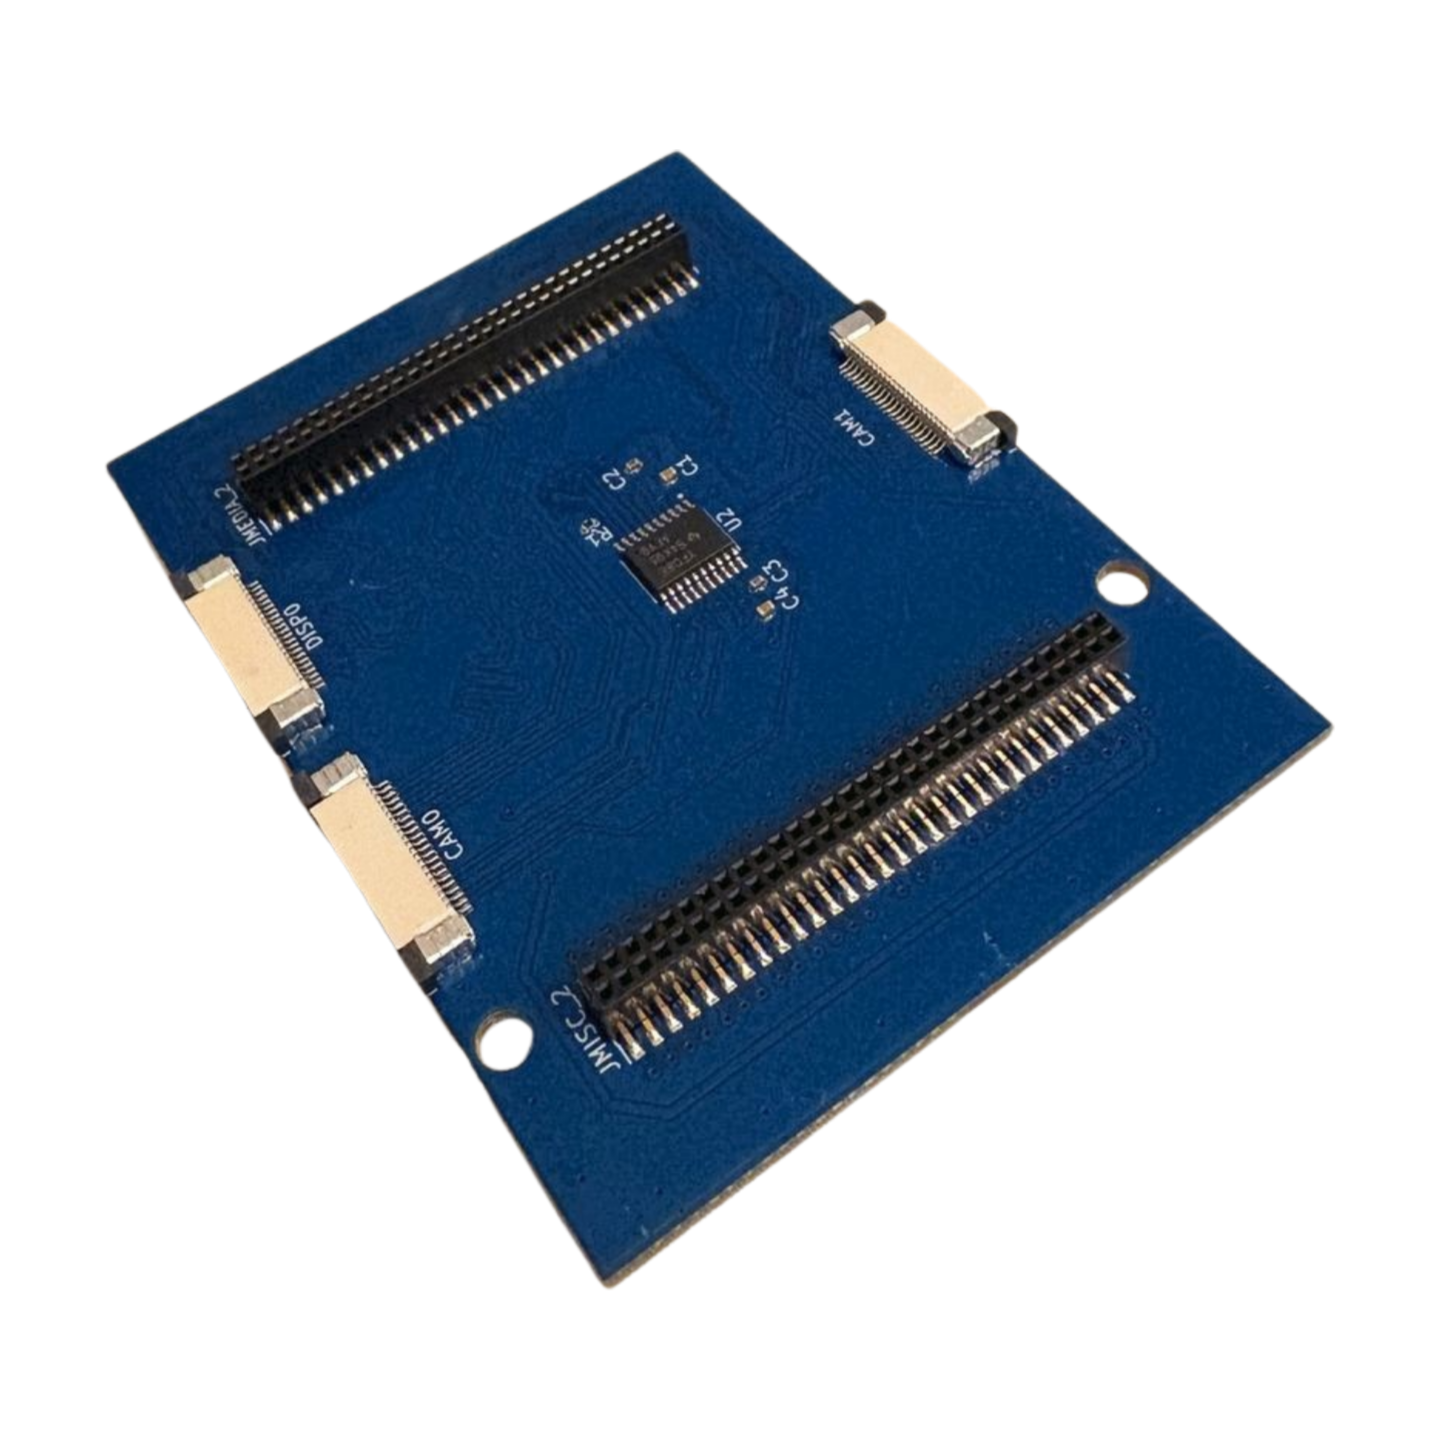
In order to use the camera or display interfaces on the UNO Q, one must edit the device tree loaded at boot. Luckily, a device tree blob (DTB) for using a Raspberry Pi V2 Camera comes with the UNO Q. However, to use this board, some small edits must be made to that device tree. There is a shell script at software/device_trees/setup_device.sh. If you run this it will carry out the necessary steps in enabling the CAM0 connector for an IMX219 (Raspberry Pi V2 Camera Module). Right now, only the RPi V2 Camera is supported. Contributions are welcome!
To enable CAM0 for the IMX219, copy the setup_device.sh to somewhere safe on your UNO Q. The easiest way I've found is to SSH into the UNO Q using VS Code. Then just drag and drop the file into the UNO Q. Then, in your terminal, change to the directory where you have this file. Then, run:
sudo ./setup_device.shThis file creates a final device tree file for you in a folder located in /boot/efi/dtb/r1b, where r1b stands for my website r1build.com. The final device tree blob is qrb2210-arduino-imola-camera-rpiv2-r1b.dtb. You should check to see if that file exists in the folder.
Next, you will need to point Linux to the right place for loading this file. To do so, you will need to find the .conf file that controls the boot. This file name seems to change for every update of the UNO Q. So, I have yet to find a way to standardize it yet. But, luckily, there is only one file with .conf in that location. That location is /boot/efi/loader/entries/. Go ahead and edit that file with the command:
sudo nano /boot/efi/loader/entries/(NameOfYourFile).confat the end of the file, add this line:
devicetree /dtb/r1b/qrb2210-arduino-imola-camera-rpiv2-r1b.dtbThis tells the Debian Linux to load our new device tree. Go ahead and reboot. Afterwards, your camera should be available.
THe shell script shows the basics
Below is some example code for running the board with OpenCV. For this to work, you should have a monitor attached. Ideally, just setup the board as a Single Board Computer (SBC), having a keyboard, mouse, and display. This isn't a requirement to run OpenCV with the board, but it will get you started quickly.
It is best to use libcamera to manage everything. To install, you can use the following commands in the terminal:
sudo apt update
sudo apt install libcamera-tools gstreamer1.0-libcameraAs a very quick check, you can use qcam to stream and check if the installation went well. The following command will open a window where you can see the camera stream from.
qcamFor this to work, you should still be using the UNO Q as a SBC (display + keyboard + mouse). This will also display a stream, much like the qcam example above. However, it is using cv2. It only includes the most basic commands to get the camera running. So, you can then use this as a base to start building your applications.
Save this script anywhere (maybe Desktop for easy access). The stream window can be closed by pressing q on the keyboard.
import cv2

# The 'libcamerasrc' element handles the UNO Q's ISP and media-ctl automatically
# videoconvert and appsink allow OpenCV to read the frames
pipeline = (
    "libcamerasrc ! "
    "video/x-raw, width=1280, height=720, framerate=30/1 ! "
    "videoconvert ! appsink"
)

cap = cv2.VideoCapture(pipeline, cv2.CAP_GSTREAMER)

if not cap.isOpened():
    print("Error: Could not open camera pipeline.")
    exit()

print("Camera stream started. Press 'q' to quit.")

while True:
    ret, frame = cap.read()
    if not ret:
        break

# Display the stream on your desktop| Qty | Value | Footprint | References |
|---|---|---|---|
| 3 | ~ | _camera_conn_:JUSHUO_AFC07-S22ECC-00-_1x22-1MP_P0.5mm_Horizontal | CAM0, CAM1, DISP0 |
| 2 | , | ||
| 2 | 0.1uF | _capacitors:C_0402_1005Metric | C2, C3 |
| 2 | 10uF | _capacitors:C_0402_1005Metric | C1, C4 |
| 2 | Conn_02x30_Odd_Even | Connector_PinHeader_1.27mm:PinHeader_2x30_P1.27mm_Vertical_SMD | JMEDIA_2, JMISC_2 |
| 2 | Conn_02x30_Odd_Even | camboard_footprints:PinHeader_2x30_P1.27mm_Vertical_SMD_Mirrored | JMEDIA_1, JMISC_1 |
| 1 | 100k | _resistors:R_0402_1005Metric_custom | R1 |
| 1 | TXS0108EPWR | camboard_footprints:SOP65P640X120-20N | U2 |
BerkeleyLab/Marble
Dual FMC FPGA carrier board developed for general purpose use in particle accelerator electronics instrumentation.


BroncoSpace-Lab/scales-hardware
Hardware design files for the Spacecraft Compartmentalized Autonomous Learning and Edge Computing System (SCALES)


rein-baremetal/REIN_R1_KiCad
Dual-MCU baremetal embedded development board featuring high-speed QSPI storage, hardware USB hub, and flexible power management. Open for PCB trace routing collaboration

BILLEE-BroncoSTAR/billee-hardware-2027
Hardware and firmware Repository for BILLEE URC 2027

Sharkeology/BlueRetro_Universal_HW1
A universal PCB for use with the BlueRetro project for basic internal console installations.
It measures 70 × 53.3 mm and has 4 copper layers, 1.6 mm thick.
15 parts, built around the TXS0108EPWR. The full list of its parts is on this page, with links to each part's symbol and footprint where PCBKit's library has them.
From the RevLmt/camboard-uno-q repository on GitHub, at the commit this page was made from: the board is camboard-uno-q.kicad_pcb and its schematic camboard-uno-q.kicad_sch. PCBKit opens the board in the browser, with nothing to install.
Its repository publishes it under the CERN-OHL-P-2.0 licence: you may reuse it on that licence's terms (keep the author's notice, and for a copyleft licence share your changes alike).