

2 layers51.7 × 32 mm

A Keyboard With A Cartridge
Typeboy is an open-source printed circuit board by ImStuBTW, from the ImStuBTW/typeboy_and_typepak repository on GitHub, published under the MIT licence. It is a 2-layer board of 141.2 × 105.6 mm with 66 parts on 55 nets, routed with 1,057 tracks and 60 vias.
It is built around the SLLB510100. Its parts include 29 diodes, 29 switches and 1 connector. It belongs with the keyboards and input and retro computing and games boards of this library.
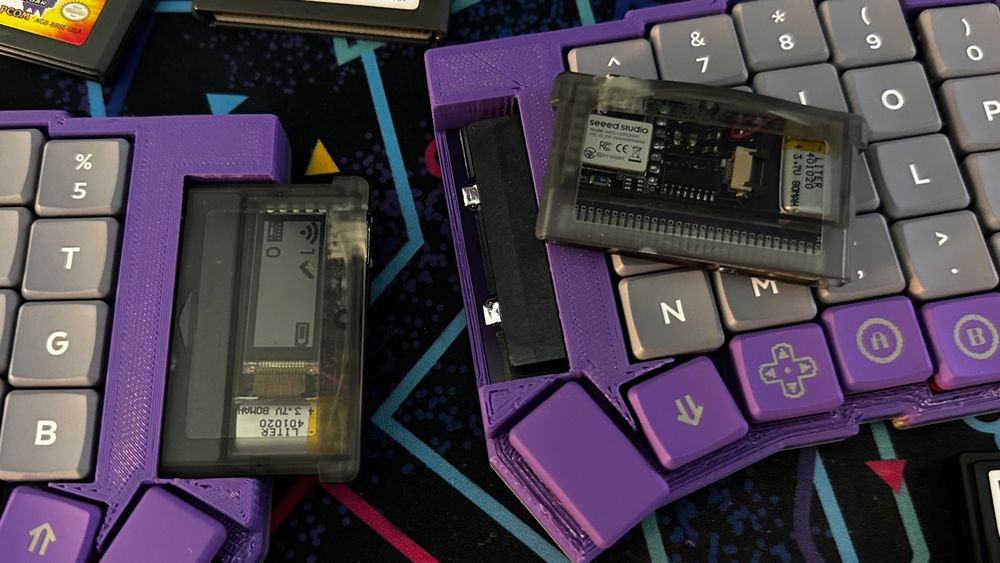
The TypePak is a custom keyboard controller PCB housed inside of an aftermarket Game Boy Advance cartridge shell. It features Bluetooth connectivity, ZMK support, a low-power monochrome display, a built in LiPo battery, 9 GPIO pins, and 8 dedicated output pins. Simply slot the TypePak into a keyboard with a compatible Game Boy cartridge slot, flip the power switch, and you've got yourself a working wireless keyboard. (After flashing the appropriate firmware and keymap, naturally.)
Unlike its companion TypeBoy, the TypePak was designed in KiCAD from scratch. Sadly there aren't any esoteric Game Boy cartridge generators just yet. This repository contains a standard KiCAD project. There's a schematic, a routed PCB, and a Gerber file.
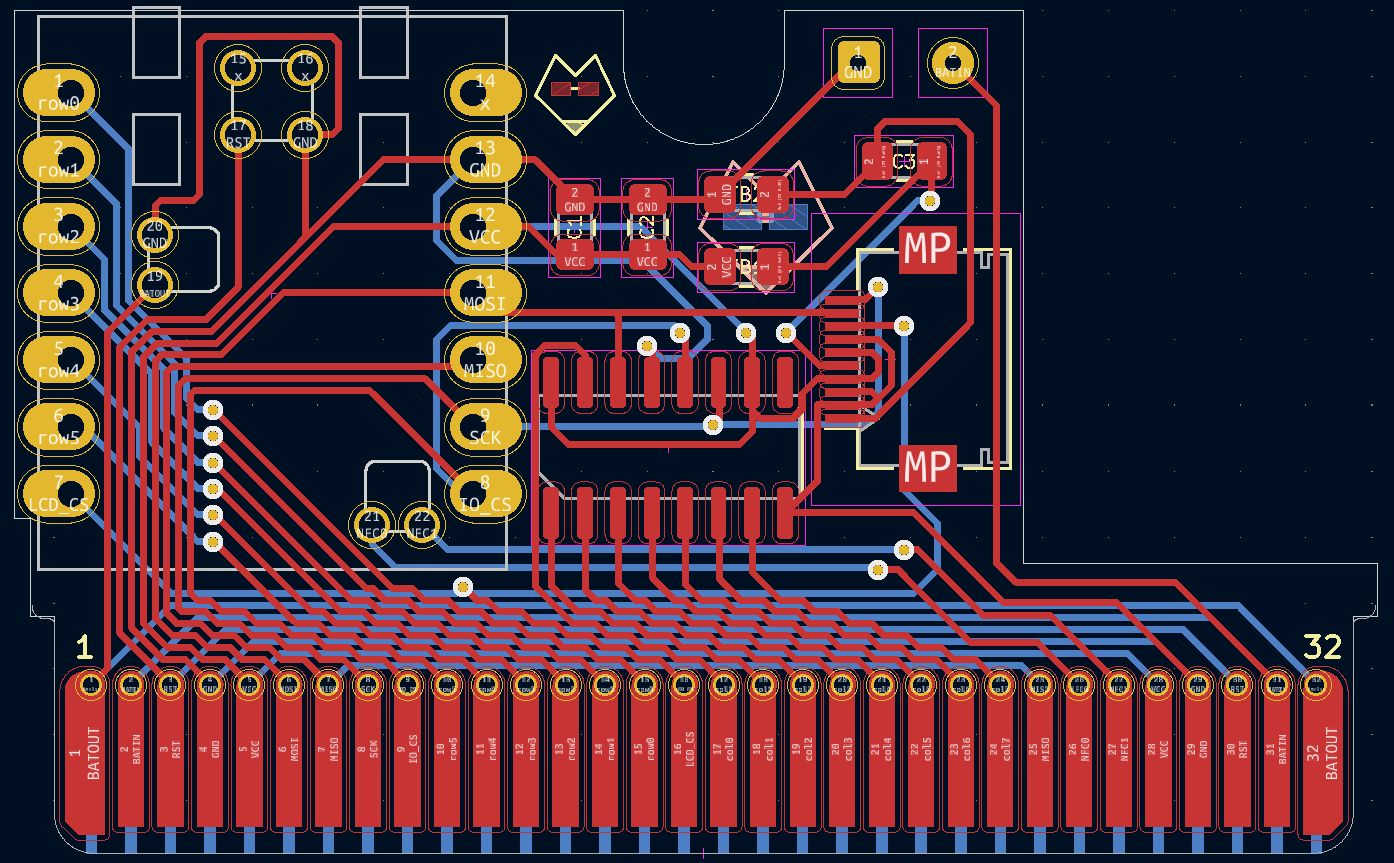
The heart of the TypePak is a XIAO nRF52840 microcontroller. It handles all of the Bluetooth communication, the wireless battery charging, and USB connectivity. The XIAO "BLE" famously has several pins mounted in the middle of the board on its underside, so the TypePak has several small holes in the PCB to reach the reset, power, and NFC pins.
There's a few additional pieces of hardware mounted onto the board. The TypePak features a LS011B7DH03 Sharp Memory Display. This is the same module found on the Nice!View keyboard display, but instead leverages karnadii's excellent sharp_memory_display_breakout circuit design. The microcontroller also takes advantage of a 74HC595 shift register to provide several more output pins. All of this is powered by a 401020 LiPo battery.
A Game Boy cartridge has 32 pins on its edge connector. The XIAO nRF52840 and the shift register have a total of 26 pins. Rather than leave twenty precent of the TypePak's cartridge pins unused, several of the important pins are exposed on both ends of the cartridge's edge connector. The battery output, power pins, reset pins, and a few others are duplicated so that you can more easily route some of the support hardware on your keyboard PCB.
Speaking of which, the TypePak does not have a built in power switch or reset button of its own. (Technically the XIAO does have a reset button, but it's underneath the cartridge's plastic casing.) You'll need to create out these components on the keyboard itself. The whole idea of this setup is to evoke the stylings of a classic Game Boy, so a large chunky power switch is honestly a welcome addition. Just remember, the battery is physically disconnected unless the keyboard's power switch is turned on, so the TypePak can't charge when disconnected from a board.
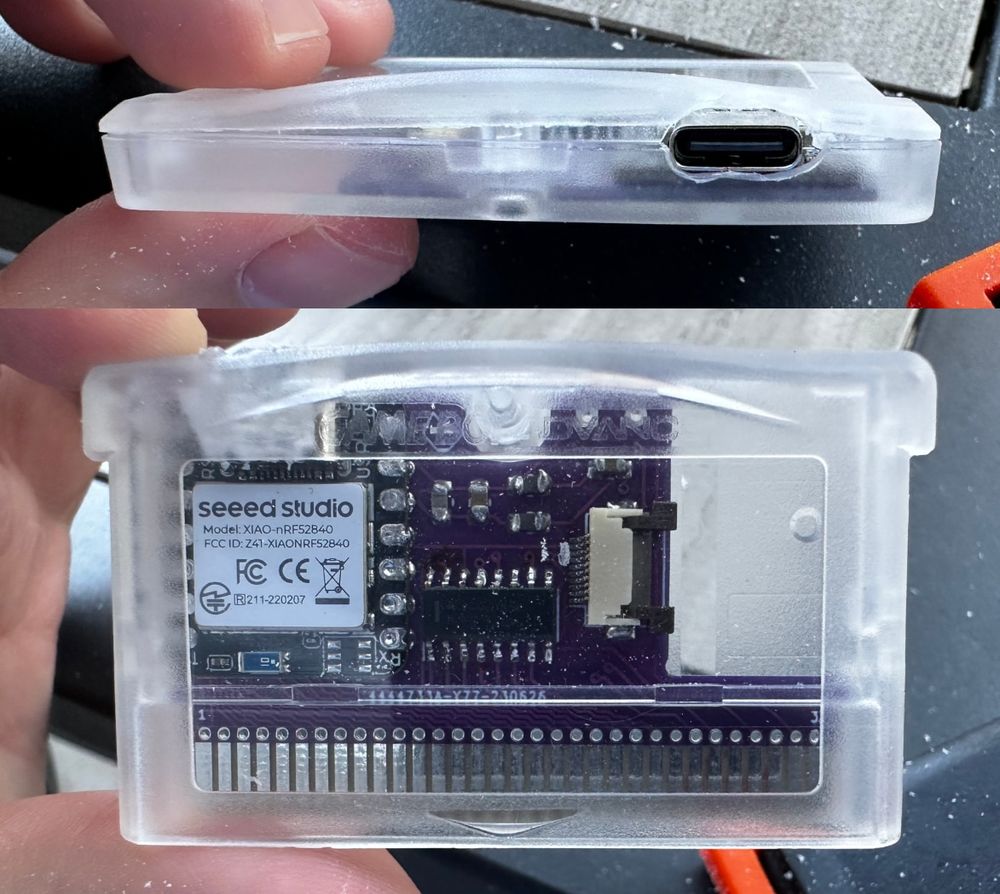
The TypePak is enclosed inside of an aftermarket Game Boy Advance cartridge. Believe it or not, these cartridges typically did not feature cutouts for USB-C ports. You'll need to drill one into the side of your cartridge so that the TypePak can charge and be flashed with new firmware.
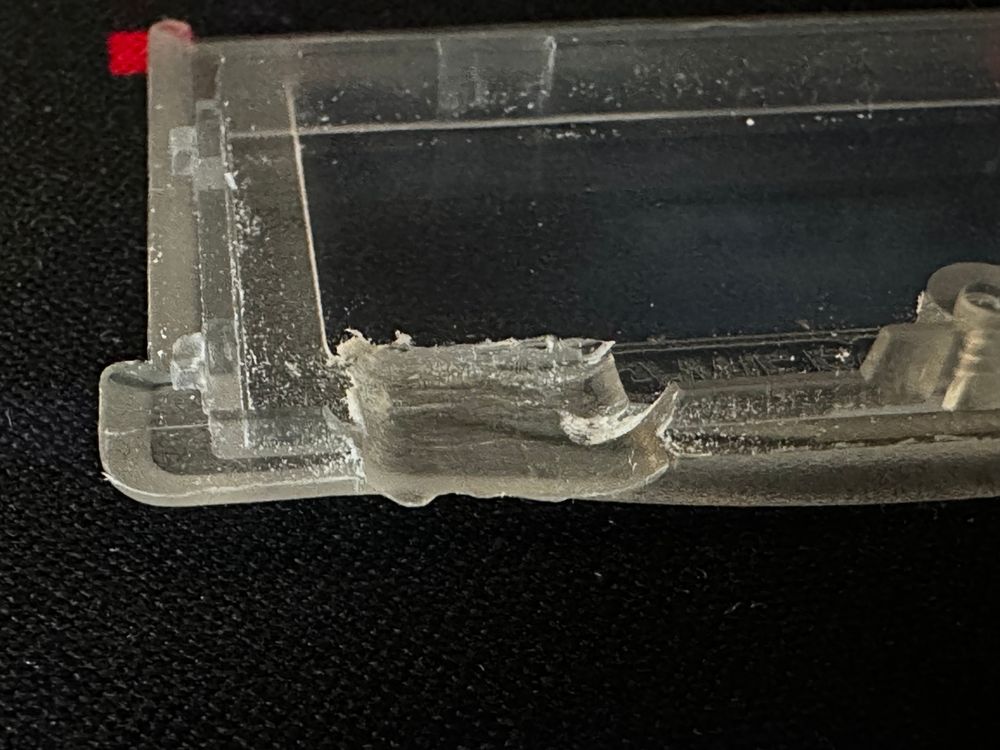
Cutting a hole in the side of the cartridge won't be enough. You'll also need to shave away some of the inside of the top of the case. You should be able to leave most of the exterior of the top untouched. There's just enough material on the inside of the case to make everything fit. The cartridge may bow slightly, but you should be able to get all the tabs locked securely into place and the fastener screw fully secured into place. Aftermarket cartridges are fairly cheap, so you may want to buy an extra to practice on.
The above table represents the parts needed to construct a single TypePak. You'll need to double everything except for the PCB order if you plan on making two. (JLCPCB fabricates PCBs in groups of 5 as a minimum.) If you're building two TypePaks, it's probably worth bumping the capacitor and ferrite bead orders up to 10. You don't want to have your entire project get stalled if you misplace one of the small components, and the bulk ordering pricing makes buying 4-6 units approximately the same cost as 10.
| Qty | Value | Footprint | References |
|---|---|---|---|
| 29 | ComboDiode | D1, D2, D10, D11, D12, D13, D14, D15, D16, D17, D18, D19, D20, D21, D22, D23 +13 | |
| 29 | PG1350 | S1, S2, S10, S11, S12, S13, S14, S15, S16, S17, S18, S19, S20, S21, S22, S23 +13 | |
| 4 | MountingHole_2.2mm_M2_Pad_Via | _1, _2, _3, _4 | |
| 1 | CartBus | Custom:GBA_Reversible_Cart_Reader | J2 |
| 1 | SLLB510100 | Custom:SLLB510100 | S** |
The 64 most common of 66 parts.

PocketConcepts/Pocket_PSU
A variable current & voltage PSU with 3S lipo charging, balancing, and protection circuit using PPS.


hackclub/OnBoard
💡 Join 1,000 teenagers and make your first PCB with a $100 grant!


famichu/MagLev_Switch_MX
The 3D printable magnetic levitation contactless switch with the linear output hall effect sensor.

mmccoyd/hillside
Family of split ergonomic keyboards with three rows of six or five keys and a generous thumb arc

It measures 141.2 × 105.6 mm and has 2 copper layers, 1.6 mm thick.
66 parts, built around the SLLB510100. The full list of its parts is on this page, with links to each part's symbol and footprint where PCBKit's library has them.
From the ImStuBTW/typeboy_and_typepak repository on GitHub, at the commit this page was made from: the board is typeboy/output/pcbs/typeboy.kicad_pcb and its schematic typepak/TypePak.kicad_sch. PCBKit opens the board in the browser, with nothing to install.
Its repository publishes it under the MIT licence: you may reuse it on that licence's terms (keep the author's notice, and for a copyleft licence share your changes alike).