
2 layers100 × 100 mm
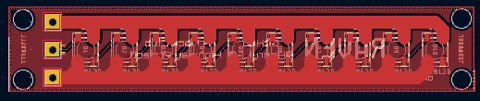
Led subsystem
HenryLi-0/raven
A spinning LED light display! (Made for Hack Club's Highway YSWS!)
33 parts1

 HenryLi-0/raven1
A spinning LED light display! (Made for Hack Club's Highway YSWS!)
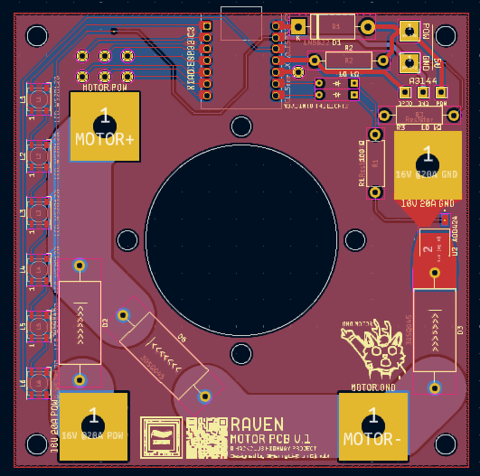
Motor subsystem is an open-source printed circuit board by HenryLi-0, from the HenryLi-0/raven repository on GitHub. It is a 2-layer board of 100 × 100 mm with 39 parts on 28 nets, routed with 123 tracks and 2 vias.
It is built around the 30SQ045. Its parts include 6 diodes, 6 inductors, 3 resistors and 2 ICs. It belongs with the robots and motor control boards and the ESP32 and RISC-V boards of this library.
It's open sourced! Hardware licensed under CERN OHL S v2. Software licensed under GNU GPL v3.
Raven is an open source spinning LED light display, built for (and generously funded by) Hack Club's Highway!
Since being introduced to an LED strip during FRC at the start of 2024, I realized I really like LEDs. Like a little too much. This could also be seen with the 10 LEDs from my Hackpad back in October 2024 and when I brought it on a robotics trip to BattleCry in June 2025 (iykyk). Simply, I kinda like LEDs a lot.
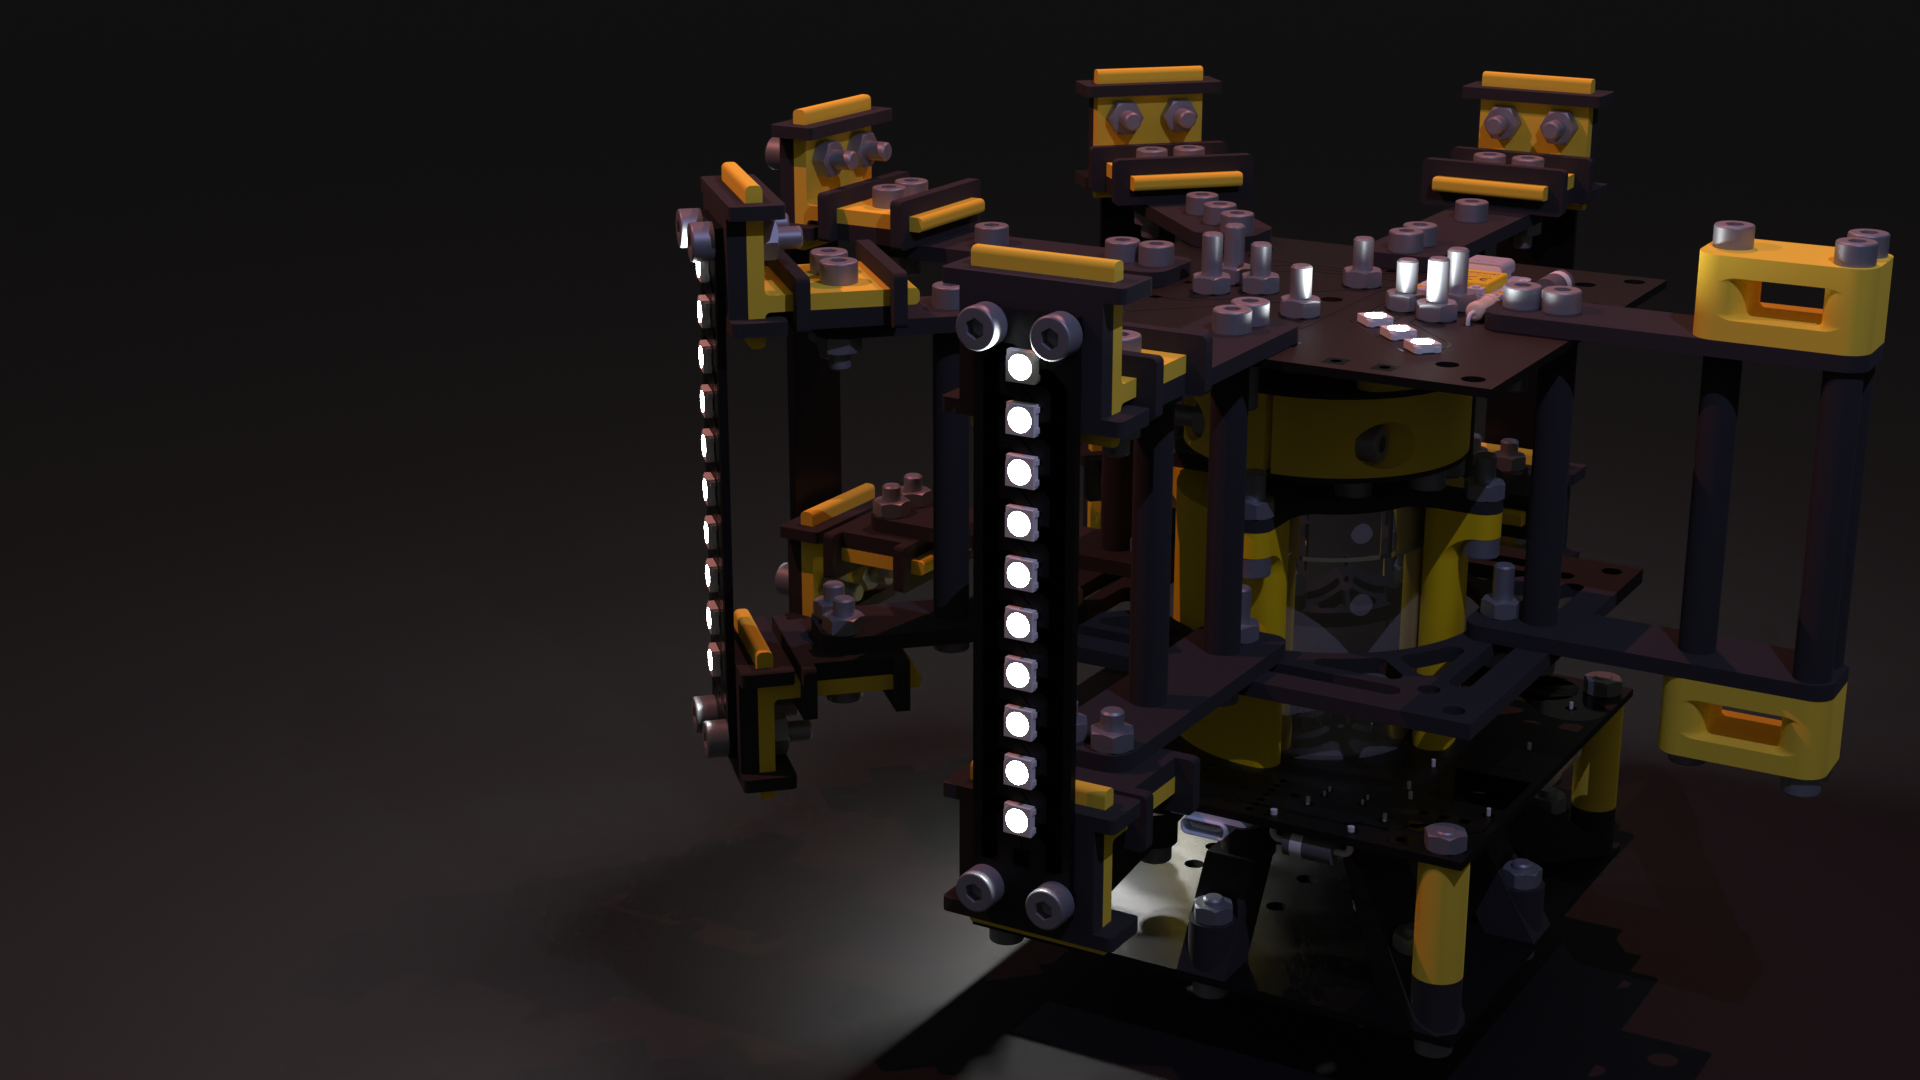
Now inspired by the lights at the venue of the aforementioned robotics trip (and the lights show that occured near the end of the event), that brings us here! Introducting Raven, a spinning LED display that uses 50 LEDs spread across 5 panels, spinning really fast. Using a Hall Effect Sensor for speed measurement, the measured values for angular prediction, and wireless control for wireless communications, Raven is capable of producing sector-based effects, rainbow gradients, strobes, and more, with a full 360 degree range of the room, or any sector of it! Apart from being an almost disco ball of sorts, the mechanism itself allows it to also act as an LED light display, almost looking like some sort of Vegas Sphere, except as a cylinder.
This project took over a hundred hours to make (with tons of redesigns!), and, retrospectively, I guess it's just because I think LEDs look pretty cool. The idea of replicating what happened in the venue really kept me going, and, now staring at what's been created, I think those hours were worth it! Learned lots a things along the way, such as reading datasheets, power in general, and implementing stuff from the ground up!
Incase you wanted a full, long description, here it is!
Introducing Raven, an open source spinning LED light display! The system can be separated into three parts: the motor subsystem, the LED control subsystem, and the LED panels. But first, what exactly is the idea behind Raven? Inspired by the light effects done at BattleCry 2025 at WPI (2025BC), along with really liking LEDs for some reason, I wanted to create a LED display that lights up an entire room. But a stationary system wouldn't create the desired effect, the effect to slice up the room into different colors. For example, imagine the left side of the room being red and the right being blue.
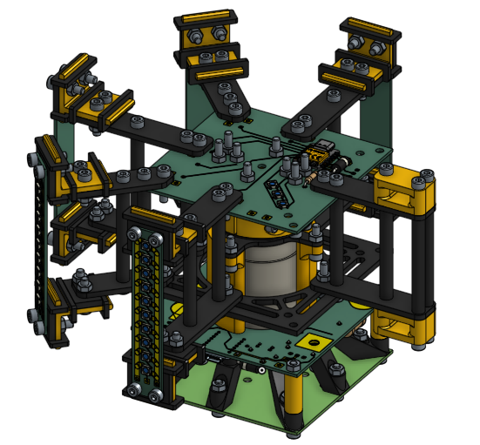
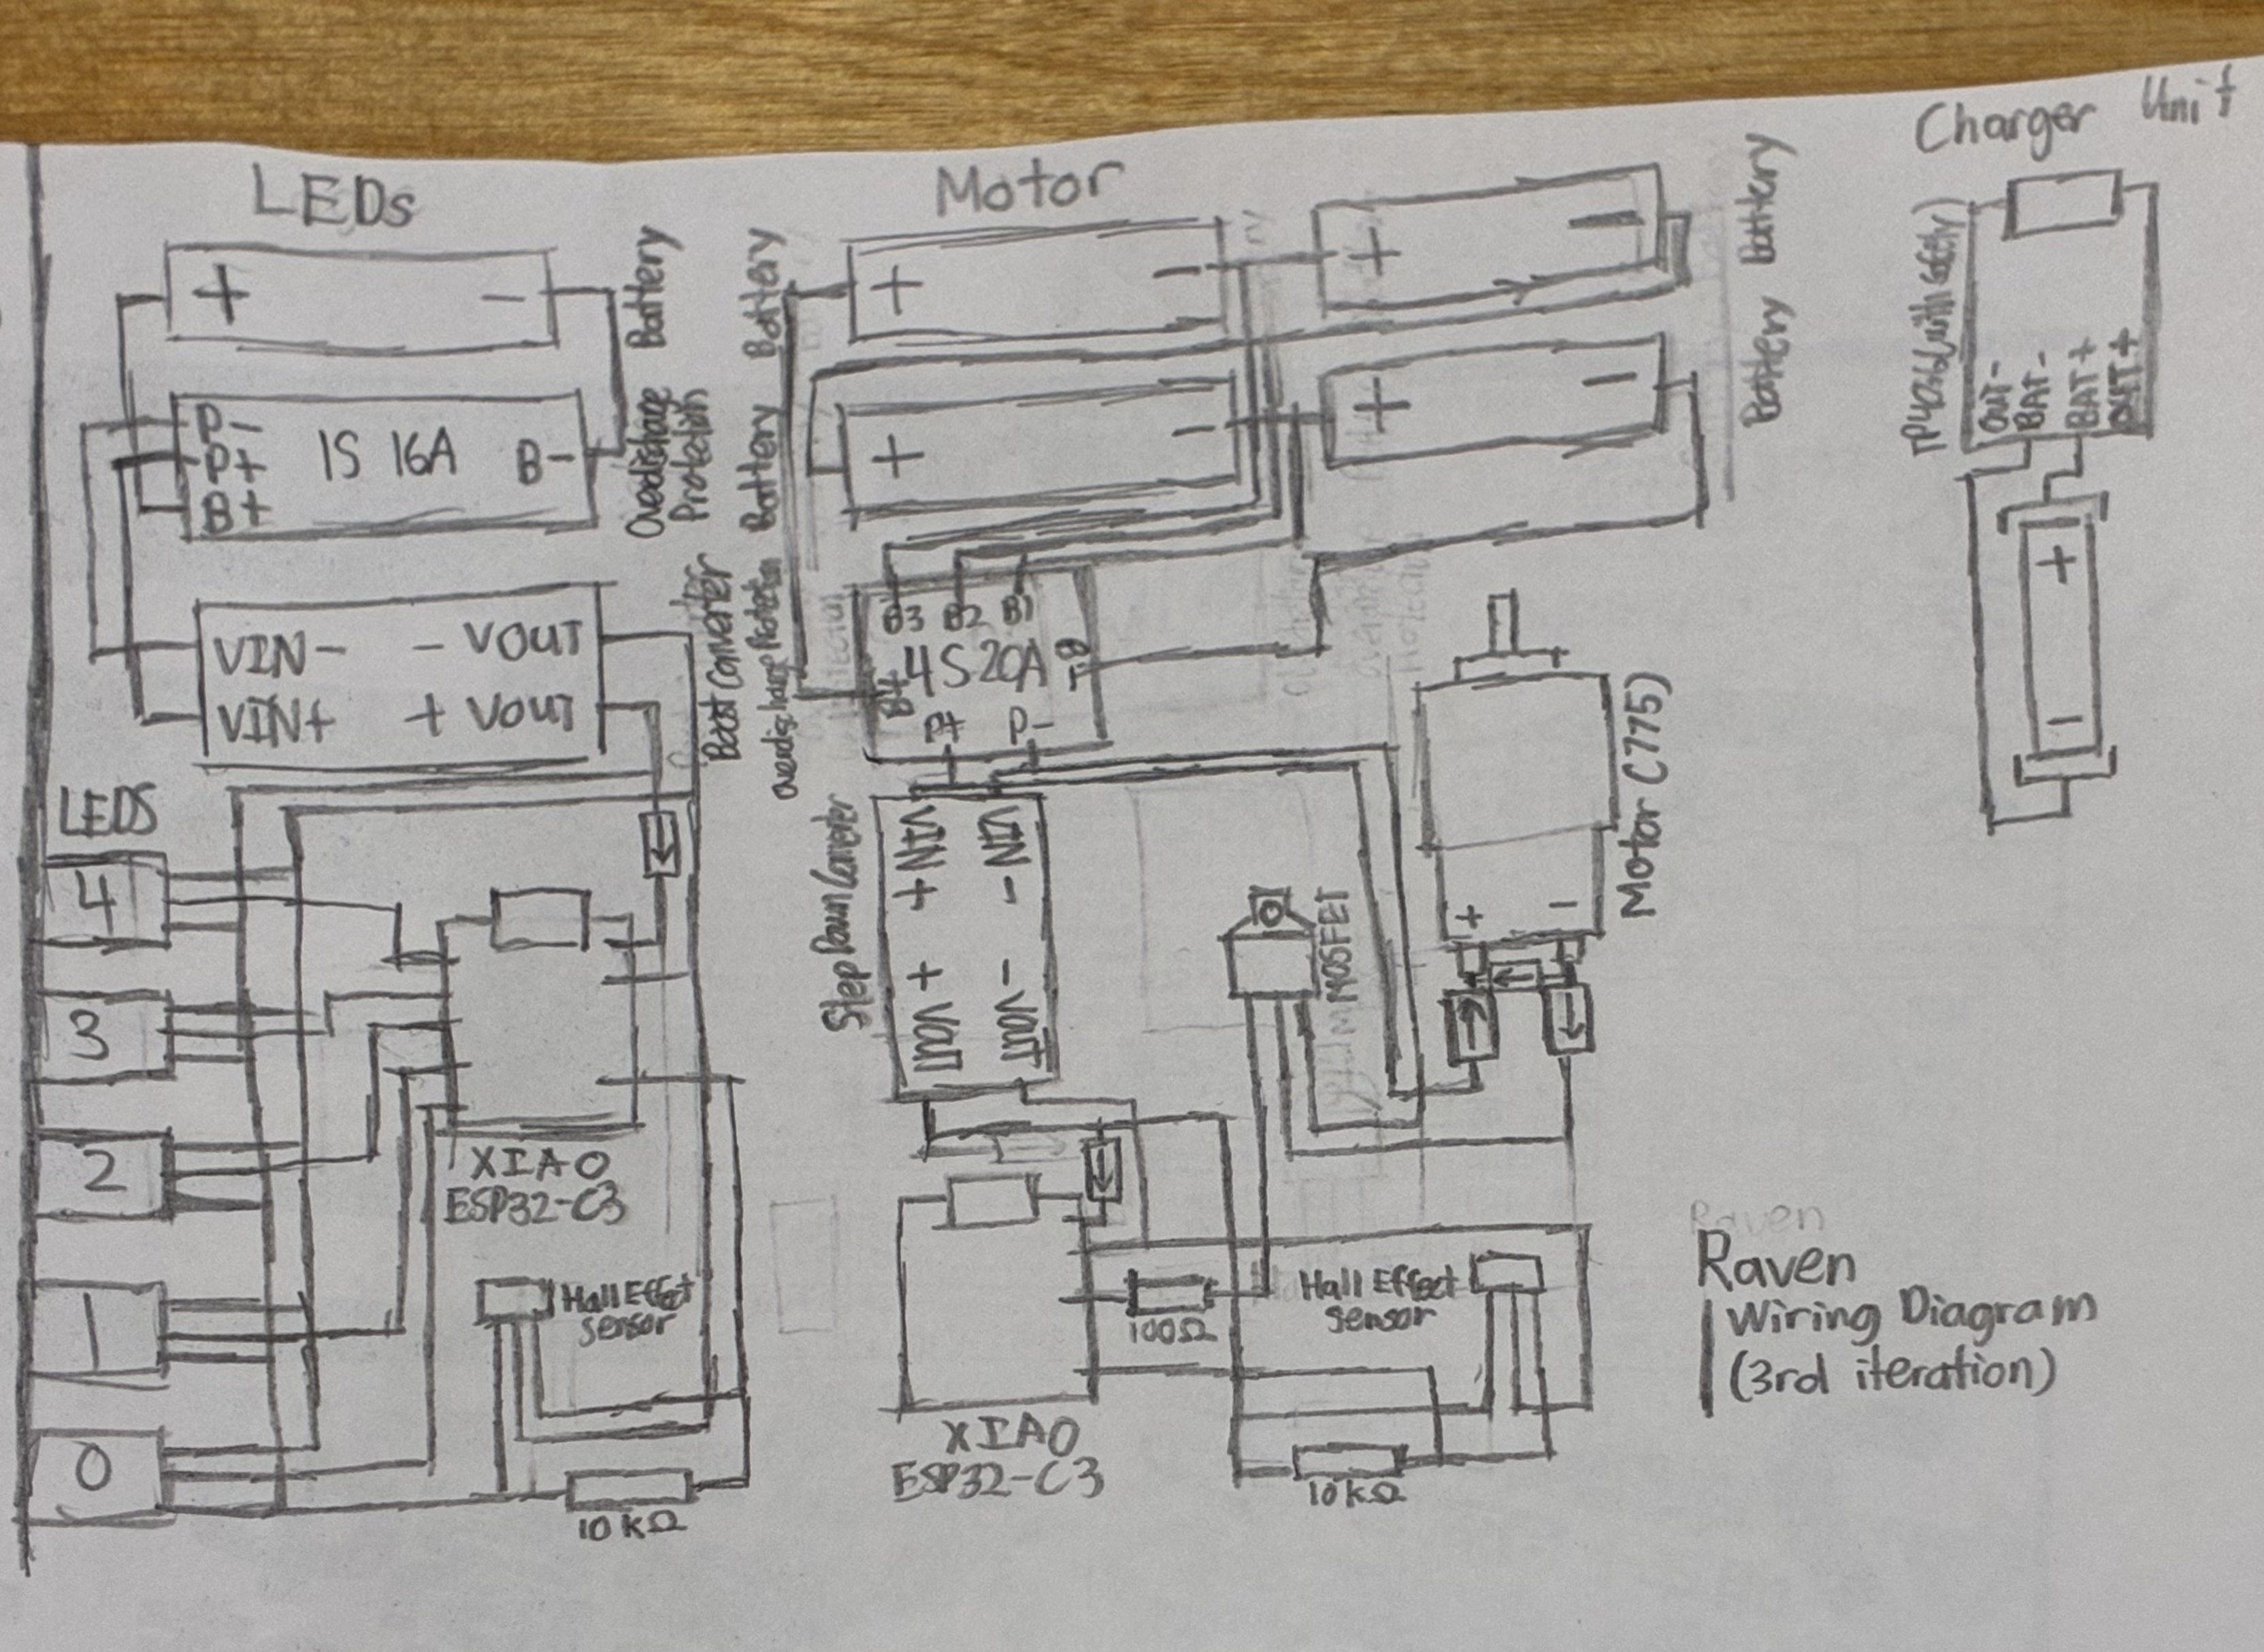
This is accomplished by having 5 LED panels, each with 10 LEDs each, vertically stacked, pointing outwards. These 5 panels form a 180 degree circle, each panel spaced 45 degrees off the next. Arms connecting to the top and bottom of the LED panels attach to a center. Spacers keep these top and bottom arms in position. In the center, the top arms connect to the LED control PCB, which contains a XIAO ESP32-C3. This board is also equipped with a Hall Effect Sensor, used to be a simple way to measure RPM without an expensive encoder. This entire section spins on a shaft collar connected to a 775 motor. Additionally, a 18650 Li-ion battery is on this section, powering the whole thing without need for a power wire.
In order to save on costs, a slip ring was strongly avoided during design. Instead, the motor subsystem powers the motor with 4 Li-ion batteries, supplying a total of 14.8-16.8V @20A to the motor. 4 Li-ion batteries was choosen as a solution to the problem with finding suitable boost converters, which were either incapable of handling 20A, or are just really expensive. In fact, it is actually cheaper to use 4 Li-ion batteries than a single one of these boost converters. This solution also gave the benefit of having additional battery time, which was a nice side bonus. The motor subsystem is stationary, with the base being a copy of the LED control subsystem's PCB. This empty PCB is used as the FR-4 material of the PCB is likely stronger than PLA parts, while also being a smart way to reuse the multiple PCBs sent by JLCPCB. This is also the reason why there are 5 LED panels, as to minimize waste. The motor subsystem is also powered with a XIAO ESP32-C3, and has its own Hall Effect Sensor to measure the RPM of the LED subsystem.
The control system starts at the stationary motor subsystem microcontroller, which sends a constant ping to the LED subsystem's microcontroller. The LED subsystem reads this ping through the ESP32's bluetooth capabilities, and also sends a ping back. Both systems need to listen to each other in order to think they are operating properly. In the event that a ping isn't heard in a long time, the LED subsystem will stop operating and the motor subsystem will attempt to bring the motor to a stop. While operating properly, the LED subsystem uses a mix of data from the motor subsystem's Hall Effect Sensor and the LED subsystem's Hall Effect Sensor to calculate its speed and position, utilizing a model of the motor's speed. The motor subsystem will use PID control with a MOSFET to ensure that the LED subsystem reaches the proper spin.
This entire system is packaged inside a cylinderical shape with diameter of roughly 24 cm and a height of roughly 15 cm. The LED subsystem, weighing less than 2 pounds, plans to spin at anywhere from 1k-2k RPM, in order to achieve a speed where the LEDs essentially blend into a blur. The LED subsytem is loaded with almost 120 screws, in order to ensure that the LED subsystem stays in place. Additionally, all batteries are protected inside an over-discharge protection board and charged with a TP4056 module with protection (the TP4056 does NOT provide power to the system, it is only used for charging.).
And that's Raven, an open source spinning light display!
Wanna know more? Here's some quick places to get started!
updatelogs for everything in different files...)BOM.md for a markdown version of it, but it won't be too descriptive!) (Or just scroll down.)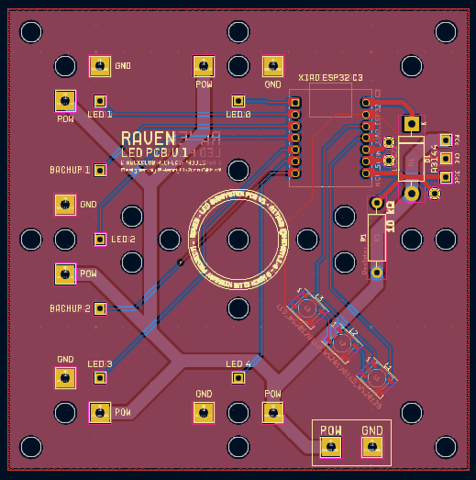
The Bill of Materials for x1 unit of Raven!
Note: For this list, the prices are as of July 2025. Depending on certain actions on certain people, this may fluctuate over the next couple months/years. Current calculations have shipping and tax included, but if you want to see how much everything actual ended up costing me (as in, trying to use all the deals), look out for updatelogs during construction time! If you'd like a BOM where things are grouped by type, check out BOM.md. Check out 'BOM.csv` to also have descriptions of each item!
Try to use the AliExpress Welcome Deal on the 775 Motor and take advantage of a current sale on the batteries (drops all the batteries down to ~$26, including shipping and taxes)! (Batteries are currently calulated with the discount.)
| Part | Price | Link |
|---|---|---|
| M4 Screws (x20, 40mm) | $2.85 | AliExpress |
| M4 Screws (x20, 30mm) | $2.49 | AliExpress |
| M4 Screws (x80, 16mm) | $7.96 | AliExpress |
| M4 Nuts (x125) | $9.45 | AliExpress |
| 3D Printed Parts | $0.00 | (self print) |
| LED Panels (min 5) | $2.10 | JLCPCB |
| LED Subsystem (min 5) | $4.00 | JLCPCB |
| Motor Subsystem (min 5) | $4.00 | JLCPCB |
| Shipping (to NYC) | $10.20 | JLCPCB |
| XIAO ESP32-C3 (x2) | $10.00 | Seeed Studio |
| Shipping (to NYC) | $9.00 | Seeed Studio |
| A3144 (min 5) | $1.18 | LCSC |
| 30SQ045 (x3) | $1.76 | LCSC |
| WS2812B (x65, mul 5) | $4.28 | LCSC |
| 1N4148 (x2, min 20) | $0.51 | LCSC |
| PR01000101002JA100 (min 5) | $0.60 | LCSC |
| MF1W-100Ω±1% T (min 10) | $0.45 | LCSC |
| 1N5822 (x2, min 5) | $0.51 | LCSC |
| AOD424 (x1) | $0.46 | LCSC |
| Handling Fee | $3.00 | (LCSC) |
| Shipping (to NYC) | $9.00 | (LCSC) |
| 775 Motor (288W, 12k) | $17.65 | AliExpress |
| Overdischarge (1S 16A) | $1.26 | AliExpress |
| Overdischarge (4S 20A std.) | $5.89 | AliExpress |
| LM2596 (x1, Step Down) | $1.76 | AliExpress |
| XL6019 (x1, Step Up) | $2.04 | AliExpress |
| TP4056 (x5, USB-C, safety) | $2.70 | AliExpress |
| 22 AWG wire (5m, 1 roll) | $2.02 | AliExpress |
| 10 AWG wire (1m, Black) | $6.86 | AliExpress |
| Battery Holder (x2, 1B) | $5.58 | AliExpress |
| Battery Holder (x1, 4B) | $3.72 | AliExpress |
| Shipping (to NYC) | $0.00 | (AliExpress) |
| Samsung 25R 18650... | $15.00 | IMR Batteries |
| Shipping (to NYC) | $9.13 | (IMR Batteries) |
| Taxes | $2.07 | (IMR Batteries) |
| Buffer | $5.00 | |
| TOTAL | $164.51 |
| Qty | Value | Footprint | References |
|---|---|---|---|
| 6 | LED_WS2812B | ScottoKeebs_Components:LED_WS2812B | L1, L2, L3, L4, L5, L6 |
| 6 | LOGO | LOGO | G***, G***, G***, G***, G***, G*** |
| 4 | , , , | ||
| 3 | 30SQ045 | Resistor_THT:R_Axial_DIN0918_L18.0mm_D9.0mm_P25.40mm_Horizontal | D2, D3, D6 |
| 2 | Diode | ScottoKeebs_Components:Diode_DO-35 | D4, D5 |
| 2 | Resistor | Resistor_THT:R_Axial_DIN0411_L9.9mm_D3.6mm_P15.24mm_Horizontal | R2, R3 |
| 1 | 1N5822 | Diode_THT:D_DO-201AD_P15.24mm_Horizontal | D1 |
| 1 | MCU_Seeed_XIAO_ESP32-C3 | ScottoKeebs_MCU:Seeed_XIAO_RP2040 | U1 |
| 1 | Resistor | Resistor_THT:R_Axial_DIN0411_L9.9mm_D3.6mm_P12.70mm_Horizontal | R1 |
| 1 | ~ | STP55NF06L:AOD424 | U2 |
The 27 most common of 39 parts.
HenryLi-0/raven
A spinning LED light display! (Made for Hack Club's Highway YSWS!)


joeycastillo/Sensor-Watch
A board replacement for the classic Casio F-91W wristwatch

rusefi/rusefi
rusefi - GPL internal combustion engine control unit

hackclub/OnBoard
💡 Join 1,000 teenagers and make your first PCB with a $100 grant!

ataradov/usb-sniffer-lite
A simple USB sniffer based on Raspberry Pi RP2040

windowsair/wireless-esp8266-dap
CMSIS-DAP compatible wireless debugger for ESP8266/ESP32/ESP32C3/ESP32S3. Optional 40MHz SPI acceleration, etc. 适配多种ESP芯片的无线调试器


lachlanA/eagle-to-kicad
Eagle SCH/LIB to KiCad SCH/LIB ULP conversion script

It measures 100 × 100 mm and has 2 copper layers, 1.6 mm thick.
39 parts, built around the 30SQ045. The full list of its parts is on this page, with links to each part's symbol and footprint where PCBKit's library has them.
From the HenryLi-0/raven repository on GitHub, at the commit this page was made from: the board is PCB/motor subsystem/motor subsystem.kicad_pcb and its schematic PCB/LED panel/LED panel.kicad_sch. PCBKit opens the board in the browser, with nothing to install.
Its repository states no licence, so its author keeps all rights: ask HenryLi-0 before reusing the design.