
4 layers40 × 40 mm
Little Boy - External
Alex-C-EE/DCServo
A platform designed to convert any brushed DC Motor to a smart continous servo
71 parts14

ESP32 based oil temperature gauge with noise filtering, smooth movement and OTA updates.
ESP Gauge is an open-source printed circuit board by Aperture-Shitpost-Innovators, from the Aperture-Shitpost-Innovators/ESPTempGauge repository on GitHub. It is a 2-layer board of 63 × 51.5 mm with 33 parts on 47 nets, routed with 147 tracks and 29 vias.
It is built around the ESP32-WROOM-32E and LMR33630CDDA. Its parts include 9 capacitors, 9 resistors, 5 connectors, 3 diodes and 2 ICs. It belongs with the ESP32 boards of this library.


[blocked]






ESP32-WROOM32 based oil temperature gauge with noise filtering, smooth movement and OTA updates.
Report Bug
·
Request Feature
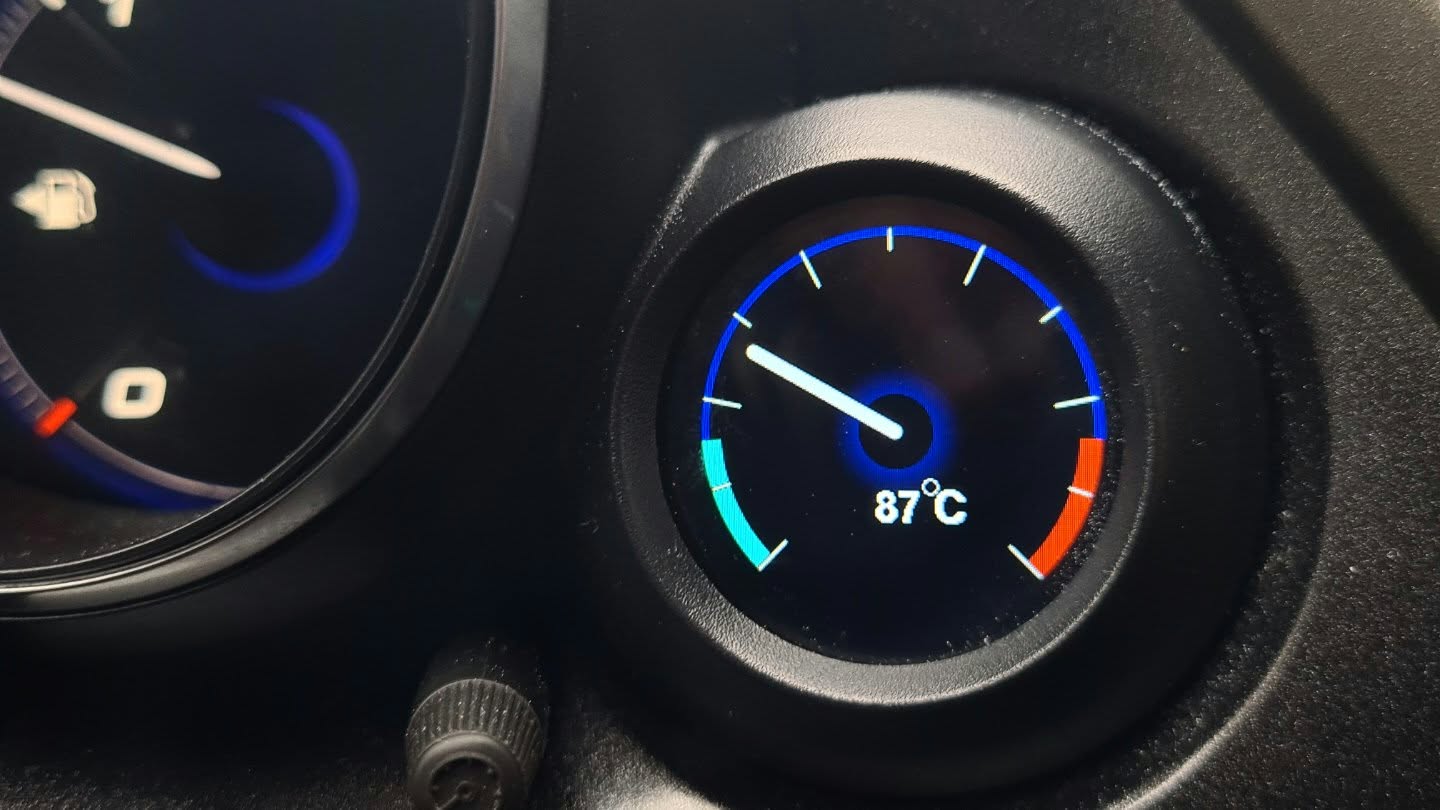
This is a customizable oil temperature gauge software repository. The default style was designed after the 9'th generation Honda Civic gauge cluster. This source code was designed to be compilable and uploadable onto an ESP32-WROOM32 out of the box using Visual Studio Code and PlatformIO.

 [blocked]
 [blocked]

Here are instructions on how to get the project up and running locally
NOTE: The non-PSRAM models cant fit the full screen into memory and thus to maintain compatibility, it will show a black bar on the bottom of the screen. It's not visible in normal mode, but will show up during an alarm. This is a hardware limitation.
You will need to either manufacture or order a custom PCB for this project, either will work. I have provided a kicad project in the hardware folder if you wish to order one or modify my design.
Wire together a harness according to the provided schematic. Please keep the power and NTC wires above 0.75mm2 to prevent excessive voltage drops.
For this project, I used an oil filter sandwich plate with 1/8 NPT sensor ports. For the purposes of fitting it into an R18 block, I had to modify mine to fit, so I blocked off it's 2 ports leaving one free, grinded down the aluminium block and torqued down the sensor. To avoid leaks, I used a medium strength oil resistant thread-locker on all NPT threads. While it should seal well about 2h after installing the thread-locker, you should allow 24h to ensure a full cure.
| Modified plate | Fitted plate |
|---|---|
This is an example of how to list things you need to use the software and how to install them.
git clone https://github.com/Aperture-Shitpost-Innovators/ESPTempGauge.git.pio/build and find the firmware.bin file.include/wifi_passes.h.UPDATE MODE on the screen.firmware.bin file and click "Upload".See the open issues for a full list of proposed features (and known issues).
Contributions are what make the open source community such an amazing place to learn, inspire, and create. Any contributions you make are greatly appreciated.
If you have a suggestion that would make this better, please fork the repo and create a pull request. You can also simply open an issue with the tag "enhancement". Don't forget to give the project a star! Thanks again!
git checkout -b feature/AmazingFeature)git commit -m 'Add some AmazingFeature')git push origin feature/AmazingFeature)Distributed under the MIT license. See the LICENSE file for more information.
Project Link: https://github.com/Aperture-Shitpost-Innovators/ESPTempGauge
| Qty | Value | Footprint | References |
|---|---|---|---|
| 3 | 100k | Resistor_SMD:R_0603_1608Metric_Pad0.98x0.95mm_HandSolder | R3, R5, R9 |
| 2 | 100n | Capacitor_SMD:C_0603_1608Metric_Pad1.08x0.95mm_HandSolder | C1, C8 |
| 2 | 10k | Resistor_SMD:R_0603_1608Metric_Pad0.98x0.95mm_HandSolder | R1, R2 |
| 2 | 1u | Capacitor_SMD:C_0603_1608Metric_Pad1.08x0.95mm_HandSolder | C6, C7 |
| 2 | 22u | Capacitor_SMD:C_0603_1608Metric_Pad1.08x0.95mm_HandSolder | C2, C3 |
| 2 | D_TVS_Dual_AAC | Package_TO_SOT_SMD:SOT-23-3 | D1, D2 |
| 2 | LOGO | LOGO | G***, G*** |
| 1 | 1.2uH | Inductor_SMD:L_1008_2520Metric_Pad1.43x2.20mm_HandSolder | L1 |
| 1 | 10K | Resistor_SMD:R_0603_1608Metric_Pad0.98x0.95mm_HandSolder | R8 |
| 1 | 10u | Capacitor_SMD:C_0603_1608Metric_Pad1.08x0.95mm_HandSolder | C4 |
| 1 | 1n | Capacitor_SMD:C_0603_1608Metric_Pad1.08x0.95mm_HandSolder | C9 |
| 1 | 2.1k | Resistor_SMD:R_0603_1608Metric_Pad0.98x0.95mm_HandSolder | R6 |
| 1 | 220n | Capacitor_SMD:C_0603_1608Metric_Pad1.08x0.95mm_HandSolder | C5 |
| 1 | 43.2k | Resistor_SMD:R_0603_1608Metric_Pad0.98x0.95mm_HandSolder | R4 |
| 1 | 51k | Resistor_SMD:R_0603_1608Metric_Pad0.98x0.95mm_HandSolder | R7 |
| 1 | Boot | Button_Switch_THT:SW_PUSH_6mm_H5mm | SW1 |
| 1 | Conn_01x03_Socket | Connector_Wire:SolderWire-0.75sqmm_1x03_P7mm_D1.25mm_OD3.5mm_Relief | J5 |
| 1 | DIMMING | Connector_Wire:SolderWire-0.75sqmm_1x01_D1.25mm_OD3.5mm_Relief | J3 |
| 1 | D_Schottky | Diode_SMD:D_0603_1608Metric | D3 |
| 1 | EN | Button_Switch_THT:SW_PUSH_6mm_H5mm | SW2 |
| 1 | ESP32-WROOM-32E | RF_Module:ESP32-WROOM-32D | U3 |
| 1 | LMR33630CDDA | Package_SO:Texas_HSOP-8-1EP_3.9x4.9mm_P1.27mm_ThermalVias | U2 |
| 1 | PROG | Connector_PinHeader_2.54mm:PinHeader_2x02_P2.54mm_Vertical | J4 |
| 1 | SCREEN | Connector_JST:JST_XH_B8B-XH-AM_1x08_P2.50mm_Vertical | J1 |
| 1 | SENSOR | Connector_Wire:SolderWire-0.75sqmm_1x02_P7mm_D1.25mm_OD3.5mm_Relief | J2 |
Alex-C-EE/DCServo
A platform designed to convert any brushed DC Motor to a smart continous servo


Alex-C-EE/Reliable-Temp-Monitor
A CAN Node designed to take temperature measurement from 3 analog-output sensors and control 2x 24V fans

SrcnUysl/three-channel-dc-motor-driver-pcb
KiCad-based three-channel DC motor driver and control PCB featuring STM32 interfacing and integrated power management.


hydromisc/hydromisc
Open hardware to measure EC and pH, drive pumps, and otherwise manage a mid-size hydroponic grow over Wi-Fi.

QuantumVillage/UncutGem
A prototype Full Stack fully Open Source NV Center Diamond Magnetometer

It measures 63 × 51.5 mm and has 2 copper layers, 1.6 mm thick.
33 parts, built around the ESP32-WROOM-32E and LMR33630CDDA. The full list of its parts is on this page, with links to each part's symbol and footprint where PCBKit's library has them.
From the Aperture-Shitpost-Innovators/ESPTempGauge repository on GitHub, at the commit this page was made from: the board is hardware/ESP_Gauge.kicad_pcb and its schematic hardware/ESP_Gauge.kicad_sch. PCBKit opens the board in the browser, with nothing to install.
Its repository states no licence, so its author keeps all rights: ask Aperture-Shitpost-Innovators before reusing the design.