2 layers91.8 × 42.7 mm
Racktemperatur
klein0r/pcb-rack-temperature-control
Control fans in your rack depending on current temperature
28 partsMIT

 souptik-samanta/dryer1
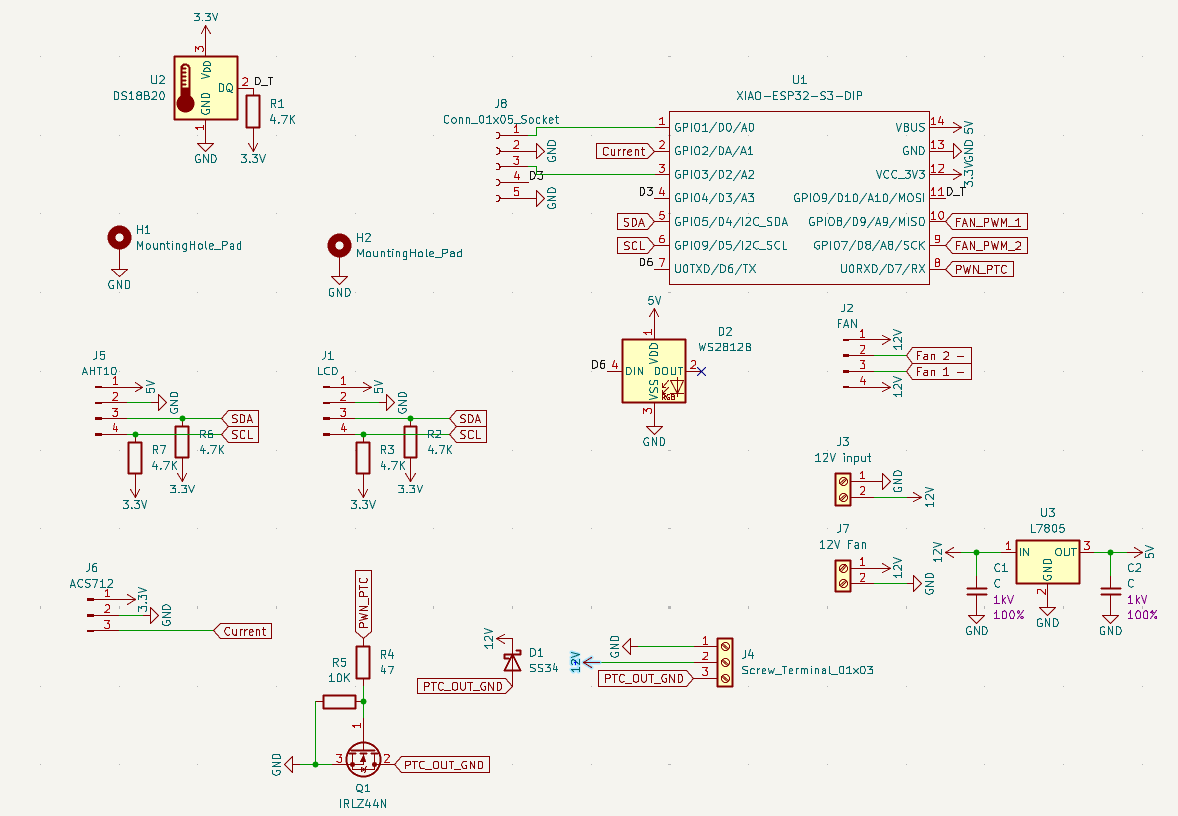
A custom PCB and self-centering spool holder for drying 3D printer filament. The PCB controls the fans, monitors temperature, and provides connections for PTC heaters.
Dryer control is an open-source printed circuit board by souptik-samanta, from the souptik-samanta/dryer repository on GitHub. It is a 4-layer board of 50 × 50 mm with 33 parts on 22 nets, routed with 139 tracks and 17 vias.
It is built around the DS18B20, AHT10 and L7805, with the IRLZ44N, SS34 and WS2812B among its other parts. Its parts include 11 resistors, 8 connectors, 4 diodes, 3 ICs and 3 transistors. It belongs with the ESP32 boards of this library.


A custom PCB and self-centering spool holder for drying 3D printer filament. The PCB controls the fans, monitors temperature, and provides connections for PTC heaters. The design is modular, making it easy to replace or upgrade the heater when needed.
I made this because I needed a filament dryer. Instead of buying one, I designed my own PCB and spool holder with the features I wanted.
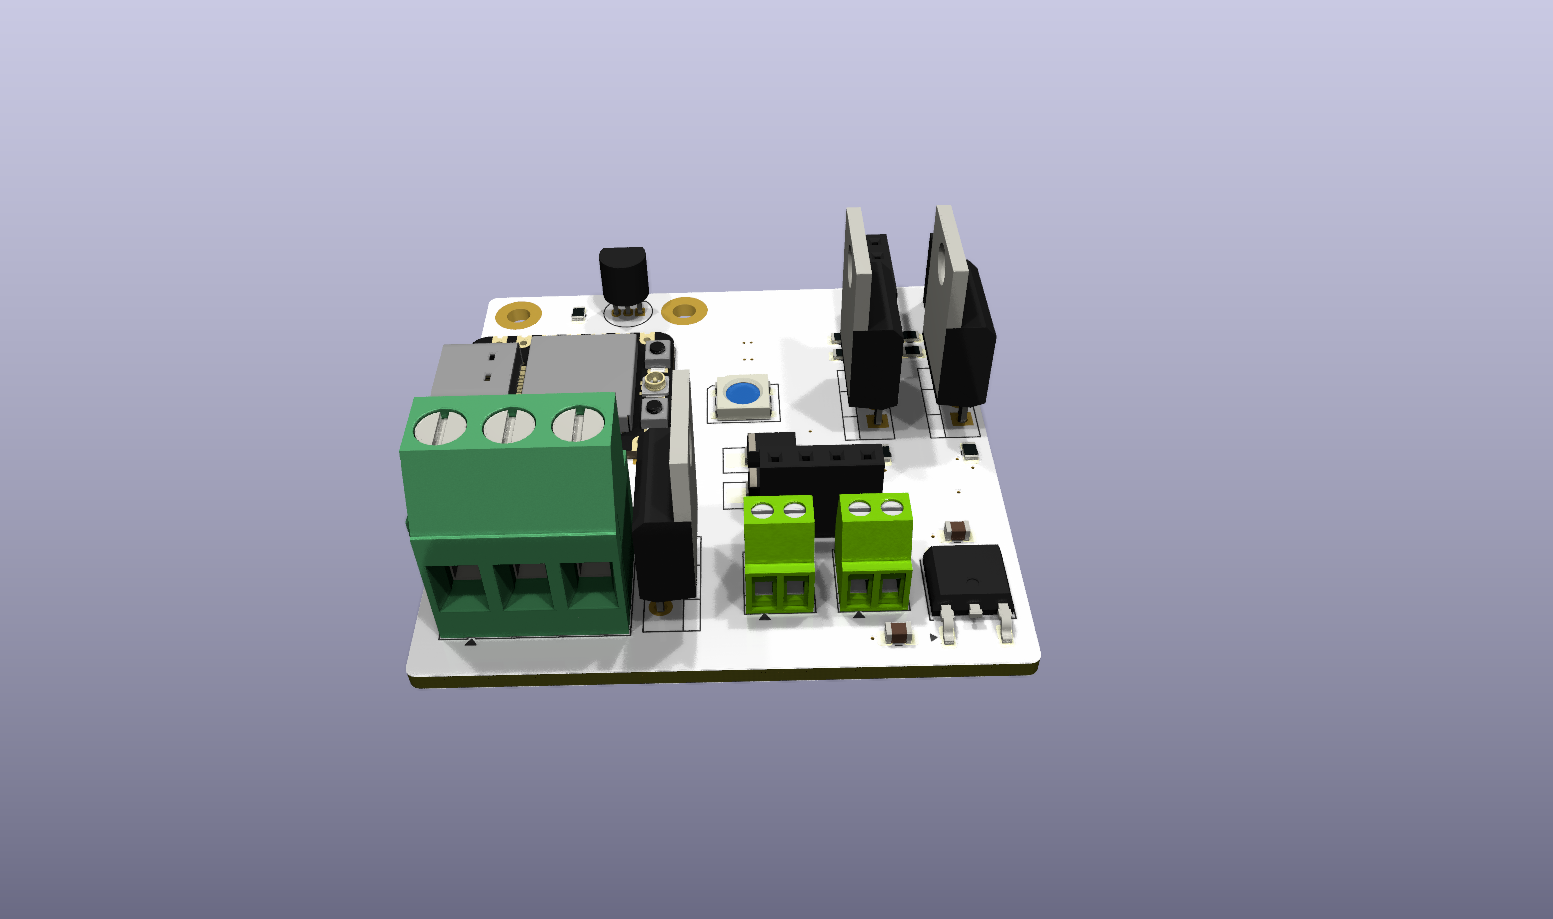
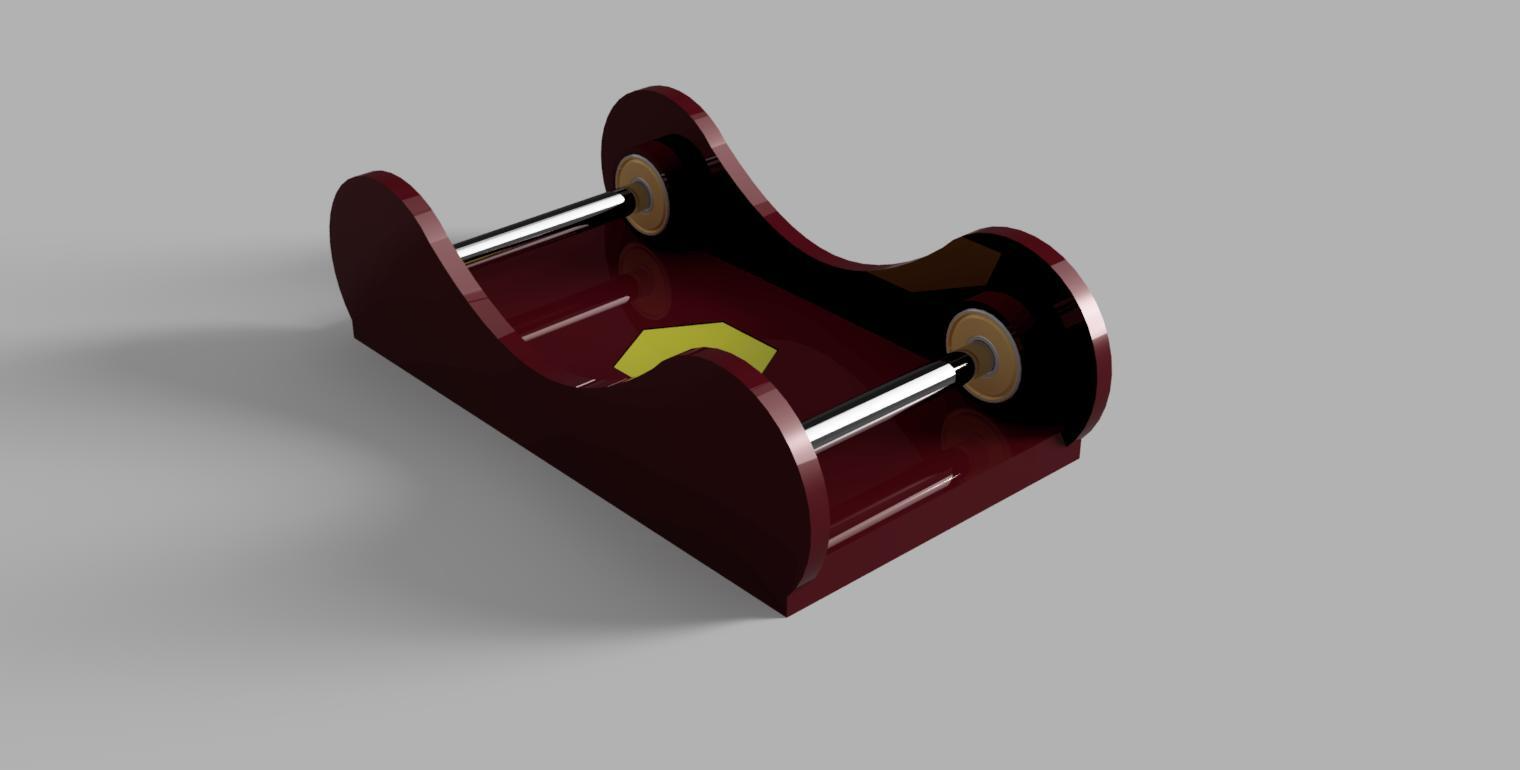
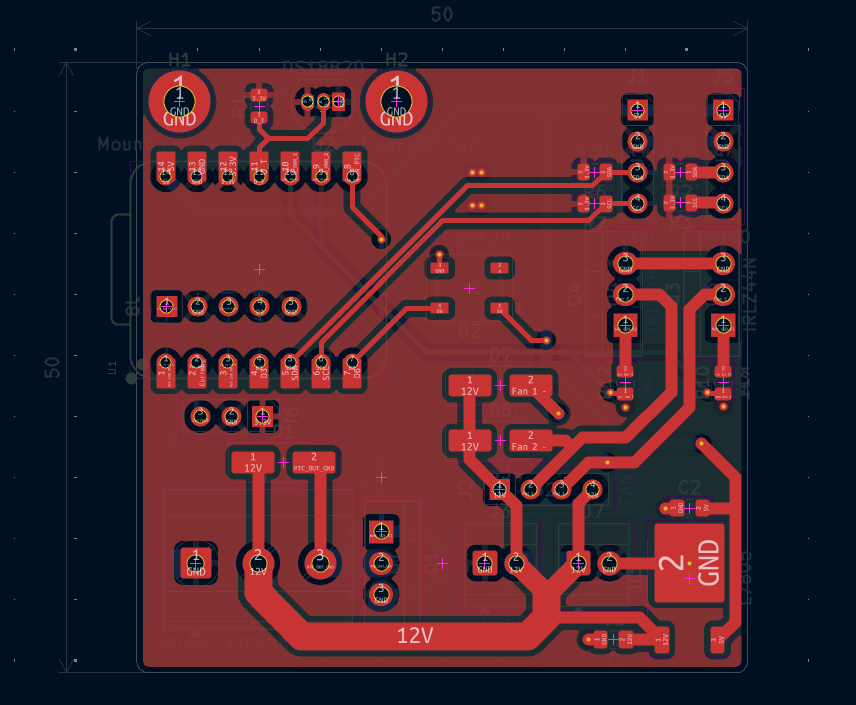
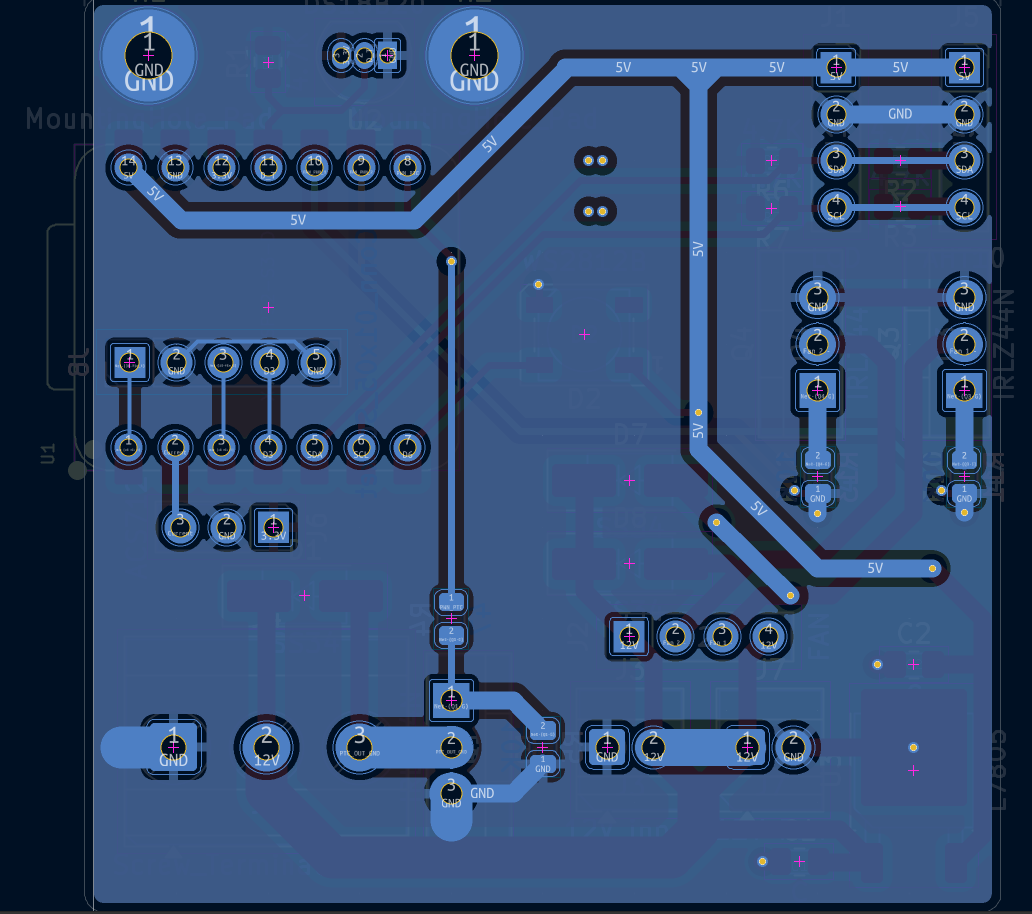
| Item | Qty | Approx. Cost |
|---|---|---|
| PCB | 1 | US$2 |
| JLCPCB Shipping | 1 | US$9 |
| XIAO ESP32-S3 | 1 | US$10 |
| PTC Heater | 1 | US$6 |
| IRLZ44N | 3 | US$1.50 |
| LM7805 | 1 | US$0.30 |
| AHT10 | 1 | US$2.50 |
| DS18B20 | 1 | US$1.50 |
| ACS712 | 1 | US$2 |
| LCD | 1 | US$3 |
| WS2812B | 1 | US$0.20 |
| 12V Fans | 2 | US$4 |
| SS34, Resistors, Headers, Screw Terminals and Misc. Components | - | US$1 |
Estimated Total: ~US$35
Designed by Souptik Samanta. PCB designed in KiCad. Mechanical parts designed in Fusion 360.
| Qty | Value | Footprint | References |
|---|---|---|---|
| 5 | 4.7K | Resistor_SMD:R_0805_2012Metric | R1, R2, R3, R6, R7 |
| 3 | 10K | Resistor_SMD:R_0805_2012Metric | R5, R11, R13 |
| 3 | 47 | Resistor_SMD:R_0805_2012Metric | R4, R10, R12 |
| 3 | IRLZ44N | Package_TO_SOT_THT:TO-220-3_Vertical | Q1, Q3, Q4 |
| 3 | SS34 | Diode_SMD:D_SMA_Handsoldering | D1, D7, D8 |
| 2 | C | Capacitor_SMD:C_0805_2012Metric_Pad1.18x1.45mm_HandSolder | C1, C2 |
| 2 | MountingHole_Pad | MountingHole:MountingHole_2.5mm_Pad_TopBottom | H1, H2 |
| 1 | 12V Fan | TerminalBlock:TerminalBlock_Xinya_XY308-2.54-2P_1x02_P2.54mm_Horizontal | J7 |
| 1 | 12V input | TerminalBlock:TerminalBlock_Xinya_XY308-2.54-2P_1x02_P2.54mm_Horizontal | J3 |
| 1 | ACS712 | Connector_PinHeader_2.54mm:PinHeader_1x03_P2.54mm_Vertical | J6 |
| 1 | AHT10 | Connector_PinSocket_2.54mm:PinSocket_1x04_P2.54mm_Vertical | J5 |
| 1 | Conn_01x05_Socket | Connector_PinSocket_2.54mm:PinSocket_1x05_P2.54mm_Vertical | J8 |
| 1 | DS18B20 | Package_TO_SOT_THT:TO-92_Inline | U2 |
| 1 | FAN | Connector_PinSocket_2.54mm:PinSocket_1x04_P2.54mm_Vertical | J2 |
| 1 | L7805 | Package_TO_SOT_SMD:TO-252-2 | U3 |
| 1 | LCD | Connector_PinSocket_2.54mm:PinSocket_1x04_P2.54mm_Vertical | J1 |
| 1 | Screw_Terminal_01x03 | TerminalBlock_Phoenix:TerminalBlock_Phoenix_MKDS-3-3-5.08_1x03_P5.08mm_Horizontal | J4 |
| 1 | WS2812B | LED_SMD:LED_WS2812B_PLCC4_5.0x5.0mm_P3.2mm | D2 |
| 1 | XIAO-ESP32-S3-DIP | Seeed Studio XIAO Series Library:XIAO-ESP32S3-DIP | U1 |
klein0r/pcb-rack-temperature-control
Control fans in your rack depending on current temperature


gadjet/Multifunction-ESP8266-Sensor-board
AKA Wireless window/door sensor version 4


ShreyasKombinadka/Edge-Atmos
A local weather station built with no HAL and all custom drivers and libraries built from bare-metal register level coding.


ErBWs/GD32-Mesh
LoRa & 4G Mesh with GD32, my bachelor's thesis. 基于 GD32 的 LoRa 组网和 4G 通信,本科毕业设计
It measures 50 × 50 mm and has 4 copper layers, 1.6 mm thick.
33 parts, built around the DS18B20, AHT10, L7805 and IRLZ44N. The full list of its parts is on this page, with links to each part's symbol and footprint where PCBKit's library has them.
From the souptik-samanta/dryer repository on GitHub, at the commit this page was made from: the board is Pcb/Dryer control.kicad_pcb and its schematic Pcb/Dryer control.kicad_sch. PCBKit opens the board in the browser, with nothing to install.
Its repository states no licence, so its author keeps all rights: ask souptik-samanta before reusing the design.