2 layers100 × 100 mm

 softerhardware/CWKeyer15
CW Keyer for Teensy 4.0
TeensyKeyerShield is an open-source printed circuit board by softerhardware, from the softerhardware/CWKeyer repository on GitHub. It is a 2-layer board of 100 × 50 mm with 99 parts on 85 nets, routed with 740 tracks and 99 vias.
It is built around the MOCD217R2M, BLM18BD252SN1 and SP0503BAHTG. Its parts include 39 capacitors, 14 resistors, 12 connectors, 5 inductors and 3 ICs. It belongs with the audio and music boards and the NXP (LPC, Kinetis, i.MX RT) boards of this library.


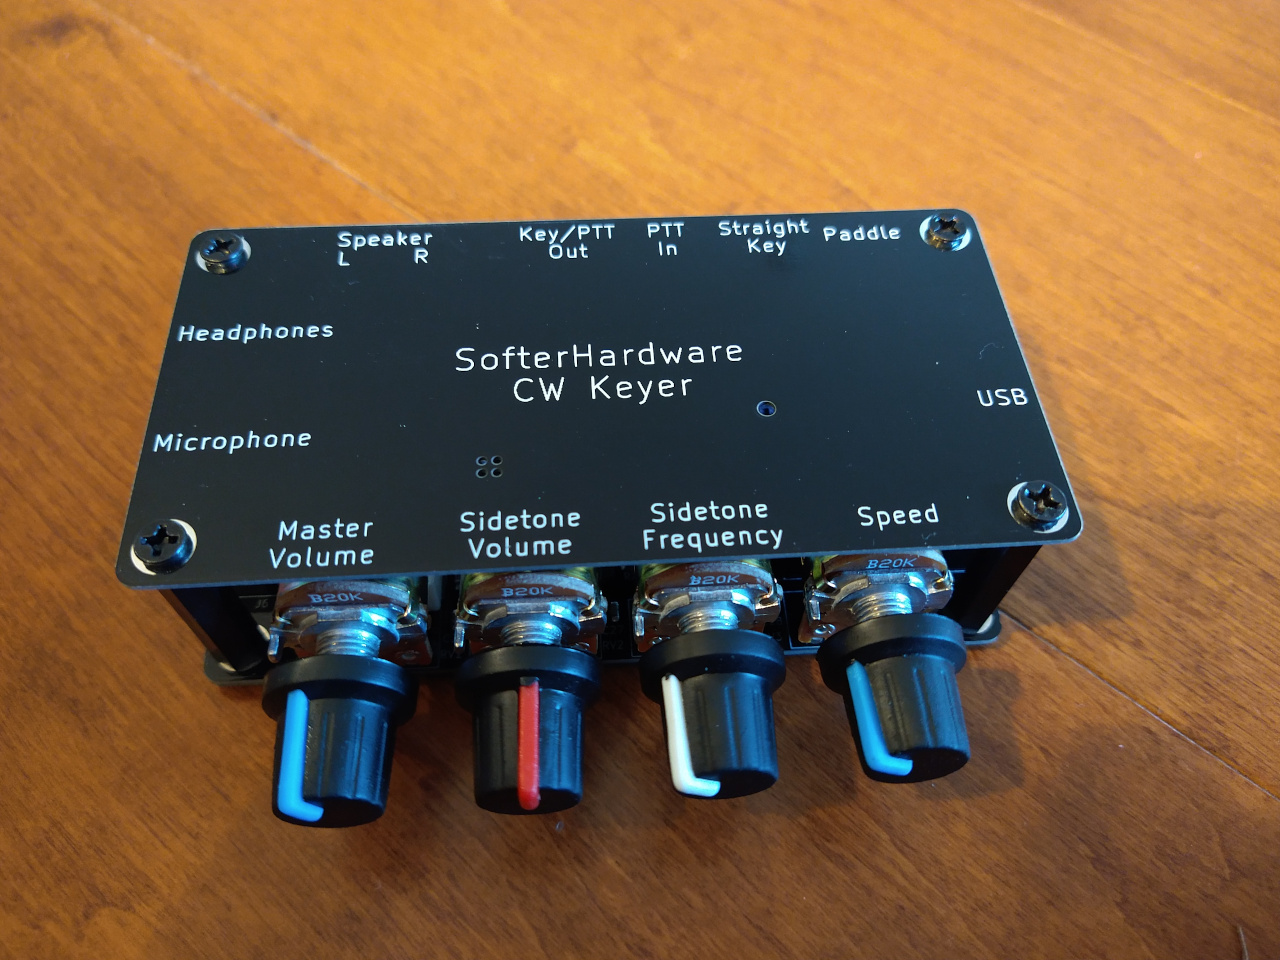
This project is a CW keyer for amateur radio. The hardware connects to a PC with USB. It then appears as an audio device for radio sound output and microphone input. It is also a Midi device to signal key up/down to the PC software, and a serial device for a connection to logging or other software on the PC. It is designed for the Hermes-Lite 2.0 or other SDR software. The radio sound is sent to the keyer and the keyer generates a sidetone, mixes it with the audio and sends it to the headphones or speaker. The sidetone has zero delay and is suitable for high speed CW. The keyer can also be used with a regular analog radio by using the key and PTT outputs. This project is currently a DIY project with instructions below for those who feel comfortable with some light soldering and Arduino programming.
The hardware consists of a carrier board as shown below and a Teensy 4 microcontroller. The Teensy can be purchased from Teensy or from sparkfun, adafruit, mouser, digikey or amazon. Make sure to order the Teensy 4.
Keyer software must be loaded into the Teensy 4 microcontroller. The Teensy 4 is programmed via a usb connection to a host computer. First, download and install the Teensy loader application for your operating system as described on this page. Then start the teensy application. Press the programming button on the Teensy and the teensy app will change to show a picture of the board. Then select the ".hex" program file, select "program" and then "reboot".
There are currently two keyer programs available, the "hasak" and the "TeensyWinkeyEmulator". Click on the "firmware" link above, and click through the directories until you find the hex file you want. The file will appear as a table of numbers with a "Raw" button on the upper right side. Right click the Raw button and select "Save link as". Make sure the file name ends in ".hex". Save the hex file and use it to program the Teensy.
TBD: Basic description, download and use instructions for Ctrlr MIDI control panel.
To write your own keyer software or to contribute to software development first clone this repository. This git repository uses several submodules to collect various projects into a single repository. You must initialize submodules when intially cloning:
git clone --recurse-submodules git@github.com:softerhardware/CWKeyer.git
After that, also be sure to pull updates from submodules:
git pull --recurse-submodules
You can find more details about how to work with git submodules on the internet.
Current development is done using Arduino IDE 1.8.19 and Teensyduino 1.56. Please make sure those are installed.
Updated libraries are required for glitchless 48kHz audio with the CW keyer hardware. These libraries are provided in this git repository. An easy way to use these libraries is to add symbolic links to the new libraries from the arduino IDE install. This is described below for Linux and MacOS systems.
Be sure to select the "Teensy 4.0" board in the Tools-->Boards-->Teensiduino menu, and to select the "Serial + Midi + Audio" USB model in the Tools-->USB type menu, otherwise compilation will fail.
(Added by DL1YCF. Note this is best done from the "terminal" app, then this is very similar to the linux case).
All the libraries are inside the Teensyduino "app" file bundle (which is a directory tree) /Applications/Teensyduino.app. Locate a sub-folder called "Audio", this will point you to the libraries for the Teensy. Normally this is located in
/Applications/Teensyduino.app/Contents/Java/hardware/teensy/avr/libraries
You can copy the "Audio" folder within that folder to a safe place (or just delete it), and do the same to the "cores" folder one step higher, that is, the "cores" folder within
/Applications/Teensyduino.app/Contents/Java/hardware/teensy/avr
Then proceed as in the linux case, that is, add a symbolic link named "cores" in the .../teensy/avr folder and two symbolic links called "Audio" and "CWKeyerShield" in the .../teensy/avr/libraries folder, that point to the directories "Audio", "cores" and "CWKeyerShield" where you have placed them after down-loading from this repository.
| Qty | Value | Footprint | References |
|---|---|---|---|
| 12 | 33pF | Capacitor_SMD:C_0603_1608Metric_Pad1.08x0.95mm_HandSolder | C13, C14, C18, C19, C20, C21, C23, C24, C36, C37, C38, C39 |
| 12 | Ferrite_Bead_Small | Resistor_SMD:R_0603_1608Metric_Pad0.98x0.95mm_HandSolder | FB1, FB2, FB3, FB4, FB5, FB6, FB7, FB8, FB10, FB11, FB12, FB13 |
| 11 | 0.1uF | Capacitor_SMD:C_0603_1608Metric_Pad1.08x0.95mm_HandSolder | C2, C3, C4, C5, C10, C25, C26, C27, C28, C33, C35 |
| 7 | 47uF | Capacitor_SMD:C_1206_3216Metric_Pad1.33x1.80mm_HandSolder | C1, C6, C7, C8, C12, C22, C34 |
| 6 | AudioJack3_SwitchTR | TeensyKeyerShield:STEREO_TRS | J5, J6, J7, J8, J9, J12 |
| 4 | 10nF | Capacitor_SMD:C_0603_1608Metric_Pad1.08x0.95mm_HandSolder | C29, C30, C31, C32 |
| 4 | 15uH | Inductor_SMD:L_1210_3225Metric_Pad1.42x2.65mm_HandSolder | L1, L2, L3, L4 |
| 4 | 25K | Potentiometer_THT:Potentiometer_Piher_T-16H_Single_Horizontal | RV1, RV2, RV3, RV4 |
| 4 | Conn_01x02 | Connector_JST:JST_EH_B2B-EH-A_1x02_P2.50mm_Vertical | J1, J2, J3, J4 |
| 4 | DNI | Resistor_SMD:R_0603_1608Metric_Pad0.98x0.95mm_HandSolder | R8, R9, R12, R13 |
| 4 | TestPoint_Alt | TeensyKeyerShield:MH | MH1, MH2, MH3, MH4 |
| 3 | 1uF | Capacitor_SMD:C_0603_1608Metric_Pad1.08x0.95mm_HandSolder | C9, C11, C15 |
| 3 | 470 | Resistor_SMD:R_0603_1608Metric_Pad0.98x0.95mm_HandSolder | R10, R11, R14 |
| 3 | 47K | Resistor_SMD:R_0603_1608Metric_Pad0.98x0.95mm_HandSolder | R3, R6, R7 |
| 2 | 4.7K | Resistor_SMD:R_0603_1608Metric_Pad0.98x0.95mm_HandSolder | R1, R2 |
| 2 | 470nF | Capacitor_SMD:C_0603_1608Metric_Pad1.08x0.95mm_HandSolder | C16, C17 |
| 2 | TestPoint | TestPoint:TestPoint_Pad_D1.0mm | TP1, TP2 |
| 1 | 33 | Resistor_SMD:R_0603_1608Metric_Pad0.98x0.95mm_HandSolder | R4 |
| 1 | 680 | Resistor_SMD:R_0603_1608Metric_Pad0.98x0.95mm_HandSolder | R5 |
| 1 | BLM18BD252SN1 | Inductor_SMD:L_0603_1608Metric_Pad1.05x0.95mm_HandSolder | L5 |
| 1 | Conn_01x04 | Connector_JST:JST_PH_B4B-PH-K_1x04_P2.00mm_Vertical | J10 |
| 1 | Conn_02x03_Odd_Even | Connector_PinHeader_2.54mm:PinHeader_2x03_P2.54mm_Vertical | JP1 |
| 1 | Conn_02x05_Odd_Even | Connector_PinHeader_2.54mm:PinHeader_2x05_P2.54mm_Vertical | J11 |
| 1 | MEMSMIC | TeensyKeyerShield:MEMSMIC | MIC1 |
| 1 | MOCD217R2M | Package_SO:SOIC-8_3.9x4.9mm_P1.27mm | U2 |
| 1 | OSHW-logo_silkscreen-front_2mm | TeensyKeyerShield:OSHW-logo_silkscreen-front_2mm | G*** |
| 1 | SP0503BAHTG | Package_TO_SOT_SMD:SOT-143 | D1 |
| 1 | Teensy4.0 | TeensyKeyerShield:Teensy40 | U3 |
| 1 | WM8960 | Package_DFN_QFN:QFN-32-1EP_5x5mm_P0.5mm_EP3.45x3.45mm_ThermalVias | U1 |
It measures 100 × 50 mm and has 2 copper layers, 1.6 mm thick.
99 parts, built around the MOCD217R2M, BLM18BD252SN1 and SP0503BAHTG. The full list of its parts is on this page, with links to each part's symbol and footprint where PCBKit's library has them.
From the softerhardware/CWKeyer repository on GitHub, at the commit this page was made from: the board is hardware/teensy_4p0_shield/TeensyKeyerShield.kicad_pcb. PCBKit opens the board in the browser, with nothing to install.
Its repository states no licence, so its author keeps all rights: ask softerhardware before reusing the design.


fossasia/pslab-hardware
PSLab Hardware Design and Schematics https://pslab.io


FeralFirmware/TailTalk
A modern async user space AppleTalk stack with Rust + Tokio

DvidMakesThings/HW_PDNode-600-Pro
The PDNode-600 is a professional-grade, 600W USB Power Delivery Unit designed specifically for compact 10-inch rack systems, targeting embedded developers, homelab enthusiasts, test benches, and smart infrastructure.