2 layers90 × 100 mm

 shapoco/xiamocon39
Game Console-Shaped Motherboard for XIAO RP2350/ESP32S3
Xiamocon is an open-source printed circuit board by shapoco, from the shapoco/xiamocon repository on GitHub. It is a 2-layer board of 100 × 50 mm with 111 parts on 74 nets, routed with 1,091 tracks and 299 vias.
It is built around the ADC101C027CIMK, LM4890 and PCA9555PW, with the RT9080-33GJ5, 1N4148WS and BSS138W among its other parts. Its parts include 41 resistors, 17 capacitors, 14 diodes, 10 switches and 9 transistors. It belongs with the RP2350 boards of this library.


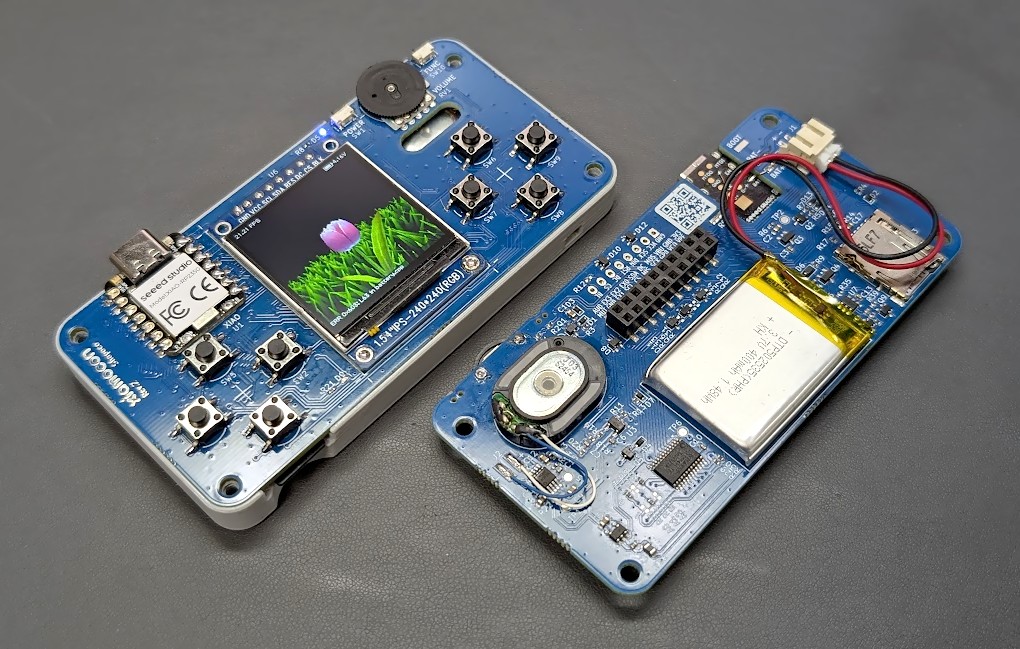
Game-console-style motherboard for XIAO RP2350/ESP32S3
[!CAUTION] Everything is currently under development. Breaking changes may occur frequently without notice.
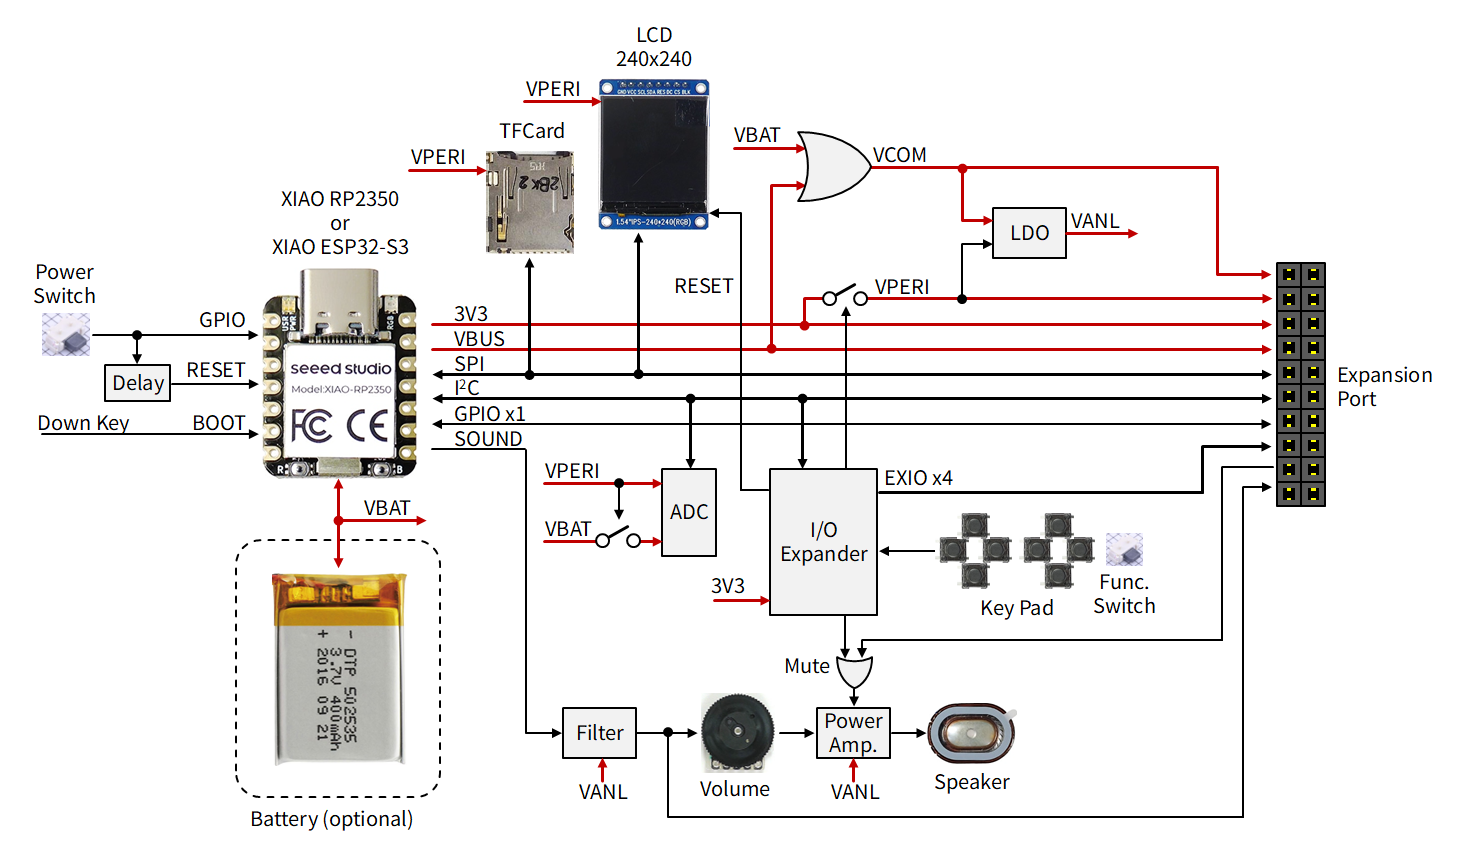
See Installing uv.
Ubuntu24.04 (WSL2):
sudo apt update
sudo apt -y install curl git
sudo apt -y install build-essential cmake gcc-arm-none-eabi
macOS:
First, install Command Line Developer Tools, Homebrew, and CMake, then run the following command:
sudo "/Applications/CMake.app/Contents/bin/cmake-gui" --install
brew install --cask gcc-arm-embeddedcurl -LsSf https://github.com/shapoco/xiamocon/raw/refs/heads/main/install.sh | bashPython virtual enviroment, Pico-SDK,
Pico-Extras, PlatformIO,
and this repository will be automatically installed in ${HOME}/.xmc/ directory.
To avoid setting the repository path every time, add the following line to your shell configuration file (e.g., ~/.bashrc, ~/.zshrc).
export XMC_REPO_PATH=${HOME}/.xmc/xiamoconConnect Xiamocon to your PC via USB and enter mass storage mode.
Initialize the environment and move to the sample app directory.
source ${HOME}/.xmc/setup.shrc
cd ${XMC_REPO_PATH}
cd cpp/example/hello_world
Build and flash the firmware.
On WSL2, you can specify the drive letter with the -d option to build and flash in one step (if the drive letter is E). You may be prompted for an administrator password.
xmc run -p rp2350_pico_sdk -d EOn non-WSL2 environments, run xmc build instead of xmc run, then manually copy the generated UF2 file to the drive.
xmc build -p rp2350_pico_sdkConnect Xiamocon to your PC via USB and check the serial port.
Initialize the environment and move to the sample app directory.
source ${HOME}/.xmc/setup.shrc
cd ${XMC_REPO_PATH}
cd cpp/example/hello_world
Build and flash while specifying the serial port with the -s option.
xmc run -p esp32s3_pio_arduino -s /dev/ttyACM0If you want to use PlatformIO's default serial port, you can omit the -s option.
[!NOTE]
- You can omit the
-poption by setting the platform in theXMC_DEFAULT_PLATFORMenvironment variable.- You can omit the
-doption by setting the drive letter in theXMC_DEFAULT_DRIVEenvironment variable.- You can omit the
-soption by setting the serial port in theXMC_DEFAULT_SERIALenvironment variable.
[!NOTE] On ESP32S3, you can also build and flash using the PlatformIO extension in VSCode.
source ${HOME}/.xmc/setup.shrc
mkdir -p my_project
cd my_project
xmc init
cp -r ${XMC_REPO_PATH}/cpp/example/hello_world/src .See the Reference Manual.
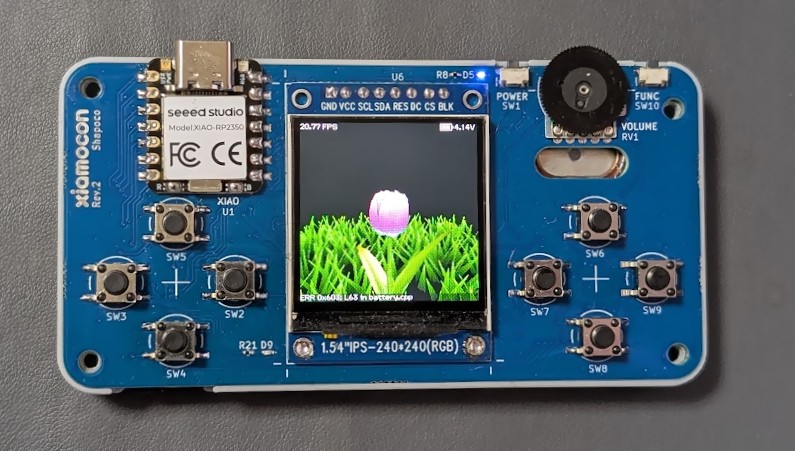
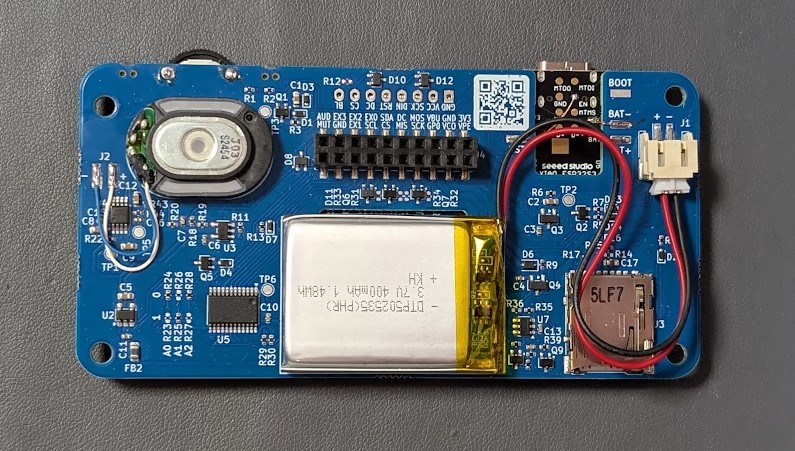
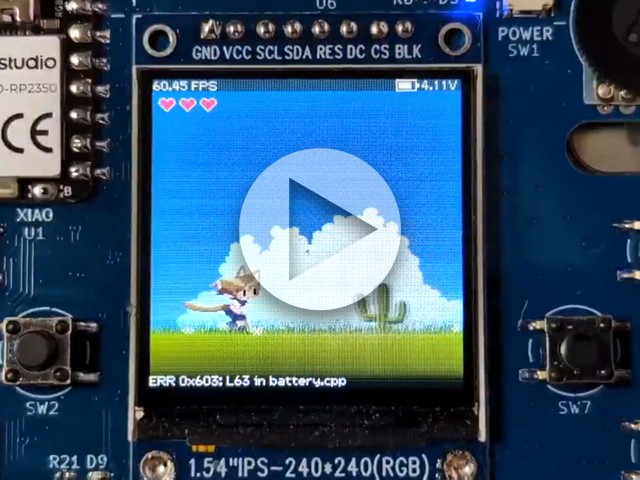
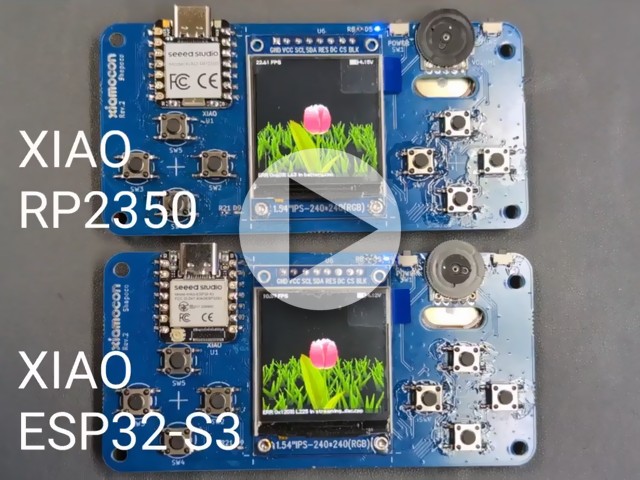
T.B.D.
| Qty | Value | Footprint | References |
|---|---|---|---|
| 11 | 0 | Resistor_SMD:R_0402_1005Metric | R20, R23, R24, R25, R26, R27, R28, R33, R34, R35, R36 |
| 9 | 10k | Resistor_SMD:R_0402_1005Metric | R1, R12, R13, R14, R15, R16, R17, R37, R38 |
| 8 | 100k | Resistor_SMD:R_0402_1005Metric | R5, R6, R11, R22, R31, R32, R39, R40 |
| 8 | Rubber | shpc_mechanical:Rubber_Contact | SW2, SW3, SW4, SW5, SW6, SW7, SW8, SW9 |
| 7 | 1N4148WS | Diode_SMD:D_SOD-523 | D1, D2, D3, D4, D7, D13, D14 |
| 6 | BSS138W | Package_TO_SOT_SMD:SOT-323_SC-70 | Q1, Q2, Q5, Q6, Q7, Q9 |
| 5 | 100n | Capacitor_SMD:C_0402_1005Metric | C6, C10, C13, C14, C15 |
| 5 | PWAMP_CE | TestPoint:TestPoint_Pad_D1.5mm | TP1, TP2, TP3, TP5, TP6 |
| 4 | TPD2E2U06DCKR | Package_TO_SOT_SMD:SOT-323_SC-70 | D8, D10, D11, D12 |
| 3 | 1u | Capacitor_SMD:C_0402_1005Metric | C3, C4, C11 |
| 3 | 4.7u | Capacitor_SMD:C_0603_1608Metric | C1, C2, C5 |
| 2 | 100 | Resistor_SMD:R_0402_1005Metric | R2, R9 |
| 2 | 10k | Resistor_SMD:R_0402_1005Metric_Pad0.72x0.64mm_HandSolder | R8, R21 |
| 2 | 10u | Capacitor_SMD:C_0603_1608Metric | C8, C17 |
| 2 | 1u | Capacitor_SMD:C_0603_1608Metric | C9, C12 |
| 2 | 2.2k | Resistor_SMD:R_0402_1005Metric | R18, R19 |
| 2 | 22k | Resistor_SMD:R_0402_1005Metric | R43, R44 |
| 2 | 4.7k | Resistor_SMD:R_0402_1005Metric | R29, R30 |
| 2 | GT-TC018A-H0375-L1 | shpc_mechanical:GT-TC018A-H0375-L1 | SW1, SW10 |
| 2 | IRLML2246TRPBF | Package_TO_SOT_SMD:SOT-23 | Q3, Q4 |
| 2 | LOGO | LOGO | G***, G*** |
| 1 | 10n | Capacitor_SMD:C_0402_1005Metric | C7 |
| 1 | 1M | Resistor_SMD:R_0402_1005Metric | R7 |
| 1 | 1N4148WS | Diode_SMD:D_SOD-323 | D6 |
| 1 | 1k | Resistor_SMD:R_0402_1005Metric | R4 |
| 1 | 1n | Capacitor_SMD:C_0402_1005Metric | C16 |
| 1 | 470k | Resistor_SMD:R_0402_1005Metric | R3 |
| 1 | 74VHC1G126 | Package_TO_SOT_SMD:SOT-23-5 | U3 |
| 1 | ADC101C027CIMK | Package_TO_SOT_SMD:TSOT-23-6 | U7 |
| 1 | BLM21PG331SN1D | Inductor_SMD:L_0805_2012Metric | FB2 |
| 1 | BSS84W | Package_TO_SOT_SMD:SOT-323_SC-70 | Q8 |
| 1 | Conn_01x02 | shpc_mechanical:SolderWirePad_1x02_SMD_150x50mil | J2 |
| 1 | FG PH-2AWT | Connector_JST:JST_PH_S2B-PH-SM4-TB_1x02-1MP_P2.00mm_Horizontal | J1 |
| 1 | HC-PM254-5.0H-2x10PS | Connector_PinSocket_2.54mm:PinSocket_2x10_P2.54mm_Vertical_SMD | J4 |
| 1 | LM4890 | Package_SO:MSOP-8_3x3mm_P0.65mm | U4 |
| 1 | M154-240240-RGB | shpc_modules:M154-240240-RGB | U6 |
| 1 | Micro_SD_Card_Det_Hirose_DM3AT | Connector_Card:microSD_HC_Hirose_DM3AT-SF-PEJM5 | J3 |
| 1 | PCA9555PW | Package_SO:TSSOP-24_4.4x7.8mm_P0.65mm | U5 |
| 1 | RK10J12E0A0A | shpc_mechanical:RK10J1xE | RV1 |
| 1 | RT9080-33GJ5 | Package_TO_SOT_SMD:TSOT-23-5 | U2 |
| 1 | XIAO RP2350 | shpc_modules:XIAO RP2350 | U1 |
| 1 | YLED0402B | LED_SMD:LED_0402_1005Metric_Pad0.77x0.64mm_HandSolder | D5 |
| 1 | YLED0402O | LED_SMD:LED_0402_1005Metric_Pad0.77x0.64mm_HandSolder | D9 |
It measures 100 × 50 mm and has 2 copper layers, 1.6 mm thick.
111 parts, built around the ADC101C027CIMK, LM4890, PCA9555PW and RT9080-33GJ5. The full list of its parts is on this page, with links to each part's symbol and footprint where PCBKit's library has them.
From the shapoco/xiamocon repository on GitHub, at the commit this page was made from: the board is hardware/kicad/xiamocon.kicad_pcb and its schematic hardware/kicad/xiamocon.kicad_sch. PCBKit opens the board in the browser, with nothing to install.
Its repository states no licence, so its author keeps all rights: ask shapoco before reusing the design.


MagGenix/AMF-Generator
A digitally controlled push-pull converter designed for generation of an alternating magnetic field (AMF). THIS DESIGN IS INCOMPLETE.


NeilKhera/Random-PCBs
A backup of random PCB projects. In various states of completion

rafaelmartins/business-card-synth
A digital polyphonic synthesizer built as a business card PCB.

tanai-prathapam/lab8_445L_personal
The hw folder should contain your schematic and board files for your PCB or circuits. In later labs, you will be creating schematics for your circuit in EAGLE. A setup tutorial can be found here.
