
2 layers59.2 × 59.2 mm
Buffered IDE2CF adapter Rev 1
RetroNynjah/Buffered-IDE2CF-adapter
Buffered IDE2CF adapter for Amiga 1200, TF1260 and others
26 parts15GPL-3.0

 robhaswell/RGB-controller42
A 10-channel RGB controller based on the ESP32 microcontroller
Controller is an open-source printed circuit board by robhaswell, from the robhaswell/RGB-controller repository on GitHub. It is a 2-layer board of 43.3 × 67.5 mm with 24 parts on 22 nets, routed with 127 tracks and 4 vias.
It is built around the SN74HCT245PWR(LX). Its parts include 11 connectors, 4 capacitors and 3 ICs. It belongs with the ESP32 boards of this library.
A 10-channel RGB controller based on the ESP32 microcontroller
Important: I have successfully ordered and assembled this project, but since then I altered the 47uF capacitor package so that it is not an extended part at JLCPCB. The author accepts NO RESPONSIBILITY for this product working, and it has not undergone extensive safety testing. Use at your own risk.
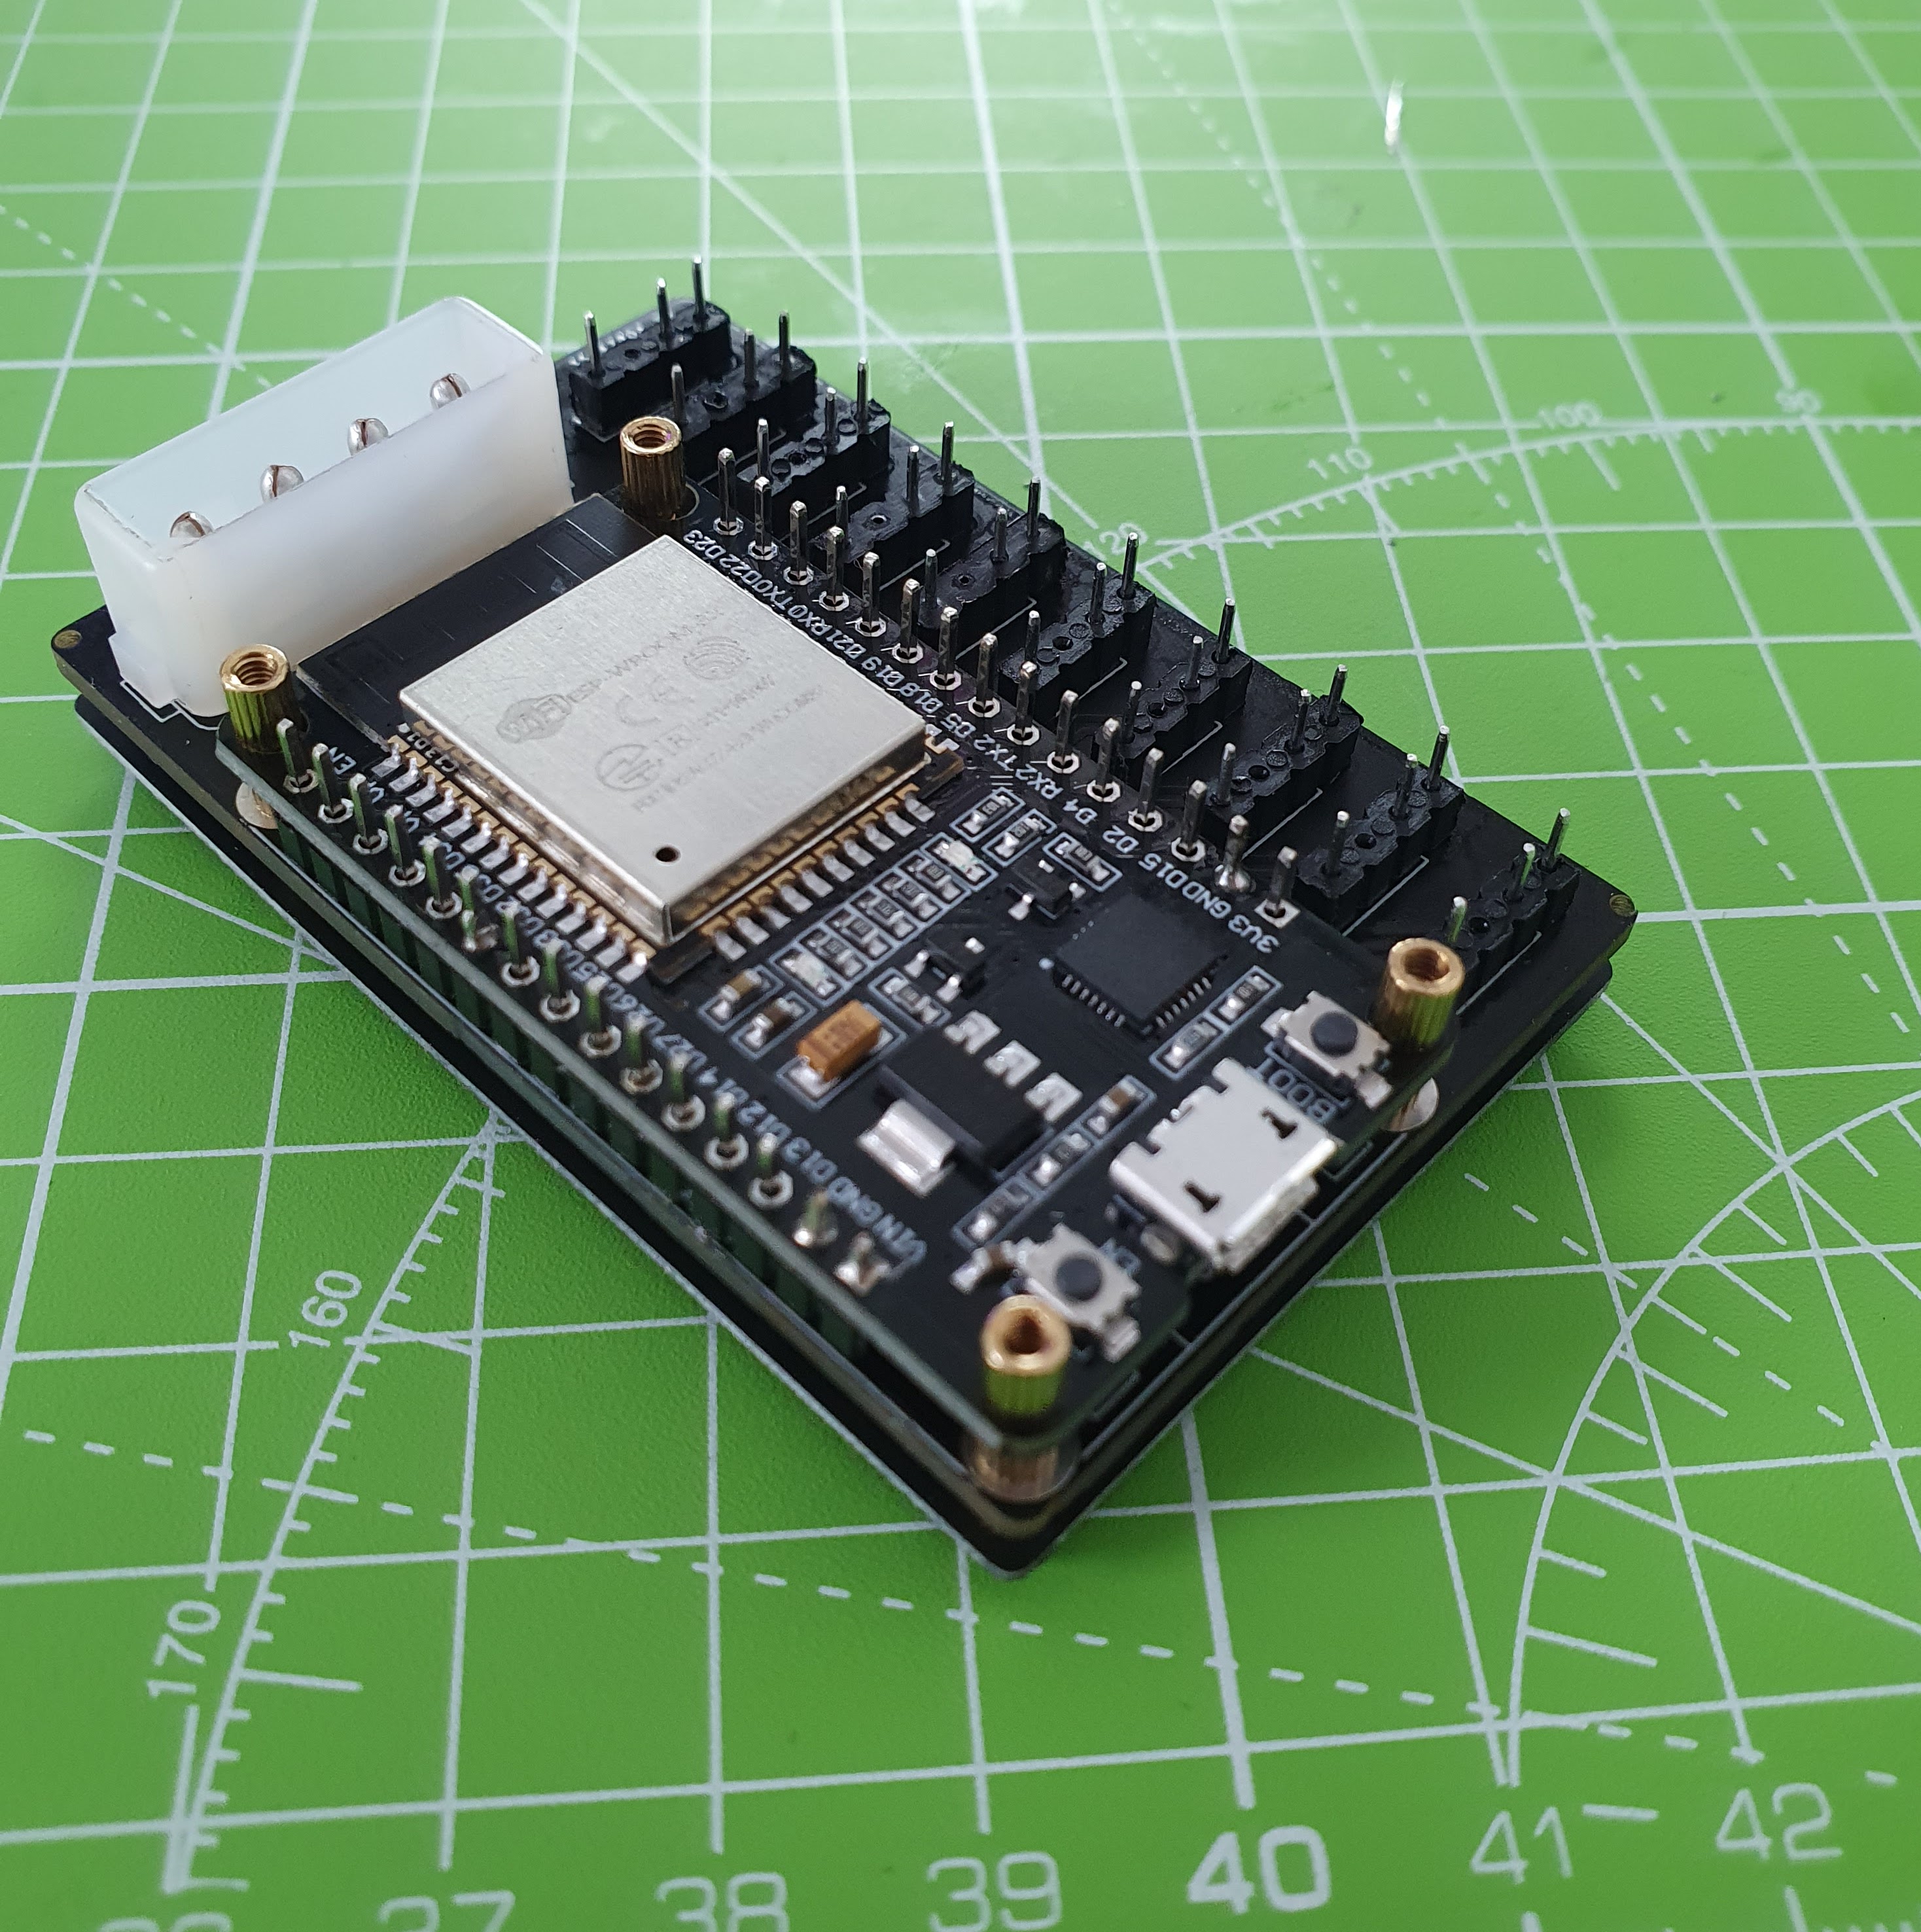
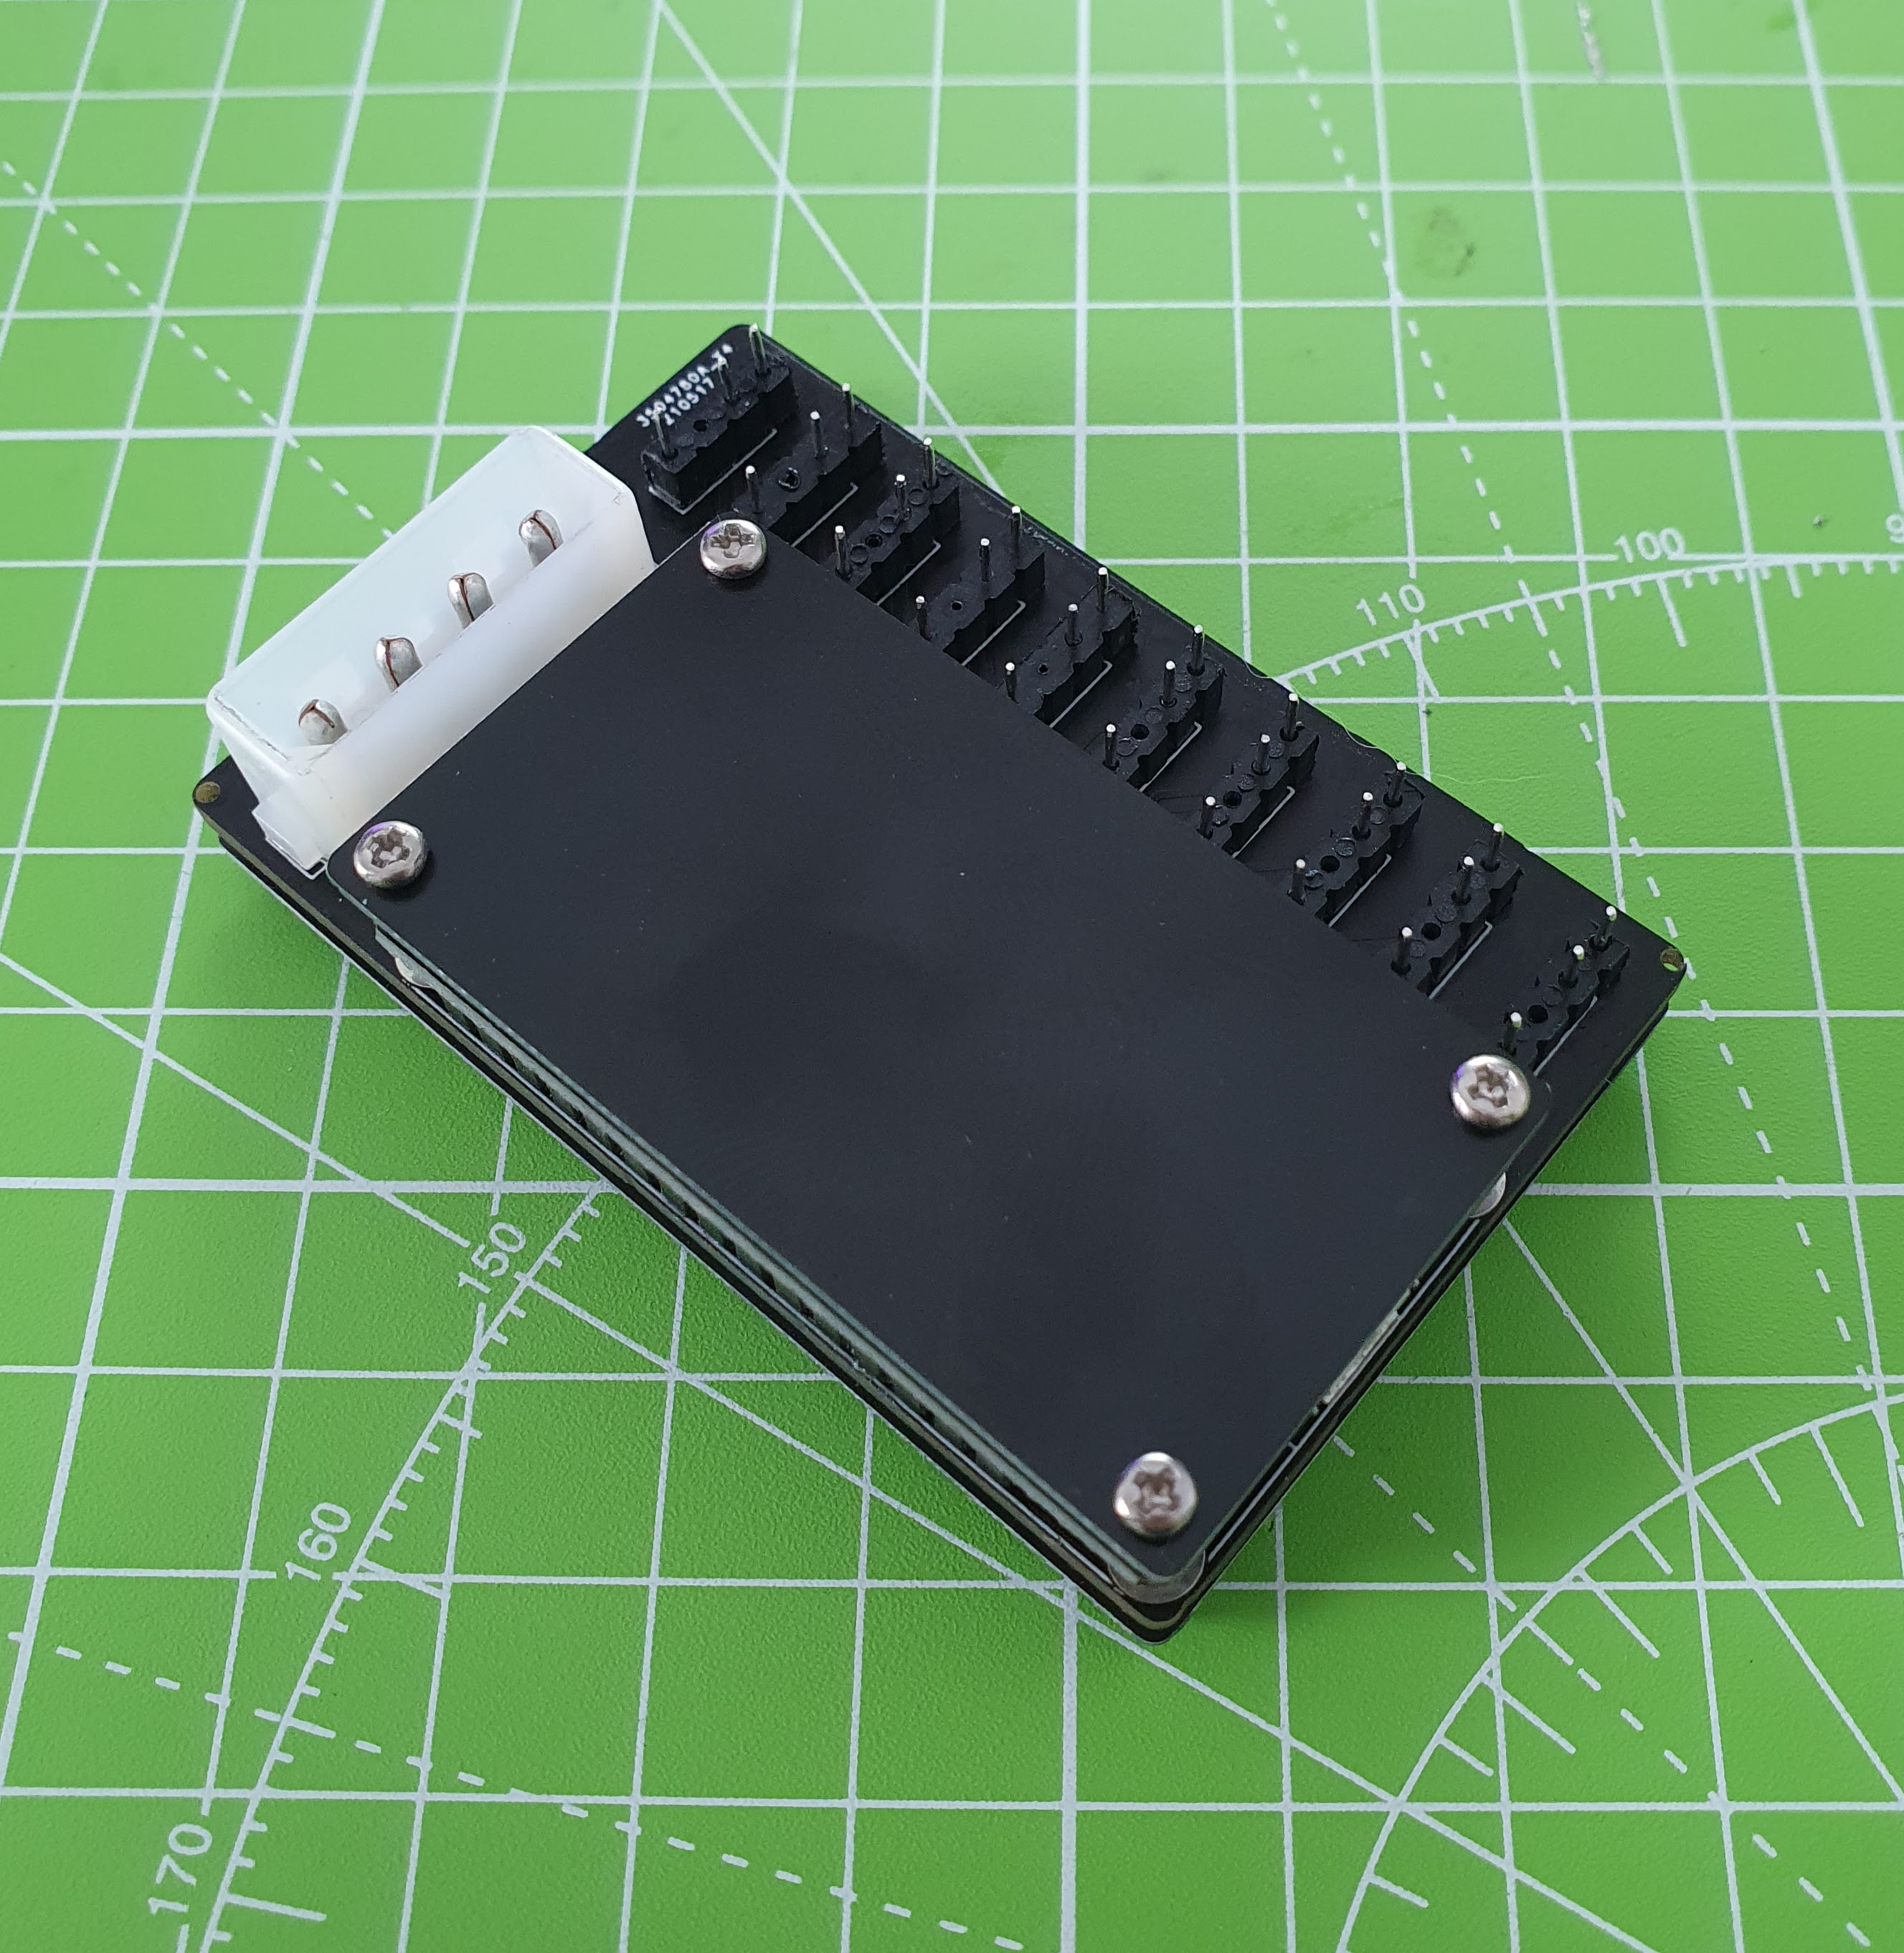
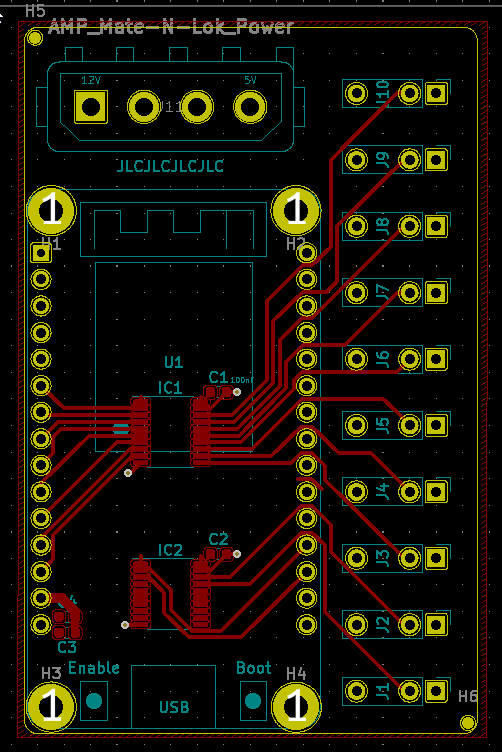
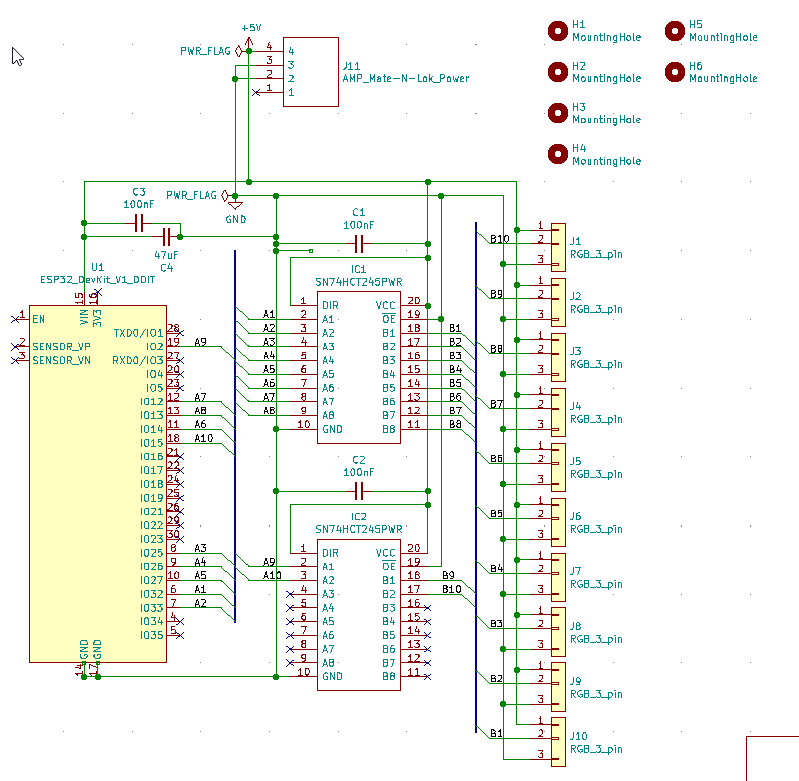
To order the PCB at JLCPCB you will need to do the following steps:
/gerber.zip as your job/JLC/Controller.csv/JLC/Controller-top-pos.csvplates/gerber-top.zip and plates/gerber-bottom.zip - no SMT Assembly required
** MAKE SURE YOU CHOOSE THE CHEAPEST SHIPPING OPTION!! **.
Final discounts will be applied right before you pay, including free SMT Assembly. The final cost should be around $30 but it varies.
| Component | Quantity | Link |
|---|---|---|
| ESP32 Devkit v1 (DOIT) | 1 | https://www.aliexpress.com/item/1005001648850998.html |
| 3-pin RGB needle adapter | 10 | https://www.aliexpress.com/item/1005005743425681.html |
| 350211-1 Mate-N-Lok connector | 1 | Find these locally - search "350211-1" at your local electronics store, or check Ebay sellers in your area. You may know this better as a "Molex connector". |
| M2 standoff, 4mm, male-female | 12 or 20 | https://www.aliexpress.com/item/1005002542327479.html?spm=a2g0o.productlist.0.0.9c1c7ed6qyouL8&aem_p4p_detail=202106131120581657595816822930013487928 or locally. Order 20 if not using screws (see next). |
| Optional: M2 screws and nuts | 4 | You can also find these on Aliexpress, or with the above spacers in kits on Amazon, etc. To keep costs down you can use use 20 male-female standoffs, but screws + nuts (or 4x female-female standoffs) will be neater. |
Soldering and construction order order I would recommend:
10x RGB pin headers should come first. You will need to remove or clip one pin from each header. To pull them out I recommend using pliers to push the pins through. You can also grab the pin with pliers and use your iron to heat it from the other side, this will free it from the plastic.
Preparing these pin headers is by far the most time consuming part of the assembly.
Protip: Place all 10 pin headers on your PCB, then place one of your spare PCBs over the top. You might want to line up the pin headers on one side, and then wiggle the binding ones until they enter the mounting holes. This will help you to get 10x headers which are nicely lined up and evenly spaced.
Most standoffs do not pass through the holes on the ESP32 devkit, so they will need adding to the PCB before the ESP32 devkit is soldered on top.
Next, solder this to the board using the included pin headers. You might optionally want to use the standoffs to fix it to the PCB while soldering. You will also need to clip the headers after it is soldered.
Finally you can solder the power connector, make sure to use plenty of solder on this one.
Screw on your top and bottom plates. These will be important in protecting your RGB controller and preventing shorts.
The final step is to load the firmware in accordance with instructions on the WLED wiki: https://github.com/Aircoookie/WLED/wiki
| Qty | Value | Footprint | References |
|---|---|---|---|
| 10 | RGB_3_pin | local:RGB_3-Pin | J1, J2, J3, J4, J5, J6, J7, J8, J9, J10 |
| 4 | MountingHole | MountingHole:MountingHole_2.2mm_M2_Pad | H1, H2, H3, H4 |
| 3 | 100nF | Capacitor_SMD:C_0603_1608Metric | C1, C2, C3 |
| 2 | MountingHole | local:ToolingHole_1.152mm | H5, H6 |
| 2 | SN74HCT245PWR | Package_SO:TSSOP-20_4.4x6.5mm_P0.65mm | IC1, IC2 |
| 1 | 47uF | Capacitor_SMD:C_1206_3216Metric | C4 |
| 1 | AMP_Mate-N-Lok_Power | local:TE_MATE-N-LOK_350211-1_1x04_P5.08mm_Vertical | J11 |
| 1 | ESP32_DevKit_V1_DOIT | local:esp32_devkit_v1_doit | U1 |
It measures 43.3 × 67.5 mm and has 2 copper layers, 1.6 mm thick.
24 parts, built around the SN74HCT245PWR(LX). The full list of its parts is on this page, with links to each part's symbol and footprint where PCBKit's library has them.
From the robhaswell/RGB-controller repository on GitHub, at the commit this page was made from: the board is Controller.kicad_pcb. PCBKit opens the board in the browser, with nothing to install.
Its repository states no licence, so its author keeps all rights: ask robhaswell before reusing the design.
RetroNynjah/Buffered-IDE2CF-adapter
Buffered IDE2CF adapter for Amiga 1200, TF1260 and others

ansemjo/chronovfd
hardware project for a clock around a russian ivl2-5/7 vfd and an esp32-wroom module

Papipapito/MSXgoauld_fusion
Placas MSX Goa'uld SD (Tang Nano 20K) con conector ZIF FFC de 40 vías: en el zócalo del Z80 o por cable con goauldext. Versiones 1.7b, 1.8N y 1.8S. Derivado de jabadiagm (GPL-3.0).

shen-tian/fadecandy
Fadecandy is a project that makes LED art easier, tastier, and more creative. We're all about creating tools that remove the technical drudgery from making LED art, freeing you to do more interesting, nuanced, and…

Ben-BJD/Pixel-Tree-Controller
Safely power 800 LEDs with one 22A ESP32 WLED controller

MrFrangipane/noonlight-pcb
Electronics for a RaspberryPico(W) based, LED Strip driving, DMX fixture


dotnet/iot
This repo includes .NET Core implementations for various IoT boards, chips, displays and PCBs.