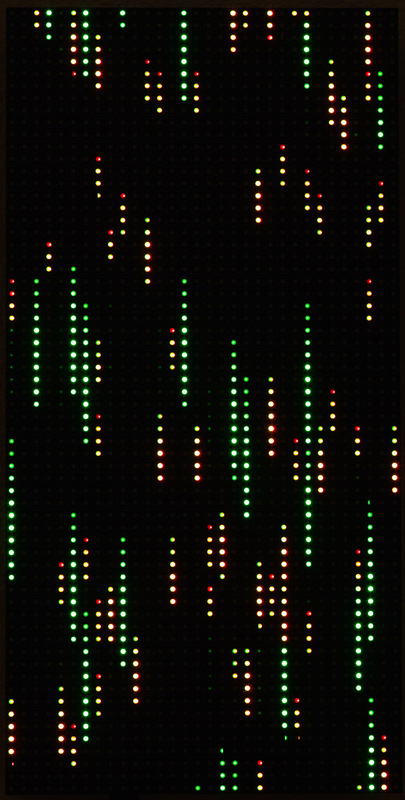
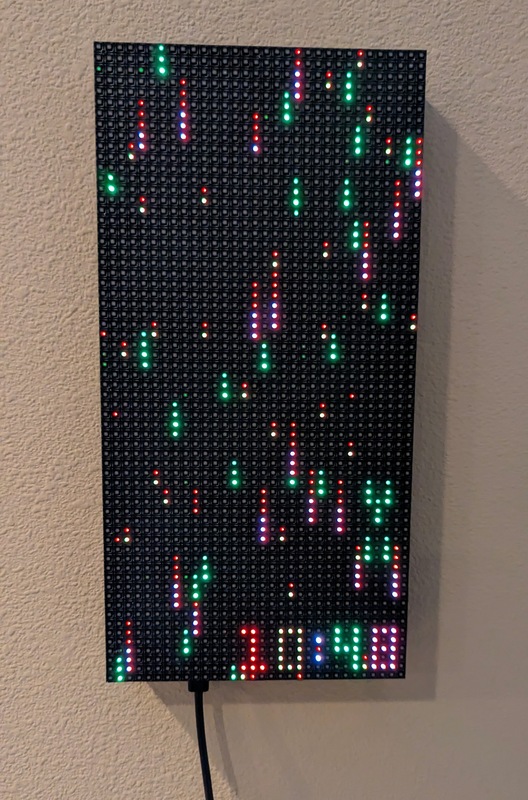
"I DON’T EVEN SEE THE CODE ANYMORE" - The Matrix. This is a clock that presents in a matrix-like format on an 8x8 RGB LED matrix. At first you will not be able to read it but eventually the patterns will become clear.
Button pcb kicad is an open-source printed circuit board by mattwach, from the mattwach/matrix_clock repository on GitHub, published under the GPL-3.0 licence. It is a 2-layer board of 42 × 9 mm with 5 parts on 3 nets, routed with 11 tracks and 0 vias.
Its parts include 2 switches and 1 connector. It belongs with the lEDs and displays boards of this library.
README
README.md
matrix_clock
"I DON’T EVEN SEE THE CODE ANYMORE" - The Matrix.
Shown above is a clock that presents the current time on an 64x32 RGB LED
matrix. The clock has other selectable modes, including a view that includes
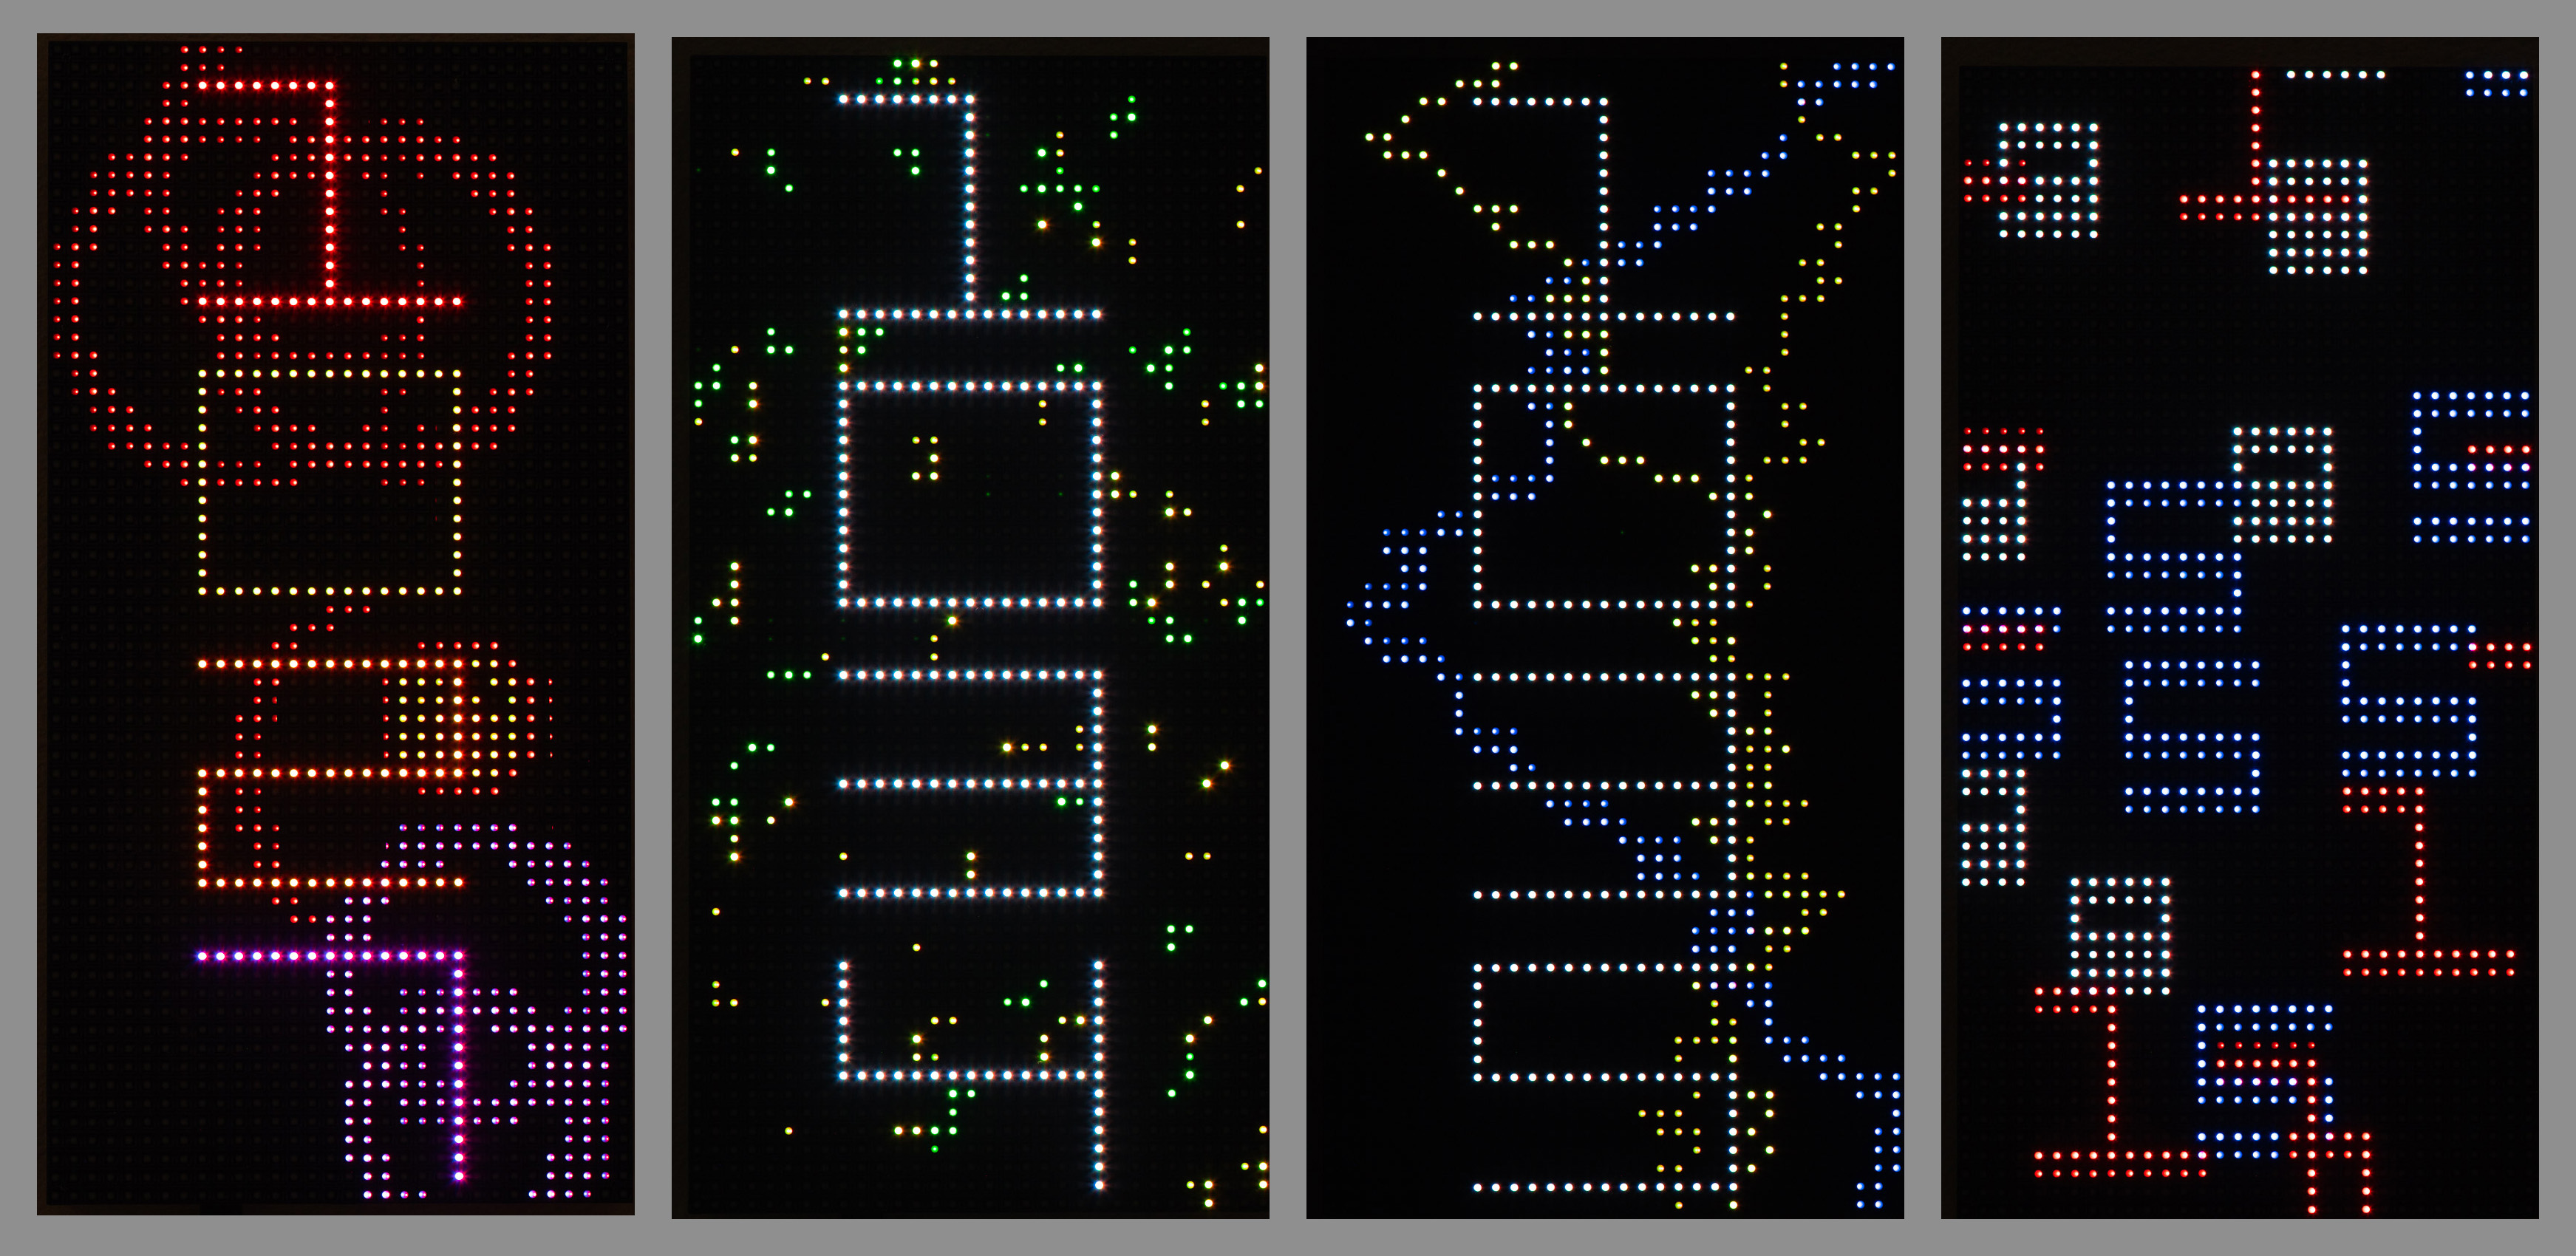
the numbers:
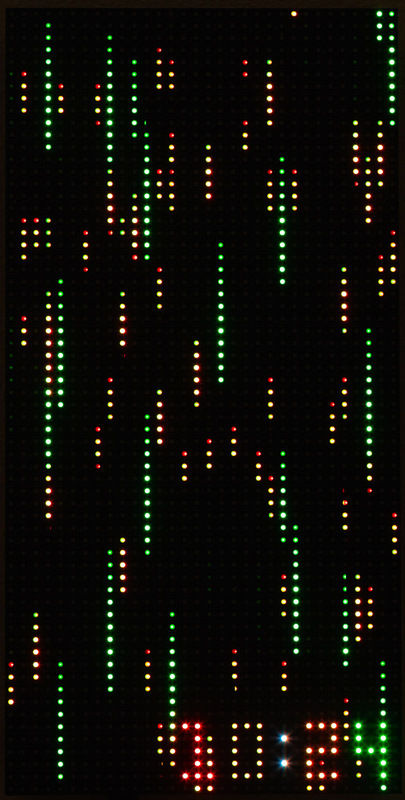
and some other selectable views:
Although the images above give you a basic idea, they can't show you the
dynamic range of the LED or the visual impression of 200 FPS animations,
The project's firmware is designed to easily incorporate support for other
hardware configurations. Included is a 8x8 "Dotstar" matrix version that was my
first version:
This document focuses on the newer 62x32-based model, which I prefer. If you
want to learn more details on the 8x8 build, I have a separate document
for it here.
In the upcoming sections, I explain how I built the clock. I also
explain how to modify the design in different ways.
Parts List
You can of course modify the design to use different ones. Prices are "at time
of writing":
LED Matrix 62x32: ($30)
Note there are many vendors of this display - I assume they have similar
interfaces.
Clock: DS3231-based RTC module ($4).
This part is optional-but-recommended. The firmware can be built to use the
Pi Pico clock libraries but you will lose battery backup and the time
will drift more.
I used one 8x2 2.54 pitch male pin header to interface the Pico PCB with
the matrix (using the usually-included interface cable)
I used a 2x1 angled 2.54 pitch pin header for connecting the LED to the
PCB.
I used a 3x1 angled 2.54 pitch pin header for connecting the buttons to
the PCB
I used a 220uF capacitor to reduce 5V noise. Somewhat larger or smaller
values should also work fine.
Circuit board for assembling components.
There are many options. I ended up ordering a PCB from
http://oshpark.com for the main board because my PCB layout needs a
two-layer board. I could have wired it up on perf board, but the large
number of pin connections would have make it difficult to get a clean
result.
There is a separate PCB for the buttons. This board is very simple so
any build technique should be straight-forward. I used my CNC
machine to cut a board within an hour. If you order a main board, you
might opt to bundle the button pcb with the order.
Optional:
The LED display can pull over 3A if all LEDs are set to white. The firmware I
wrote never does this and needs about 100-300 mA for most of the modes
(as-measured with a multimeter). Thus I'm using the Pi Pico's VDD pin, which is
directly connected to USB power. This connection should be limited to 500 mA or
less, thus I added the following electronic components to enforce the current
limit:
NCP380 current limiting IC
Two additional 1uf capacitors for stability. I am using SMD but ceramic
through-hole are also an option.
My hardware has this current protection but it has never activated outside of
testing thus one might argue that it's not needed. If you plan to make your own
display modes, I suggest including the protection.
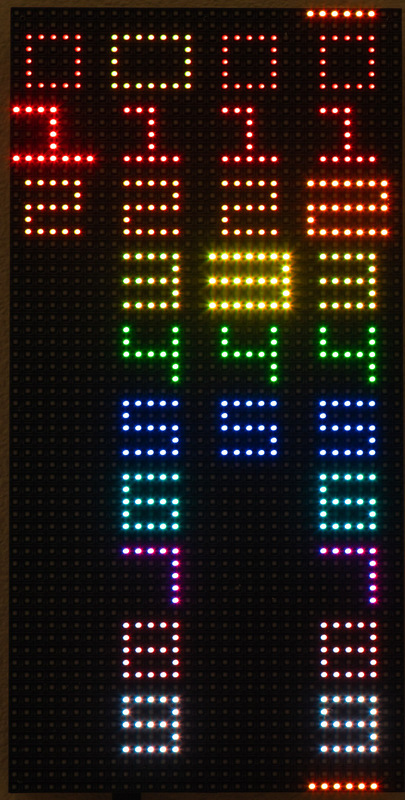
Reading the clock
How can the clock be read when no numbers are shown? By noting the colors and
speed of the particles. Here is my color mapping for each number, as shown in
the time setting interface:
Colors are defined in src/colors.c if you would like to edit
them.
Feature Overview
This is a quick tour of the built in-features
Power On
When you plug in the clock via any USB power source you will get a matrix clock
display that indicates the current time as-reported by the RTC clock hardware.
Setting the Time
The clock has two buttons on it's side: "set" and "increment". Pressing "set"
goes into time change mode where you can use "set" and "increment" to change
each time digit.
You can also set the clock via the USB connection.
Changing the Display Mode
If you press the "increment" button while the matrix is showing, the clock will
cycle through display modes. Currently defined modes include:
Simple Shows the time with no animations. The color of the time
changes throughout the day to approximate a sunrise/daytime/sunset color
temperature.
Matrix With Numbers The default
Matrix Only For those who want a challenge
Bounce Particles bounce around the numbers.
Number Cascade Digits fall from the top of the display to the bottom. The
size and speed of the digit represent the place in the time (hours vs
minutes).
Waveform Waveforms progress from the bottom of the display to the top at
different speeds based on the time digit.
Drops A water droplet effect appears behind the numbers.
Off - Useful if you want a darkened room.
Each display mode uses color as described earlier to accent the current time.
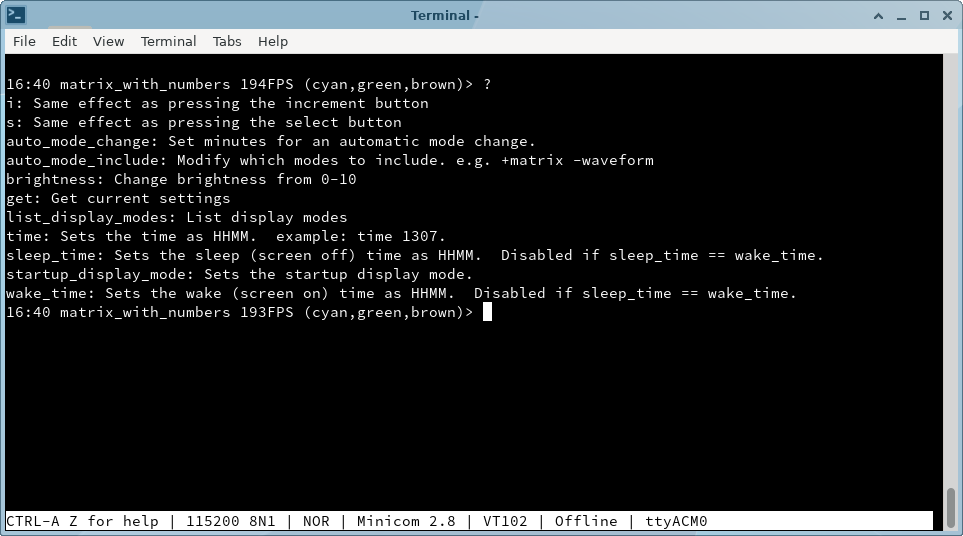
Console Configuration
If you plug the clock into a computer, you can run a terminal emulator program
to access many additional settings. In Linux, I use the "minicom" terminal
emulator and my command looks like this:
bash
minicom -b 115200 -P /dev/ttyUSB0
The serial device (/dev/ttyUSB0) can vary between computers and operating
systems.
Once started, you will see something like this:
By default, minicom turns on local echo, making my typed characters appear
twice. minicom allows this to be turned off with ctrl-a e.
Type help or ? for help.
Build Instructions
Electronics
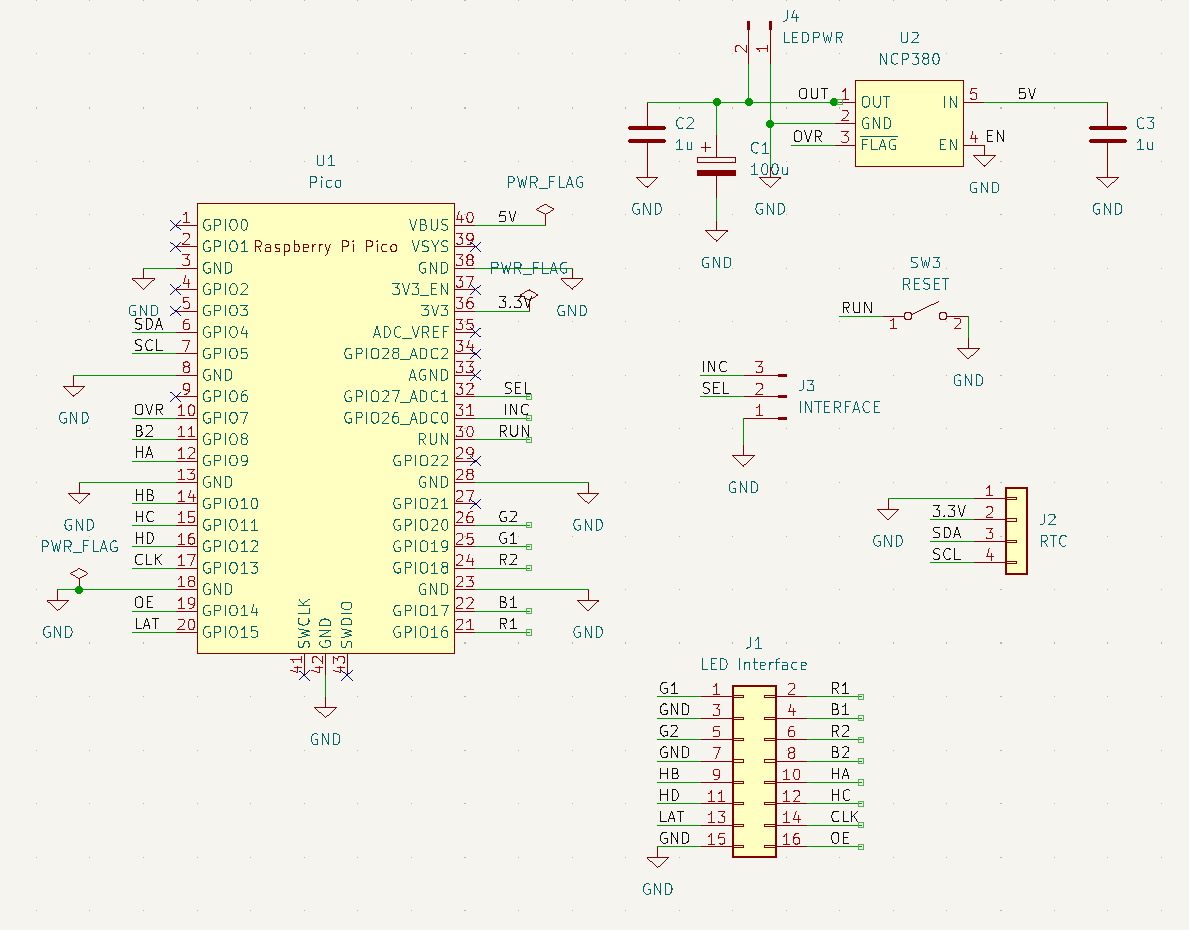
Here is the schematic for the 64x32 version:
Here is a description on major components and their purpose:
Pi Pico: This is the main controller
RTC (Real Time Clock, Optional): This provides time to the Pico via an I2C connection.
You could use alternate clock hardware as described in a later section. In
terms of the I2C connection, note that the RTC clock is powered by 3.3V
instead of the specified 5V. This is the easiest way to make the clock
compatible with the 3.3V maximum voltage of the PI Pico. If your RTC really
does need 5V, there are solutions but the details are not the focus of this
document. Thus I suggest doing a Google search for "3.3 to 5V I2C" to learn
more.
64x32 matrix: This is also a 5V part and is connected to the 5V VDD of the
Pico, allowing ~500mA to be safely consumed by the panel. The Pico is
directly connected and will deliver 0-3.3V signals to the panel. Unlike
I2C for the RTC clock, the LED pins are high impedance inputs with no pullup
thus there is no hardware risk in connecting them directly to the Pico. The
main risk is that the LED panel will not accept 3.3V as a legitimate "high"
signal and thus it wont work. For my panel 3.3V was accepted without a
problem thus no level converters were needed. I suspect this is the common
scenario with these panels.
100 uF-470 uF capacitor. The actual value is not important other than
"big". The purpose of the capacitor is to support the power requirements of
the LED, which can be a "noisy" load, needing near zero current one moment
and several hundred mA the next.
Buttons. Select, increment and reset as described earlier.
NCP380 current limiting chip (optional). This chip provides insurance for
the case where you one day decide to change the firmware to light up many
LEDs and draw too much current. If you really want to do support high
current draw, you'll need to rework the power design so that the LED panel
can be directly powered from a capable (3A+) source instead of VDD on the
Pico.
VDD on the Pico is a direct passthrough to the USB power so it's the
USB regulator (wall adapter or computer) and the PCB traces of the Pico that are
the main power bottlenecks.
If you don't us use the NCP380, simply connect the Pico VDD pin directly to the LED.
Keep the 100u capacitor for noise purposes.
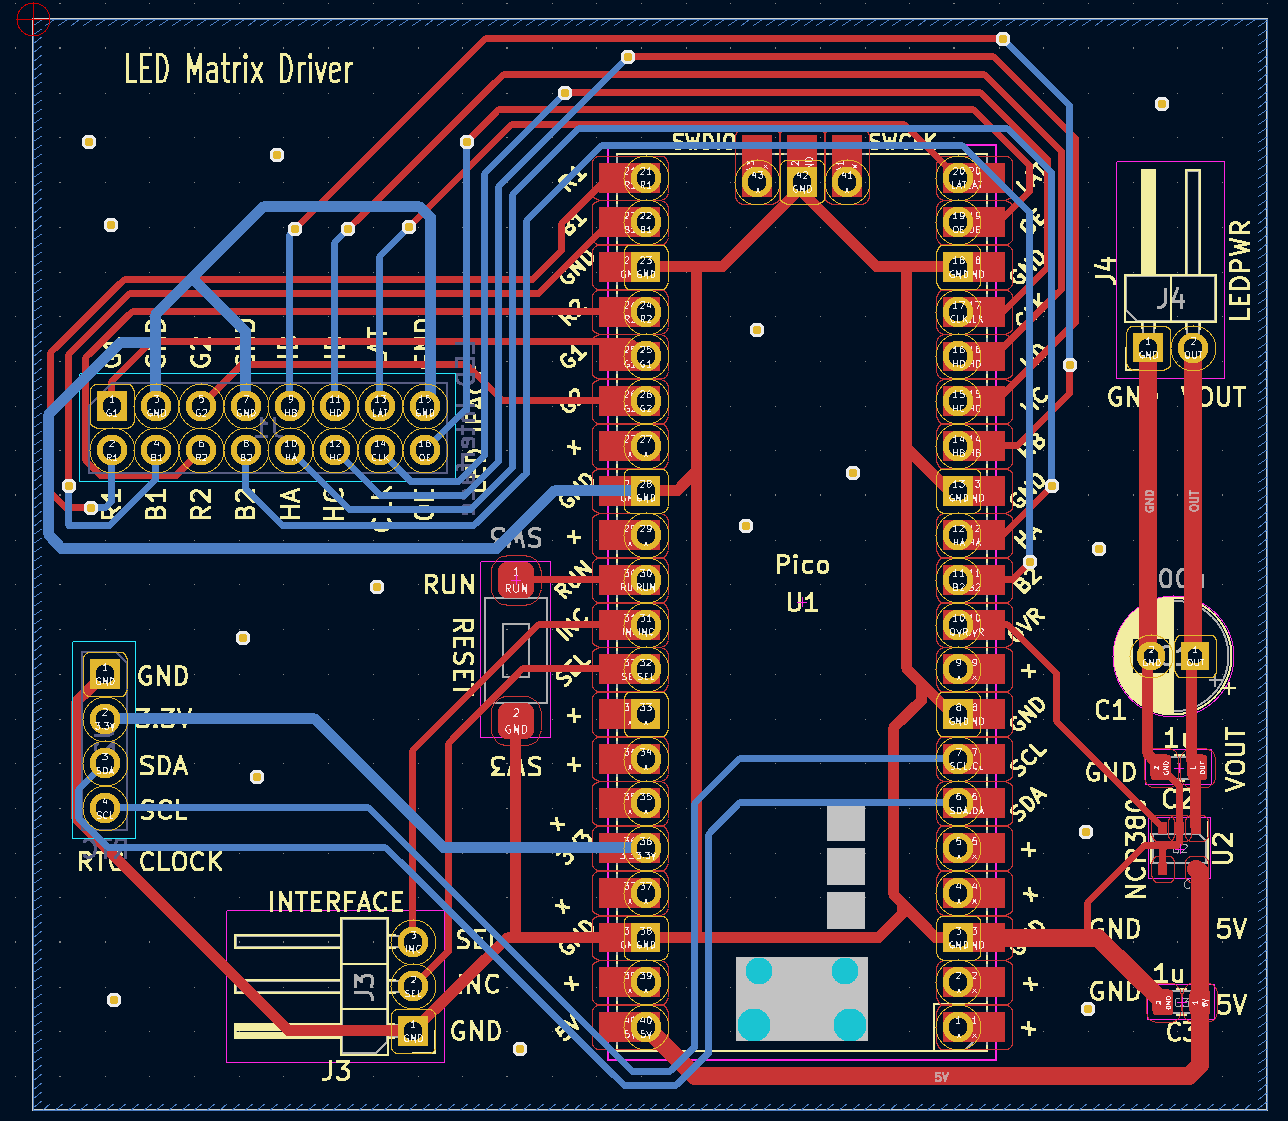
In terms of layout, here is the KiCAD layout for the schematic above (with
ground plane hidden):
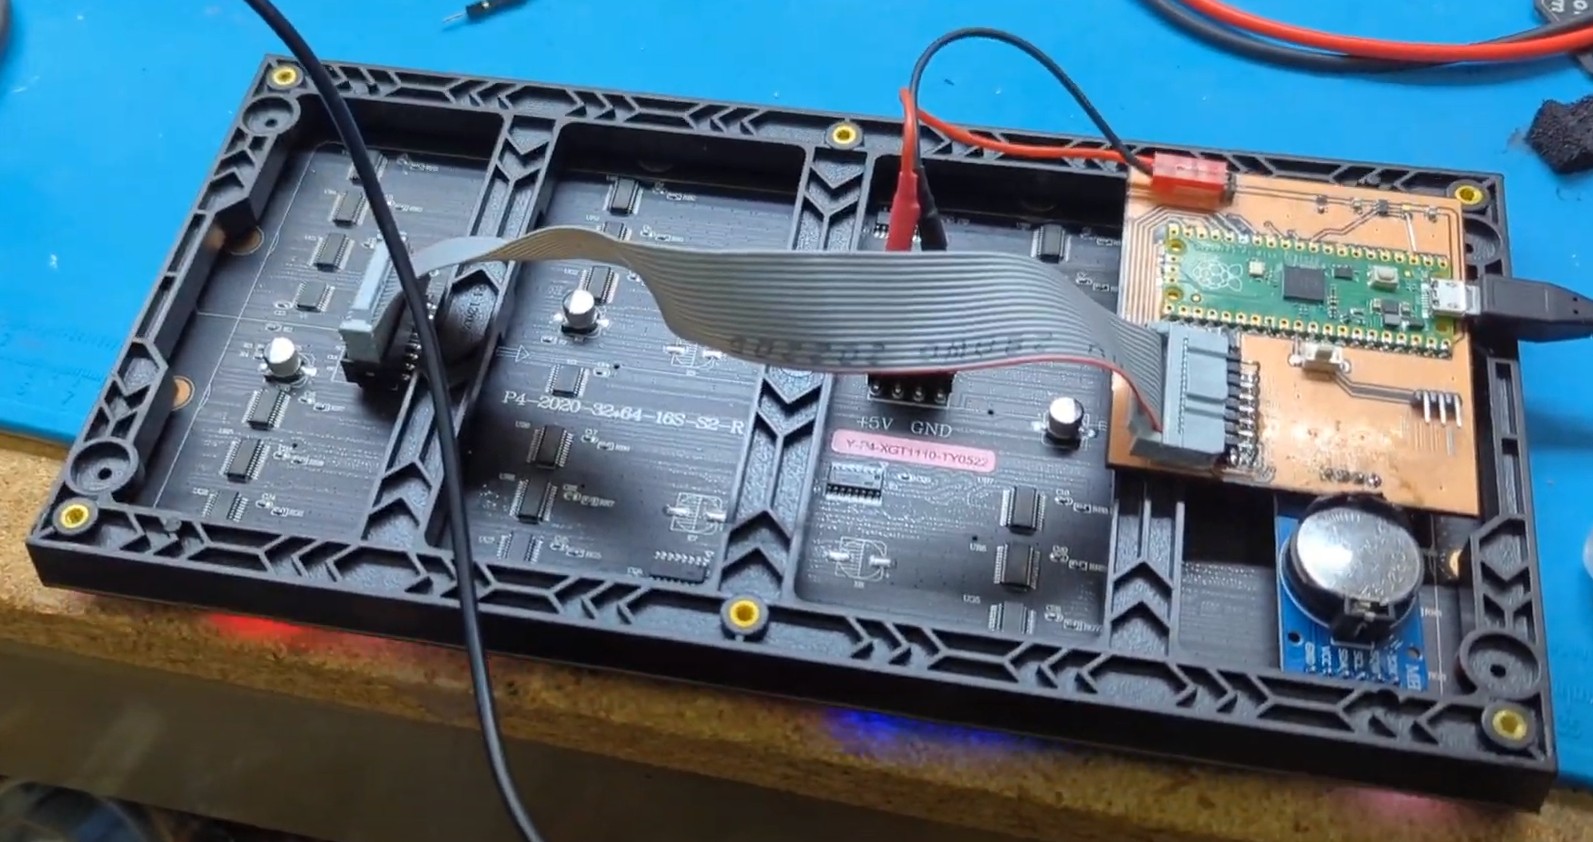
and here is a photo of the completed PCB. Note that the capacitor can't be seen
because it is on the backside of the board:
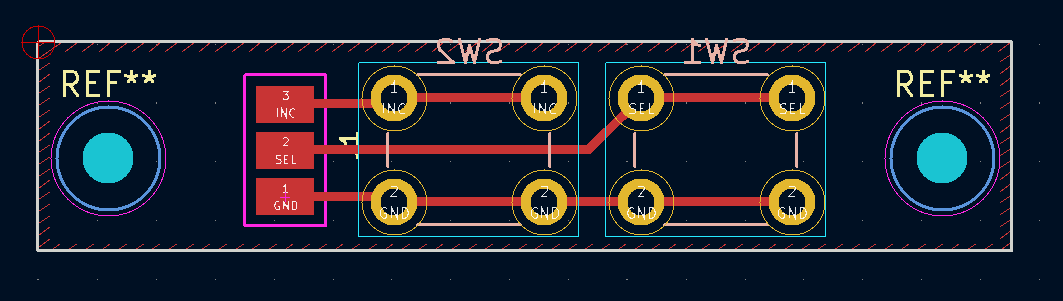
As for the buttons, here is the simple KiCAD layout:
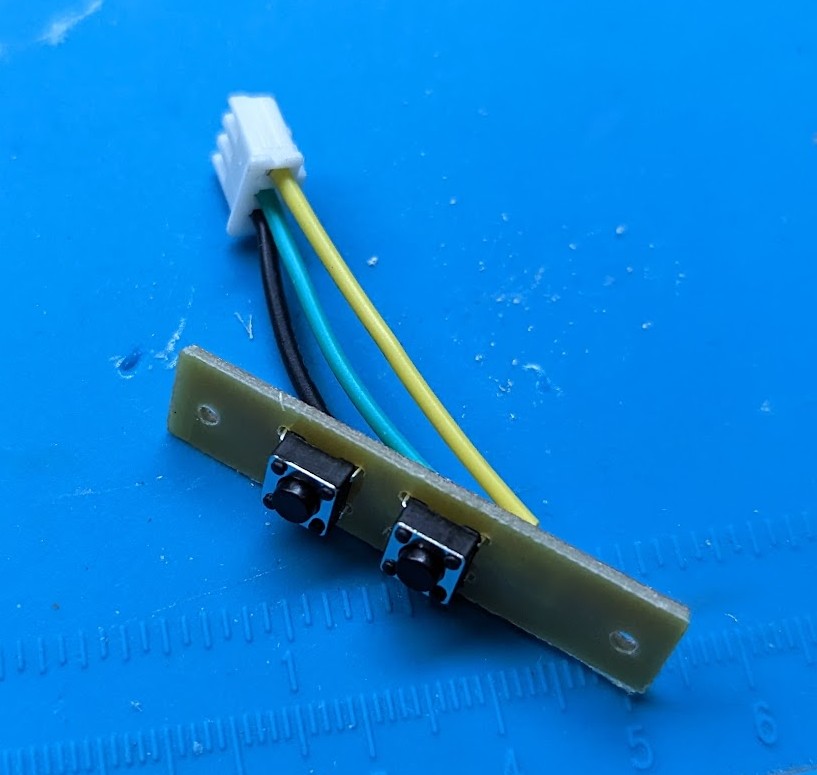
and the finished board that I cut out with my CNC machine (just using a perf
board would also work fine):
Firmware
TLDR: If you don't want to build the firmware (matrix_clock_led_64x32.uf2)
yourself, I have a couple of precompiled versions under the
firmware directory.
Source files (written in C) are provided in the src/ directory. If you
have never built PI Pico firmware before, run through the official Getting
started with the Raspberry Pi
PICO
documentation first to get the needed tools up-and-running on your system.
The instructions for building the clock firmware are the same as the guide
linked above, but I created a small/simple bootstrap.sh
script to lessen the number to needed steps:
bash
./bootstrap.sh
cd build/
make -j
I encourage you to view the contents of bootstrap.sh
yourself instead of blindly running it. You'll see something like this:
bash
$ cat bootstrap.sh
#!/bin/bashif[ ! -f pico_uart_console/CMakeLists.txt ]; then
git submodule init
git submodule update
fi
rm -rf build
mkdir build
cd build
cmake ..
If building under Windows, you may opt to run the DOS-equivalent commands
contained within bootstrap.sh manually. The good news is that there
are only a few commands to run.
The two major things done here are getting some dependencies (git submodules)
and setting up a new build environment under build/
If all went well above, you will have a src/build/matrix_clock.uf2 file
available to load onto a PI Pico. Note that
firmware/matrix_clock_led_64x32.uf2 will not be changed.
Hardware build
The hardware build is fairly minimalistic, solving the given problems:
Securing the PI Pico, RTC hardware and buttons at the bottom of the panel
Keeping the connection cables constrained so the clock can mount flat on a
wall
Providing a wall mount
I solved all of these problem by creating a couple of 3D models and printing them out.
I used OpenSCAD for the modeling.
If you don't want to mess around with OpenSCAD, I also have the models available
for direct download at
case/led_matrix_64x32/export. These are .3mf
files (the successor to .stl format) that most modern slicer programs can
directly load.
To assemble, I used M2 bolts to attach the buttons to the bottom, 6mm long I
think but something in that area should be fine. I used M3 bolts (around
12-16mm) to attach the 3D printed parts to the led matrix.
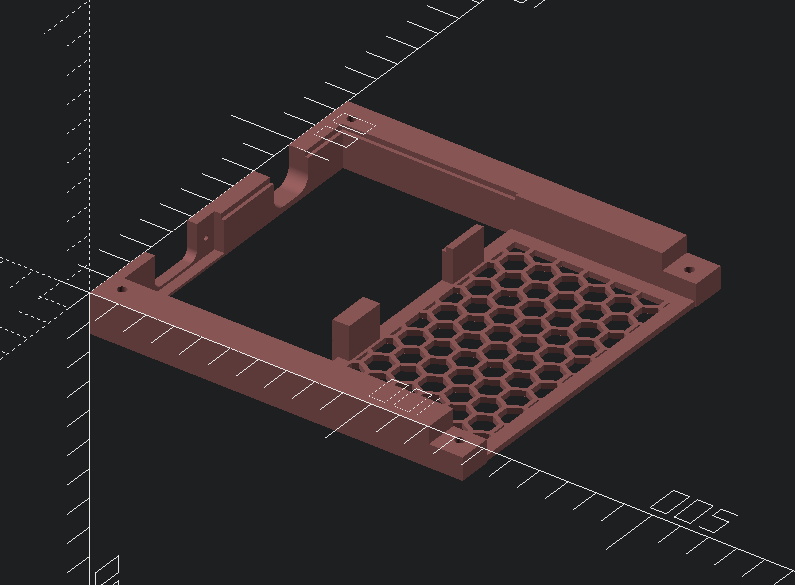
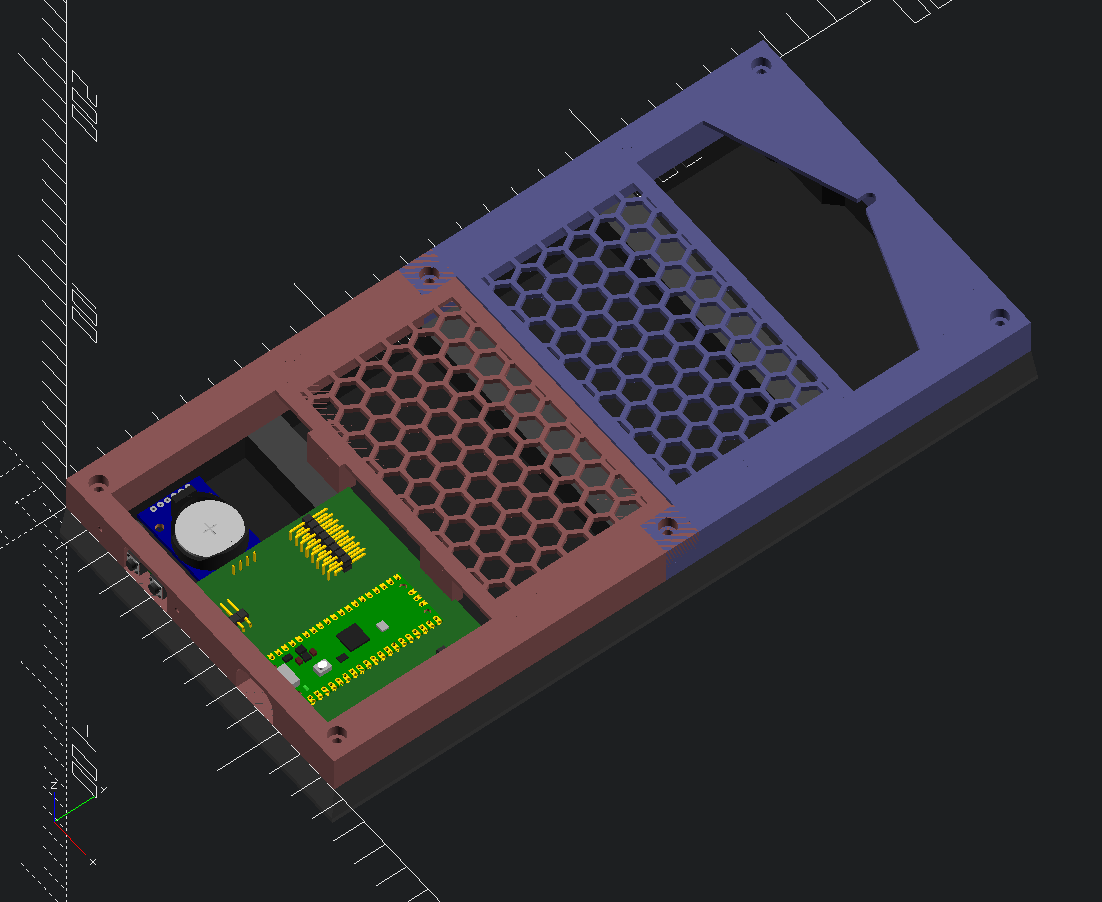
The PCB settles into a custom slot in the bottom 3d part (see the grooves in the
red image above) and is held in place with no bolts required, just make sure
it's in the proper position before tightening the frame bolts.
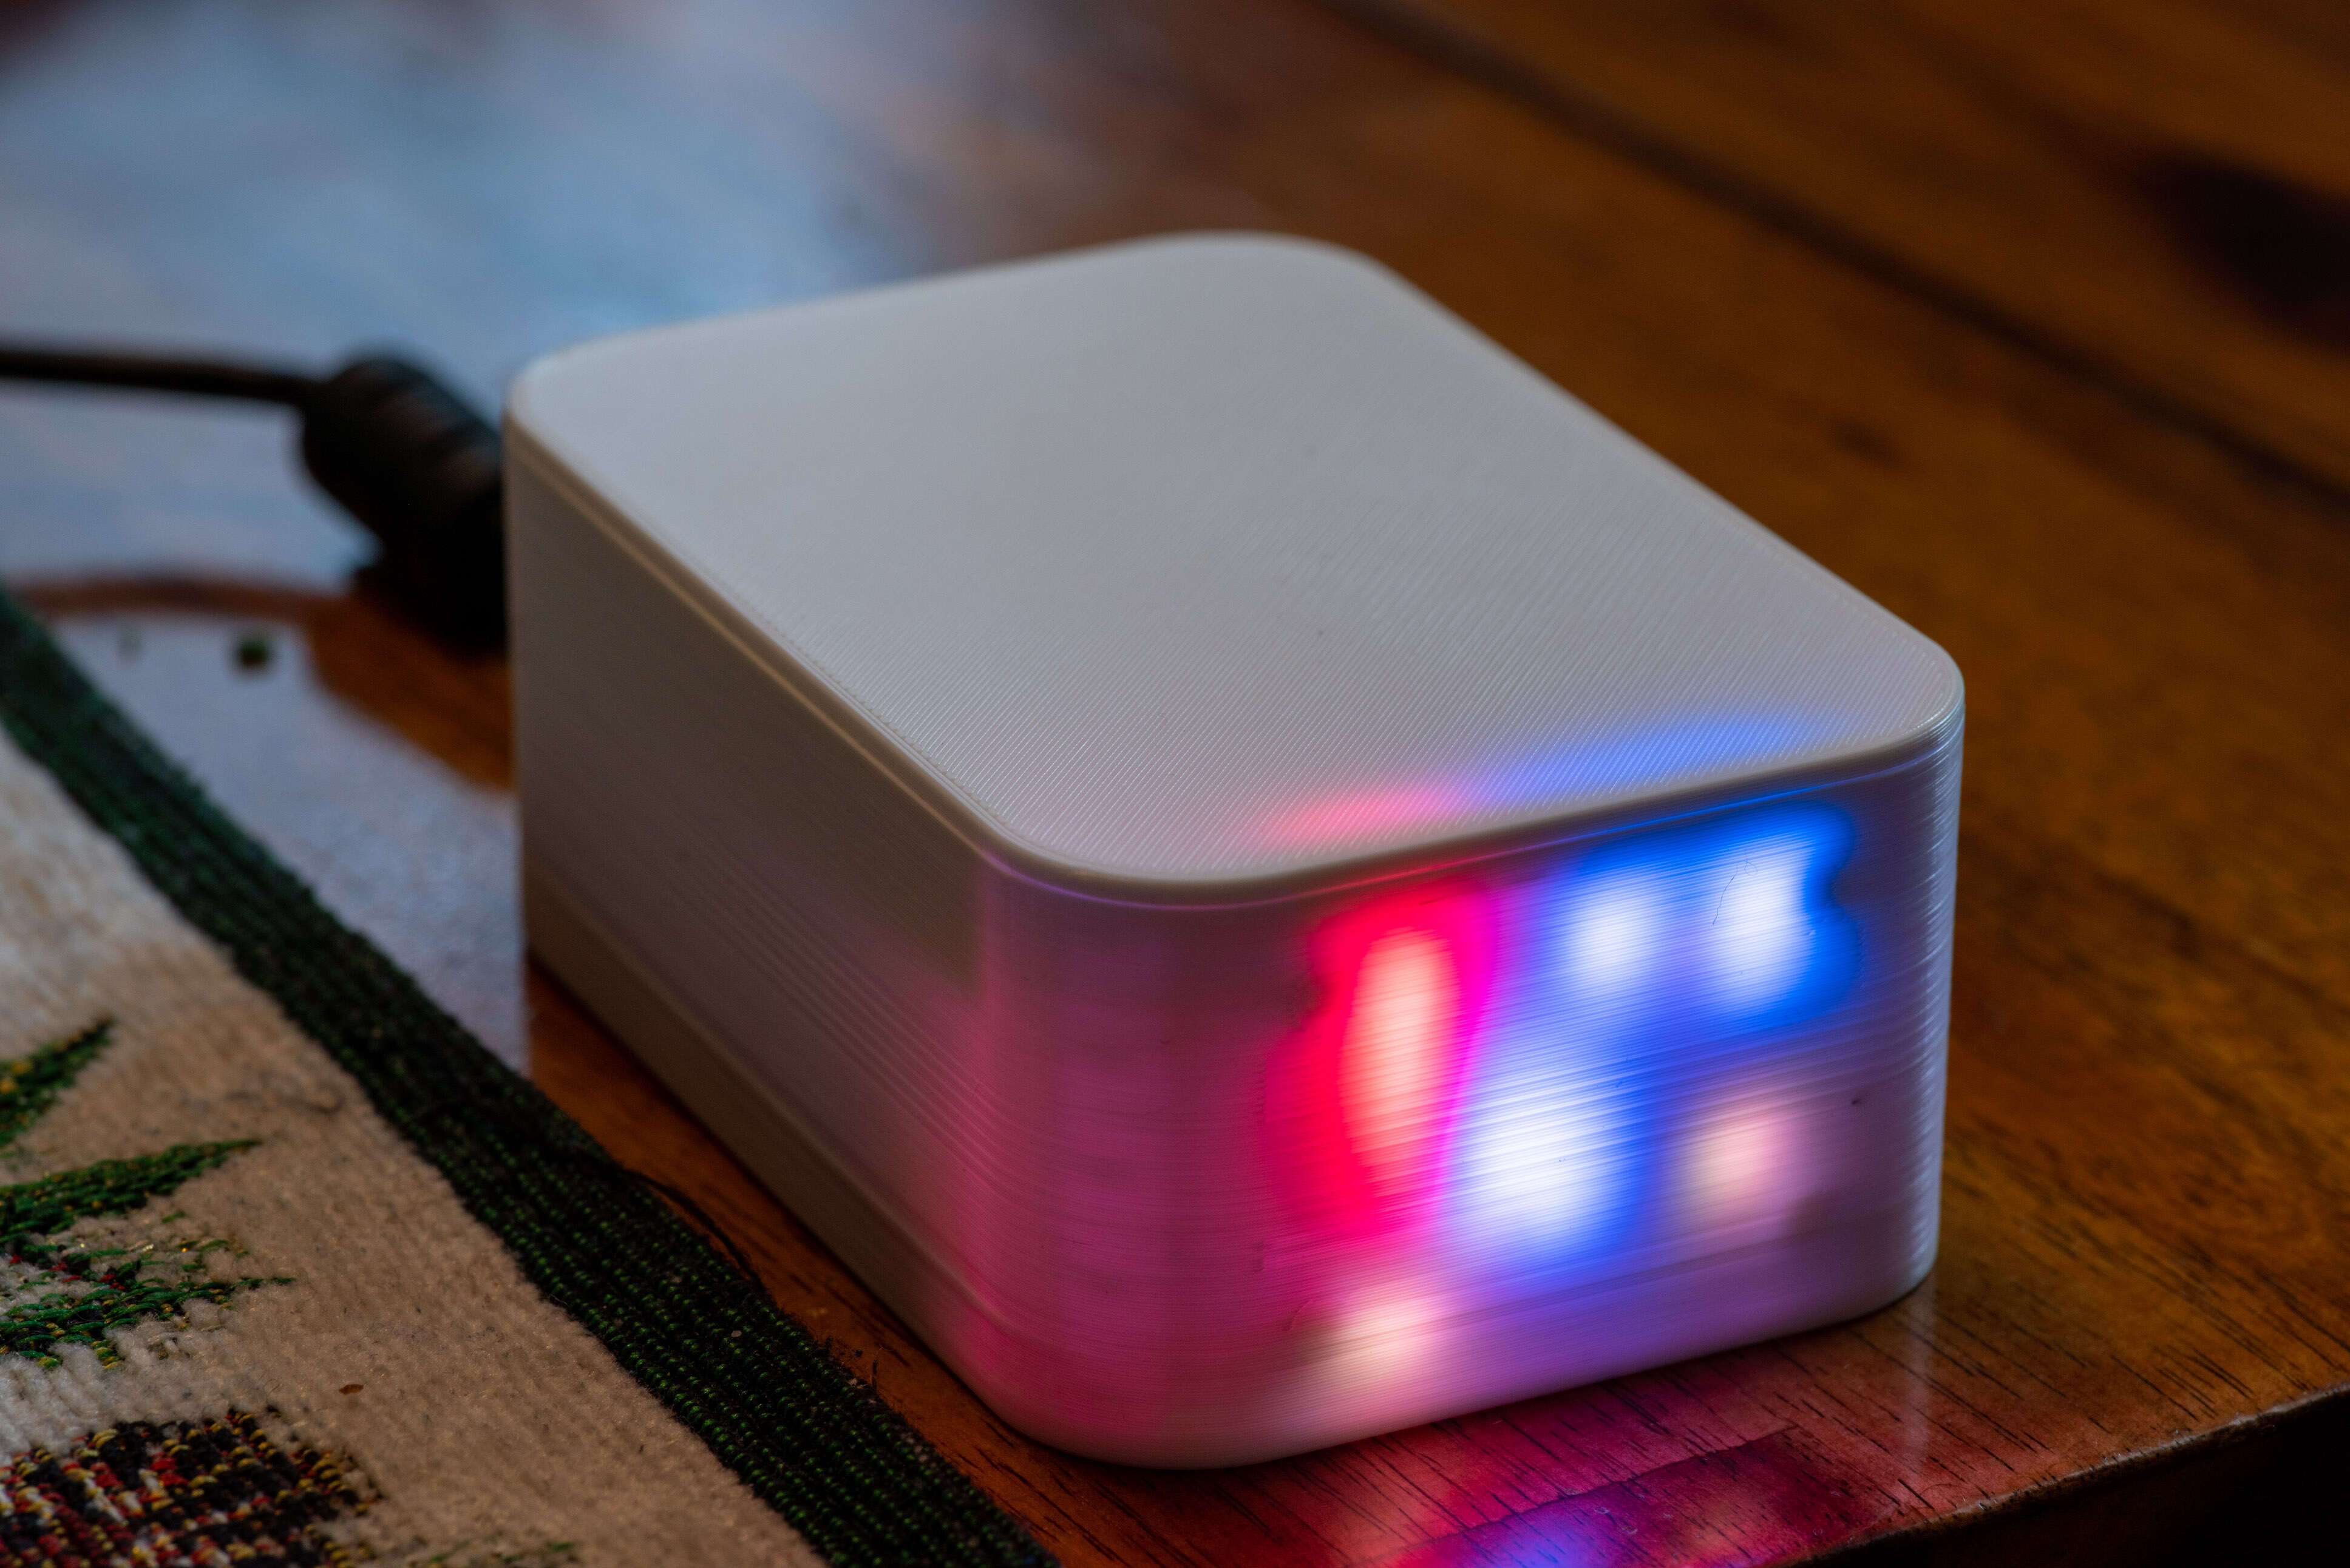
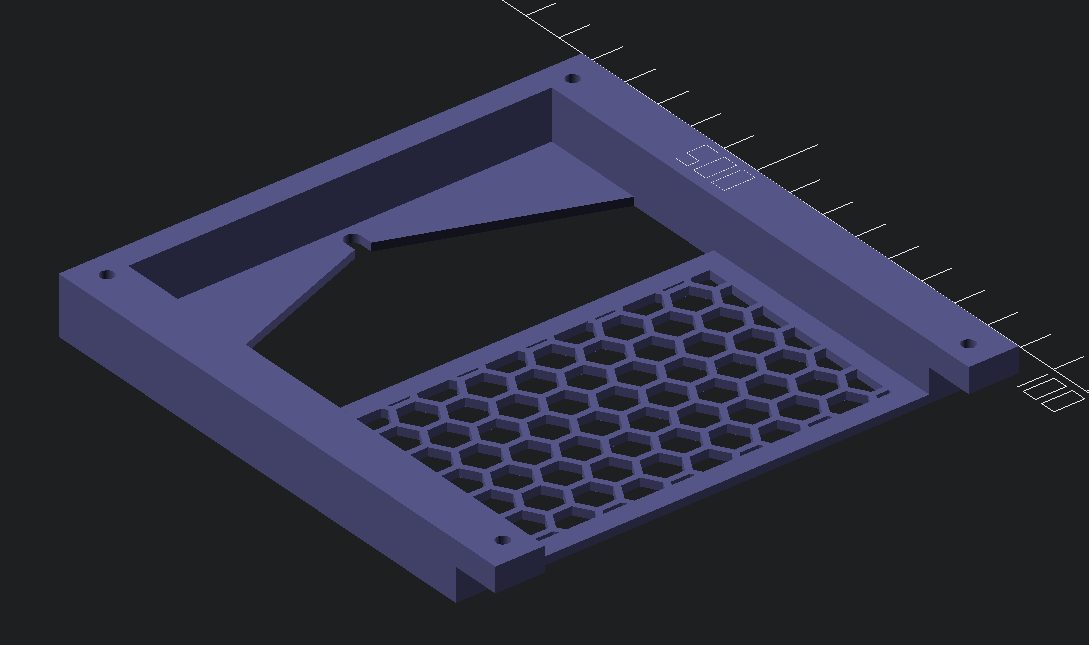
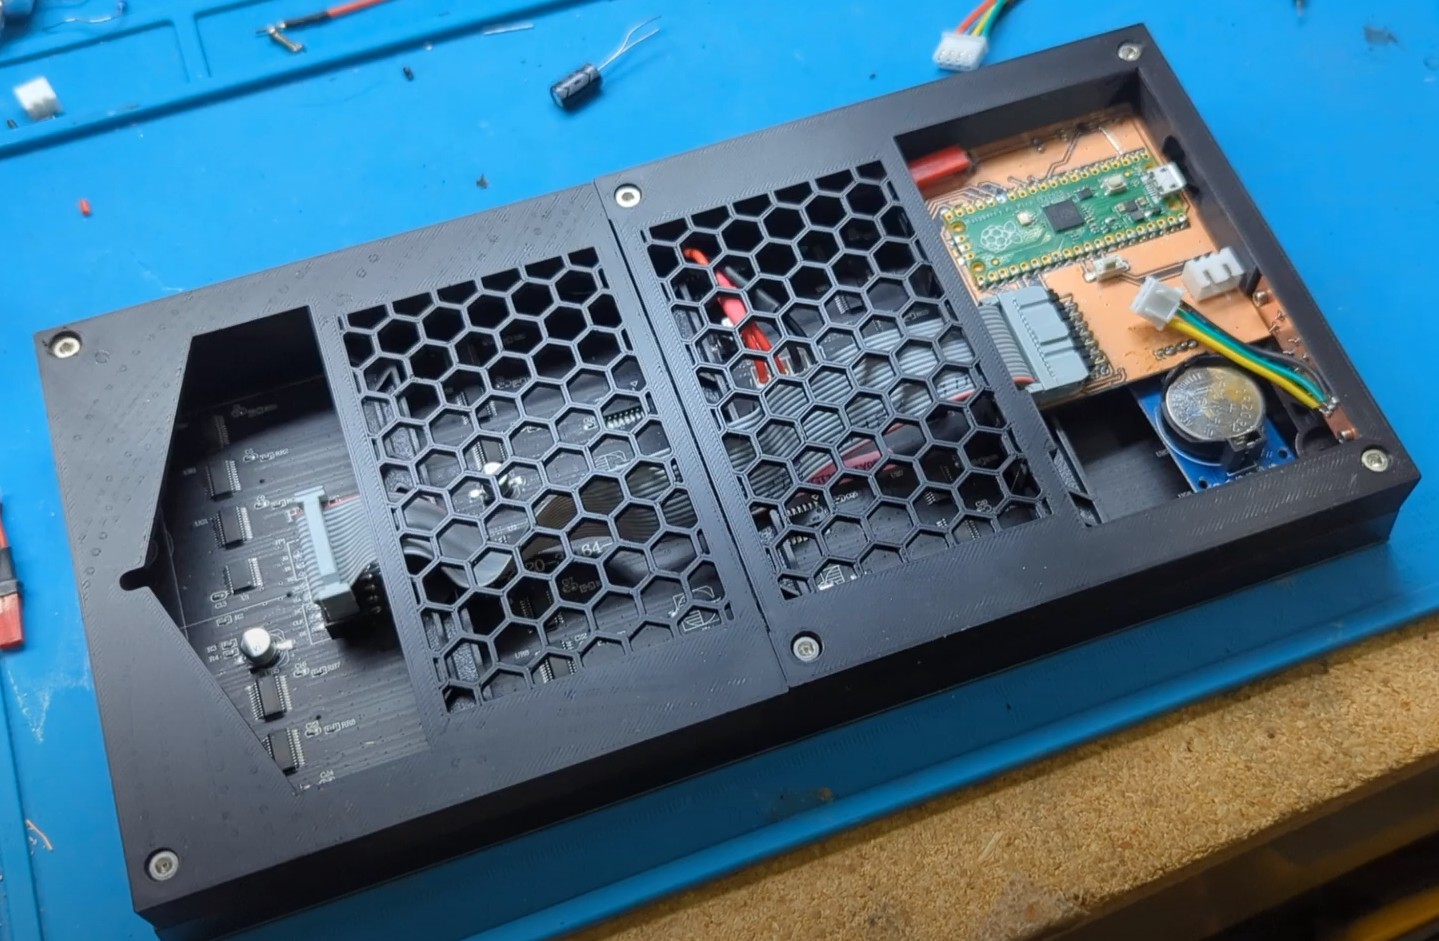
The hex matrixes on the back hold the power and led interface cables within the
unit so that it will mount flush on the wall. A guide and slot is provided for
wall hanging the unit.
Customization Guide
This part of the documentation points you in the right direction if you want to
modify the project. This entire section should be consider optional and more
advanced than others.
Using Different LED Hardware
The file src/led_matrix.h, contains the interface your
hardware driver will be called with.
src/led_matrix_62x32.c implements it for the 64x32 LED
hardware. There is also a src/led_matrix_dotstar.c
file which is used instead when building the dotstar version. To add
additional hardware support, create a new .c file (for example
src/led_matrix_neopixel.c) and change src/CMakeLists.txt
to point to your new file.c`. The main function you'll be implementing is:
c
#define LED_MATRIX_WIDTH 8
#define LED_MATRIX_HEIGHT 8// render the matrix.// data is of the form 0xIIRRGGBB where// II -> Intensity (brightness)// RR -> Red// GG -> Green// BB -> Blue//// Values are 0-255// format is horizontal rows. The first pixel// sent is the southwest corner of the matrix.void led_matrix_render(uint32_t* data);
Again, look at src/led_matrix_dotstar.c for a
straight-forward implementation of led_matrix_render.
// gets the current time in HHMM format (0000 - 2359)// For example, if 1354 is returned, the time is 13:54 (or// 1:34 PM if you prefer)uint16_t clock_get_time();
// Sets the time. For example: time_hhmm = 1234 would set the// time to 12:34. Note that 24h time is always used so 1234// is 12:34 PM and 0034 is 12:34 AM.void clock_set_time(uint16_t time_hhmm);
There are two files and one directory to consider. The first file is
src/clock_render.c. Specifically, this section:
c
struct DisplayMode display_modes[] = {{"matrix_with_numbers", matrix_with_numbers_render}, // This entry will be the default power-on mode{"matrix", matrix_render},
{"bounce", bounce_render},
{"number_cascade", number_cascade_hires_render},
{"waveform", waveform_render},
{"drops", drops_render},
{"off", blank_render}, // always put this entry at the end of the list};
This section lists the display modes, names them and provides a function pointer
to each one. If you were to remove a line from this array, or reorder the
lines, you would see the corresponding change when you build/load new firmware.
In order for the function pointers to have any meaning, you'll need to include
the corresponding files:
This value (0-255), would then be used as a baseline brightness when turning on
LEDs in led
Changing the Console
The file src/clock_settings.c contains all of the commands available to the
USB shell. Adding your own is straight-forward but I suggest skimming through
https://github.com/mattwach/pico_uart_console to get up-to-speed on how the
console works first.
"I DON’T EVEN SEE THE CODE ANYMORE" - The Matrix. This is a clock that presents in a matrix-like format on an 8x8 RGB LED matrix. At first you will not be able to read it but eventually the patterns will become clear.
"I DON’T EVEN SEE THE CODE ANYMORE" - The Matrix. This is a clock that presents in a matrix-like format on an 8x8 RGB LED matrix. At first you will not be able to read it but eventually the patterns will become clear.
Open-source and real-time orchestrator for cyber-physical-systems, to easily design, test and deploy embedded applications and digital twins.
5 parts546MIT
Questions
How big is the Button pcb kicad PCB?
It measures 42 × 9 mm and has 2 copper layers, 1.6 mm thick.
What parts does the Button pcb kicad use?
5 parts. The full list of its parts is on this page, with links to each part's symbol and footprint where PCBKit's library has them.
Where can I download the Button pcb kicad KiCad files?
From the mattwach/matrix_clock repository on GitHub, at the commit this page was made from: the board is schematic/button_pcb_kicad/button_pcb_kicad.kicad_pcb and its schematic schematic/button_pcb_kicad/button_pcb_kicad.kicad_sch. PCBKit opens the board in the browser, with nothing to install.
Can I use the Button pcb kicad design in my own project?
Its repository publishes it under the GPL-3.0 licence: you may reuse it on that licence's terms (keep the author's notice, and for a copyleft licence share your changes alike).