
2 layers19 × 76 mm
Sub
google/mozc-devices
Circuit diagrams and firmware source code for Gboard DIY keyboards
15 parts3kApache-2.0

The Raspberry Pi Pico W program to implement a drip irrigation controller for my plants.
Drip v2 is an open-source printed circuit board by lluque42, from the lluque42/drip_irrigation_controller repository on GitHub. It is a 2-layer board of 68.3 × 81.8 mm with 15 parts on 52 nets, routed with 53 tracks and 0 vias.
Its parts include 5 connectors, 4 diodes, 2 resistors, 2 transistors and 2 switches.
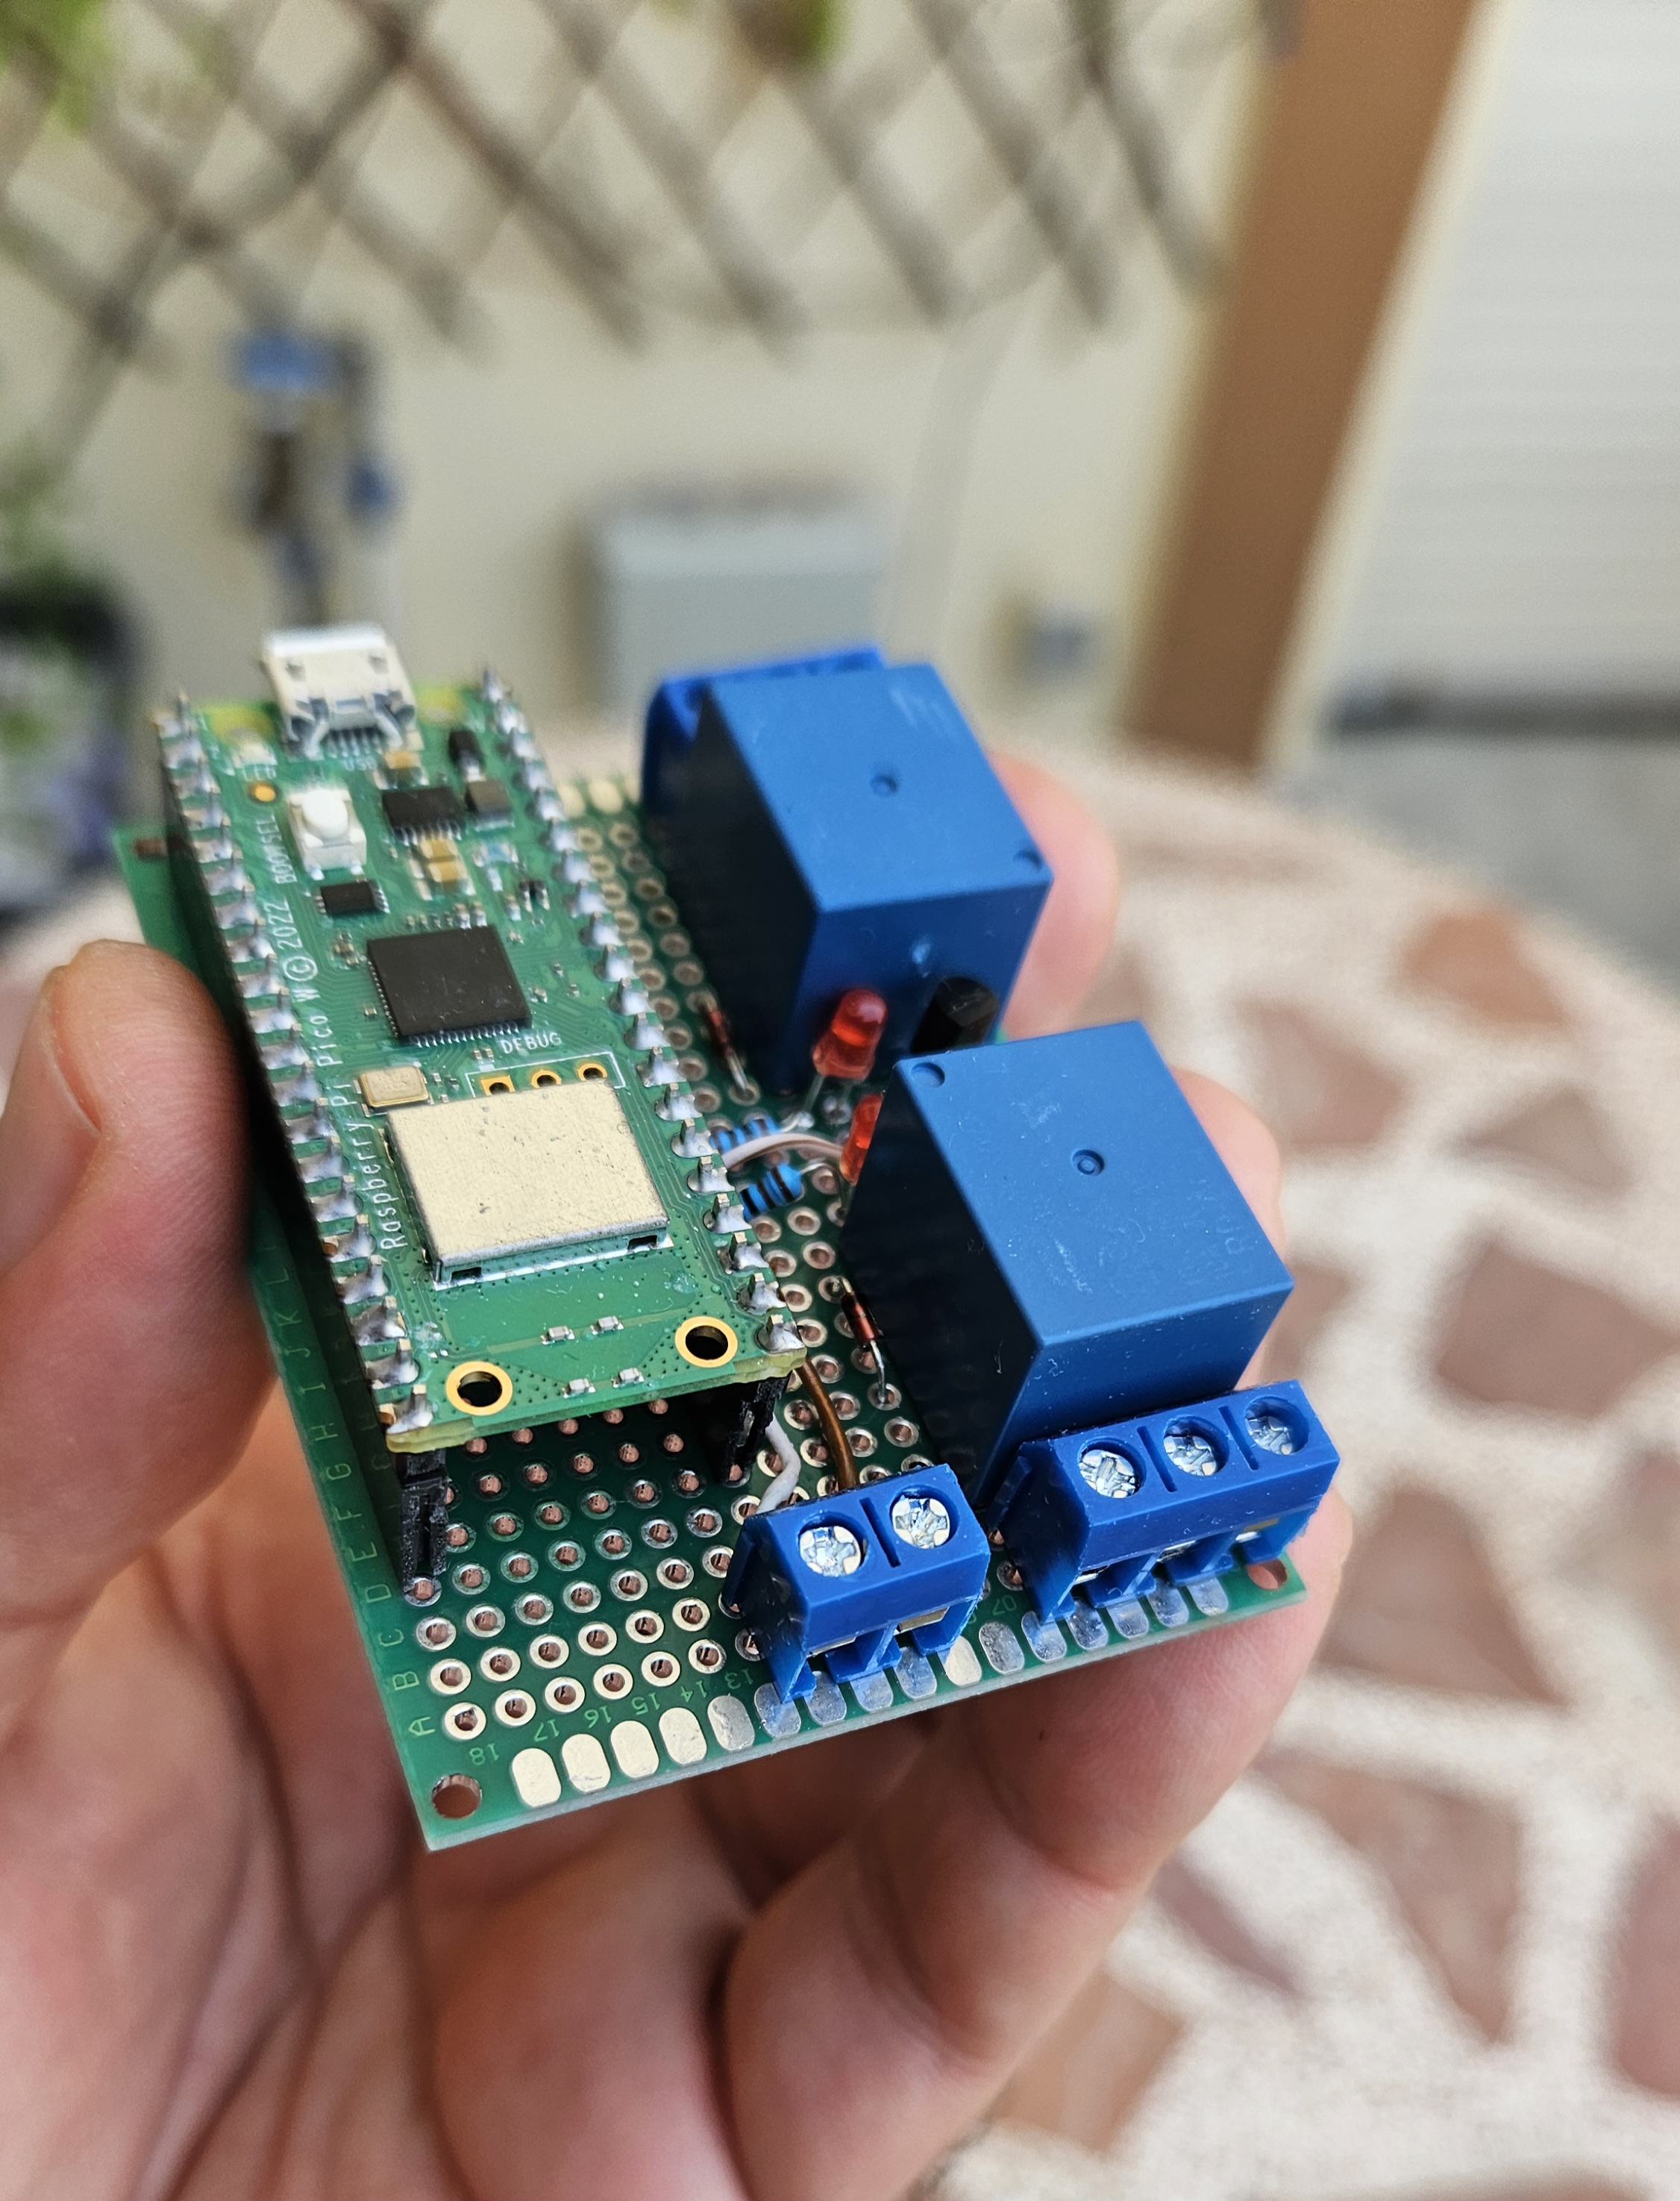
This drip irrigation controller was designed to control one relay for a water electrovalve and a second relay for ornament lights. Both relays may be configured for independent one-time-a-day activation to remain active during a configurable time. The frequency in terms of days between activations is also configurable. Any of the relays may be disabled which will stop their future scheduled activations.
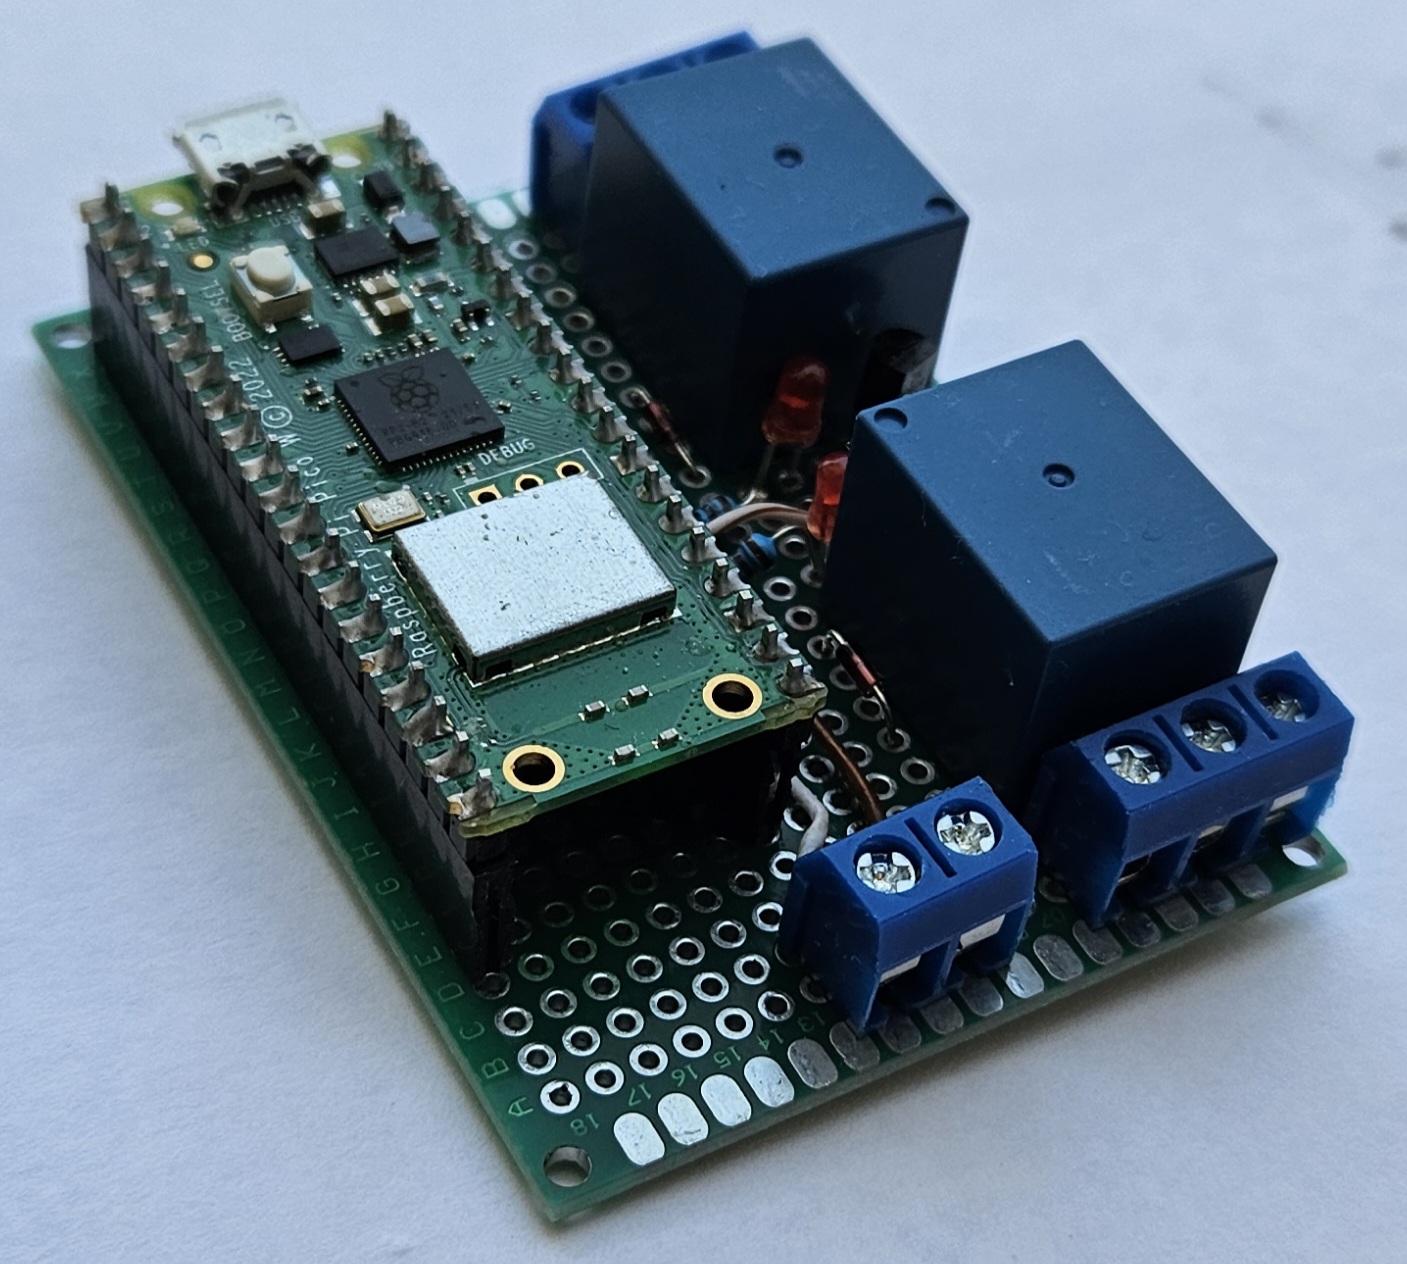
A default configuration is applied at building time (edit files 'CMakeLists.txt', 'timers_default_data.cmake', and 'wlan_setup_data.cmake' to change it). The controller configuration (get and set) and manual activation may be done remotely through the wifi connection with simple UDP messages exchange.
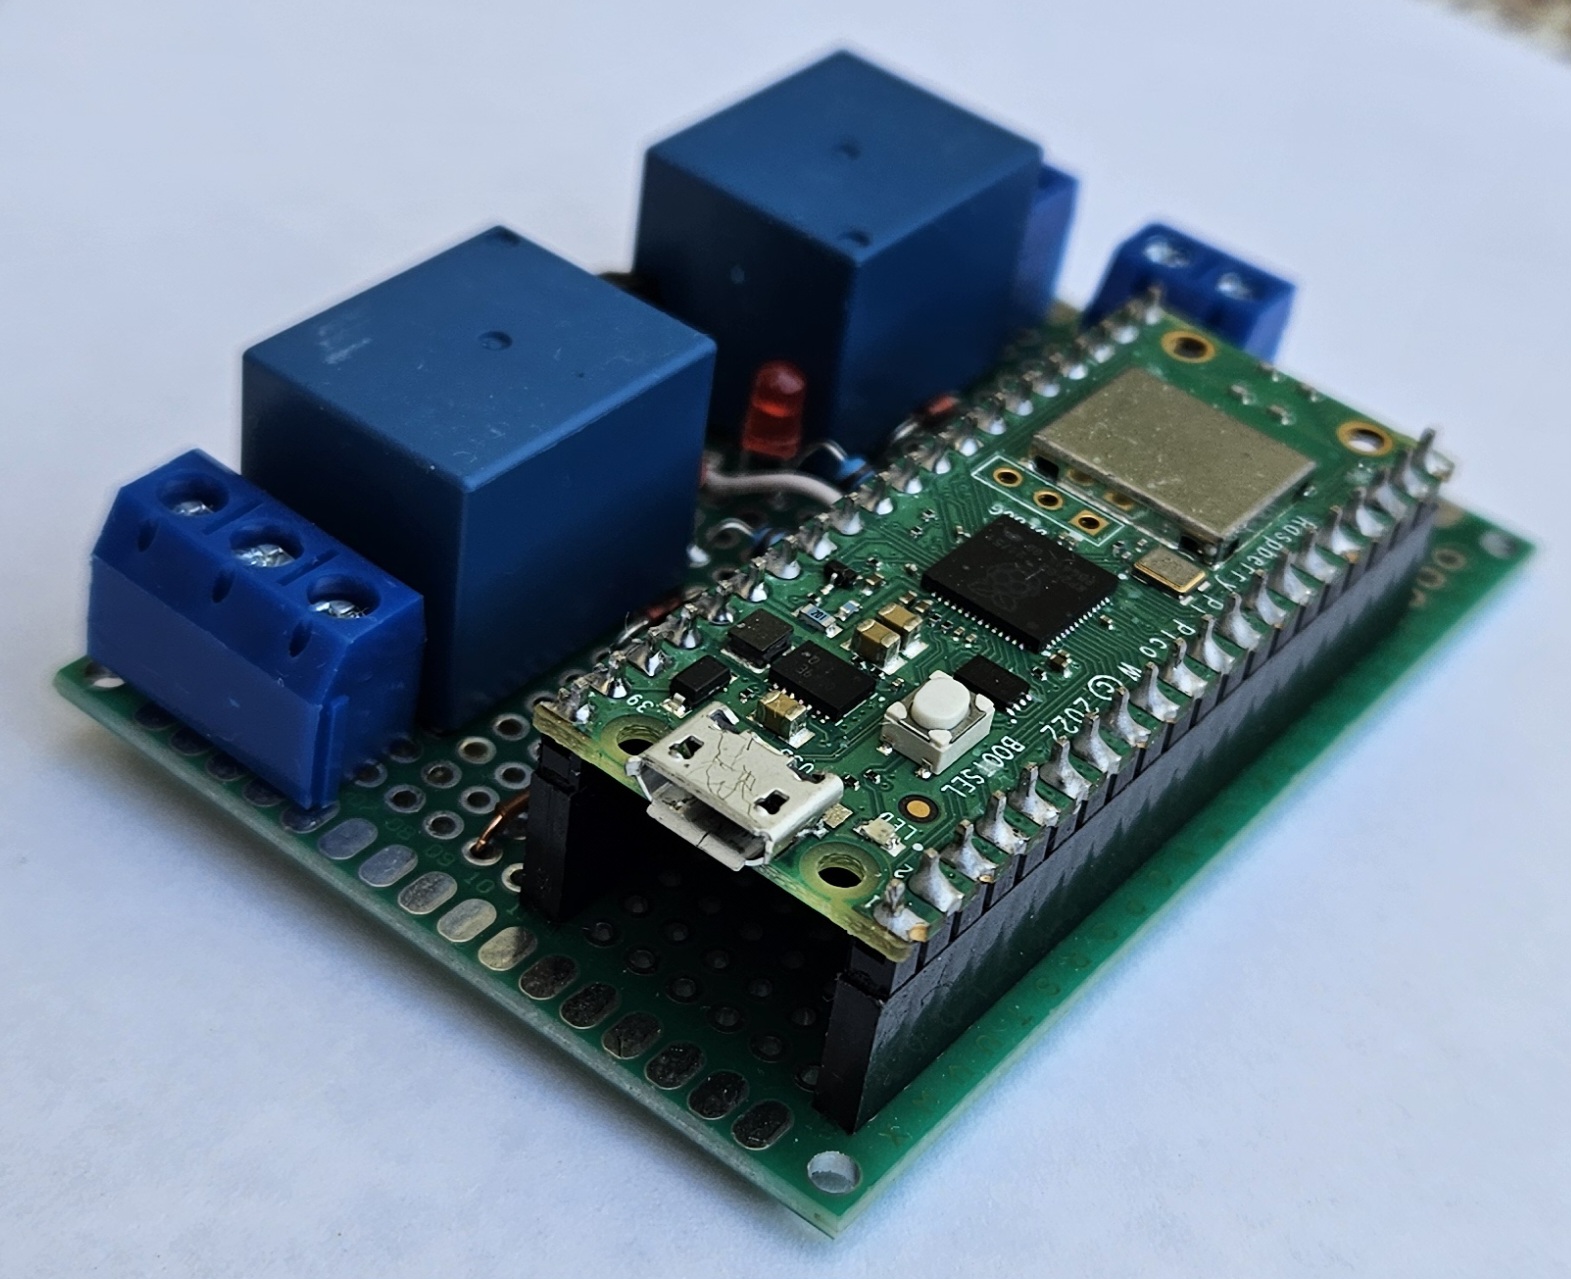
This is the second controller I've built for my house plants. The first was written in Python in a rush before going out on a trip and worked perfectly. It had a dot matrix screen with a setup menu through microswitches; a real-time clock module, etc. But some years later it hangs a lot, outdoor installation always takes its toll.
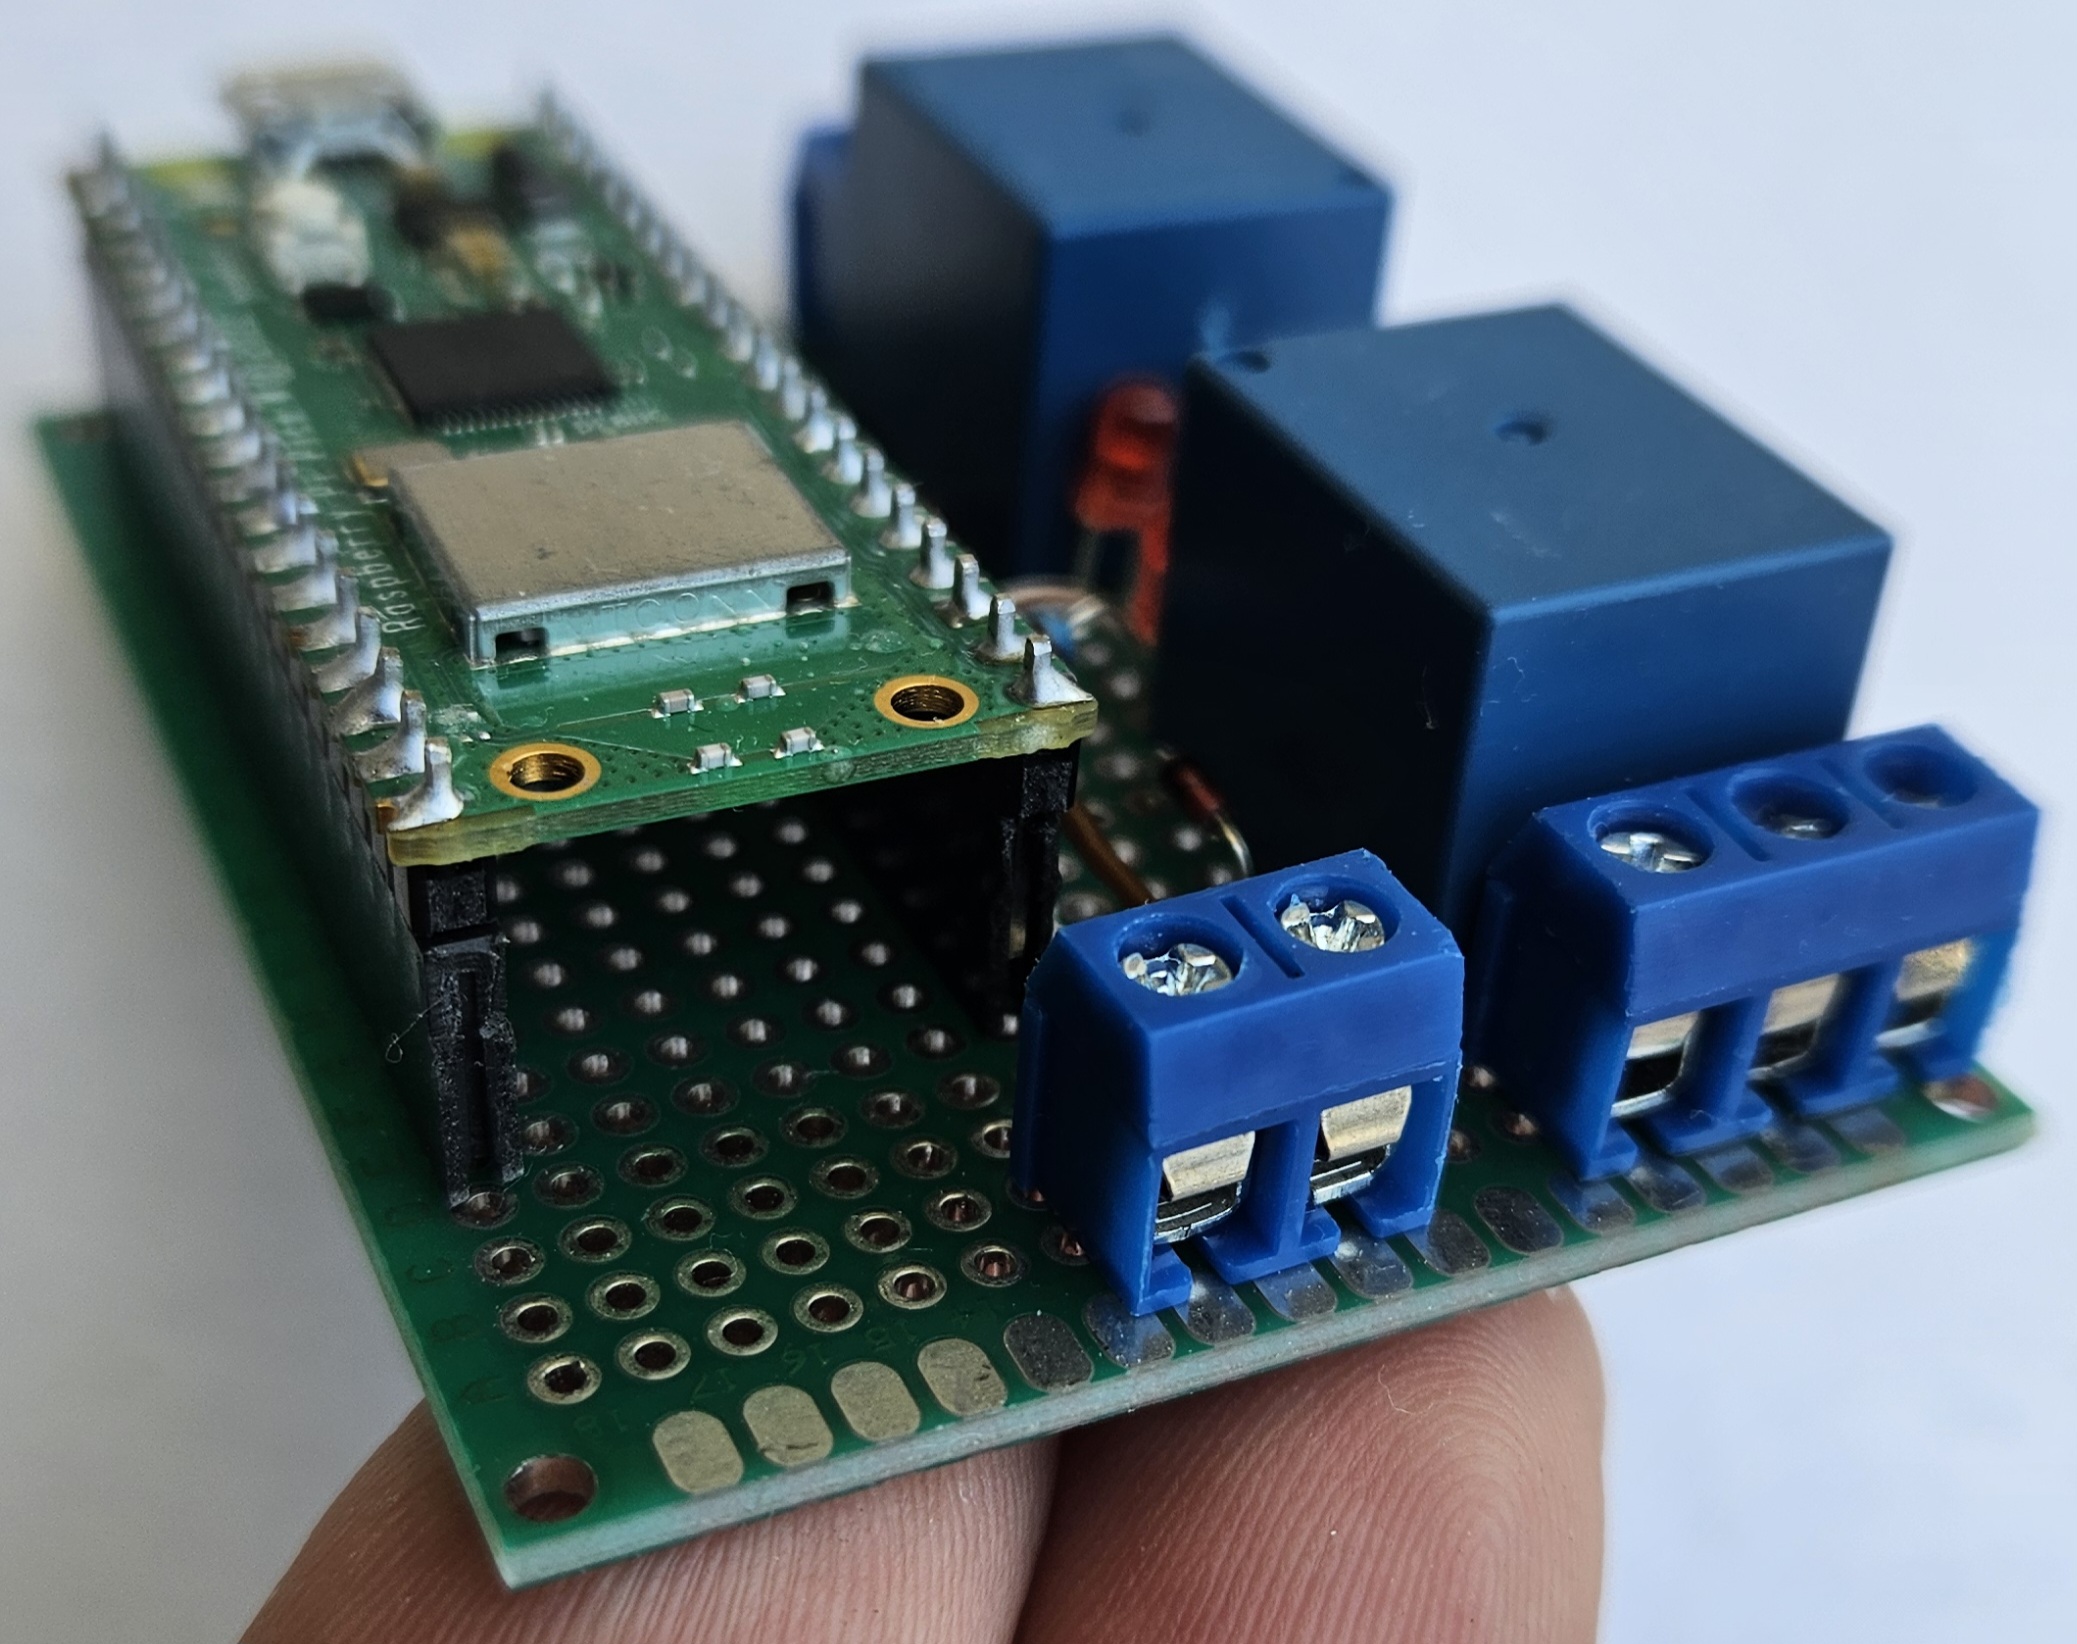
So I've decided to implement a new version that loses the screen in favor of a WiFi connection for keep-alive signaling against a server, configuration and commands.
This repository includes all the code and scripts to built the program in a Raspberry Pi Pico (1) W board. The schematics for the external hardware is also included.
Luis Luque - 2025
REMEMBER: This code was made for and tested on a Pico W (first family of the Raspberry Pi Pico series). Use at your own risk in other platforms.
Clone repository from:
https://github.com/lluque42/drip_irrigation_controller.git
Two files are included to allow an easy customization:
Create a build directory and enter to it:
drip_irrigation_controller $ mkdir build
drip_irrigation_controller $ cd build
drip_irrigation_controller/build $
Once inside, execute cmake against the parent directory (where the CMakeLists.txt is):
drip_irrigation_controller/build $ cmake ..
drip_irrigation_controller/build $
If no errors occurred, then a Makefile file should have been created in the build directory. Execute it to build the binaries.
drip_irrigation_controller/build $ makeIf everything ok, a number of binary files should've been produced, among them a drip.elf or drip.uf2 ready to be loaded into the Pico W board.
For building the tests tool, see the Wifi connectivity section.
If some error occur check the pre-requisites:
The microcontroller can connect to a wireless network if the correct settings were edited in the wlan_setup_data.cmake file (a template for this file is provided, just write your settings and rename the file).
A static IPv4 address must be provided, as well as an UDP port (a high non-common one to avoid issues). This is necessary for the controller to act as a simple text UDP server. That is, it will open the UDP port listening for incoming messages. A set of message formats define commands and responses that may be sent to the controller and back.
The messages are plain-text ASCII, human readable, strings (without the NUL termination), that is, a string sent as the payload of the UDP datagram.
A simple, dirty client (and a server) written to debug this program is included as a git sub-module in:
drip_irrigation_controller/test/udp_tx_rxSince it is a submodule it should be initialized from the drip_irrigation_controller root directory by doing:
drip_irrigation_controller $ git submodule update --init --recursiveAfter that, both the client and server can be build with:
drip_irrigation_controller/test/udp_tx_rx $ makeWhich places the binaries in the bin folder.
To use the client to communicate over the wifi with the irrigation controller (assuming the default values in the wlan_setup_data.cmake.template) just do:
.../test/udp_tx_rx/bin $ ./udp_client 192.168.1.69 1234This will receive input from the stdin for the user to send text to the controller.
The commands, their formats, and the expected replies are the following:
Below are the recognized command messages and their replies. The client just need to write and read this as the payload of UDP messages to/from the controller that acts as a server on the IP address and UDP port set in the wlan_setup_data.cmake at build time.
For non get commands, expect a response of "done" if it was correctly processed or a custom human readable error message.
TODO
./
├── .gitignore				(to prevent undesired files to be stagged)
├── Doxyfile				(doxygen config file for doc generation)
├── Makefile				(use 'make help' for instructions)
├── README.md				(brief documentation)
├── doc/					(documentation extracted from comments in .h)
│   ├── html/				(html documentation)
│   │   ├── ...
│   │   ├── index.html		(entry point for html documentation)
│   │   ├── ...
│   └── man/				(man pages documentation)
│       └── man3/
│           └── ...			(example of use: 'man -l ft_string.h.3')
├── include/				(directory for public header files (.h))
│   ├── ...
│   └── ...
├── src/					(dir for source code and private header files)
│   ├── ...
│   │   ├── ...
│   │   └── ...
│   └── ...					(may be structured in several directories)
│       ├── ...
│       └── ...
├── lib/ (external libraries) TODO
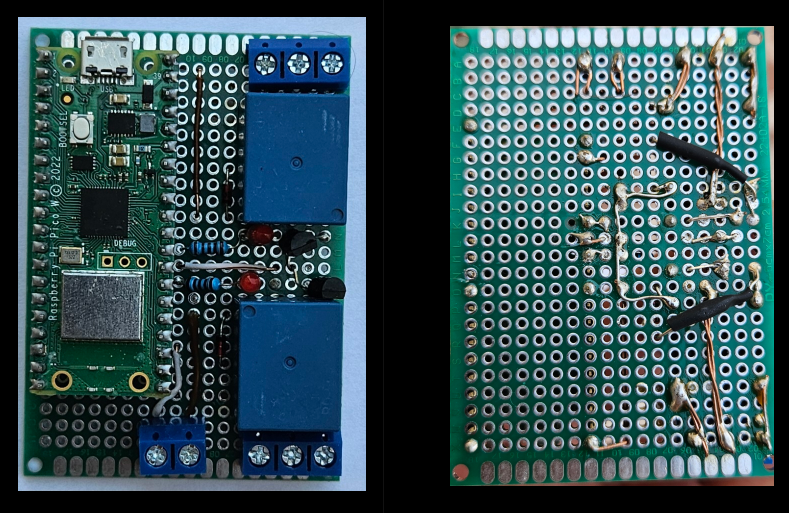
Volts across led: 2,5 V With a 10K resistance and driven through the 2n3904 (100KOhm base to gpio)
With USB 5V directly fed, the relay coil consumes 70mA The pico restarts everytime te coil de-energizes, the diode requirement is real.
Had to replace the 100K base resistor with a 10K because with the realy coil current I guess the transistor couldn't remain polarized.
| Qty | Value | Footprint | References |
|---|---|---|---|
| 2 | 1K | Resistor_THT:R_Axial_DIN0207_L6.3mm_D2.5mm_P7.62mm_Horizontal | R1, R2 |
| 2 | 1N4007 | Diode_THT:D_DO-41_SOD81_P10.16mm_Horizontal | D1, D3 |
| 2 | 2N3904 | Package_TO_SOT_THT:TO-92_Inline | Q1, Q2 |
| 1 | 5VDC OUT | TerminalBlock_Phoenix:TerminalBlock_Phoenix_MKDS-1,5-2_1x02_P5.00mm_Horizontal | J2 |
| 1 | LIGHTS | Relay_THT:Relay_SPDT_SANYOU_SRD_Series_Form_C | K2 |
| 1 | LIGHTS | LED_THT:LED_D3.0mm | D4 |
| 1 | LIGHTS | TerminalBlock_Phoenix:TerminalBlock_Phoenix_MKDS-1,5-3_1x03_P5.00mm_Horizontal | J5 |
| 1 | Pins_1_to_20 | Connector_PinSocket_2.54mm:PinSocket_1x20_P2.54mm_Vertical | J4 |
| 1 | Pins_21_to_40 | Connector_PinSocket_2.54mm:PinSocket_1x20_P2.54mm_Vertical | J3 |
| 1 | WATER | LED_THT:LED_D3.0mm | D2 |
| 1 | WATER | TerminalBlock_Phoenix:TerminalBlock_Phoenix_MKDS-1,5-3_1x03_P5.00mm_Horizontal | J1 |
| 1 | WATER | Relay_THT:Relay_SPDT_SANYOU_SRD_Series_Form_C | K1 |
It measures 68.3 × 81.8 mm and has 2 copper layers, 1.6 mm thick.
15 parts. The full list of its parts is on this page, with links to each part's symbol and footprint where PCBKit's library has them.
From the lluque42/drip_irrigation_controller repository on GitHub, at the commit this page was made from: the board is data/hardware_v2/drip_v2/drip_v2.kicad_pcb and its schematic data/hardware_v2/drip_v2/drip_v2.kicad_sch. PCBKit opens the board in the browser, with nothing to install.
Its repository states no licence, so its author keeps all rights: ask lluque42 before reusing the design.
google/mozc-devices
Circuit diagrams and firmware source code for Gboard DIY keyboards

hoglet67/RGBtoHDMI
Bare-metal Raspberry Pi project that provides pixel-perfect sampling of Retro Computer RGB/YUV video and conversion to HDMI

mntmn/amiga2000-gfxcard
MNT VA2000, an Open Source Amiga 2/3/4000 Graphics Card (Zorro II/III), written in Verilog

hackclub/OnBoard
💡 Join 1,000 teenagers and make your first PCB with a $100 grant!

kenp-io/not-for-airpods-repairs
The content of this repository is licensed under the WTFPL License. Please have a close look at the terms before using this material.

Luos-io/luos_engine
Open-source and real-time orchestrator for cyber-physical-systems, to easily design, test and deploy embedded applications and digital twins.

Chrismettal/EleLab_v2
Cheap DIY lab system for hobbyists and the tinkering folk
