
2 layers96.6 × 82.8 mm

 krishivjoshi219-collab/Starbie
A custom pirate-themed interactive virtual pet console and environmental monitor powered by the Seeed Studio XIAO ESP32-C3 (based on the starbie) so basically I don't how to write a readme.dm so it might be um worst :C…
Starbie My first PCB is an open-source printed circuit board by krishivjoshi219-collab, from the krishivjoshi219-collab/Starbie repository on GitHub. It is a 2-layer board of 84.8 × 84.6 mm with 12 parts on 29 nets, routed with 177 tracks and 0 vias.
It is built around the DHT11. Its parts include 3 connectors, 2 resistors, 2 ICs, 2 switches and 1 diode. It belongs with the ESP32 and RISC-V boards of this library.
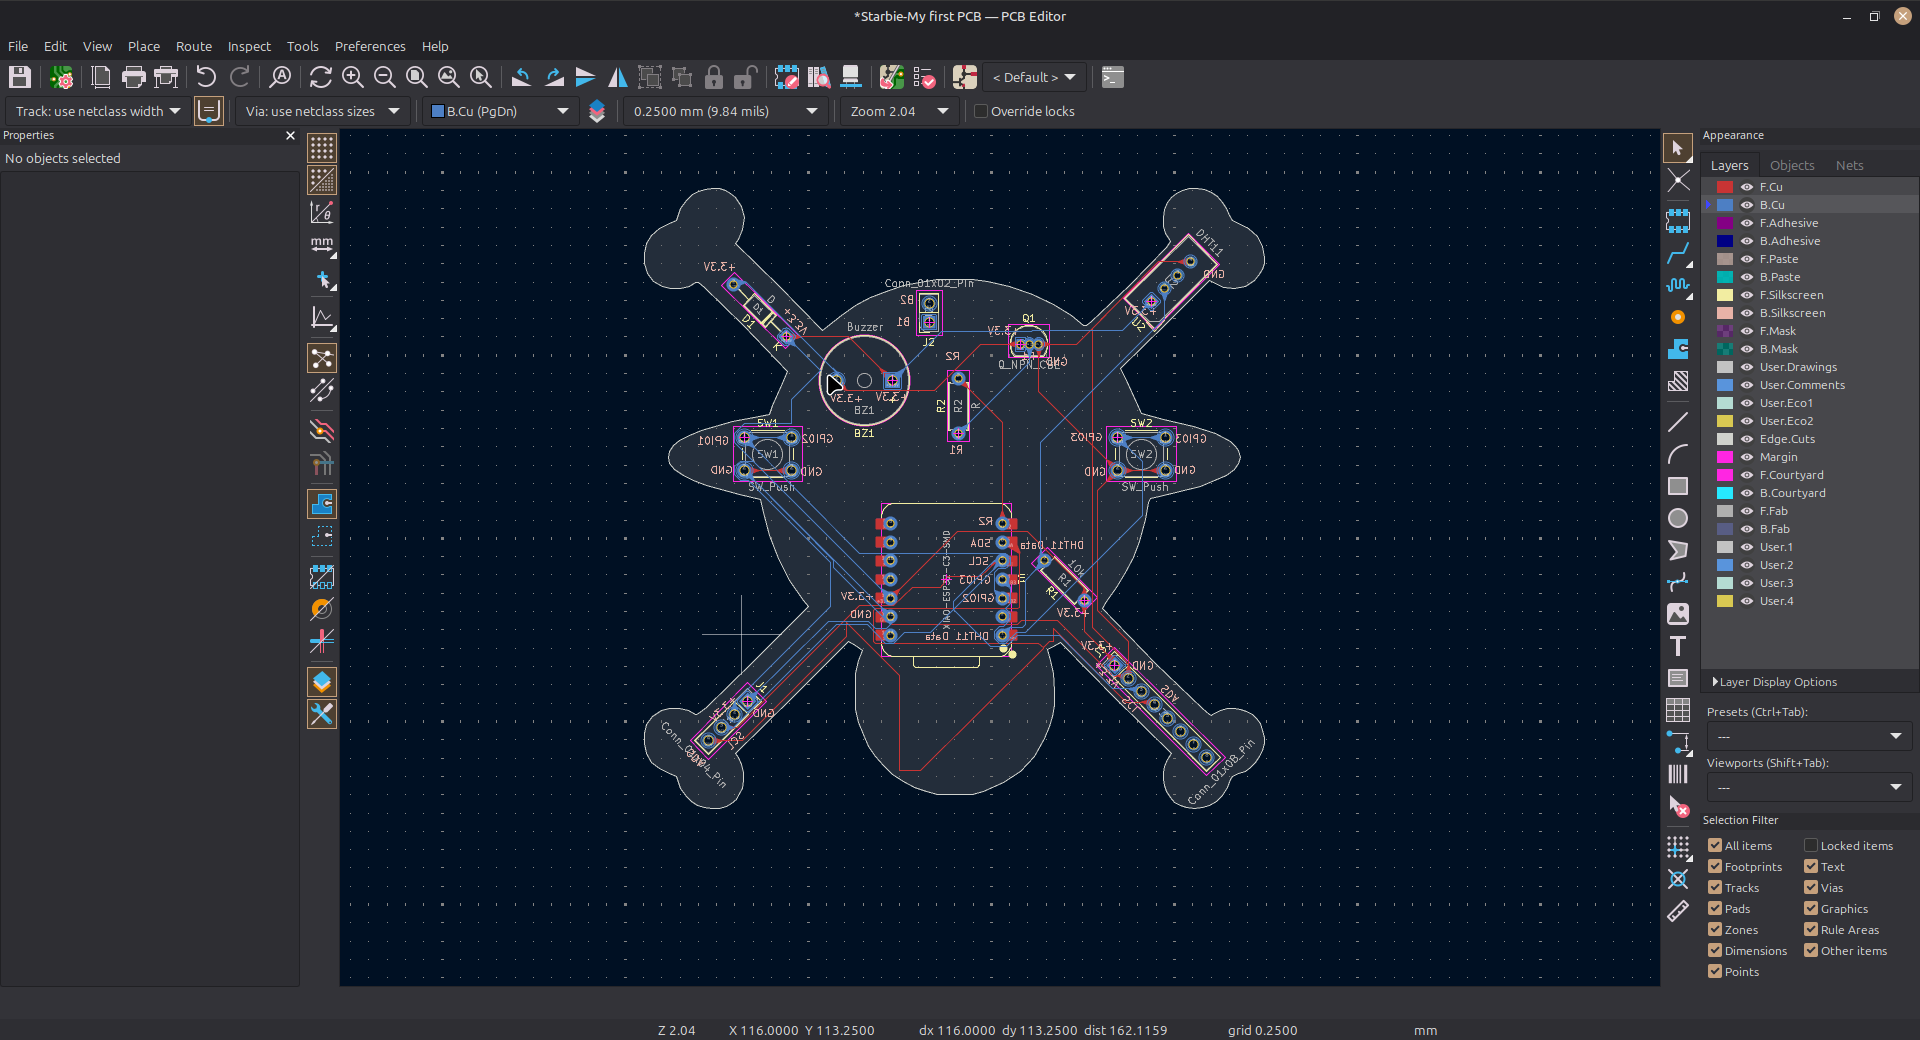
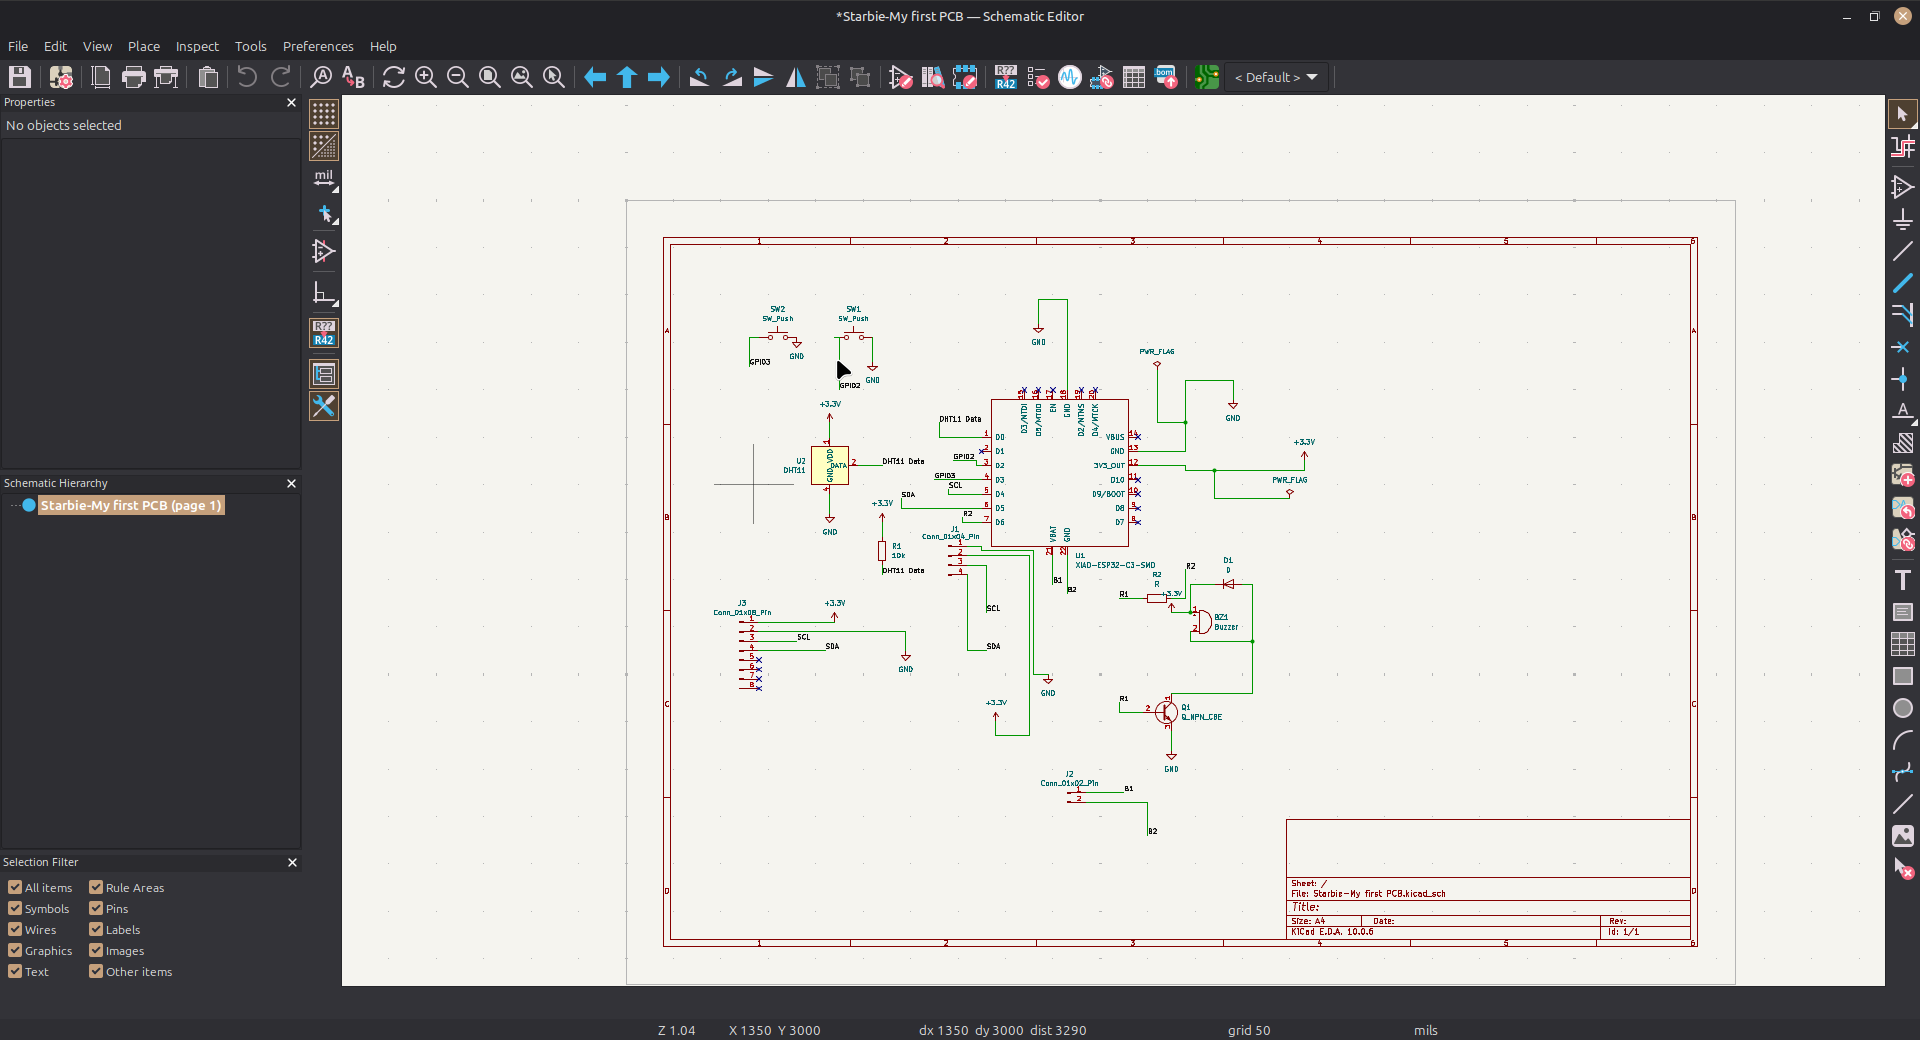
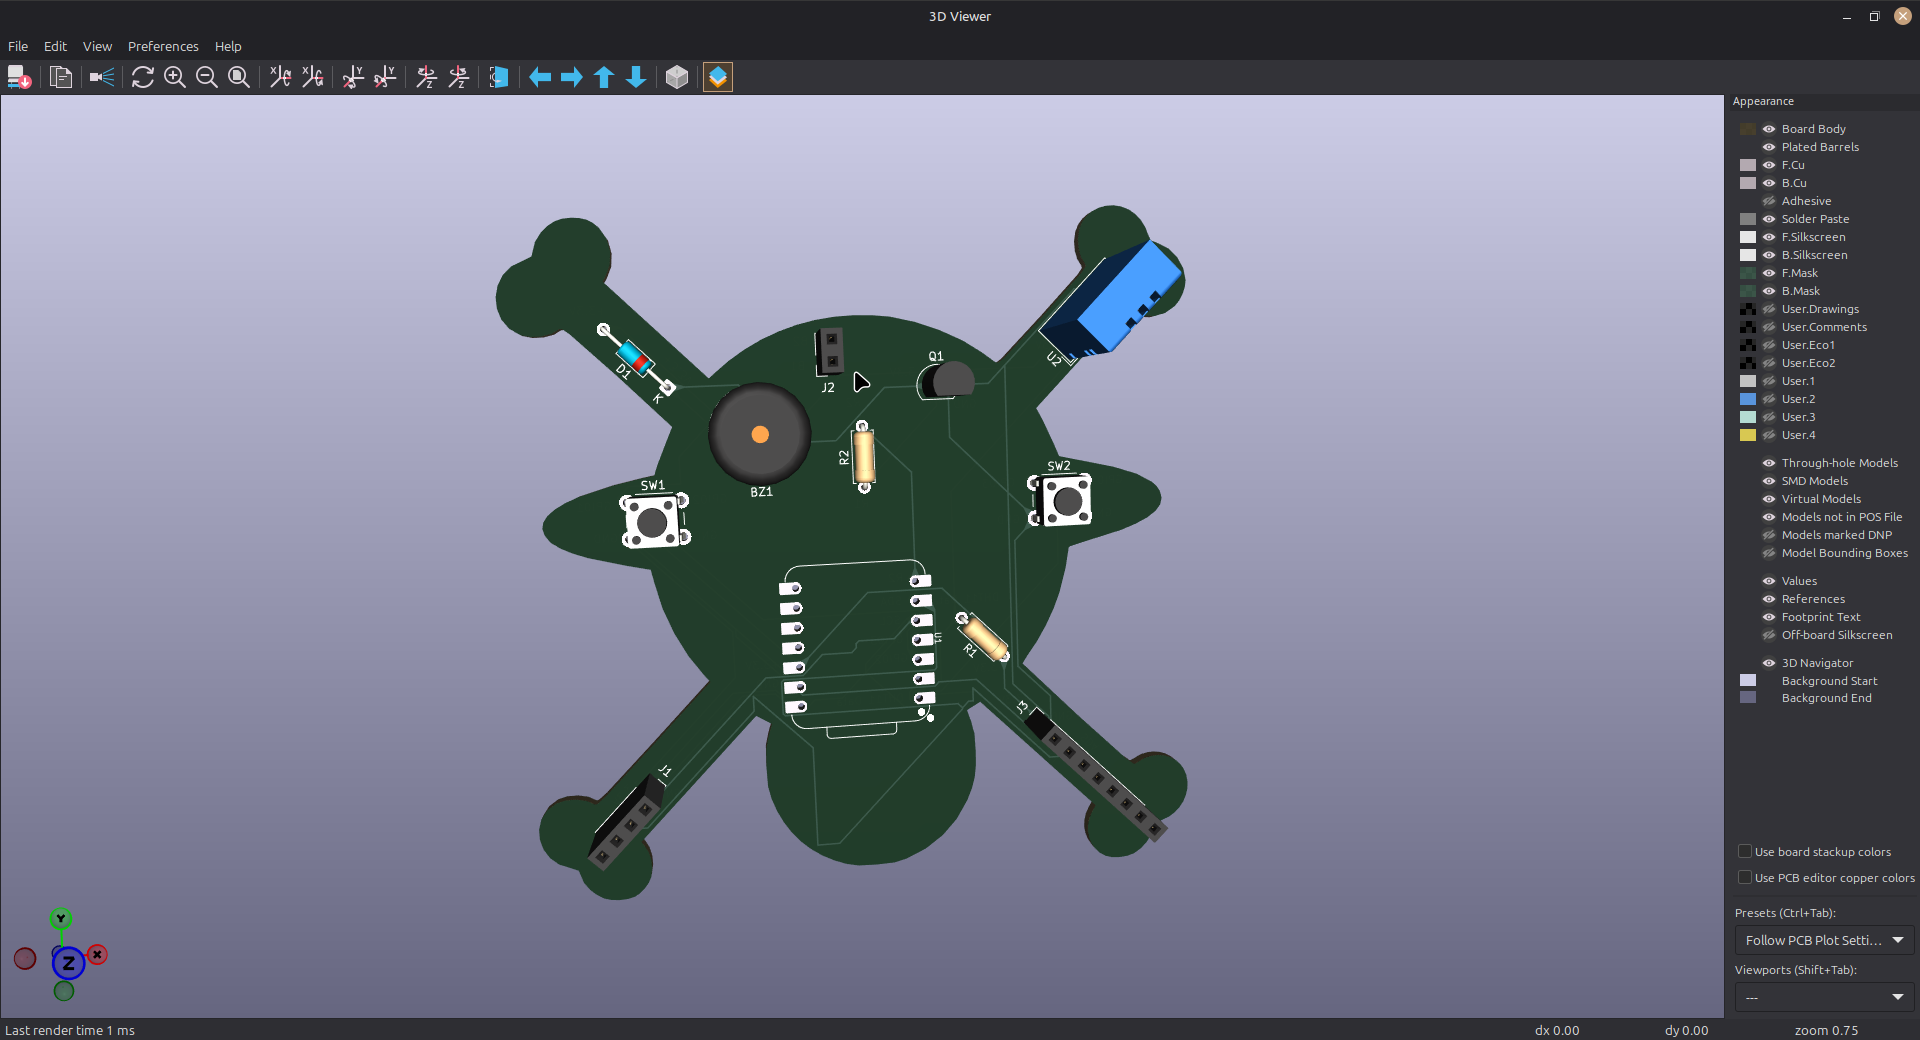
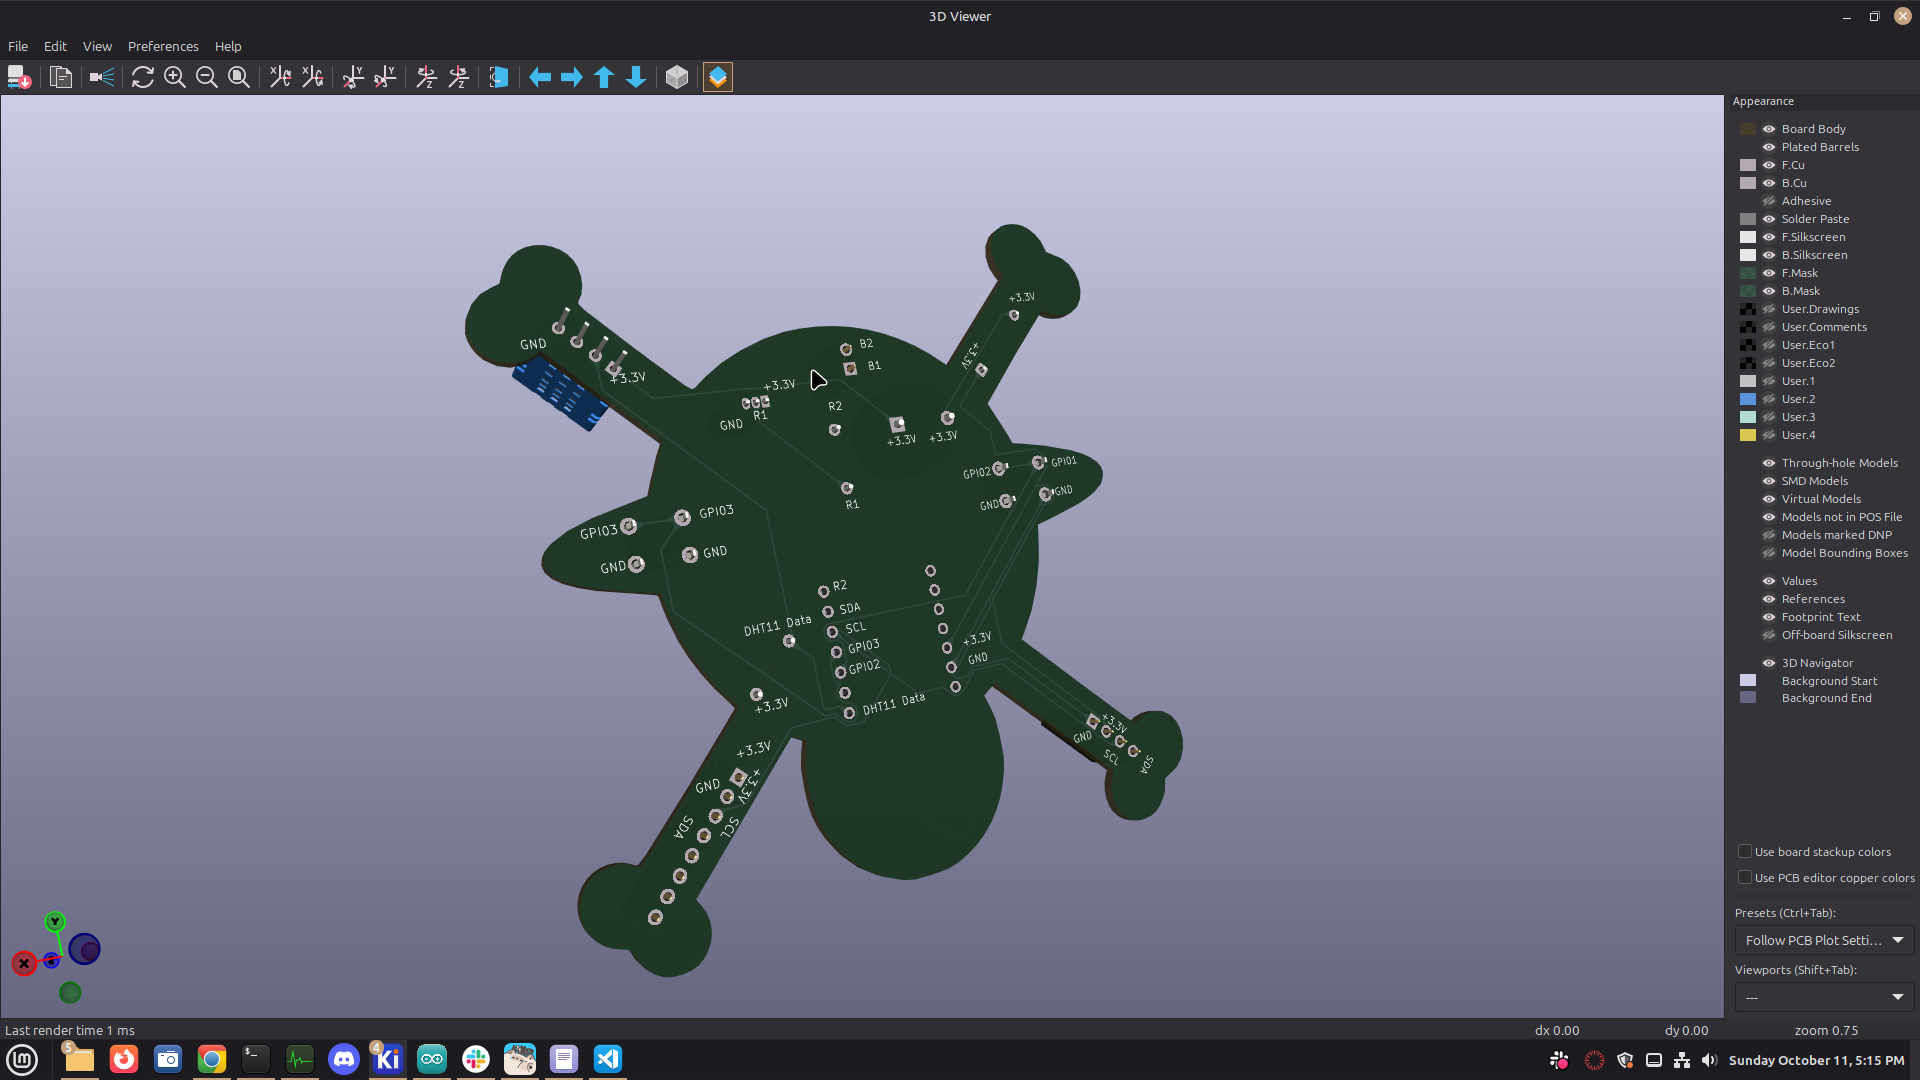
Here we hard following components: Mircrocontroller: I used a ESP32-C3 (I am new do i don't know much about mircrocontroller!!!!!)
Display: I used a 4 pin 0.96 OLED for displaying my luffy (i know that luffy is not a pet but uh whatever)
Push BUttons: I wired 2 push button on the side of the PCB so you can open the menu etc
Motion sensors: So luffy can react to any motion like falling etc
Temperature: Just shows the tempeature in the menu
| Function / Component | XIAO Pin Label | ESP32-C3 GPIO | Notes |
|---|---|---|---|
| DHT11 Data | D0 | GPIO 2 | 10kΩ pull-up to +3.3V |
| Button 1 (Menu) | D2 | GPIO 4 | Active-Low (Internal Pull-Up) |
| Button 2 (Stats) | D3 | GPIO 5 | Active-Low (Internal Pull-Up) |
| I2C SDA | D4 | GPIO 6 | Shared by OLED and MPU-6050 |
| I2C SCL | D5 | GPIO 7 | Shared by OLED and MPU-6050 |
| Buzzer Driver | D6 | GPIO 21 | Switches NPN base via 1kΩ resistor |
firmware/Starbie/Starbie.ino in the Arduino IDE.Adafruit GFX LibraryAdafruit SSD1306Adafruit MPU6050DHT sensor libraryFirst of all i am a beginner who is doing his first hardware project and first project without the use of AI (exluding writng C++ in the arduino IDE it is well under the 30% ai limit)
This is the first time i am writing a README.md !!
I was seriously like oh i could even do all this !! when i first opened the kicad for half life
Half Life is my first ysws and first project in which use of ai was minimal but still it was hard for me !!
But it was really fun too !! I started this week late just on wed and that also cuz of schools etc i was busy right now too!!
KiCAD is now really easy for me it doesn't feel like a new world now !!:D
But i had many dificuties too very much so this time instead of vibe coding i did everything myself just took help of the ai by asking questions like "How to do this ?" etc but i did the entire designing part myself and also i was really scarded like just how to write a README !!!!!!!!
But now it feels easy !!
And also i am able to explain the entire project myself !
What i found most boring was adding silkscreen !! Other than it i enjoyed everything most of ig
And solving the errors in the PCB design was the most frustating part !!! that 64nm error i talked about in my journal !!
Most fun part as PCB routing and adding the edge.cuts as the straw hats !!!!!!!!!!
After that i enjoyed the schemetic too and i generally enjoyed the debugging the KiCad errors too !
| Qty | Value | Footprint | References |
|---|---|---|---|
| 2 | SW_Push | Button_Switch_THT:SW_PUSH_6mm | SW1, SW2 |
| 1 | 10k | Resistor_THT:R_Axial_DIN0207_L6.3mm_D2.5mm_P7.62mm_Horizontal | R1 |
| 1 | Buzzer | Buzzer_Beeper:Buzzer_12x9.5RM7.6 | BZ1 |
| 1 | Conn_01x02_Pin | Connector_PinSocket_2.54mm:PinSocket_1x02_P2.54mm_Vertical | J2 |
| 1 | Conn_01x04_Pin | Connector_PinSocket_2.54mm:PinSocket_1x04_P2.54mm_Vertical | J1 |
| 1 | Conn_01x08_Pin | Connector_PinSocket_2.54mm:PinSocket_1x08_P2.54mm_Vertical | J3 |
| 1 | D | Diode_THT:D_DO-35_SOD27_P10.16mm_Horizontal | D1 |
| 1 | DHT11 | Sensor:Aosong_DHT11_5.5x12.0_P2.54mm | U2 |
| 1 | Q_NPN_CBE | Package_TO_SOT_THT:TO-92L_Inline | Q1 |
| 1 | R | Resistor_THT:R_Axial_DIN0207_L6.3mm_D2.5mm_P7.62mm_Horizontal | R2 |
| 1 | XIAO-ESP32-C3-SMD | Imported Parts:XIAO-ESP32-C6-DIP | U1 |

lansidev/conveyor-belt
Miniature 3D printed conveyor belt for simulation and fun working with sensors, all controllable with Raspberry Pi


ebrithiljonas/OMG_PCB
All in One PCB for the OpenMQTTGateway Project

GeorgK/SniffingTrinket
A room climate monitor using the Adafruit Trinket Pro

bhaskar9980/Guardian
Guardian is an advanced, fully automated hydroponics system designed to optimize plant growth and maximize yield.

Twistx77/Firefly
Open WIFI-enabled RGB lamp with temperature, humidity, suspended air particles and eCO2 sensors.

unla-investigacion-desarrollo/ecosistema-iot
Antes de desarrollar el sistema final, realizamos una etapa de exploración donde investigamos y experimentamos con las siguientes tecnologías:
It measures 84.8 × 84.6 mm and has 2 copper layers, 1.6 mm thick.
12 parts, built around the DHT11. The full list of its parts is on this page, with links to each part's symbol and footprint where PCBKit's library has them.
From the krishivjoshi219-collab/Starbie repository on GitHub, at the commit this page was made from: the board is hardware/Starbie-My first PCB.kicad_pcb and its schematic hardware/Starbie-My first PCB.kicad_sch. PCBKit opens the board in the browser, with nothing to install.
Its repository states no licence, so its author keeps all rights: ask krishivjoshi219-collab before reusing the design.