
2 layers65 × 56 mm
IGrillRPiSSRCtl rev sD
kins-dev/igrill-smoker
Using the iGrill as a control unit for a DIY smoker
42 parts3

 kins-dev/igrill-smoker3
Using the iGrill as a control unit for a DIY smoker
IGrillRPiSSRCtl rev sE is an open-source printed circuit board by kins-dev, from the kins-dev/igrill-smoker repository on GitHub. It is a 2-layer board of 65 × 56 mm with 65 parts on 45 nets, routed with 342 tracks and 9 vias.
It is built around the MMBT3904LT1G and M2.5. Its parts include 26 resistors, 9 transistors, 7 diodes, 2 connectors and 1 switch.

🔴 Note: You are 100% responsible for ensuring safe food practices are followed.
🔴 Check and modify temperatures as appropriate
Create a low cost smoking unit that can be controlled/monitored via the internet.
See the design document.
Prices as of June 10th, 2019. Some items like the hotplates or skillet can be found at Goodwill instead. Total cost (new) $287.96. Every item can be used for more than one task. Meat, wood chips, and extension cords not included.
You must have:
Optional items:
Note: This has been tested using a Raspberry Pi B 3 with Raspian Stretch. Your milage may vary.
This guide assumes you've done the basic setup of network and updated the system on your Raspberry Pi. Remember, you probably want to enable ssh access. You must have your iGrill ready to complete the installation and setup. This does require python 3 to be installed.
Either download and run auto-install.sh from the installation directory or run the following commands:
git clone https://git.kins.dev/igrill-smoker
cd igrill-smoker/install
bash run-install.sh
After starting the run-install.sh script, you should turn on your iGrill v2. Installation shouldn't take long and the device is needed for setup.
Copy config/iGrill_config.example.ini to config/iGrill_config.ini. Update iGrill_config.ini with any system settings you want to change.
Here is what that file looks like:
# Copyright (c) 2019:   Scott Atkins <scott@kins.dev>
#                       (https://git.kins.dev/igrill-smoker)
# License:              MIT License
#                       See the LICENSE file
[iGrill]
# can be Standard or Mini
Type=Standard

[Probes]
# For iGrill mini set food probe to 0 and smoke probe to 1

# Food probe must be set between 0 and 4, where 0 means the
# probe is disabled.  The left most probe is 1 and right most
# is 4 on the iGrill 2/3
#
# If you disable the food probe, you must use a stage that
# is iGrill mini compatible (see stage file) or disable stages
FoodProbe=1

# Smoke probe must be set between 1 and 4.  The left most probe
# is 1 and right most is 4 on the iGrill 2/3
SmokeProbe=4

[Logging]Edit the chart.html file in the website_example directory to suit your needs and copy it to your /var/www/html directory.
The iGrill mini has a single probe. That means you can either monitor the smoke temperature or the food temperature. Since this is controlling a plug for the smoke, you should not monitor the food temperature via the iGrill mini probe. Follow the instructions in iGrill_config.example.ini for setting the probe values.
Start a smoking session by running:
./start_smoking.shSecure your instance of lighttpd using the instructions at https://github.com/galeone/letsencrypt-lighttpd/blob/master/renew.sh. You may want a wildcard certificate and you can find instructions via https://asknetsec.com/generate-lets-encrypt-free-wildcard-certificate-using-certbot-ubuntu-16-04/. Check your SSL setup via https://www.ssllabs.com/ssltest/index.html.
Also, it may be a good idea to setup lighttpd such that *.csv/*.json is not cached. Here's an example lighttpd config file:
server.modules = (
        "mod_expire",
        "mod_access",
        "mod_alias",
        "mod_compress",
        "mod_redirect",
        "mod_setenv",
        "mod_dirlisting",
)

server.document-root                            = "/var/www/html"
server.upload-dirs                              = ( "/var/cache/lighttpd/uploads" )
server.errorlog                                 = "/var/log/lighttpd/error.log"
server.pid-file                                 = "/var/run/lighttpd.pid"
server.username                                 = "www-data"
server.groupname                                = "www-data"
server.port                                     = 80

index-file.names                                = ( "index.php", "index.html", "index.lighttpd.html" )
url.access-deny                                 = ( "~", ".inc" )
static-file.exclude-extensions                  = ( ".php", ".pl", ".fcgi" )

compress.cache-dir                              = "/var/cache/lighttpd/compress/"
compress.filetype = ( "application/javascript", "text/css", "text/html", "text/plain" )1.3 Uses TP-Link Kasa for power control. 1.4 includes a brand new power control board that plugs into the Raspberry Pi which will allow much more fine grain control of the smoker temperature.
This is necessary because the relay in the TP-Link won't handle the number of on/off cycles required. Instead a solid state relay is used. A word of caution, this is not UL rated or certified. If you don't know which end of the soldering iron to hold, then you probably should just stick with 1.3.
The TP-Link Kasa plug will still be used as a failsafe device in the system.
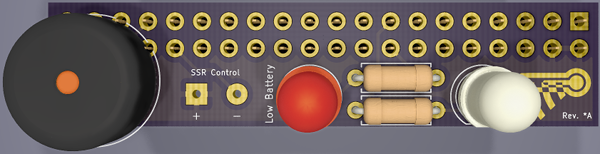
This board has a buzzer, two LEDs and connection points for the solid state relay. It sits off the edge of the Raspberry Pi GPIOs.
This board should not be used.
Features
Defects
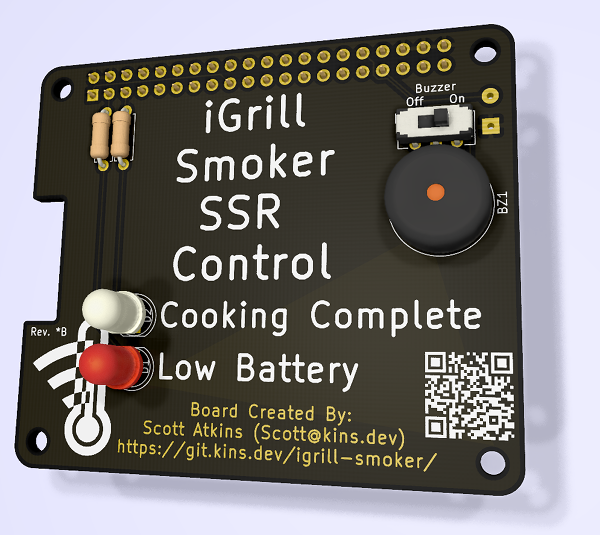
This board has a buzzer, two LEDs and connection points for the solid state relay. It sits on the Raspberry Pi GPIOs.
This board should not be used.
New Features
Defects
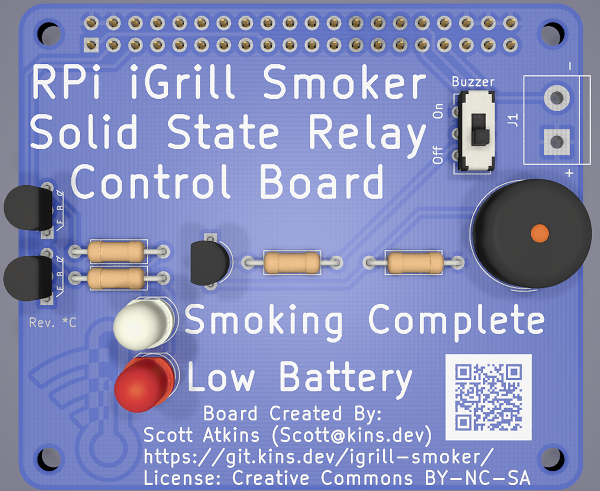
This board has a buzzer, two LEDs and a terminal block for the solid state relay. It sits on the Raspberry Pi GPIOs.
This board is currently in production and has not been tested.
New Features
Fixes
Defects
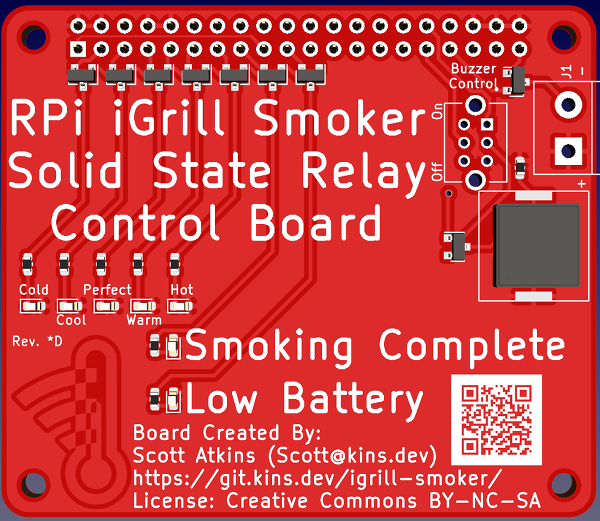
This board has a buzzer, seven LEDs and connection points for the solid state relay. It sits on the Raspberry Pi GPIOs.
The boards back from production are bad
New Features
Defects
TODO: Add part list
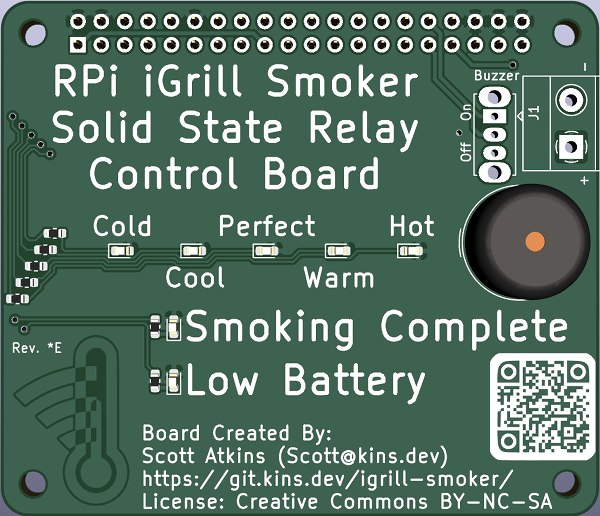
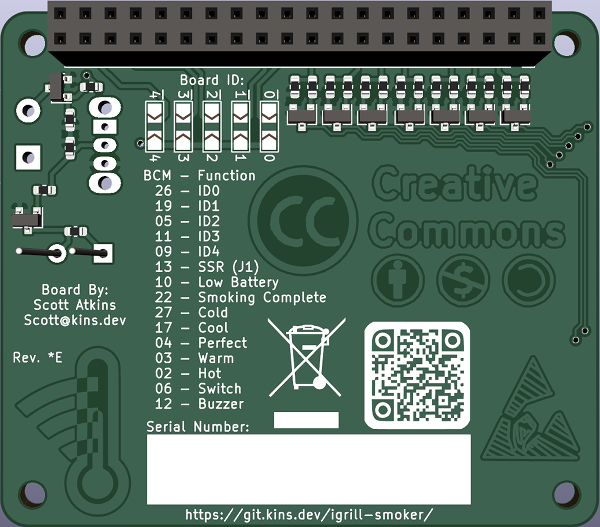
This board has a buzzer, seven LEDs and connection points for the solid state relay. It sits on the Raspberry Pi GPIOs. It also has jumpers for a board id number
This board is not yet in production and has not been tested.
New Features
Defects
TODO: Add part list
| Qty | Value | Footprint | References |
|---|---|---|---|
| 10 | 1kΩ | Resistor_SMD:R_0603_1608Metric | R2, R4, R6, R8, R10, R11, R13, R15, R16, R17 |
| 9 | 10kΩ | Resistor_SMD:R_0603_1608Metric | R18, R19, R20, R21, R22, R23, R24, R25, R26 |
| 9 | MMBT3904LT1G | Package_TO_SOT_SMD:SOT-23 | Q1, Q2, Q3, Q4, Q5, Q6, Q7, Q8, Q9 |
| 7 | 180Ω | Resistor_SMD:R_0603_1608Metric | R1, R3, R5, R7, R9, R12, R14 |
| 5 | Jumper_3_Open | Jumper:SolderJumper-3_P2.0mm_Open_TrianglePad1.0x1.5mm_NumberLabels | JP1, JP2, JP3, JP4, JP5 |
| 4 | M2.5 | MountingHole:MountingHole_2.7mm_M2.5 | MK1, MK2, MK3, MK4 |
| 2 | LOGO | iGrillRPiSSRCtl-rev-sE:WiFiThem_18x12 | G***, G*** |
| 2 | LOGO | iGrillRPiSSRCtl-rev-sE:github-qr-11.7mm | G***, G*** |
| 1 | Buzzer | Buzzer_Beeper:Buzzer_TDK_PS1240P02BT_D12.2mm_H6.5mm | BZ1 |
| 1 | Cold | LED_SMD:LED_0603_1608Metric | D3 |
| 1 | Conn_02x20_Odd_Even | Connector_PinSocket_2.54mm:PinSocket_2x20_P2.54mm_Vertical | P1 |
| 1 | Cool | LED_SMD:LED_0603_1608Metric | D4 |
| 1 | Hot | LED_SMD:LED_0603_1608Metric | D7 |
| 1 | Low Battery | LED_SMD:LED_0603_1608Metric | D1 |
| 1 | Perfect | LED_SMD:LED_0603_1608Metric | D5 |
| 1 | SW_SPDT | Button_Switch_THT:SW_Slide_1P2T_CK_OS102011MS2Q | SW1 |
| 1 | Screw_Terminal_01x02 | TerminalBlock_Phoenix:TerminalBlock_Phoenix_MKDS-1,5-2-5.08_1x02_P5.08mm_Horizontal | J1 |
| 1 | Smoking Complete | LED_SMD:LED_0603_1608Metric | D2 |
| 1 | Warm | LED_SMD:LED_0603_1608Metric | D6 |
The 59 most common of 65 parts.
kins-dev/igrill-smoker
Using the iGrill as a control unit for a DIY smoker

kins-dev/igrill-smoker
Using the iGrill as a control unit for a DIY smoker

kins-dev/igrill-smoker
Using the iGrill as a control unit for a DIY smoker


antmicro/com-express-7-baseboard
This project contains open hardware design files for a baseboard supporting COM Express 7 modules. The board breaks-out major communications and peripheral interfaces provided by the standard.

nuerolynx/embedded-systems-lab
Arduino UNO R4 WiFi and ESP32 prototypes for access control, automation, displays, monitoring, and Bluetooth audio.
gatekeep/KFDToolSW_NET4.0
Quick test to see feasibility to downgrade the KFDTool GUI to .NET 4.0

zarlicho/Qris-soundbox-esp32
QRIS Soundbox adalah sistem notifikasi pembayaran realtime yang dikembangkan untuk menerima dan memproses notifikasi pembayaran QRIS melalui protokol MQTT.


sergeyvfx/GPSDOMonitor
A tiny module which is connecting to a databus of GPSDO modules with the goal to visualize when the PLL is locked, GPS time is stabilized and things like this.
It measures 65 × 56 mm and has 2 copper layers, 1.6 mm thick.
65 parts, built around the MMBT3904LT1G and M2.5. The full list of its parts is on this page, with links to each part's symbol and footprint where PCBKit's library has them.
From the kins-dev/igrill-smoker repository on GitHub, at the commit this page was made from: the board is kicad/iGrillRPiSSRCtl-revsE/iGrillRPiSSRCtl-rev-sE.kicad_pcb. PCBKit opens the board in the browser, with nothing to install.
Its repository states no licence, so its author keeps all rights: ask kins-dev before reusing the design.