Skip to the content
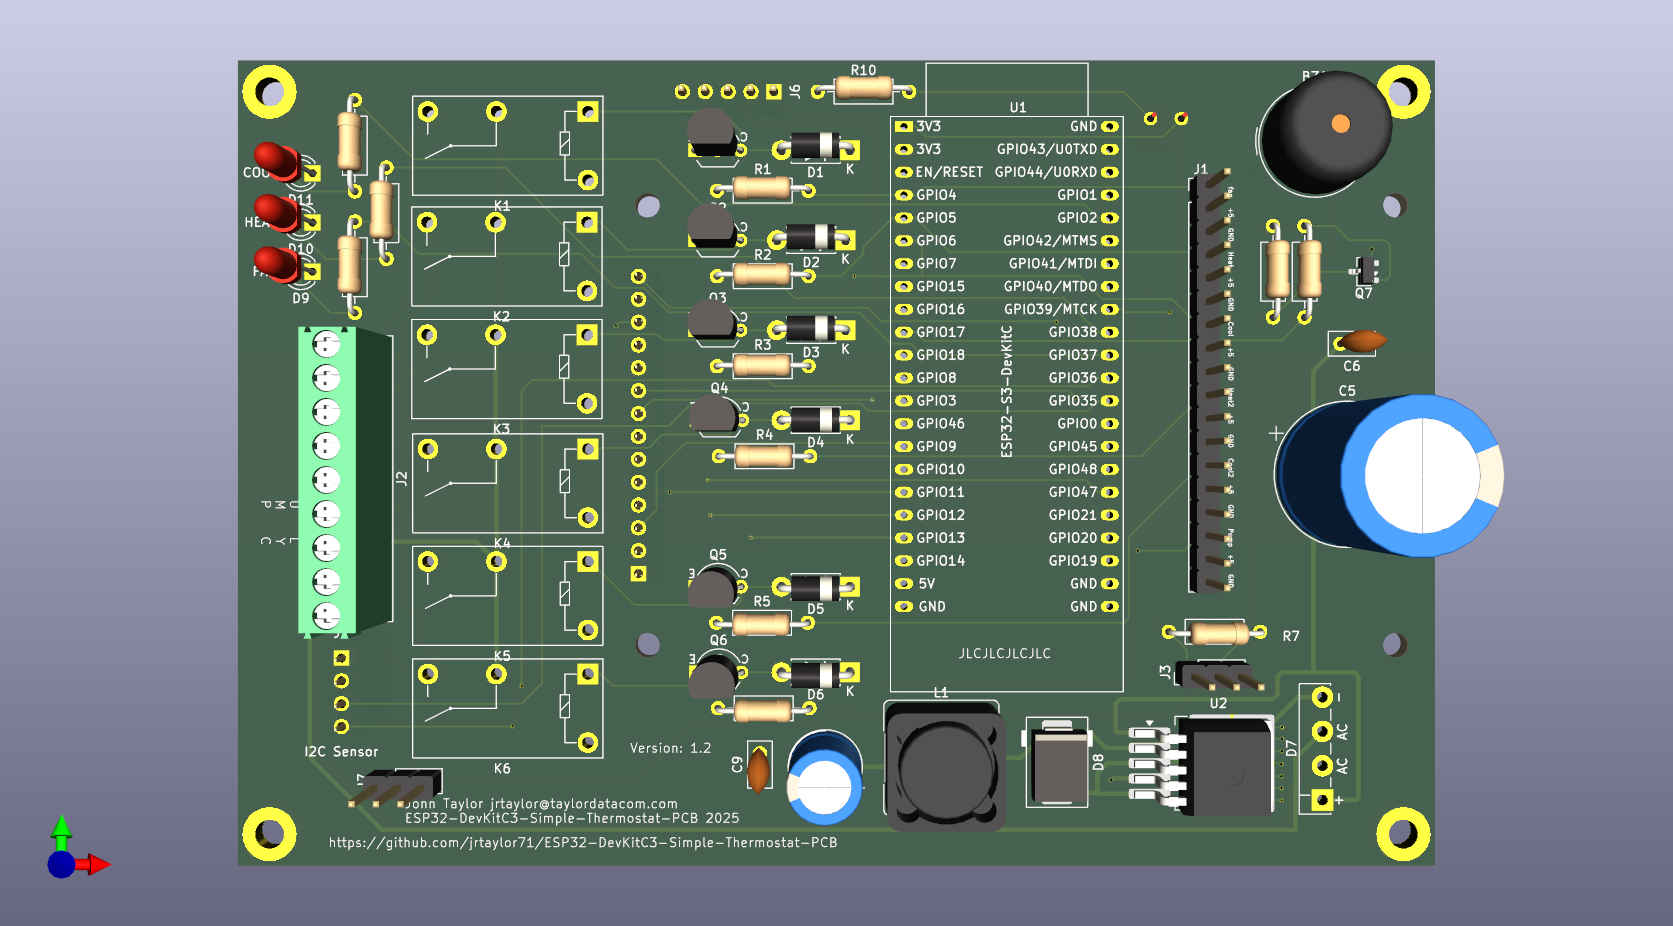
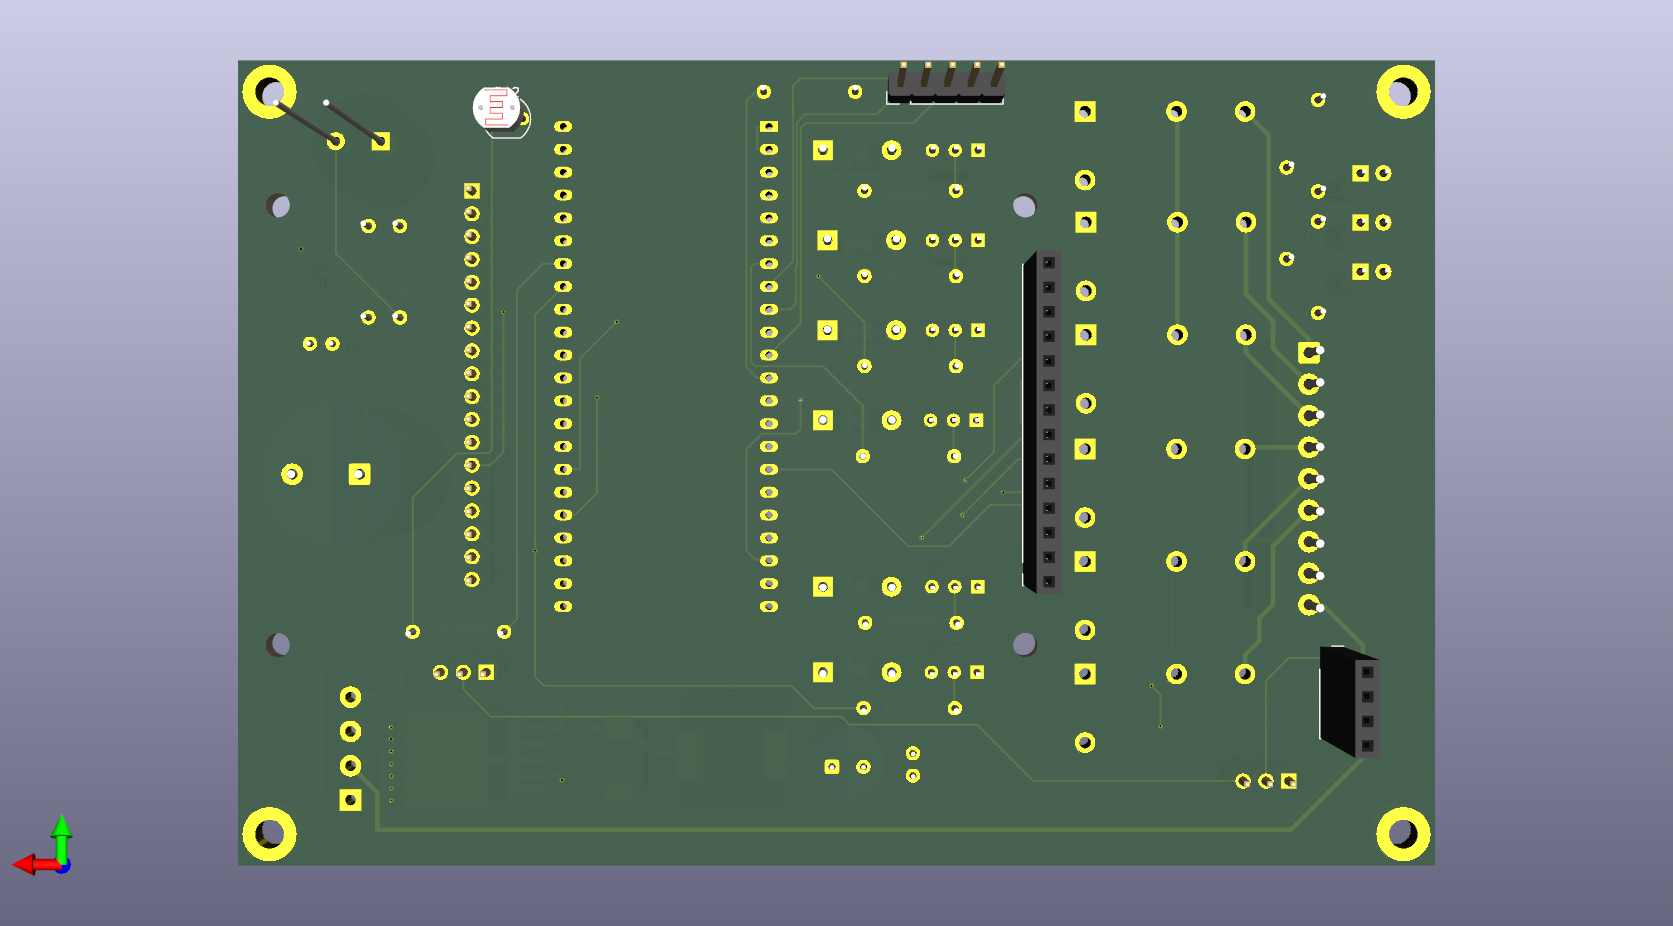
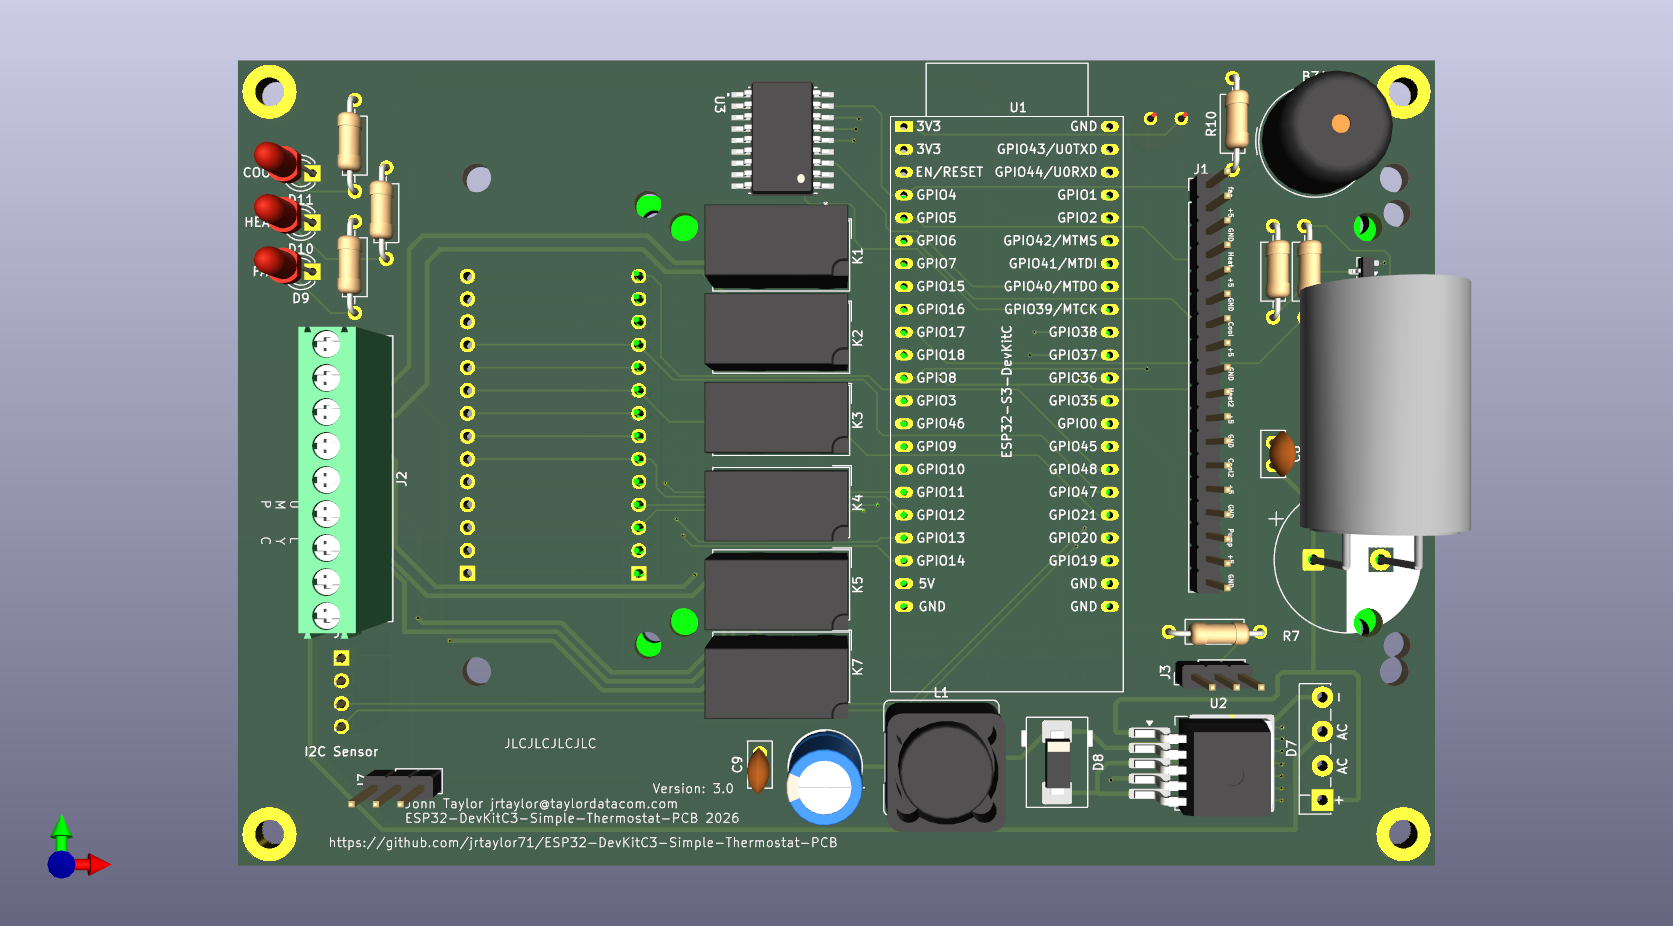
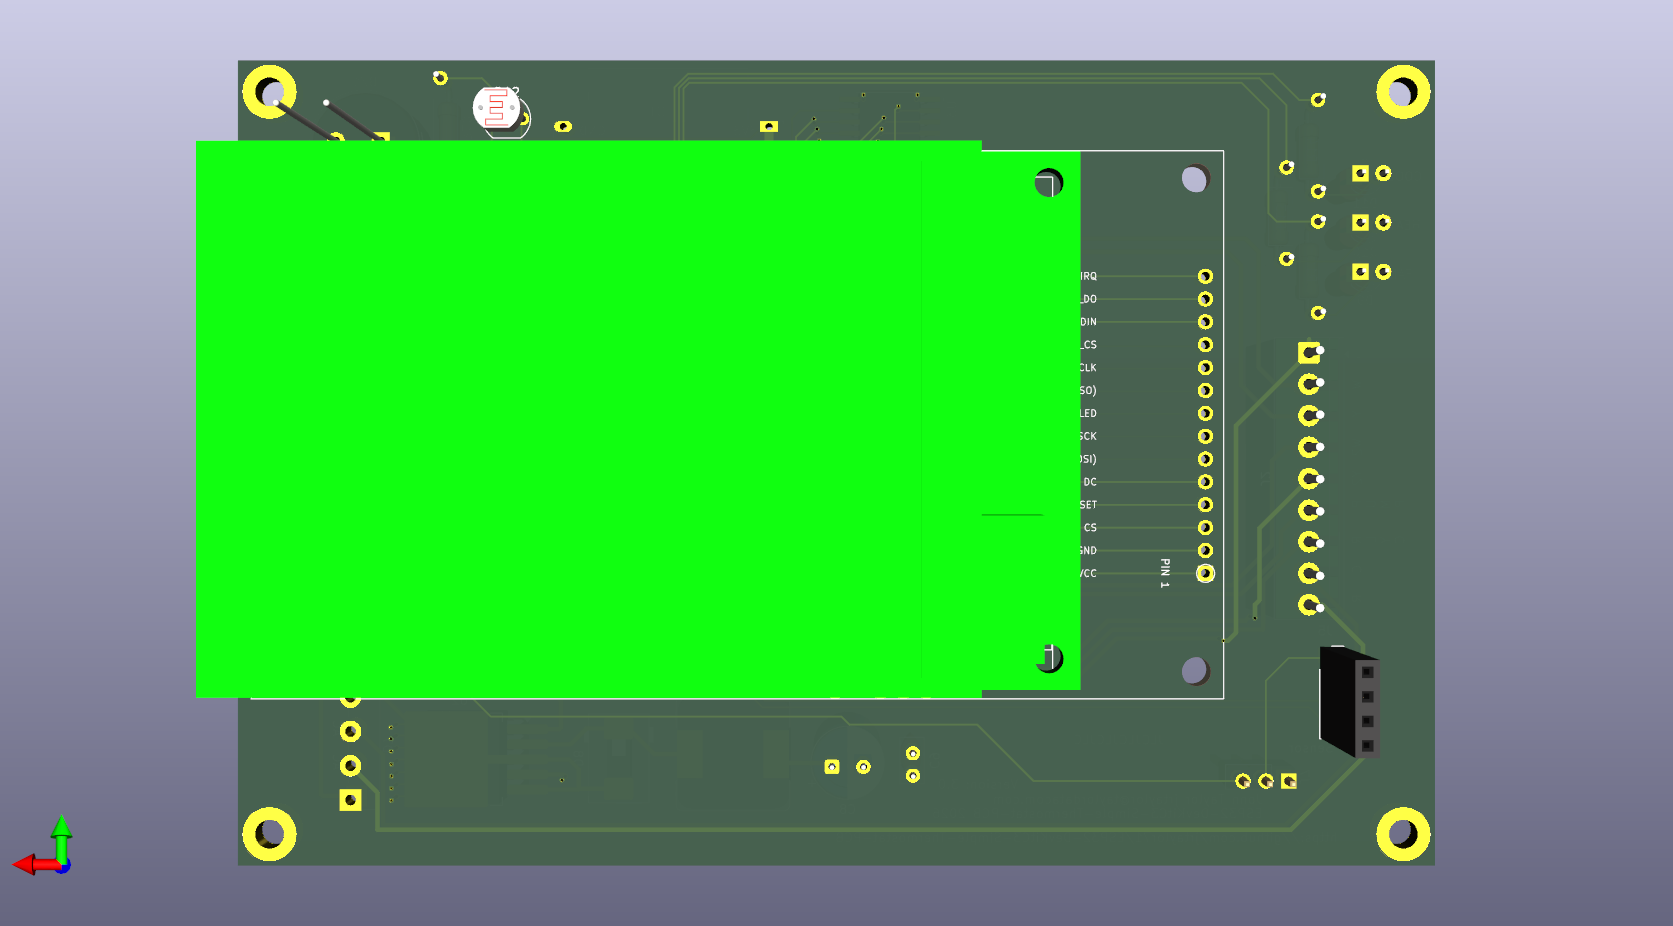
4 layers133 × 89.5 mmESP32-DevKitC3-Simple Thermostat PCB, the printed circuit board in 3D

ESP32-DevKitC3-Simple Thermostat PCB

jrtaylor71/ESP32-DevKitC3-Simple-Thermostat-PCB2

ESP32-DevKitC3 Simple Thermostat with PCB

Size
133 × 89.5 mm
Copper layers
4
Thickness
1.6 mm
Parts
61
Nets
69
Pads
227
Tracks, vias
397, 22
Pours
2
Routed
Yes
KiCad
KiCad 9.0 (file 20241229)
Created
6 Dec 2025
Updated
14 Sep 2026

Overview

ESP32-DevKitC3-Simple Thermostat PCB is an open-source printed circuit board by jrtaylor71, from the jrtaylor71/ESP32-DevKitC3-Simple-Thermostat-PCB repository on GitHub. It is a 4-layer board of 133 × 89.5 mm with 61 parts on 69 nets, routed with 397 tracks and 22 vias.

It is built around the ESP32-S3-DEVKITC-1-N8, LM2596S-5.0 and DS18B20, with the G5Q-1A, 470UF 10V 6.3*7 and GL5537 among its other parts. Its parts include 14 resistors, 11 diodes, 7 transistors, 7 connectors and 6 switches. It belongs with the home automation and IoT boards and the ESP32 boards of this library.

Main components

8

README

README.md

ESP32-S3-Simple-Thermostat

A comprehensive, feature-rich simple thermostat system built on the ESP32 platform with professional PCB design. Perfect for DIY smart home automation with full Home Assistant integration.

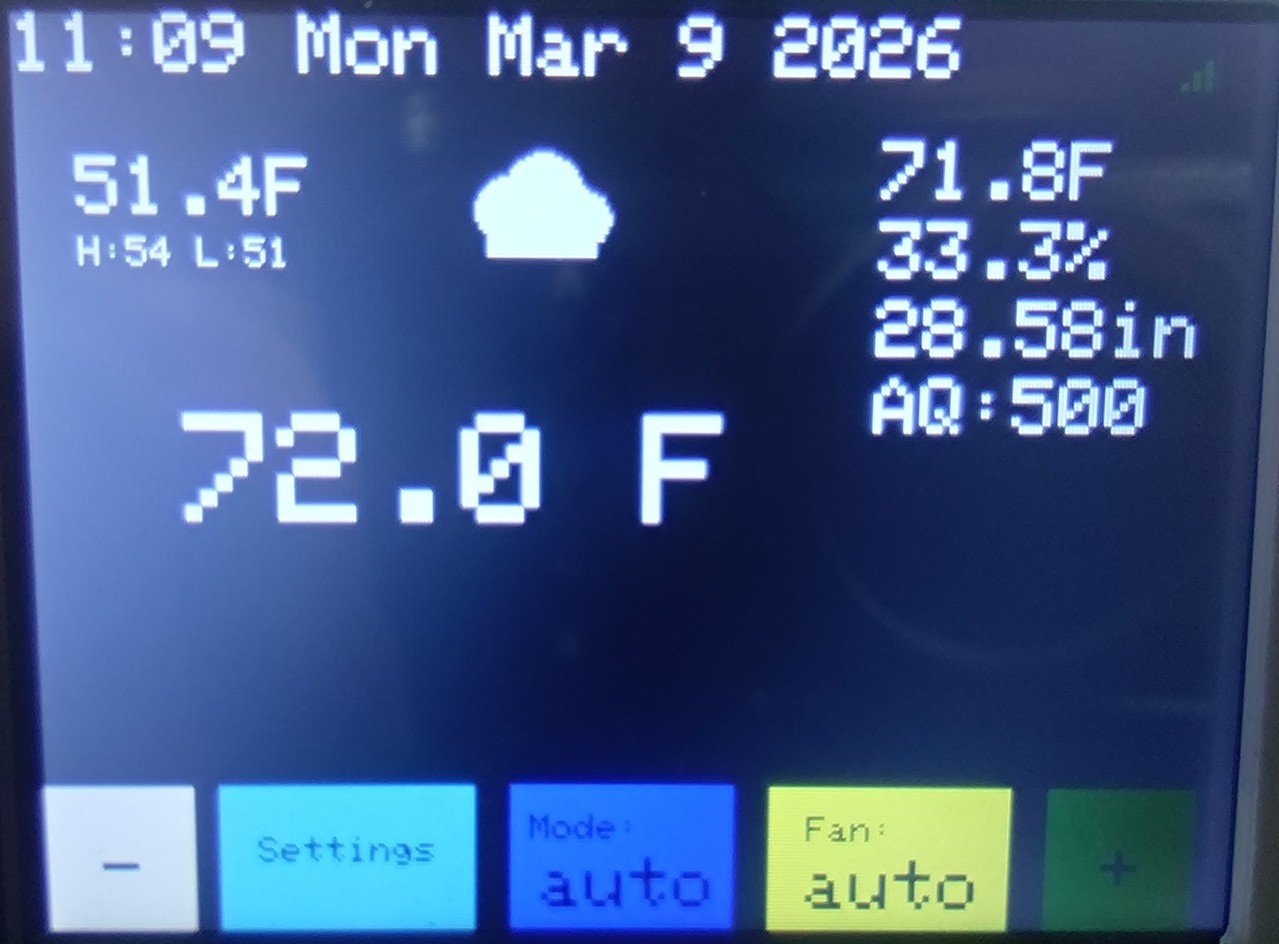
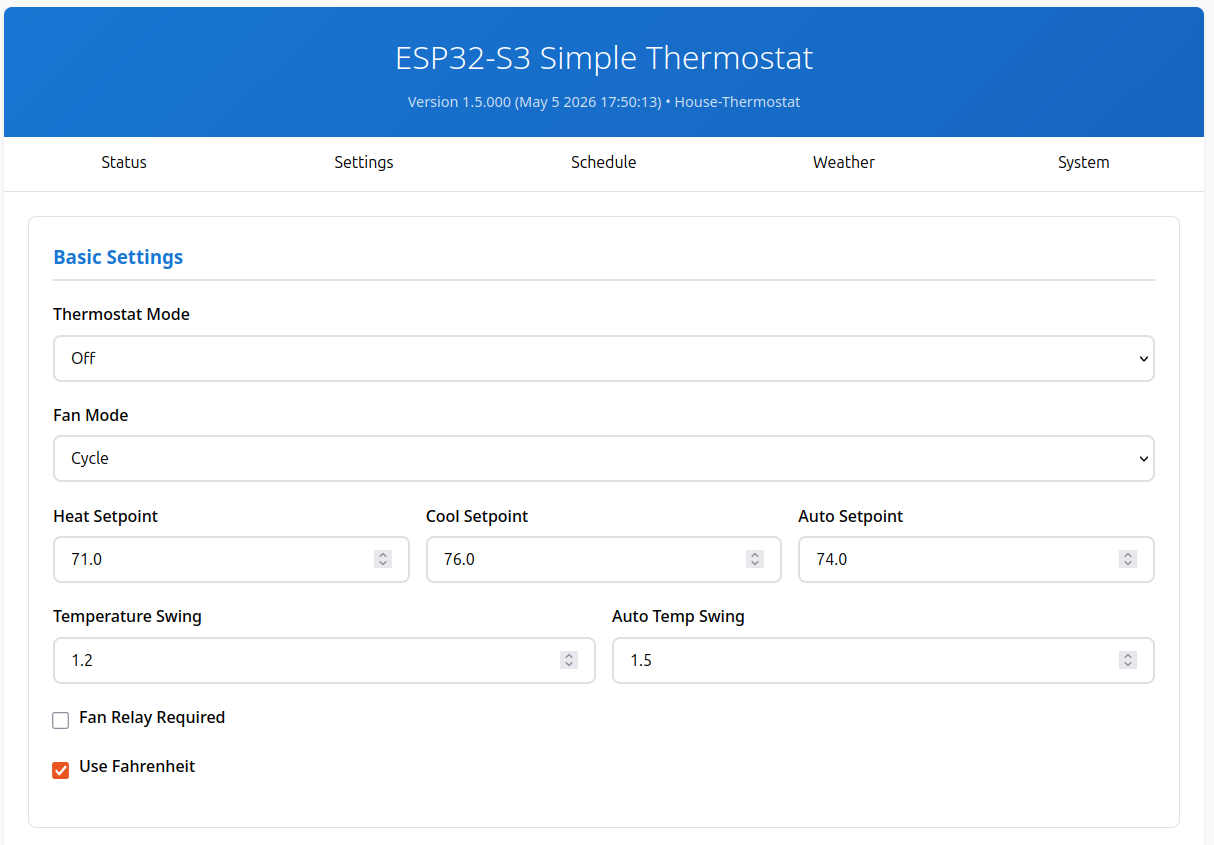
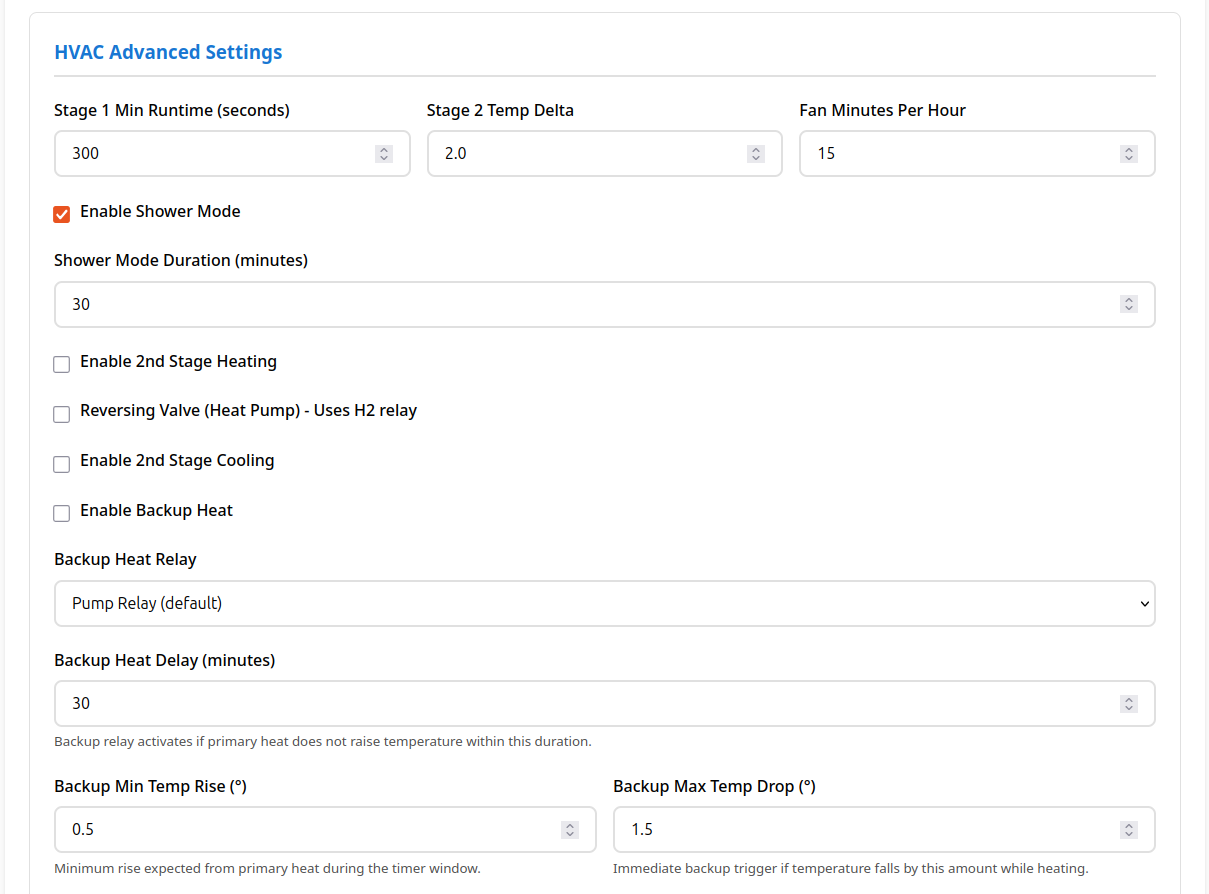
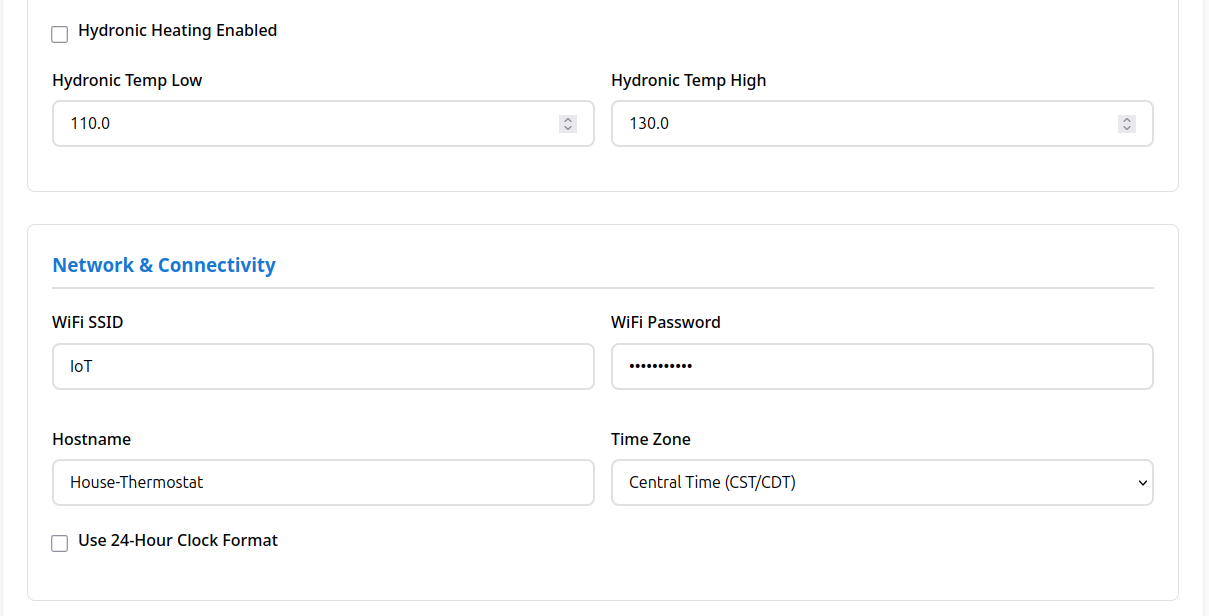
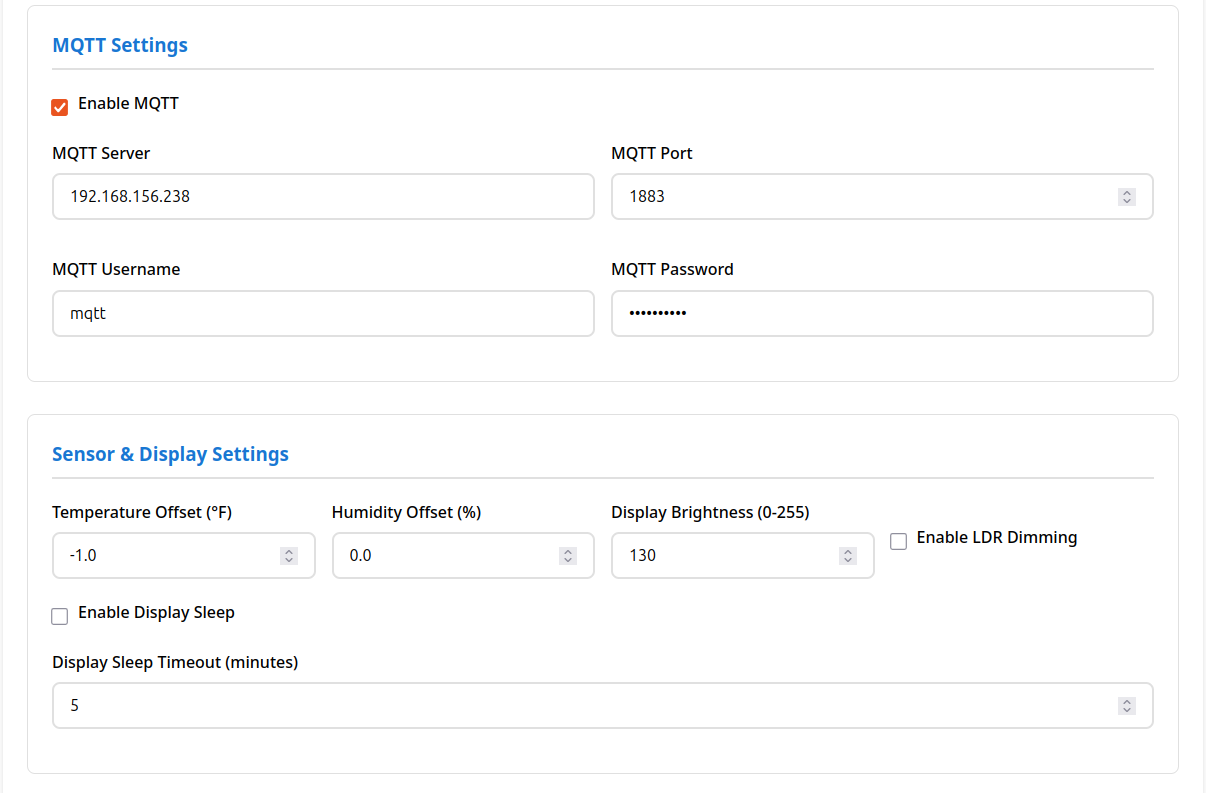
Main-Display Settings1 Settings2 Settings3 Settings4

🌟 Key Features

  • 📱 Local Touch Control: ILI9341 TFT LCD with intuitive touch interface
  • 🏠 Smart Home Ready: Full MQTT integration with Home Assistant auto-discovery and climate entity support
  • 📅 Bidirectional Schedule Sync: 7-day schedules with day/night periods, HA helper automation, and live two-way update flow
  • 🌡️ Multiple Sensors: AHT20/BME280 ambient temperature and humidity plus DS18B20 hydronic water sensing
  • ⚡ Multi-Stage HVAC: Support for 2-stage heating and cooling, stage timing, delta thresholds, and stage 2 runtime logic
  • 🌍 Regional HVAC Behavior: Switchable US mode (standard temperature-driven cooling) or EU mode (adds optional humidity-driven dehumidification support alongside temperature control)
  • 🔄 Heat Pump Ready: Reversing valve support and heat-pump-compatible staging logic
  • 🔥 Backup Heat Monitoring: Auxiliary heat fallback logic with delay windows and temperature-drop detection
  • 💨 Advanced Fan Control: Auto, continuous, and scheduled cycling modes with independent heat/cool fan relay requirements
  • 🔥 Separate Heat/Cool Fan Logic: Configure whether the fan relay is needed for heating, cooling, or both for legacy HVAC systems
  • 🧯 Hydronic Safety Protection: DS18B20 water monitoring with lockout logic that blocks unsafe fan/heating operation and protects radiant systems
  • 🚿 Shower Mode: Pause heating for 5-120 minutes with countdown timer and buzzer alert
  • 🌤️ Weather Integration: OpenWeatherMap and Home Assistant weather with color-coded icons, current conditions, and display updates
  • 🏢 Multi-Thermostat Support: Scale from single-device installs to multi-device Home Assistant automation setups
  • 🌐 Modern Web Interface: Complete tabbed interface with embedded scheduling, status monitoring, OTA upload, and settings management
  • 📡 Offline Operation: Full functionality without WiFi connection or internet access
  • 🔧 Professional PCB: Custom PCB design for clean, permanent installation and compact integration
  • 🔄 OTA Updates: Over-the-air firmware updates with real-time progress tracking and reboot recovery
  • 🔒 Factory Reset: Built-in reset capability via boot button for clean default recovery
  • 🎭 Motion Detection: LD2410 24GHz mmWave sensor for automatic display wake and occupancy-aware screen behavior
  • 🔊 Audible Alerts: Buzzer feedback for shower mode, relay events, and user interaction cues
  • 🧠 Reliability Features: Watchdog reset, anti-flicker display refresh, I2C protection, and graceful sensor recovery

�️ Operating Modes

Thermostat Modes

  • Off: All heating, cooling, and fan demand relays are disabled
  • Heat: Single heat setpoint with configurable swing (hysteresis) to prevent short-cycling
  • Cool: Single cool setpoint with configurable swing (hysteresis) to prevent short-cycling
  • Auto: Single setpoint with a wider dead-zone swing; heating and cooling only activate once the temperature moves outside the dead-zone and turn off at the setpoint boundary rather than immediately on dead-zone re-entry

Fan Modes

  • Auto: Fan runs only when heating or cooling demand is active, based on the independent heat/cool fan relay requirement settings
  • On: Fan runs continuously regardless of HVAC demand
  • Cycle: Fan runs on a repeating schedule (configurable minutes per hour) even without active heating or cooling demand

Regional HVAC Modes

  • US Mode: Standard temperature-driven heating and cooling control
  • EU Mode: Adds an optional humidity-driven dehumidification assist that runs alongside temperature control, using a configurable humidity setpoint, deadband, and dedicated relay selection

Schedule Modes

  • Scheduled: Setpoints automatically follow the active day/night period for the current day of week
  • Manual Override: Adjusting a setpoint while a schedule is active temporarily overrides the schedule for a fixed duration before resuming normal scheduled behavior
  • Disabled: Schedule following can be turned off entirely in favor of fixed manual setpoints

Shower Mode

  • Temporarily pauses heating for a configurable duration (5-120 minutes)
  • Displays a live countdown timer on the touch screen while active
  • Buzzer alert signals when the countdown is about to end
  • Can be toggled directly from the touch screen setpoint control when enabled in settings

�🚀 Quick Start

  • PCB V1.x Hardware-Main-Display Hardware-Main-Display

  • PCB V3.x Hardware-Main-Display Hardware-Main-Display

Hardware Requirements

  • ESP32-S3-WROOM-1-N16 (16MB Flash, No PSRAM) or N8/N32 variants
  • ILI9341 320x240 TFT LCD with XPT2046 Touch Controller
  • AHT20 or BME280 Temperature/Humidity Sensor (I2C)
  • DS18B20 Temperature Sensor (optional, for hydronic heating)
  • LD2410 24GHz mmWave Motion Sensor (optional, for display wake)
  • 5x Relay Module for HVAC control
  • Custom PCB that can use either onboard relay or external relays via pin header

Software Setup

Option 1: Use Prebuilt Firmware (Recommended)
  1. Clone this repository
  2. Navigate to firmware/ directory
  3. Find the latest build folder (e.g., build_YYYYMMDD-HHMMSS/)
  4. Flash using the variant-specific script:
    • Linux/Mac:
      • Default: ./latest_flash_N16.sh (uses /dev/ttyACM0)
      • Custom port: ./latest_flash_N16.sh /dev/ttyUSB0
    • Windows:
      • Default: latest_flash_N16.bat (uses COM3)
      • Custom port: latest_flash_N16.bat COM4
  5. Use touch interface to configure WiFi and settings
Option 2: Build from Source
  1. Install PlatformIO IDE
  2. Clone this repository
  3. Open project in PlatformIO
  4. Build firmware using ./build.sh with options:
    • Interactive mode: ./build.sh (select from menu)
    • Specific variant: ./build.sh 1 (N8), ./build.sh 2 (N16), or ./build.sh 3 (N32)
    • All variants: ./build.sh all or ./build.sh 4
    • Additional flags: clean, quiet, cleanlibs
    • Examples:
      • ./build.sh 2 - Build 16MB variant (default)
      • ./build.sh all clean - Clean build all variants
      • ./build.sh 3 quiet - Build 32MB silently
      • ./build.sh cleanlibs - Remove all libraries and packages
  5. Memory usage: RAM 25.2% (82728/327680 bytes); Flash 19.0% (1246KB/6553KB for N16)
  6. Firmware organized in firmware/N8/, firmware/N16/, firmware/N32/ directories
  7. Flash using variant-specific scripts:
    • Linux/Mac:
      • Default: ./firmware/latest_flash_N16.sh (uses /dev/ttyACM0)
      • Custom port: ./firmware/latest_flash_N16.sh /dev/ttyUSB0
    • Windows:
      • Default: firmware\latest_flash_N16.bat (uses COM3)
      • Custom port: firmware\latest_flash_N16.bat COM5
  8. Use touch interface to configure WiFi and settings
Flashing Requirements
  • esptool.py (installed automatically with PlatformIO)
  • USB connection to ESP32-S3
  • Boot mode: Hold BOOT button while connecting USB (if needed)
  • Default serial port: /dev/ttyACM0 (Linux/Mac) or COM3 (Windows)
Manual Flashing with esptool

If you need to flash manually using esptool, use the following command:

Linux/Mac:

bash
esptool.py --chip esp32s3 --port /dev/ttyACM0 --baud 460800 --before default_reset --after hard_reset write_flash -z \
    --flash_mode dio --flash_freq 80m --flash_size 16MB \
    0x0 bootloader.bin \
    0x8000 partitions.bin \
    0x10000 firmware.bin

Windows:

bash
esptool.py --chip esp32s3 --port COM3 --baud 460800 --before default_reset --after hard_reset write_flash -z \
    --flash_mode dio --flash_freq 80m --flash_size 16MB \
    0x0 bootloader.bin \
    0x8000 partitions.bin \
    0x10000 firmware.bin

Flash addresses for the 3 required files:

  • bootloader.bin at address 0x0
  • partitions.bin at address 0x8000
  • firmware.bin at address 0x10000

Adjust for your hardware:

  • Change --port to your serial port (Linux: /dev/ttyACM0 or /dev/ttyUSB0, Windows: COM3, COM4, etc.)
  • Change --flash_size to 8MB, 16MB, or 32MB to match your ESP32-S3 variant (N8, N16, or N32)

For detailed build and flash instructions, see USER_MANUAL.md

💻 Web Interface

Access the thermostat's web interface by navigating to its IP address:

Tabbed Interface with Embedded Features

Status Tab: Real-time monitoring of:

  • Current temperature and humidity
  • Thermostat and fan modes
  • Relay states and system status
  • Weather information (when configured)
  • Barometric pressure (with BME280 sensor)

Settings Tab: Complete configuration interface for:

  • Temperature setpoints and control modes
  • MQTT/Home Assistant integration and broker settings
  • WiFi network settings and reboot recovery
  • Multi-stage HVAC parameters including stage 2 runtime and delta thresholds
  • Reversing valve configuration for heat-pump systems
  • Backup heat enablement, relay selection, delay timing, and temperature-drop logic
  • Hydronic heating controls with low/high water protection thresholds
  • Fan scheduling options and independent heat/cool fan relay toggles
  • Regional HVAC mode selection for US or EU behavior
  • EU humidity dehumidification controls, relay selection, setpoint, and deadband
  • Shower mode enable/disable and duration (5-120 minutes)
  • Display brightness, sleep, and clock settings
  • Temperature/humidity sensor calibration and offsets
  • OTA update management and firmware details

Schedule Tab: Comprehensive 7-day scheduling:

  • Day and night periods for each day of the week
  • Editable Heat, Cool, and Auto temperatures for each period
  • Time controls for period transitions
  • Schedule enable/disable and override controls
  • All options always visible - no hidden menus

Weather Tab: Weather data configuration:

  • OpenWeatherMap API integration
  • Home Assistant weather entity integration
  • Configurable update intervals (5-60 minutes)
  • City/state/country configuration

System Tab: Device information and firmware updates:

  • System information and uptime
  • Firmware version details
  • OTA firmware upload with progress tracking
  • Reboot and factory reset options

For complete usage instructions, see USER_MANUAL.md

🏠 Home Assistant Integration

Automatic Discovery & Control

Automatic discovery and integration with Home Assistant:

  1. Enable MQTT in thermostat settings
  2. Configure MQTT broker details
  3. Thermostat appears automatically in Home Assistant with a full climate entity and status payloads
  4. Full control via Home Assistant interface
  5. Supports climate entity with heating, cooling, auto, and off modes
  6. Publishes relay, mode, target, schedule override, and hydronic state for automation use

Bidirectional Schedule Sync 🔄

Full synchronization between thermostat and Home Assistant:

Device → HA (Inbound):

  • Thermostat publishes complete schedule on boot and config changes
  • HA automations automatically update helper entities for each day and period
  • Changes made on device instantly visible in HA

HA → Device (Outbound):

  • Change any schedule helper in HA (time, temperature, enabled status)
  • Automation publishes change to device via MQTT immediately
  • Device receives and applies change instantly
  • No manual sync needed - fully automatic bidirectional flow

Multi-Thermostat Support:

  • Each device gets its own set of helpers (shop_thermostat, studio_thermostat, house_thermostat, etc.)
  • Centralized multi-device automation handles all thermostats
  • Proper hostname normalization for MQTT topics vs. helper IDs
  • Can manage 10+ thermostats from single HA instance

Setup Instructions:

  1. Ensure MQTT is enabled on thermostat
  2. Copy multi_thermostat_schedule_sync.yaml to HA packages directory
  3. Generate per-device packages: ./generate_schedule_package.sh shop_thermostat
  4. Add package to HA configuration
  5. Reload automations/scripts in HA
  6. Helpers auto-populate from device schedule state

🛠️ Advanced Features

Multi-Stage Operation

  • Intelligent staging based on time and temperature
  • Configurable stage 2 activation parameters and runtime thresholds
  • Prevents system short-cycling and optimizes energy efficiency
  • Supports separate heating and cooling stage logic for multi-stage HVAC systems
  • Includes runtime gating and dead-zone control behavior for stable operation

US/EU Regional HVAC Behavior

  • Thermostat region mode can be configured for US or EU control behavior
  • US Mode: Standard temperature-driven heating and cooling control
  • EU Mode: Adds optional humidity-driven dehumidification assist that runs alongside temperature control, with configurable setpoint and deadband
  • Standalone dehumidification state is surfaced to web status and TFT display
  • Works with relay selection modes for cooling stage 1, stage 2, or pump relay output

Heat Pump and Backup Heat Support

  • Reversing valve support for heat-pump systems with mode-aware valve control
  • Backup heat logic can monitor a primary heat source and automatically add auxiliary heat when recovery stalls or temperature falls too quickly
  • Relay conflicts are automatically managed so backup heat does not overlap with reserved stage 2 or reversing valve outputs
  • Works alongside standard heating and cooling staging without forcing a single control strategy

Hydronic Heating Support

  • DS18B20 water temperature monitoring
  • Safety interlocks prevent operation when water is too cold
  • Configurable high/low temperature thresholds
  • Hydronic lockout logic blocks unsafe heating/fan behavior when the loop is below the configured minimum
  • Perfect for radiant floor heating systems and hydronic boiler setups

Fan Control Options

  • Auto: Fan runs only with heating/cooling
  • On: Continuous fan operation
  • Cycle: Scheduled fan operation (configurable minutes per hour)
  • Independent Heat/Cool Relay Settings: Choose whether a fan relay is required while heating, while cooling, or for both modes
  • Legacy HVAC Compatibility: Supports systems where the fan is required for cooling only, heating only, or both without forcing a single global setting

Display, Sensor, and Safety Enhancements

  • Motion-based wake on LD2410 radar occupancy detection
  • Display sleep and dimming support with activity sensing
  • Buzzer feedback for alerts, boot tones, and mode transitions
  • Watchdog protection, OTA recovery, and factory reset support
  • AHT20/BME280 temperature/humidity calibration offsets and sensor error recovery
  • I2C mutex protection to prevent bus contention between sensors and display logic
  • Anti-flicker display refresh logic and stable UI updates
  • Hydronic low-temp alert publishing and lockout recovery monitoring for radiant systems

Included Hardware and Support Features

  • 5 relay outputs for heating, cooling, and fan control
  • Optional DS18B20 hydronic sensor and LD2410 motion sensor
  • Local TFT UI with touch controls and embedded settings
  • Web interface for complete configuration and status polling
  • OTA firmware upload through the device’s system tab
  • Compatibility with both single-device and multi-thermostat Home Assistant installations

🖨️ 3D Printable Case

A professional two-part case design is included for clean wall-mount installation:

Case Features

  • Two-part screw-retained design: Front (display side) and back (wall-mount side) halves
  • Integrated PCB mounting: Built-in standoffs (13mm height) for secure PCB installation
  • Countersunk front screws: 4× M2.5 countersunk (DIN 7991), 10–12mm length, 7mm inset
  • Keyhole wall mounting: Easy installation without removing case (83mm spacing)
  • Display opening: Precise 50mm × 68mm opening for 3.2" ILI9341 touchscreen (rotated 90°)
  • AHT20 sensor + LDR cutouts: 12.5×6mm rectangle (rotated 90°) and Ø5.5mm hole
  • Wire management: 22mm back pass-through plus side ventilation slots
  • Ventilation: Strategically placed slots for optimal heat dissipation
  • Professional finish: Smooth surfaces and rounded edges

Files Included

  • case/freecad_front_case.py - Front case (display side) FreeCAD Python script
  • case/freecad_back_case.py - Back case (wall-mount side) FreeCAD Python script
  • case/freecad_outputs/front_case_display_freecad.stl - Front half for 3D printing
  • case/freecad_outputs/back_case_wall_freecad.stl - Back half for 3D printing
  • case/freecad_outputs/front_case_display_freecad.FCStd - Front case FreeCAD project
  • case/freecad_outputs/back_case_wall_freecad.FCStd - Back case FreeCAD project
  • case/freecad_outputs/front_case_display_freecad.step - Front case STEP format
  • case/freecad_outputs/back_case_wall_freecad.step - Back case STEP format
  • case/freecad_outputs/CE5_front_case_display_freecad.gcode - Creality Ender 5 gcode (front)
  • case/freecad_outputs/CE5_back_case_wall_freecad.gcode - Creality Ender 5 gcode (back)

Print Specifications

  • Material: PLA or PETG recommended
  • Layer height: 0.2mm
  • Infill: 15-20%
  • Supports: None required
  • Print time: ~7–9 hours total
  • Dimensions: 149.0mm × 105.5mm × ~47mm (assembled)
    • Front: ~17.1mm (2.5mm wall; 13mm standoffs; front walls 1.6mm above standoffs)
    • Back: ~30.1mm (2.5mm wall; 20mm component clearance; bosses/keyholes)

STL Files Location: All printable STL files are in the case/freecad_outputs/ directory.

Motion Detection

  • LD2410 24GHz mmWave Sensor: Automatic display wake on motion detection
  • Hardware Pins: RX=15, TX=16, Motion=18
  • Robust Detection: Works with sensors that don't respond to UART commands
  • Home Assistant Integration: Motion sensor auto-discovery and status publishing
  • Energy Saving: Display automatically sleeps when no motion detected
  • Seamless Operation: Works alongside existing touch controls

Safety Features

  • Watchdog timer prevents system lockups
  • Factory reset via boot button (10+ seconds)
  • Temperature limit enforcement
  • Graceful offline operation

🔧 Factory Reset

Press and hold the boot button for more than 10 seconds while the thermostat is running to restore all settings to defaults.

📄 License

This project is released under the GNU General Public License v3.0. Free to use, modify, and distribute. NOT for commercial use.

🤝 Contributing

Contributions welcome! Please:

  1. Fork the repository
  2. Create a feature branch
  3. Make your changes
  4. Submit a pull request

📞 Support

  • Issues: Use GitHub Issues for bug reports
  • Discussions: GitHub Discussions for questions
  • Documentation: Comprehensive docs included
  • Serial Debug: Detailed logging at 115200 baud

🙏 Credits & Acknowledgments

Firmware: Jonn Taylor - Enhanced firmware implementation

Created for the DIY smart home community

Parts

61
QtyValueFootprintReferences
74.7kResistor_THT:R_Axial_DIN0207_L6.3mm_D2.5mm_P10.16mm_HorizontalR1, R2, R3, R4, R5, R6, R7
61N4007PCM_Diode_THT_AKL:D_DO-41_SOD81_P7.62mm_HorizontalD1, D2, D3, D4, D5, D6
62N2222A-TO92PCM_Package_TO_SOT_THT_AKL:TO-92_Inline_Wide_EBCQ1, Q2, Q3, Q4, Q5, Q6
6G5Q-1ARelay_THT:Relay_SPST_Omron-G5Q-1AK1, K2, K3, K4, K5, K6
41kResistor_THT:R_Axial_DIN0207_L6.3mm_D2.5mm_P10.16mm_HorizontalR8, R11, R13, R14
4MountingHoleMountingHole:MountingHole_2.7mm_M2.5H5, H6, H7, H8
4MountingHole_M3_3.2mm_PadPCM_SL_Mechanical:MountingHole_3.2mm_PadH1, H2, H3, H4
2100nF_CeramicCapacitor_THT:C_Disc_D5.0mm_W2.5mm_P2.50mmC6, C9
210kResistor_THT:R_Axial_DIN0207_L6.3mm_D2.5mm_P10.16mm_HorizontalR9, R10
11000uF_50VCapacitor_THT:CP_Radial_D16.0mm_P7.50mmC5
112uH_5.2A_1260Inductor_SMD:L_Bourns_SRR1260L1
12N7002Package_TO_SOT_SMD:SOT-23Q7
13.2 lcd tftConnector_PinSocket_2.54mm:PinSocket_1x14_P2.54mm_VerticalJ4
1470uF_10VCapacitor_THT:CP_Radial_D8.0mm_P3.50mmC8
1BuzzerBuzzer_Beeper:Buzzer_TDK_PS1240P02BT_D12.2mm_H6.5mmBZ1
1COOLLED_THT:LED_D3.0mmD11
1DS18B20Connector_PinHeader_2.54mm:PinHeader_1x03_P2.54mm_VerticalJ3
1ESP32-S3-DevKitCPCM_Espressif:ESP32-S3-DevKitCU1
1FANLED_THT:LED_D3.0mmD9
1GL5537OptoDevice:R_LDR_5.1x4.3mm_P3.4mm_VerticalR12
1HEATLED_THT:LED_D3.0mmD10
1I2C SensorConnector_PinSocket_2.54mm:PinSocket_1x04_P2.54mm_VerticalJ5
1KBP210GPCM_Diode_THT_AKL:Diode_Bridge_KBPD7
1LD2410CConnector_PinHeader_2.54mm:PinHeader_1x05_P2.54mm_VerticalJ6
1LM2596S-5Package_TO_SOT_SMD:TO-263-5_TabPin3U2
1PINHD_1x18_MaleConnector_PinHeader_2.54mm:PinHeader_1x18_P2.54mm_VerticalJ1
1PINHD_1x3_MaleConnector_PinHeader_2.54mm:PinHeader_1x03_P2.54mm_VerticalJ7
1SS34PCM_Diode_SMD_AKL:D_SMCD8
1Screw_Terminal_9_P3.50mmTerminalBlock_Phoenix:TerminalBlock_Phoenix_PT-1,5-9-3.5-H_1x09_P3.50mm_HorizontalJ2

More from jrtaylor71/ESP32-DevKitC3-Simple-Thermostat-PCB

1

Similar boards

  • 2 layers133 × 89.5 mmESP32-Simple Thermostat PCB, the printed circuit board in 3D

    ESP32-Simple Thermostat PCB

    jrtaylor71/ESP32-Simple-Thermostat

    Simple ESP32 Thermostat with touch screen

    52 parts2
  • 4 layers95 × 95 mmCube motherboard, the printed circuit board in 3D

    Cube motherboard

    willem-pennings/balancing-cube

    A cube that balances itself in a corner or edge using reaction wheels

    52 parts1.1kGPL-3.0
  • 2 layers100 × 100 mmCarrier, the printed circuit board in 3D

    Carrier

    moinsen-dev/open-bed-climate

    Open-source, local-first bed climate system: water-cooled/heated mat, standard parts, DIY kits, Home Assistant. Design phase.

    126 partsApache-2.0
  • 2 layers50 × 100 mmServo tester, the printed circuit board in 3D

    Servo tester

    TobiasKaiser/servo_tester_pcb

    Servo tester PCB (KiCad)

    39 parts
  • 2 layers100 × 100 mmIr receiver, the printed circuit board in 3D

    Ir receiver

    adeboni/electronics

    This repository stores code for various electronics projects I've made

    89 parts
  • 2 layers95 × 75 mmBattery predictor, the printed circuit board in 3D

    Battery predictor

    touhidsiddiqueeraj-bit/Multi-Horizon-Hazard-Models-for-Battery-Failure-Prediction

    This study extends an existing multi-horizon hazard classification framework—originally developed for NASA 18650 cells using Histogram-based Gradient Boosting (HGB)—to three additional datasets (CALCE LCO/CX2, Oxford…

    25 parts1
  • 2 layers100 × 100 mmController, the printed circuit board in 3D

    Controller

    Hartmannlight/Buttonbox

    Firmware and PCB files for an ESP32-S3 sim-racing button box with five rotary encoders, capacitive touch on encoder/buttons, two ST7789 displays, MCP23017 button/LED expansion, MPR121 touch sensing, WS2812 status LEDs…

    66 parts

Questions

How big is the ESP32-DevKitC3-Simple Thermostat PCB PCB?

It measures 133 × 89.5 mm and has 4 copper layers, 1.6 mm thick.

What parts does the ESP32-DevKitC3-Simple Thermostat PCB use?

61 parts, built around the ESP32-S3-DEVKITC-1-N8, LM2596S-5.0, DS18B20 and G5Q-1A. The full list of its parts is on this page, with links to each part's symbol and footprint where PCBKit's library has them.

Where can I download the ESP32-DevKitC3-Simple Thermostat PCB KiCad files?

From the jrtaylor71/ESP32-DevKitC3-Simple-Thermostat-PCB repository on GitHub, at the commit this page was made from: the board is pcb/ESP32-DevKitC3-Simple-Thermostat-PCB.kicad_pcb and its schematic pcb/ESP32-DevKitC3-Simple-Thermostat-PCB.kicad_sch. PCBKit opens the board in the browser, with nothing to install.

Can I use the ESP32-DevKitC3-Simple Thermostat PCB design in my own project?

Its repository states no licence, so its author keeps all rights: ask jrtaylor71 before reusing the design.