
4 layers85.5 × 112.2 mm
TranslateIA
lapalmaelettronica/Progetti
Una lista dei progetti che ho pubblicato su instagram, potete trovarci pcb, codici, schemo elettrici e stampe 3d!
77 parts

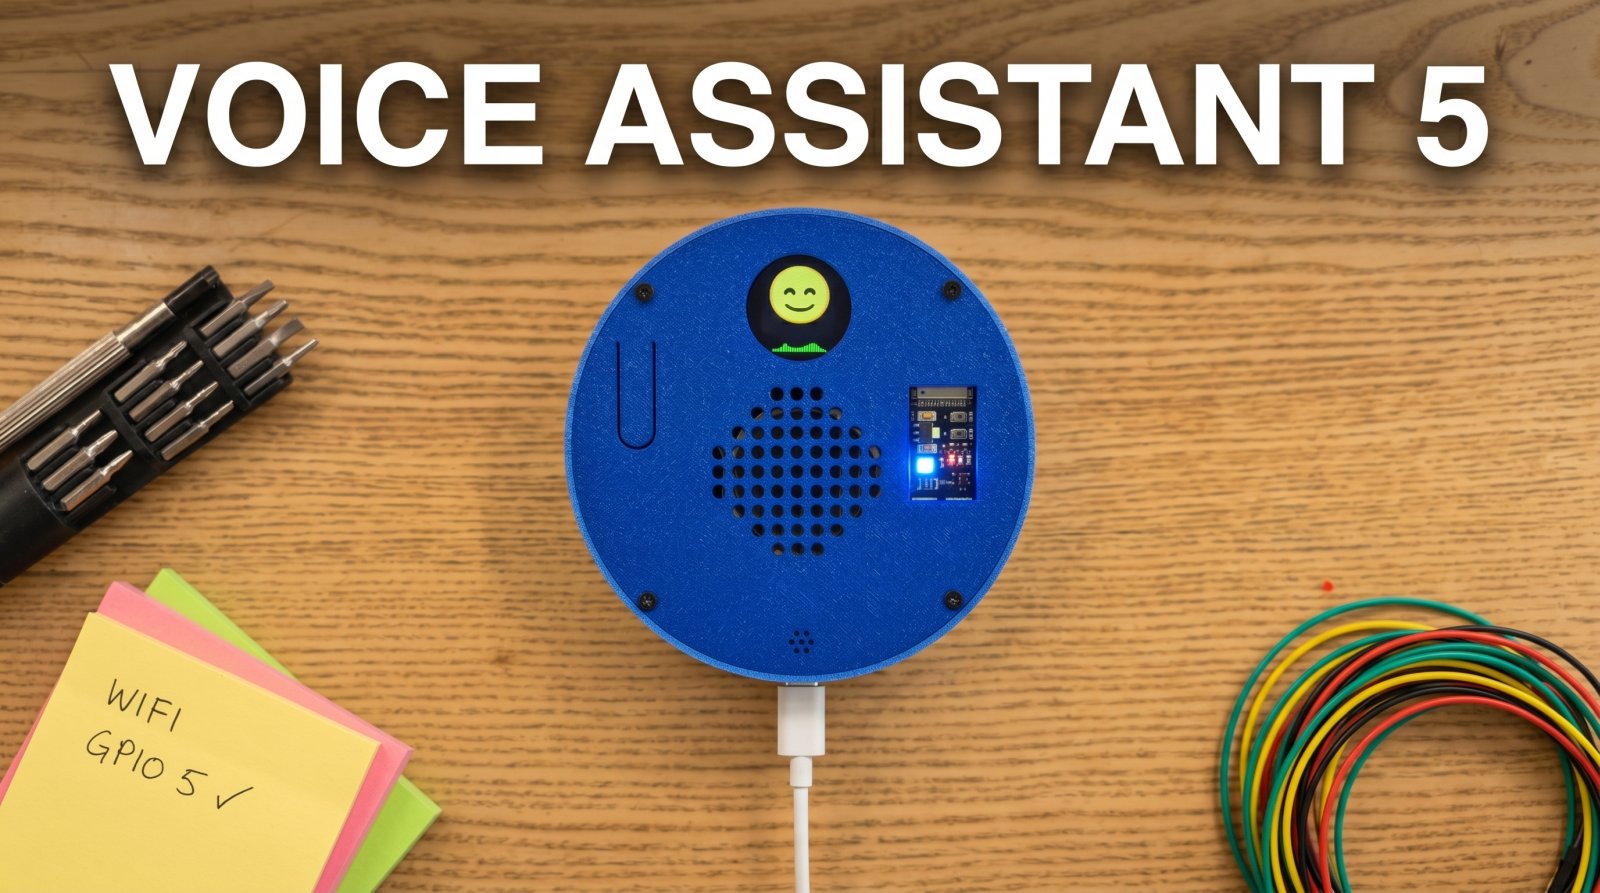
ESP32-S3 push-to-talk voice assistant using OpenAI Realtime API
Va5pcb is an open-source printed circuit board by iollama, from the iollama/Voice-Assistant-5 repository on GitHub, published under the GPL-3.0 licence. It is a 2-layer board of 135 × 135 mm with 16 parts on 34 nets, routed with 247 tracks and 24 vias.
It is built around the ESP32-S3, INMP441 and PCM5102APW. Its parts include 13 connectors, 2 resistors and 1 switch. It belongs with the ESP32 boards of this library.


Press the button, talk, let go — and get an instant spoken reply, with an animated emoji face that grins, frowns and laughs along with the conversation. Less than $20 in parts, a case you print yourself, running on your own OpenAI key.
The part that makes it worth building: it has no character until you give it one.
Everything that gives this thing a personality lives behind a web page the device serves. The system persona prompt, one of ten voices, the spoken language, and the face itself:
drop in a GIF, PNG, JPG or MP4 and it adopts immediately. No recompile, no cable, no SD card, no code. Write Nietzsche. Write Churchill. Write Daffy Duck. Hand it to someone else and let them write over it.
That design came out of a classroom. VA5 is used in schools, where students research a figure, write the persona themselves, load it on, and then have to hold a conversation with what they wrote. A thin characterisation falls apart within a minute or two of being interrogated, so they go back and rewrite it. Write, test by talking, revise — which is prompt engineering, except nobody has to call it that.
Thirty students cannot each be flashing firmware. That single constraint explains most of the design decisions in this repo: why the whole persona is editable from a phone, and why personas export as a .zip so one set of
devices can cycle between classes.
VOICE-AGENT-XXYY (the XXYY is the last 2 bytes of its MAC address). No password.http://192.168.4.1. Under Wi-Fi Networks, enter your network name and password, hit Add network, then Connect & reboot. The device remembers it from then on -- and up to five more.http://voice-agent-XXYY.local (same XXYY as the AP name). If .local doesn't resolve on your network, use the IP address printed to the Serial Monitor.A push-to-talk voice assistant built on the ESP32-S3, using the OpenAI Realtime API for speech-to-speech conversation over secure WebSockets. Features dual-core FreeRTOS architecture, animated emoji display with audio waveform visualization, a web configuration portal, and RGB LED status indicators.
Core 0 handles all network and protocol tasks (WiFi, WebSocket, Base64 encode/decode). Core 1 handles all hardware I/O (I2S microphone/speaker, button, display). The two cores communicate through PSRAM ring buffers and volatile flags.
The assistant can also call OpenAI function tools during a response — currently set_display_emotion (drives the emoji display), set_volume (adjusts speaker volume, persists across reboots), and show_network_info (shows the device IP and token count on screen).
| Component | Description | Comments | Link |
|---|---|---|---|
| ESP32-S3 N16R8 | Dev board with 16 MB flash and 8 MB OPI PSRAM | buy the N16R8 varient | Ali, Amazon |
| INMP441 | I2S MEMS microphone | - | Ali, Amazon |
| MAX98357A | I2S audio amplifier breakout | Better to buy soldered | Ali, Amazon |
| PCM5102A (optional) | I2S DAC breakout (GY-PCM5102A) with 3.5 mm stereo jack | Skip if you only want the onboard speaker. Drives headphones or any powered speaker (e.g. JBL Go/Clip/Flip) via a 3.5 mm AUX cable. | Ali, Amazon |
| Speaker | 1-3W 4/8-ohm or similar small speaker | Up to 57mm, use foam for pressure if the speaker is too thin | Ali, Amazon |
| GC9A01 | Round TFT display, 240x240, SPI | Get the square one | Ali, Amazon |
| WS2812 NeoPixel | RGB LED (built-in on most ESP32-S3 dev boards) | Nothing to buy, it's built in | - |
| Tactile Push Button | 12x12 mm momentary switch (PTT) | - | Ali, Amazon |
| Jumper Wires | Male-to-male/female (for the non PCB version) | - | Ali, Amazon |
| USB-C Cable | Data + power, Type C to Type A | You should have one at home | Ali, Amazon |
| Breadboard | 400 Tie Points | You'll only need one power rail | Ali, Amazon |
| Screws | M2 and M3 Self-Tapping Screws | I recommend a full kit | Ali, Amazon |
A persona is a character the device becomes: a system prompt, a voice, a language and an emoji set, bundled together. The settings page has a Browse gallery that pulls ready-made ones straight from this repo, and you can export your own as a .zip to back up, share, or hand to a class.
Shipped categories include Science (Ada Lovelace, Marie Curie, Sir Isaac Newton), Historical (Abraham Lincoln, Winston Churchill) and Philosophy (Friedrich Nietzsche, Yoda, Daffy Duck) — alongside Biblical, Theological, and a Functional category holding an ESP32 that explains its own hardware.
Writing your own is the interesting part. Vague personas produce vague conversations — the difference between "you are Winston Churchill" and a paragraph on what he knew, how he spoke, what he refused to discuss and where he was wrong is immediately audible.
Personas live in personas/. Pull requests welcome.
There is also a persona-creating skill for Google's Antigravity in .agents/skills/persona-creator/ — the same workflow the personas above were built with.
Don't want to breadboard it? pcb/ has a custom 2-layer breakout PCB that wires up the same components fixed pin-for-pin (matching the tables below) and adds a solder-in expansion header for spare GPIOs. This is the exact board design that was ordered, assembled, and is running the unit here at VA5 HQ — not an unverified first spin.
What's in pcb/:
va5pcb.kicad_pcb + va5pcb.kicad_pro -- the KiCad board project. Open it in KiCad (8.0+) to inspect footprint placement, silkscreen, or the routed copper before ordering.fab/ -- bare-board gerbers + Excellon drill (*.gbr, *.drl, .gbrjob), already exported and ready to hand to a fab house (JLCPCB, PCBWay, etc.) as-is. Standard 2-layer board, no unusual stackup.The board was scripted-routed then hand-finished in KiCad (a couple of stragglers a headless autorouter leaves behind); run your own DRC pass in KiCad if you want to double-check before ordering. The parametric generator that produced this board (component placement, net list, silkscreen) isn't part of this release -- pcb/ ships the finished design, not the pipeline that built it.
Populate it with the same parts as the Hardware Components table above (skip the breadboard and jumper wires -- solder straight onto the board footprints instead). The PCM5102A headphone DAC is optional, same as the breadboard build; if you install it, use the PCB build parts (pcb_ring.stl, pcb_top.stl, pcb_bottom.stl) from 3D Printed Enclosure below, which carry a matching 3.5 mm jack hole in the ring. The board's spare-GPIO header is documented in Expansion Header (PCB build only) below.
| INMP441 Pin | ESP32-S3 Pin | Note |
|---|---|---|
| SD (data) | GPIO 40 | I2S data in |
| WS | GPIO 41 | Word select / LRCLK |
| SCK | GPIO 42 | Bit clock |
| L/R | GND | Selects left channel |
| VDD | 3.3V | |
| GND | GND |
| MAX98357A Pin | ESP32-S3 Pin | Note |
|---|---|---|
| DIN | GPIO 17 | I2S data out (shared with PCM5102A if both populated) |
| BCLK | GPIO 47 | Bit clock (shared) |
| LRC | GPIO 21 | Word select / LRCLK (shared) |
| SD | 3.3V or GPIO 38 | 3.3V keeps the amp always on (legacy wiring). Tie to GPIO 38 instead if you've also populated the PCM5102A and want to switch between them from the portal. |
| VIN | 5V | |
| GAIN | 3.3V | 6 dB gain (recommended) -- avoids amp clipping/distortion into an 8 Ω speaker at high volume |
| GND | GND |
Populate this only if you want a headphone jack or want to feed a powered speaker (e.g. JBL) via 3.5 mm AUX. With both chips installed, the portal Audio Output selector picks which one plays; firmware mutes the other via its enable pin.
| PCM5102A Pin | ESP32-S3 Pin | Note |
|---|---|---|
| DIN | GPIO 17 | I2S data out (shared with MAX98357A) |
| BCK | GPIO 47 | Bit clock (shared) |
| LCK | GPIO 21 | Word select / LRCLK (shared) |
| SCK | GND | Use internal PLL (no MCLK from ESP32) |
| XSMT | GPIO 39 | Active-low mute; HIGH = play |
| FMT, FLT, DEMP | GND (factory-set on most breakouts) | I2S format, normal filter, no de-emphasis |
| VIN | 3.3V | Most GY breakouts accept 3.3V or 5V; check silkscreen |
| GND | GND | |
| L / R / GND | 3.5 mm stereo jack | Built into the breakout PCB |
The portal Audio Output selector (below Volume) picks Speaker (MAX98357A) or Headphones (PCM5102A). The choice persists across reboots. Changes are rejected with HTTP 409 during an active conversation -- save while idle (green LED).
You can also just say "switch to headphones" or "use the speaker". VA5 confirms on the current output and switches right after that reply. A small speaker / headphones icon above the on-screen volume bar shows where audio is going. (Without a PCM5102A installed, "headphones" goes silent; say "switch back to the speaker" to undo.)
| GC9A01 Pin | ESP32-S3 Pin | Note |
|---|---|---|
| SCLK | GPIO 6 | SPI clock |
| MOSI (SDA) | GPIO 7 | SPI data |
| CS | GPIO 5 | Chip select |
| DC | GPIO 4 | Data/command |
| RST | GPIO 2 | Hardware reset |
| BLK | 3.3V | Backlight (always on) |
| VCC | 3.3V | |
| GND | GND |
| Component | Pin | ESP32-S3 Pin | Note |
|---|---|---|---|
| PTT Button | Signal | GPIO 1 | INPUT_PULLUP, active LOW |
| PTT Button | GND | GND | |
| NeoPixel RGB LED | Data | GPIO 48 | Built-in on most S3 boards, no jumper needed. Also brought out on the expansion header (see below) for future repurposing. |
| MAX98357A SD (optional) | Enable | GPIO 38 | Only needed if you populated the PCM5102A and want runtime switching. Otherwise tie SD to 3.3V. |
| PCM5102A XSMT (optional) | Mute | GPIO 39 | Only populated when PCM5102A is installed. HIGH = play, LOW = mute. |
| Rail | Components |
|---|---|
| 3.3V | INMP441, GC9A01, MAX98357A SD pin (legacy wiring only), GC9A01 BLK, PCM5102A VIN (optional) |
| 5V | MAX98357A VIN |
| GND | All components (common ground) |
The PCB build exposes every ESP32-S3 GPIO that isn't already driven by a peripheral, plus power rails, on unpopulated 2.54 mm through-hole pads. Solder a male or female header strip if you want one — pick whichever fits your add-on. Most pads sit in the lower band of the board; four GPIOs are on a small screen-side header in the gap between the ESP and the display.
| Header | Pads | Silkscreen labels |
|---|---|---|
| Data — bottom (J9) | 8 GPIO | 9 48 10 11 12 13 14 19 |
| Data — screen-side (J13) | 4 GPIO | 15 16 18 8 |
| Power — bottom (J10) | 7 | 3V 3V G G G 5V 5V (2×3.3 V / 3×GND / 2×5 V) |
Notes on the data row:
Silkscreen labels are shortened (3V rather than 3V3, G rather than GND) so each label fits within the 2.54 mm pad pitch.
Pick one of the two toolchains below -- both build the same .ino source. Versions are pinned in toolchain.md.
Set these under the Tools menu before uploading:
| Setting | Value |
|---|---|
| Board | ESP32S3 Dev Module |
| USB CDC On Boot | Enabled |
| CPU Frequency | 240MHz (WiFi) |
| Core Debug Level | None |
| USB DFU On Boot | Disabled |
| Erase All Flash Before Sketch Upload | Disabled |
| Events Run On | Core 1 |
| Flash Mode | QIO 80MHz |
| Flash Size | 16MB (128Mb) |
| JTAG Adapter | Disabled |
| Arduino Runs On | Core 1 |
| USB Firmware MSC On Boot | Disabled |
| Partition Scheme | Custom (uses partitions.csv from sketch folder) |
| PSRAM | OPI PSRAM |
| Upload Mode | UART0 / Hardware CDC |
| Upload Speed | 921600 |
| USB Mode | Hardware CDC and JTAG |
The custom partition table (partitions.csv) provides 3 MB for the app and ~11 MB for LittleFS (emoji frames).
Install libraries via Arduino Library Manager (Sketch > Include Library > Manage Libraries...):
| Library | Author | Note |
|---|---|---|
| ArduinoJson (v6.x+) | Benoit Blanchon | JSON parsing for API messages |
| Adafruit NeoPixel | Adafruit | RGB status LED driver |
| Arduino_GFX_Library | moononournation | Display driver (required only when USE_DISPLAY 1) |
QR codes (captive-portal join + network info screen) use the esp_qrcode API bundled with the ESP32 board package -- no separate library install.
ArduinoWebsockets is vendored in the src/ directory with two critical bug fixes applied. Do not install it via Library Manager -- the sketch includes the local patched copy automatically. See websockets_patches.md for details.
Everything (board settings, partition scheme, libraries, build flags) is pinned in platformio.ini. After cloning and copying config.h.sample to config.h (see below):
pio run -t upload          # compile + upload sketch
pio run -t uploadfs        # upload LittleFS data partition (emoji frames)
pio device monitor         # serial monitor at 115200, with esp32 exception decoder
Or, in VS Code, install the PlatformIO IDE extension and use the toolbar buttons (Build / Upload / Upload Filesystem Image / Serial Monitor).
platformio.ini uses the pioarduino fork of the espressif32 platform -- the default upstream platform is stuck on Arduino-ESP32 core 2.x and is missing a header that Arduino_GFX_Library 1.6.5 needs. The pin 55.03.312-1 matches Arduino-ESP32 3.3.12.
The vendored ArduinoWebsockets is found via PlatformIO's src_dir = voice_agent_5 setting -- do not add arduinoWebsockets to lib_deps.
A config.h.sample file is included in the sketch folder. Copy it to config.h and fill in your credentials:
cp voice_agent_5/config.h.sample voice_agent_5/config.hThen edit config.h and replace the placeholder values with your OpenAI API key (and optionally WiFi credentials):
#define OPENAI_API_KEY "sk-your-openai-api-key"
#define WIFI_SSID "your-network-name"
#define WIFI_PASSWORD "your-network-password"
config.h is listed in .gitignore and will not be committed. WiFi credentials are also configurable at runtime via the captive portal and stored in NVS. The API key can also be set via the web UI (stored in NVS, overrides config.h).
VOICE-AGENT-XXYY (last 2 bytes of MAC)192.168.4.1)Shortcut: hold the push-to-talk button while powering the device on to go straight to the config portal, without waiting for it to try the saved networks first.
The device remembers up to 6 networks, so it can move between home, the office and a phone hotspot without being set up again.
Passwords are stored on the device and are never shown again — not on the settings page and not through its API. They are, however, stored unencrypted in the ESP32's NVS flash, so treat physical access to the board as access to those passwords.
Once connected to WiFi, open a browser and navigate to http://voice-agent-XXYY.local (or the IP address printed to Serial Monitor).
From the settings page you can configure:
marin, cedar, alloy, ash, ballad, coral, echo, sage, shimmer, verse); selection takes effect on the next session.zip file. Secrets (Wi-Fi, API key) are never exported. Needs the browser to be online. See voice_agent_5/docs/profile-import-export.md.Less-common options live behind the Admin Zone toggle further down the page: Wi-Fi Networks (see Multiple WiFi Networks above), your API Key (override the compiled config.h key, stored in NVS), conversation behavior (Persist Conversation, Verbose Logging), and token usage.
All settings are saved to NVS and persist across reboots. Use Restore defaults (in the Admin Zone) to reset the agent settings.
The Admin Zone also has Provision default persona, which pulls the published default persona -- prompt, voice and emoji -- from the project repo and writes it into the device. Use it to set up a board that was flashed with firmware but no emoji image (so the display would otherwise be blank), or to load a newly published default. Unlike Restore defaults (which reverts to the compiled-in fallback prompt and on-device emoji), this downloads the current default from the web, so your browser needs internet. It writes the device's read-only default emoji set directly and checks free storage before changing anything.
USE_DISPLAY set to 1 in voice_agent_5.ino (default)lib_deps for PlatformIO)Once the device is on WiFi, browse to http://voice-agent-XXYY.local/emojis (or hit Open editor on the main settings page). Drop in a GIF, PNG, JPG, or H.264 MP4 for any of the seven moods and the assistant will use it immediately -- no re-flash, no Python, no SD card. The shipped defaults are stored separately and are never overwritten, so there is no way to brick the device through customization; reset any mood (or all of them) at any time. See voice_agent_5/docs/emoji-customization.md for the full walkthrough, supported formats, and how to share an emoji pack.
The customization page needs your browser to have internet access (it loads the GIF decoder and zip libraries from a CDN). The device itself stays local-only.
The emoji animations are stored as pre-rendered RGB565 binary frames in a LittleFS partition. They must be flashed separately from the sketch. The sketch and filesystem go to different partitions -- they don't overwrite each other. You only need to re-upload the filesystem when the frame files change.
With PlatformIO:
pio run -t uploadfsplatformio.ini already points data_dir at voice_agent_5/data/, so this packages the 56 .bin frame files into a LittleFS image and flashes it to the data partition.
With Arduino IDE (one-time plugin install):
.vsix file~/.arduinoIDE/plugins/ (create the plugins folder if it doesn't exist)Then to upload:
Verify: Open Serial Monitor after uploading both sketch and filesystem. You should see:
LittleFS mounted.
Display: loaded 8 frames for 'neutral'
Display: GC9A01 initializedIf you want to regenerate the data/*.bin files from the source GIFs in feelings/:
Requirements: Python 3 with Pillow (pip install Pillow)
Run:
cd voice_agent_5
python utils/convert_gifs.py
This extracts 8 evenly-spaced frames from each GIF, resizes to 150x150, converts to RGB565 little-endian binary, and writes to data/default/<emotion>_<frame>.bin. The default/ subdirectory is the shipped emoji set; runtime overrides written from the captive portal land in data/custom/ on the device and never touch the defaults.
Emoji animations sourced from Google Fonts Emoji, used under the Creative Commons Attribution 4.0 International License (CC BY 4.0).
ArduinoWebsockets v0.5.4 has two upstream bugs that prevent WSS connections on ESP32: a missing setInsecure() method in SecuredEsp32TcpClient, and a missing fallback to insecure mode in the ESP32 branch of upgradeToSecuredConnection(). Both cause every secure WebSocket connection to fail silently. (Both are still present upstream as of v0.5.4.)
The library is vendored in src/ with fixes already applied -- no manual patching required. For full details, the exact code changes, and instructions for updating to a newer version, see websockets_patches.md. For the licensing side -- upstream version, licence, and the full list of what was modified -- see VENDORED.md.
These are defined in voice_agent_5.ino and require recompilation to change:
| Constant | Default | Description |
|---|---|---|
SAMPLE_RATE_IN | 24000 | Microphone sample rate (Hz). Required by the OpenAI Realtime GA API (audio/pcm is fixed at 24 kHz). |
SAMPLE_RATE_OUT | 24000 | Speaker playback rate (Hz). Must match OpenAI Realtime API output format. |
JITTER_BUFFER_MS | 300 | Milliseconds of audio to buffer before starting playback. Higher = smoother but more latency. |
LOW_WATER_BYTES | 3072 | Rebuffer threshold (~64 ms at 24 kHz). When the speaker buffer drops below this during playback, pause and re-accumulate before resuming. |
DMA_BLOCK_SIZE | 1024 | I2S DMA transfer size in bytes per read/write call. |
WIFI_CONNECT_TIMEOUT_MS | 8000 | Time to wait for each saved network in range before trying the next one. |
WIFI_SOLE_TIMEOUT_MS | 15000 | Time to wait when exactly one saved network is in range — there is nothing to fall through to but the config portal, so it gets a longer budget. |
WIFI_MAX_NETWORKS | 6 | How many WiFi networks are remembered (in wifi_store.h). Saving another drops the least recently used one. |
EMOJI_FRAME_MS | 120 | Delay between emoji animation frames (~8 fps). Lower = faster animation. |
EMOJI_SIZE_PX | 150 | Emoji frame dimensions (width and height). Must match convert_gifs.py output. |
EMOJI_NUM_FRAMES | 8 | Number of animation frames per emotion. Must match convert_gifs.py output. |
USE_DISPLAY | 1 | Set to 0 to disable display entirely (serial-only mode, no GC9A01 or Arduino_GFX needed). |
These are configurable at runtime via the web portal and persist across reboots:
| Setting | Default | Range | Description |
|---|---|---|---|
| System Prompt | "You are a helpful voice assistant..." | up to 12 KB (12288 chars) | Controls assistant persona |
| Voice | marin | alloy, ash, ballad, coral, echo, sage, shimmer, verse, marin, cedar | OpenAI Realtime voice; applies on next session |
| Language | Automatic | Automatic or one of 13 languages | Forces every reply into the chosen language; Automatic matches whatever you speak. Applies on next session |
| Persist Conversation | true | boolean | Chain responses via previous_response_id |
| Verbose Logging | true | boolean | Detailed serial debug output |
| Volume | 50 | 0 - 100 | Speaker volume (PCM sample scaling) |
| Audio Output | Speaker | Speaker / Headphones | Which output plays (only meaningful with the optional PCM5102A installed) |
The box/ directory contains the STL files for a circular 145 mm enclosure designed to hold all components. The geometry is a parametric build123d (Python) model; the .stl files here are pre-generated from it, so you don't need to render anything yourself.
Each printable part is its own STL, and the file prefix tells you which build it belongs to — print every 3dp_* file or every pcb_* file, never a mix. No part is shared between the two builds.
3dp_*, 7 parts): 3dp_ring.stl (carries the same 3.5 mm jack passthrough as the PCB ring, for the optional PCM5102A), 3dp_top.stl (the top plate carries printed bosses for the ESP32, display, amp, mic, speaker, and button), 3dp_bottom.stl, plus the small parts that mount components to the top plate: 3dp_speaker_y_bracket.stl, 3dp_cantilever_bracket.stl (ESP32 clamp), 3dp_inline_button_frame.stl, and 3dp_inline_button_bracket.stl.pcb_*, 3 parts): pcb_ring.stl (includes a 3.5 mm jack passthrough aligned with the optional PCM5102A DAC), pcb_top.stl (completely flat — the speaker is glued, so there are no bosses), pcb_bottom.stl (carries four standoffs that set the PCB height above the bottom plate).The parametric build123d source (where dimensions, component positions, and clearances are defined) is maintained in the project's development repo and isn't bundled with this release — just pick the STL set matching your build above and print.
The design uses a top/ring/bottom construction: the top plate holds all components (ESP32, display, speaker, mic, amplifier, button) facing down into the body — from outside you see its flat face. It is printed feature-side-up and flipped over at assembly; the model is pre-mirrored so that, once flipped, everything lines up with the PCB below. The ring forms the enclosure wall (USB cutout toward the ESP; orient the headphone hole toward the bottom), and the bottom plate closes the base. Parts are secured with M3 screws into printed bosses.
| State | LED Color | Meaning |
|---|---|---|
STATE_WIFI_WAIT | Yellow (solid) | Connecting to WiFi |
STATE_WIFI_CONFIG | Yellow (flashing) | AP mode, awaiting WiFi credentials |
STATE_READY_FOR_INPUT | Green | Idle, ready for push-to-talk |
STATE_RECORDING | Pink | Mic active, streaming audio to OpenAI |
STATE_THINKING | Blue | Waiting for API response |
STATE_SPEAKING | Cyan | Playing response audio |
Tools are OpenAI function calls the model makes autonomously during a response. All tool registration lives in voice_agent_5/tools.ino — adding a tool is two steps and touches only that one file.
Step 1 — Write the handler:
static void handleMyToolCall(const String& payload) {
    DynamicJsonDocument doc(256);
    if (deserializeJson(doc, payload) != DeserializationError::Ok) return;

    beginToolCall(doc["call_id"] | "");   // sets up g_pending_call_id and flags

    // parse arguments, do your work, optionally set g_tool_result_output
    g_tool_result_output = "done";
}
Important: handlers run inside the WebSocket
onMessagecallback and cannot callwsClient.send()directly. Use the flag mechanism (beginToolCall+g_tool_result_output) — the protocol loop sends the result afterresponse.donearrives. For cross-core side effects (display, NVS writes), set avolatile boolflag and handle it on Core 1 inloop().
Step 2 — Register the tool:
Add an entry to the TOOLS[] array in tools.ino:
{
    "my_tool_name",
    "Plain-text description the model reads to decide when to call this.",
    "{\"type\":\"object\",\"properties\":{"
    "\"param1\":{\"type\":\"string\",\"description\":\"What param1 does\"}"
    "},\"required\":[\"param1\"]}",
    handleMyToolCall
}
buildToolsJson() will include the new schema in the next session.update, and dispatchToolCall() will route calls to your handler. No changes to protocol.ino needed.
For the full async tool call flow diagram, see voice_agent_5/docs/architecture.md.
For detailed technical documentation covering dual-core architecture, ring buffer internals, audio pipeline, protocol details, emoji display system, and memory layout, see architecture.md.
.local address: mDNS may not work on all networks/devices. Use the IP address printed to Serial Monitor instead.VA5 is licensed under GPL-3.0 (GNU General Public License, version 3).
You can build these devices, use them, modify them, teach with them, and sell them. None of that needs anyone's permission. If you'd like to talk about a commercial arrangement or a classroom deployment, you're welcome to — hello@oriliventures.com — but it isn't a condition of any of the above.
The obligation that comes with GPL-3.0 is share-alike: if you hand someone the firmware, or a device running it, modified or not, they're entitled to the source under this same licence.
voice_agent_5/src/tiny_websockets/internals/wscrypto/base64.hpp.voice_agent_5/src/tiny_websockets/internals/wscrypto/sha1.hpp.| Qty | Value | Footprint | References |
|---|---|---|---|
| 2 | ESP32-S3 | PinSocket_1x22_P2.54mm_Vertical | J1, J2 |
| 2 | INMP441 | PinSocket_1x03_P2.54mm_Vertical | J3, J4 |
| 2 | USB-C 5V | R_0603_1608Metric | R1, R2 |
| 1 | EXP-AUX | PinSocket_1x02_P2.54mm_Vertical | J11 |
| 1 | EXP-DATA | PinSocket_1x08_P2.54mm_Vertical | J9 |
| 1 | EXP-PWR | PinSocket_1x07_P2.54mm_Vertical | J10 |
| 1 | EXP-SCR | PinSocket_1x04_P2.54mm_Vertical | J13 |
| 1 | GC9A01 | PinSocket_1x08_P2.54mm_Vertical | J8 |
| 1 | MAX98357A | PinSocket_1x07_P2.54mm_Vertical | J5 |
| 1 | PCM5102A | PinSocket_1x09_P2.54mm_Vertical | J6 |
| 1 | PCM5102A | PinSocket_1x06_P2.54mm_Vertical | J7 |
| 1 | PTT | SW_PUSH-12mm | SW1 |
| 1 | USB-C 5V | USB_C_Receptacle_GCT_USB4135-GF-A_6P_TopMnt_Horizontal | J12 |
lapalmaelettronica/Progetti
Una lista dei progetti che ho pubblicato su instagram, potete trovarci pcb, codici, schemo elettrici e stampe 3d!


tothpetiszilard/a3_8p_redFIS
Hacking into Audi A3 8P Driver Information System


galopago/iot-badge-legacy
Electronic conference badge for programming conventions, hacking events, etc.

Thecactusman0/Nebula-openwatch
Nebula is a ESP32 based smartwatch that features a rotating bezel encoder

JadenS180/spectrum-analyzer
ESP32-based real-time audio spectrum analyzer with custom PCB design. Features INMP441 I2S microphone, SSD1306 OLED display, FFT processing, and real-time WiFi streaming to a browser-based visualizer via WebSockets.
It measures 135 × 135 mm and has 2 copper layers, 1.6 mm thick.
16 parts, built around the ESP32-S3, INMP441 and PCM5102APW. The full list of its parts is on this page, with links to each part's symbol and footprint where PCBKit's library has them.
From the iollama/Voice-Assistant-5 repository on GitHub, at the commit this page was made from: the board is pcb/va5pcb.kicad_pcb. PCBKit opens the board in the browser, with nothing to install.
Its repository publishes it under the GPL-3.0 licence: you may reuse it on that licence's terms (keep the author's notice, and for a copyleft licence share your changes alike).