2 layers20.5 × 24.8 mm
 html-css-js-python/GPU12864
Simple Arduino-based GPU.
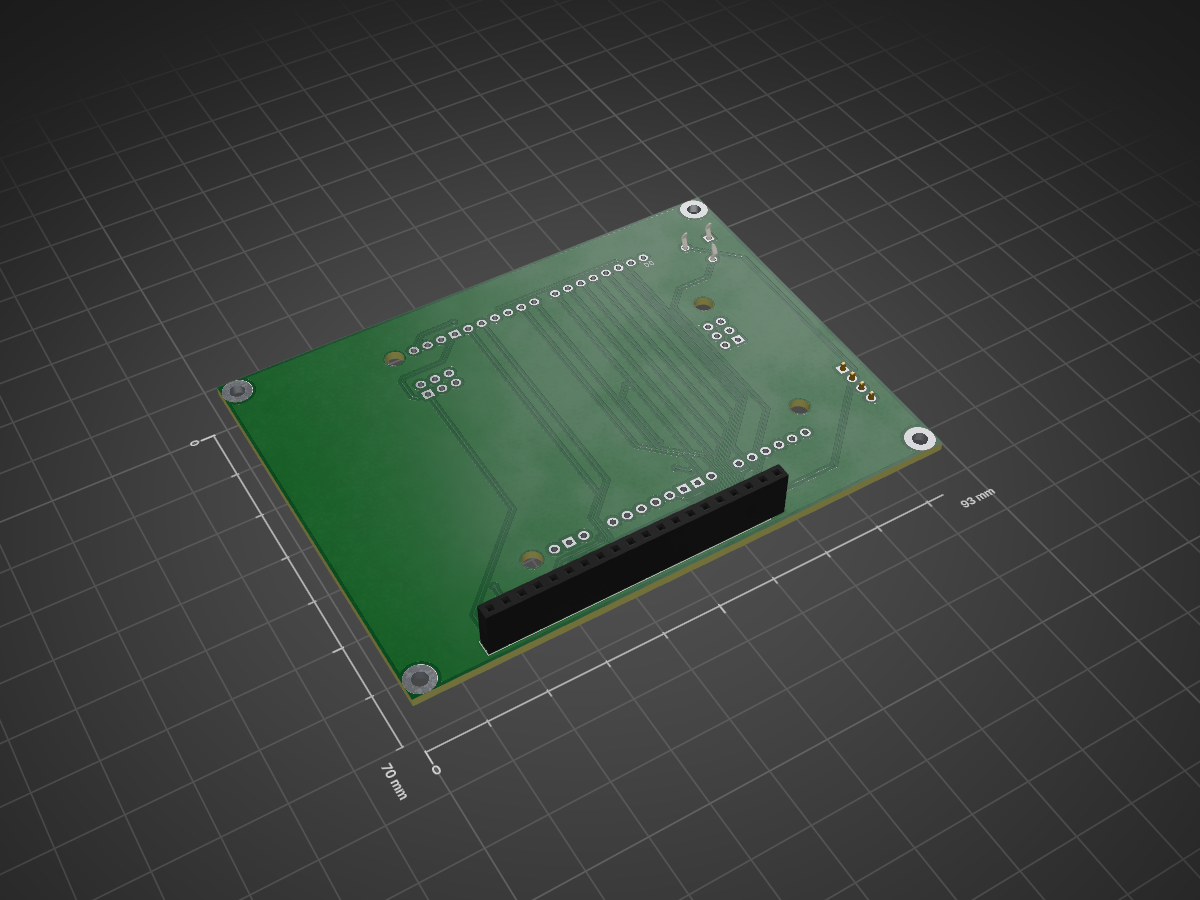
GPU12864 is an open-source printed circuit board by html-css-js-python, from the html-css-js-python/GPU12864 repository on GitHub, published under the Apache-2.0 licence. It is a 2-layer board of 93 × 70 mm with 8 parts on 45 nets, routed with 176 tracks and 8 vias.
It belongs with the AVR (ATmega, ATtiny) boards of this library.





VidiaG Force RT-X12864 is an open-source, microcontroller-based GPU designed for 128x64 GLCD displays. It acts as a dedicated graphics processing unit, handling framebuffer management, rendering, and communication with the display independently from the main CPU.
Unlike a typical GLCD library, the CPU does not directly control the display. Instead, it sends high-level drawing commands to the RT-X12864 GPU, which performs all rendering operations and updates the GLCD using its own framebuffer.
CPU (Master)
    |
    | I²C Commands (400 kHz)
    v
VidiaG Force RT-X12864 GPU
    |
    | Framebuffer Rendering
    v
CustomGLCD Driver
    |
    v
128x64 GLCD Display
[!IMPORTANT] The CPU only sends high-level commands such as drawing pixels, lines, text, and bitmaps. The GPU handles all low-level rendering and display communication.
| Component | Description |
|---|---|
| GPU | Arduino Uno R4 WiFi |
| CPU | Any compatible I2C master (tested with Arduino Nano Every) |
| Display | AG12864AHF / KS0108-compatible 128x64 GLCD |
| Interface | I²C Fast-Mode (400 kHz) |
| VRAM | 1 KB framebuffer |
| Power Consumption | Approximately 255 mA including the display (idle) |
gpu_soft/ScreenI2C/ScreenI2C.ino to the Arduino Uno R4 WiFi.GND, VCC, SCL, and SDA.GPU12864.h in your CPU project.gpuBegin() before using any GPU functions.#include "GPU12864.h"
void setup()
{
gpuBegin();
gpuClear();
gpuDrawText(1, 1, "Hello, World!", FONT_5X7);
gpuDrawLine(0, 0, 127, 63);
gpuUpdate();
}
void loop()
{
}The API is function-based rather than object-oriented.
Functions, yes, functions. Because yes.
It was simpler to implement this way. :P
| Command | Function |
|---|---|
gpuBegin() | Begins communication between CPU and GPU (takes about 1.2 s) |
gpuClear() | Clear the framebuffer |
gpuUpdate() | Send the framebuffer to the GLCD |
gpuDrawPixel(uint8_t x, uint8_t y, bool color = true) | Draw a single pixel |
gpuDrawLine(uint8_t x0, uint8_t y0, uint8_t x1, uint8_t y1, bool color = true) | Draw a line |
gpuDrawRect(uint8_t x, uint8_t y, uint8_t w, uint8_t h, bool color = true) | Draw a rectangle |
gpuFillRect(uint8_t x, uint8_t y, uint8_t w, uint8_t h, bool color = true) | Draw a filled rectangle |
gpuDrawCircle(uint8_t x, uint8_t y, uint8_t r, bool color = true) | Draw a circle |
gpuFillCircle(uint8_t x, uint8_t y, uint8_t r, bool color = true) | Draw a filled circle |
gpuDrawText(uint8_t x, uint8_t y, const char* text, uint8_t fontId, bool color = true) | Render text |
gpuDrawBitmap(uint8_t x, uint8_t y, const uint8_t *bitmap, uint8_t width, uint8_t height) | Render a bitmap stored in PROGMEM |
[!TIP] You can use
gpuFillRect()instead ofgpuClear()when you want to clear only part of the screen to avoid screen flashing on refresh.
The repository includes several demonstration programs:
For developers who want to use GPU12864 and additional drivers without copying files into every sketch.
Download the Arduino IDE package (ZIP)
After installing the ZIP through Sketch → Include Library → Add .ZIP Library…, use:
#include <GPU12864.h>
#include <adrv/AdditionalDriver.h>
instead of:
#include "GPU12864.h"
#include "AdditionalDriver.h"
Ready-to-use sketches are available in File → Examples → GPU12864 IDE Pack.
The repository includes the complete KiCad project and manufacturing files for the RT-X12864 adapter PCB, including:
.kicad_pro project file.kicad_sch schematic.kicad_pcb PCB layout.gbr).drl)gerber.zip ready for PCB fabrication[!NOTE] This is not an RTX graphics card. It is a custom, microcontroller-based 2D GPU for GLCD displays.
This project is released as open-source hardware and software. You are free to study, modify, and distribute it under the terms of the license.
| Qty | Value | Footprint | References |
|---|---|---|---|
| 1 | AG12864AHF | Connector_PinHeader_2.54mm:PinHeader_1x20_P2.54mm_Vertical | J1 |
| 1 | Arduino_Uno_R4_WiFi_Shield | PCM_arduino-library:Arduino_Uno_R4_WiFi_Shield | A1 |
| 1 | Contrast | Potentiometer_THT:Potentiometer_Runtron_RM-065_Vertical | RV1 |
| 1 | INPUT | Connector_PinHeader_2.54mm:PinHeader_1x04_P2.54mm_Vertical | J2 |
The 4 most common of 8 parts.
It measures 93 × 70 mm and has 2 copper layers, 1.6 mm thick.
8 parts. The full list of its parts is on this page, with links to each part's symbol and footprint where PCBKit's library has them.
From the html-css-js-python/GPU12864 repository on GitHub, at the commit this page was made from: the board is hardware/GPU12864/GPU12864.kicad_pcb and its schematic hardware/GPU12864/GPU12864.kicad_sch. PCBKit opens the board in the browser, with nothing to install.
Its repository publishes it under the Apache-2.0 licence: you may reuse it on that licence's terms (keep the author's notice, and for a copyleft licence share your changes alike).

joeycastillo/Sensor-Watch
A board replacement for the classic Casio F-91W wristwatch

rusefi/rusefi
rusefi - GPL internal combustion engine control unit

hoglet67/RGBtoHDMI
Bare-metal Raspberry Pi project that provides pixel-perfect sampling of Retro Computer RGB/YUV video and conversion to HDMI

shanteacontrols/OpenDeck
A platform for building interactive control and sensing devices using MIDI and OSC built with Zephyr RTOS.

hackclub/OnBoard
💡 Join 1,000 teenagers and make your first PCB with a $100 grant!

dangiu/PicoMemcard
Emulating PSX Memory Card (or controller) using a Raspberry Pi Pico

OLIMEX/DIY-LAPTOP
Do It Yourself Open Source Hardware and Software Modular Hacker's Friendly Laptop