

4 layers106 × 29.2 mm
Batterymeter
hb020/batterymeter
Handheld Battery AC and Time Domain characterization tool on Attiny series 2
145 parts20
 etherkit/EtherKeyerMini4
A simple Morse Code keyer that does the basic functions you need
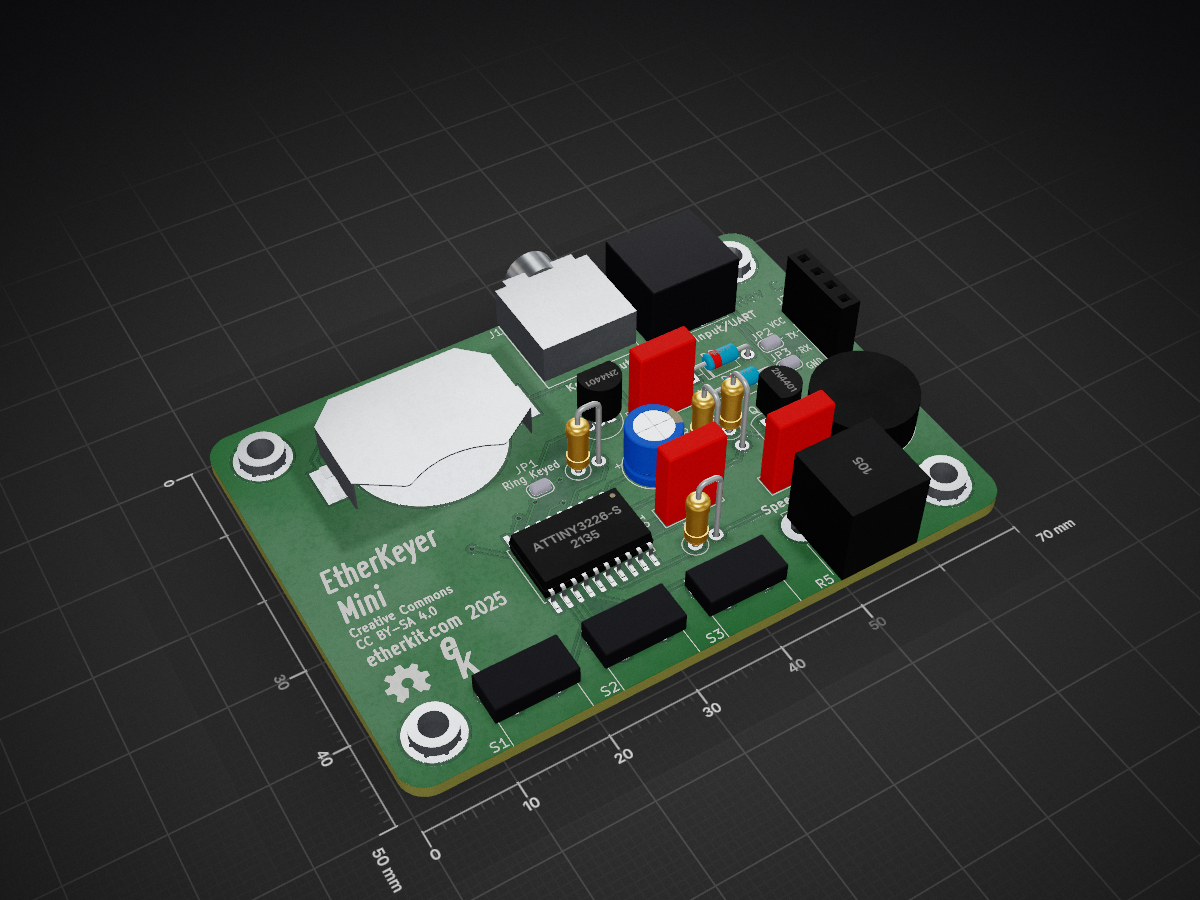
EtherKeyerMini is an open-source printed circuit board by etherkit, from the etherkit/EtherKeyerMini repository on GitHub. It is a 2-layer board of 70 × 50 mm with 31 parts on 29 nets, routed with 127 tracks and 5 vias.
It is built around the ATTINY3226-SU and CR2032. Its parts include 5 resistors, 4 capacitors, 3 connectors, 3 switches and 2 diodes. It belongs with the AVR (ATmega, ATtiny) boards of this library.
A simple keyer that does the basic functions that you need.
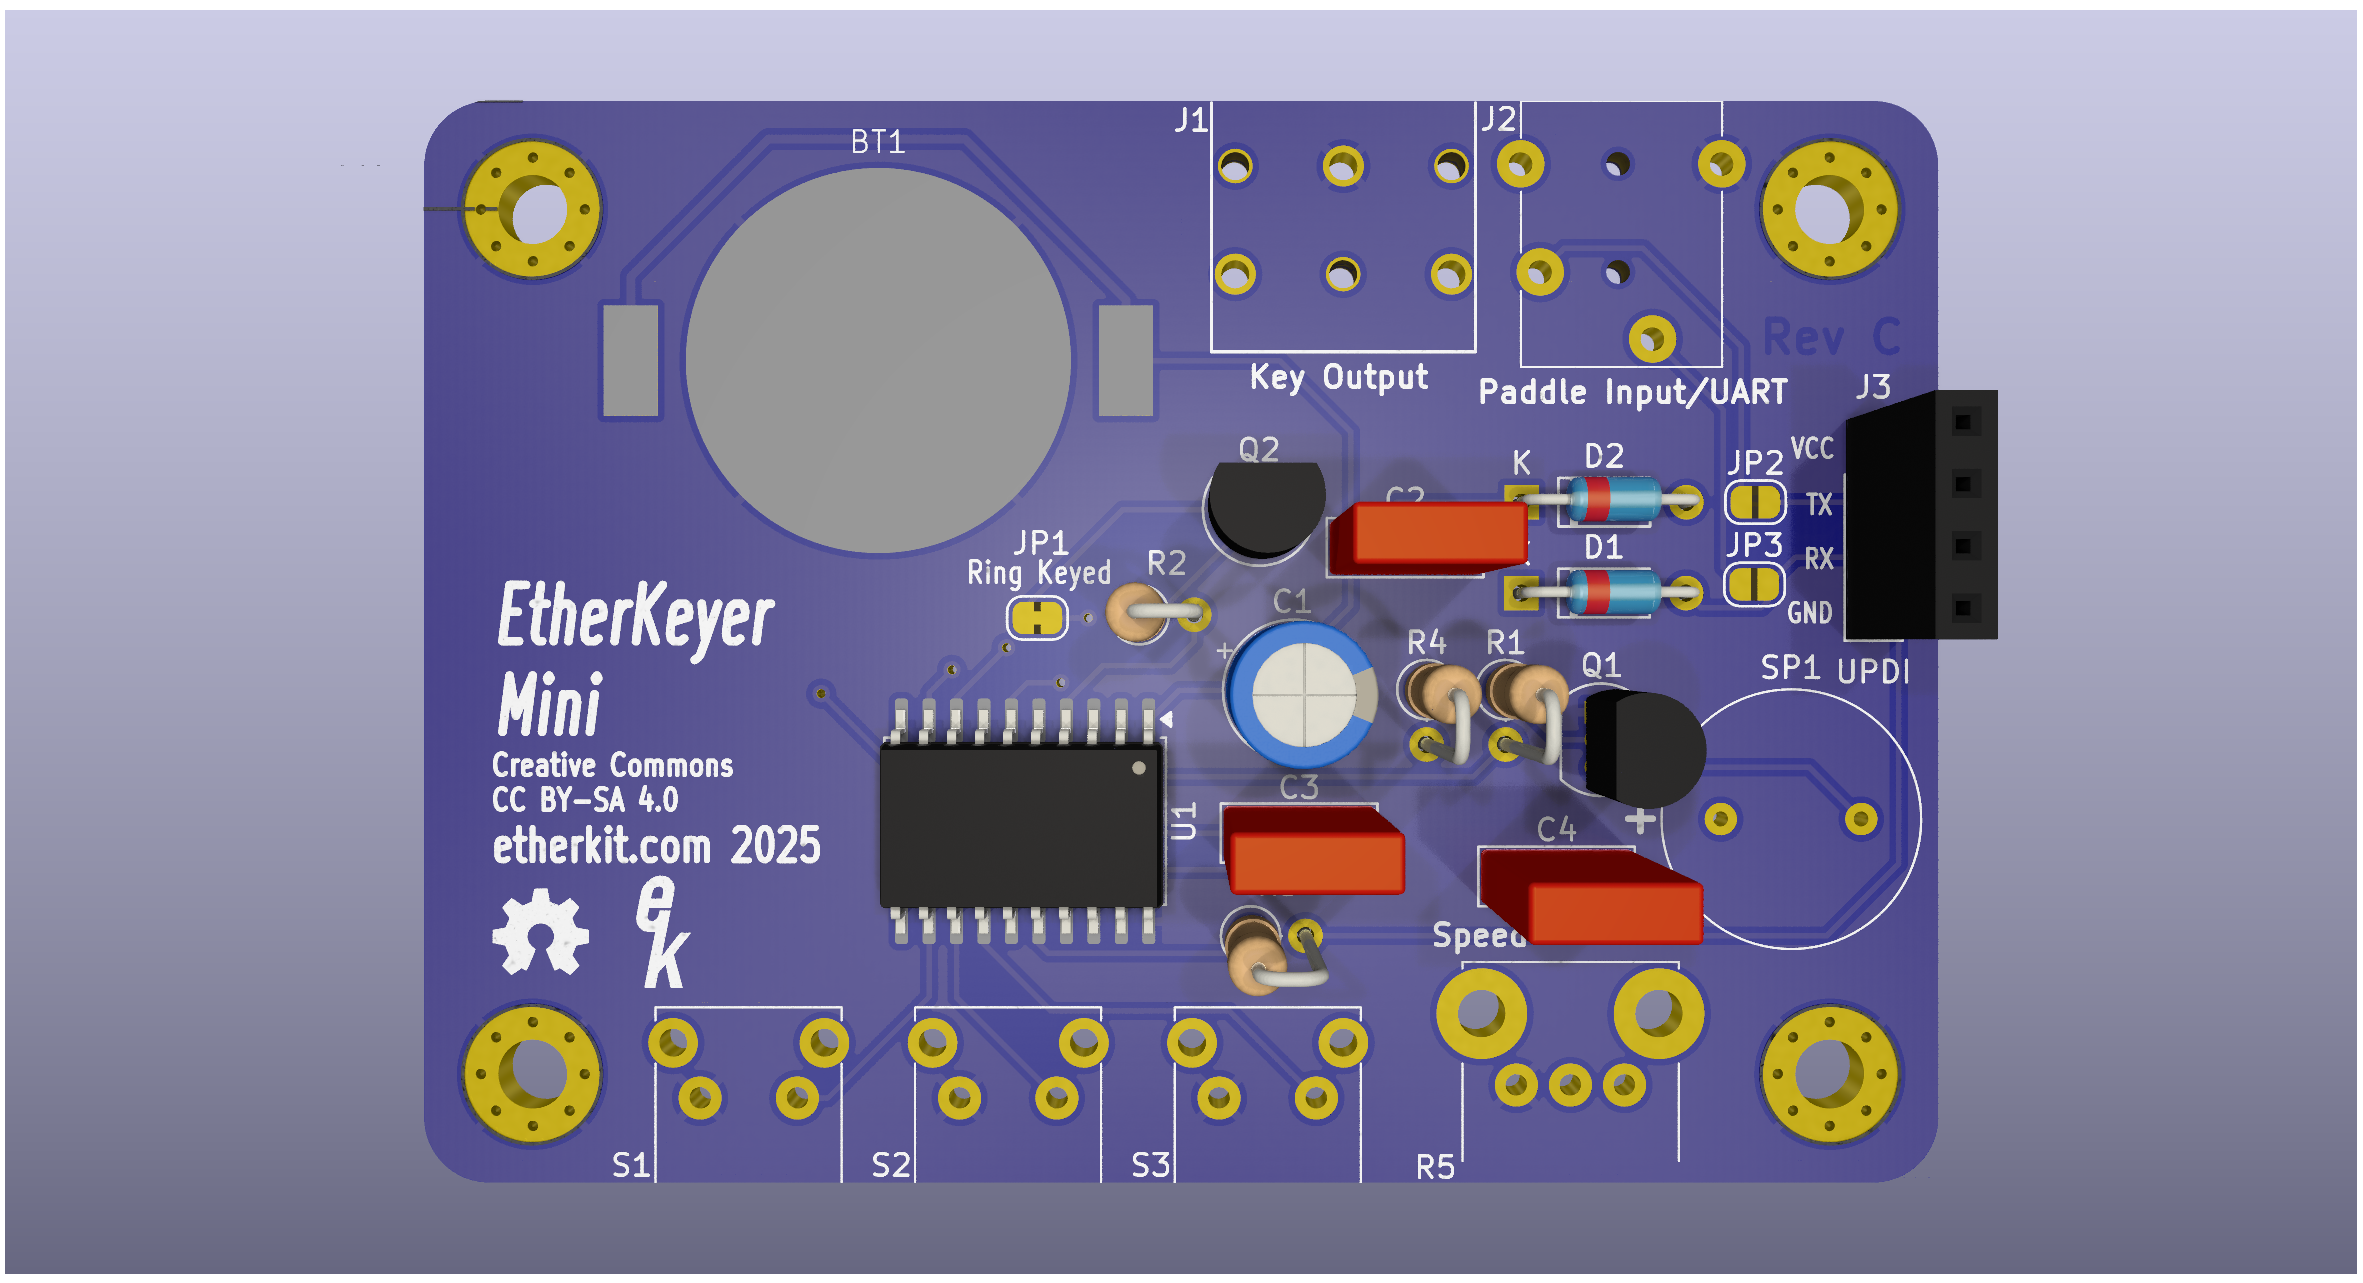
In order to program the message memories, change parameters other than the keyer speed, and update the firmware, you'll need a serial terminal that can connect to the 5 V TTL UART on EtherKeyer Mini via the 3.5 mm TRRS paddle jack. The Etherkit UART Adapter board has a USB-C connection for your PC and the requisite 3.5 mm TRRS jack, so that all that you need to connect to EtherKeyer Mini is a 3.5 mm TRRS cable.
A CR2032 lithium coin cell is required for powering EtherKeyer Mini.
The knob control on the right side of the front of EtherKeyer Mini controls the keyer speed, from a minimum of 5 WPM to a maximum of 40 WPM. This control can be adjusted at any time and responds immediately.
Cancel any message playback by pressing any button or paddle.
The format for interacting with EtherKeyer Mini via the UART is very simple. In order to place EtherKeyer Mini into UART mode, press and hold button 3 for at least one second. If your serial terminal is open when you do this, you'll get a greeting from EtherKeyer Mini to let you know it is ready for commands.
Each message memory has a maximum size of 40 characters.
Exit UART mode by pressing and holding button 3 again for at least one second, or issue the X: command in the serial terminal. UART mode also returns to keyer mode after 60 seconds without a received line, so the keyer can go back to sleep.
19200 baud, send New Line only, no flow control.
W? - Keyer speed1? - Message memory 12? - Message memory 23? - Message memory 31:<message> - Message memory 12:<message> - Message memory 23:<message> - Message memory 3X: - Exit UART ModeR: - Reverse Paddle TerminalsN: - Normal Paddle TerminalsA: - Set Iambic A ModeB: - Set Iambic B ModeS: - Sidetone OnO: - Sidetone OffPlease see the Requirements section above for the hardware necessary for the UART adapter.
EtherKeyer Mini uses an ATtiny3226 microcontroller with the Optiboot bootloader pre-installed. You can use load new firmware onto EtherKeyer Mini via a UART adapter connected to the paddle jack (the easiest way to do so is using the Etherkit UART Adapter board with a 3.5 mm TRRS cable). You can also use a standard USB-UART adapter connected to jack J3 to program the ATtiny3226 via UPDI protocol.
Programming via the paddle jack is accomplished using the Arduino IDE using the megaTinyCore board support package. Use this link for instructions on how to add this board support package to your Arduino IDE. Once you have added the board support package, connect your UART adapter to your PC. In Arduino IDE, select the "ATtiny3226/1626/826/426 w/Optiboot" as your board and port corresponding to your programming UART adapter. Make sure to set all of the specific board settings in the Tools menu of Arduino IDE to those shown below:
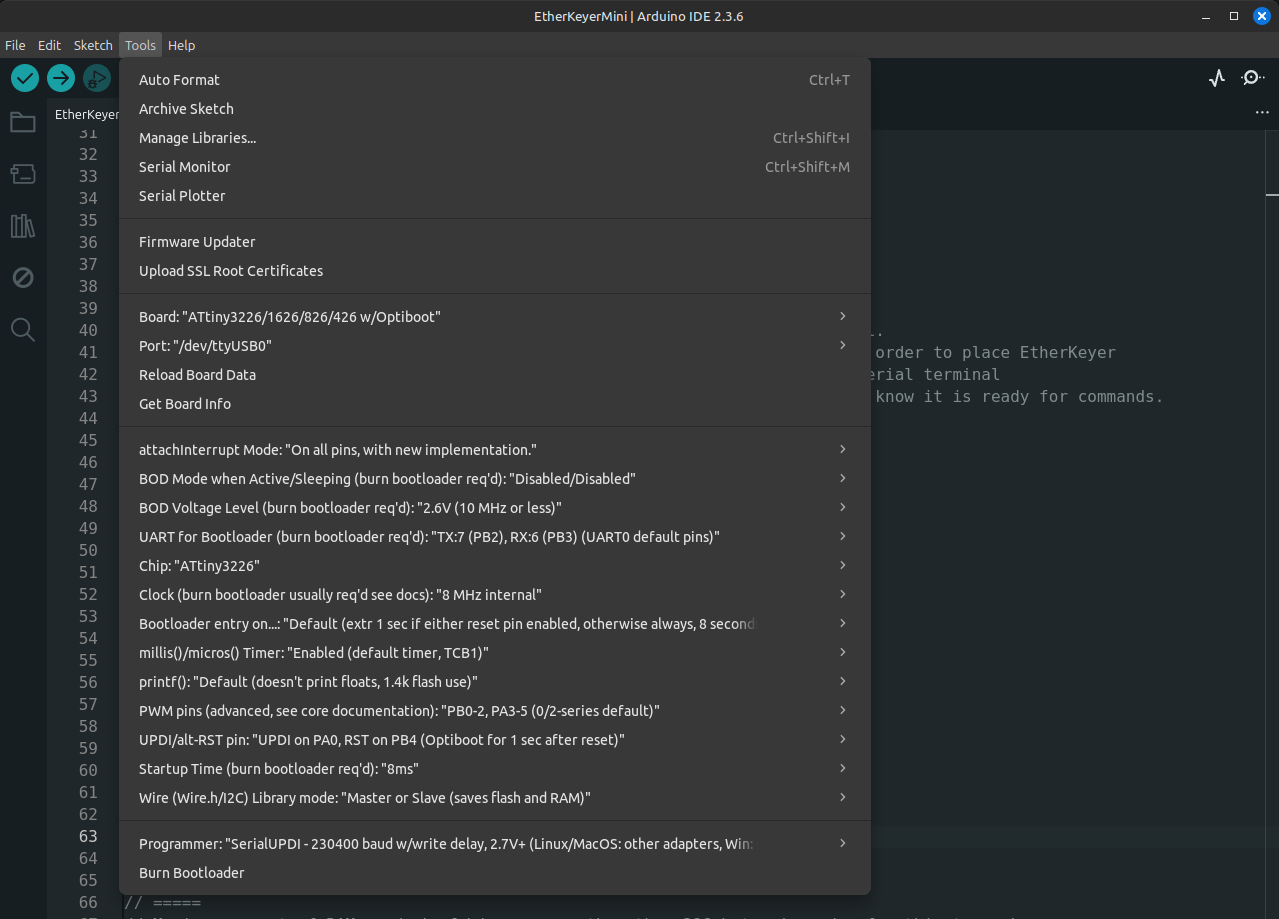
Once you have all of these settings correct, you can load the EtherKeyerMini.ino sketch into the Arduino IDE and then use the Sketch > Upload menu command or use the upload button on the toolbar.
| Qty | Value | Footprint | References |
|---|---|---|---|
| 4 | MountingHole_Pad | MountingHole:MountingHole_3.2mm_M3_Pad_Via | H1, H2, H3, H4 |
| 3 | 100n | Capacitor_THT:C_Rect_L7.0mm_W2.5mm_P5.00mm | C2, C3, C4 |
| 3 | 10k | Resistor_THT:R_Axial_DIN0207_L6.3mm_D2.5mm_P2.54mm_Vertical | R1, R2, R4 |
| 3 | PUSHBUTTON_TACTILE | EtherkitKicadLibrary:C&K_PTS645VH832LFS | S1, S2, S3 |
| 2 | 1N5711 | Diode_THT:D_DO-35_SOD27_P7.62mm_Horizontal | D1, D2 |
| 2 | 2N4401 | Package_TO_SOT_THT:TO-92_Inline | Q1, Q2 |
| 2 | SolderJumper_2_Bridged | Jumper:SolderJumper-2_P1.3mm_Open_RoundedPad1.0x1.5mm | JP2, JP3 |
| 1 | 1M | EtherkitKicadLibrary:Bournes_PTV09A | R5 |
| 1 | 4.7u | Capacitor_THT:CP_Radial_D6.3mm_P2.50mm | C1 |
| 1 | 470 | Resistor_THT:R_Axial_DIN0207_L6.3mm_D2.5mm_P2.54mm_Vertical | R3 |
| 1 | ATtiny3226-S | Package_SO:SOIC-20W_7.5x12.8mm_P1.27mm | U1 |
| 1 | CR2032 | EtherkitKicadLibrary:Linx_BAT-HLD-001 | BT1 |
| 1 | Key Output | EtherkitKicadLibrary:Kycon_STX-3120-3B | J1 |
| 1 | LOGO | EtherkitKicadLibrary:EtherkitLogoSmall | G1 |
| 1 | Logo_Open_Hardware_Small | EtherkitKicadLibrary:OSHWLogo4mm | SYM1 |
| 1 | Paddle Input/UART | EtherkitKicadLibrary:SameSky_SJ-43514 | J2 |
| 1 | Piezo Speaker | EtherkitKicadLibrary:PUI_AT-1224-TWT-12V-2-R | SP1 |
| 1 | Ring Keyed | Jumper:SolderJumper-2_P1.3mm_Bridged_RoundedPad1.0x1.5mm | JP1 |
| 1 | UPDI | Connector_PinSocket_2.54mm:PinSocket_1x04_P2.54mm_Vertical | J3 |
It measures 70 × 50 mm and has 2 copper layers, 1.6 mm thick.
31 parts, built around the ATTINY3226-SU and CR2032. The full list of its parts is on this page, with links to each part's symbol and footprint where PCBKit's library has them.
From the etherkit/EtherKeyerMini repository on GitHub, at the commit this page was made from: the board is PCB/EtherKeyerMini.kicad_pcb and its schematic PCB/EtherKeyerMini.kicad_sch. PCBKit opens the board in the browser, with nothing to install.
Its repository states no licence, so its author keeps all rights: ask etherkit before reusing the design.
hb020/batterymeter
Handheld Battery AC and Time Domain characterization tool on Attiny series 2

mayermakes/MyGenWashy
Generic washing Machine Controller - Result of the TuttleButtle Hackathon 2025


mayermakes/analog-bridge
modular logic probe (3V3 logic level, 16 channels per device, SCPI)


alexanderenrique/attiny-e-ink
Ultra-low-power ATtiny3226 e-ink quote display — firmware and KiCad PCB

etherkit/Si5351AVFO
After any schematic change, run tools/exportdocs.sh (needs KiCad 10 kicad-cli). It rewrites docs/Si5351AVFOschematic.pdf, the netlist, SVGs and docs/erc.rpt.