2 layers18.5 × 26 mm
24g2usb rp2350zero
joypad-ai/joypad-os
Universal controller firmware for building adapters, dongles, and custom controllers.
4 parts1.7kApache-2.0

 circuitsable/TascamDR40usbc1
A PCB to turn Tascam's DR-40 into a USB C device
Tascamusbc is an open-source printed circuit board by circuitsable, from the circuitsable/TascamDR40usbc repository on GitHub, published under the GPL-3.0 licence. It is a 2-layer board of 8.6 × 9.2 mm with 4 parts on 10 nets, routed with 48 tracks and 2 vias.
Its parts include 2 resistors and 2 connectors.
This is an adapter PCB that replaces the DR-40's USB mini port with a host charging capable USB C port.
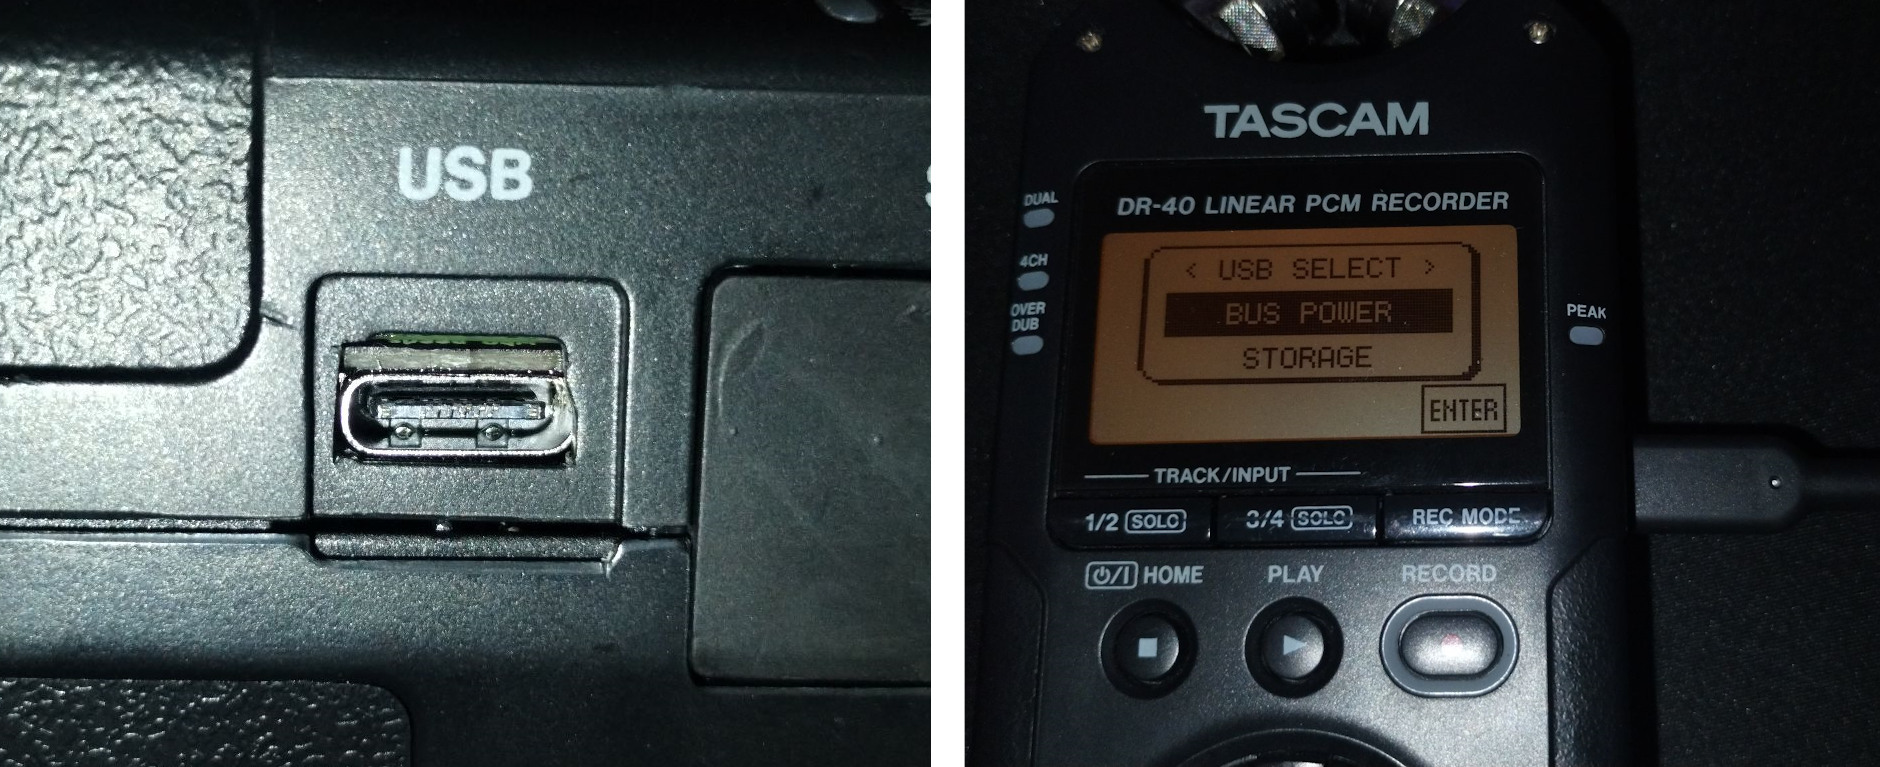
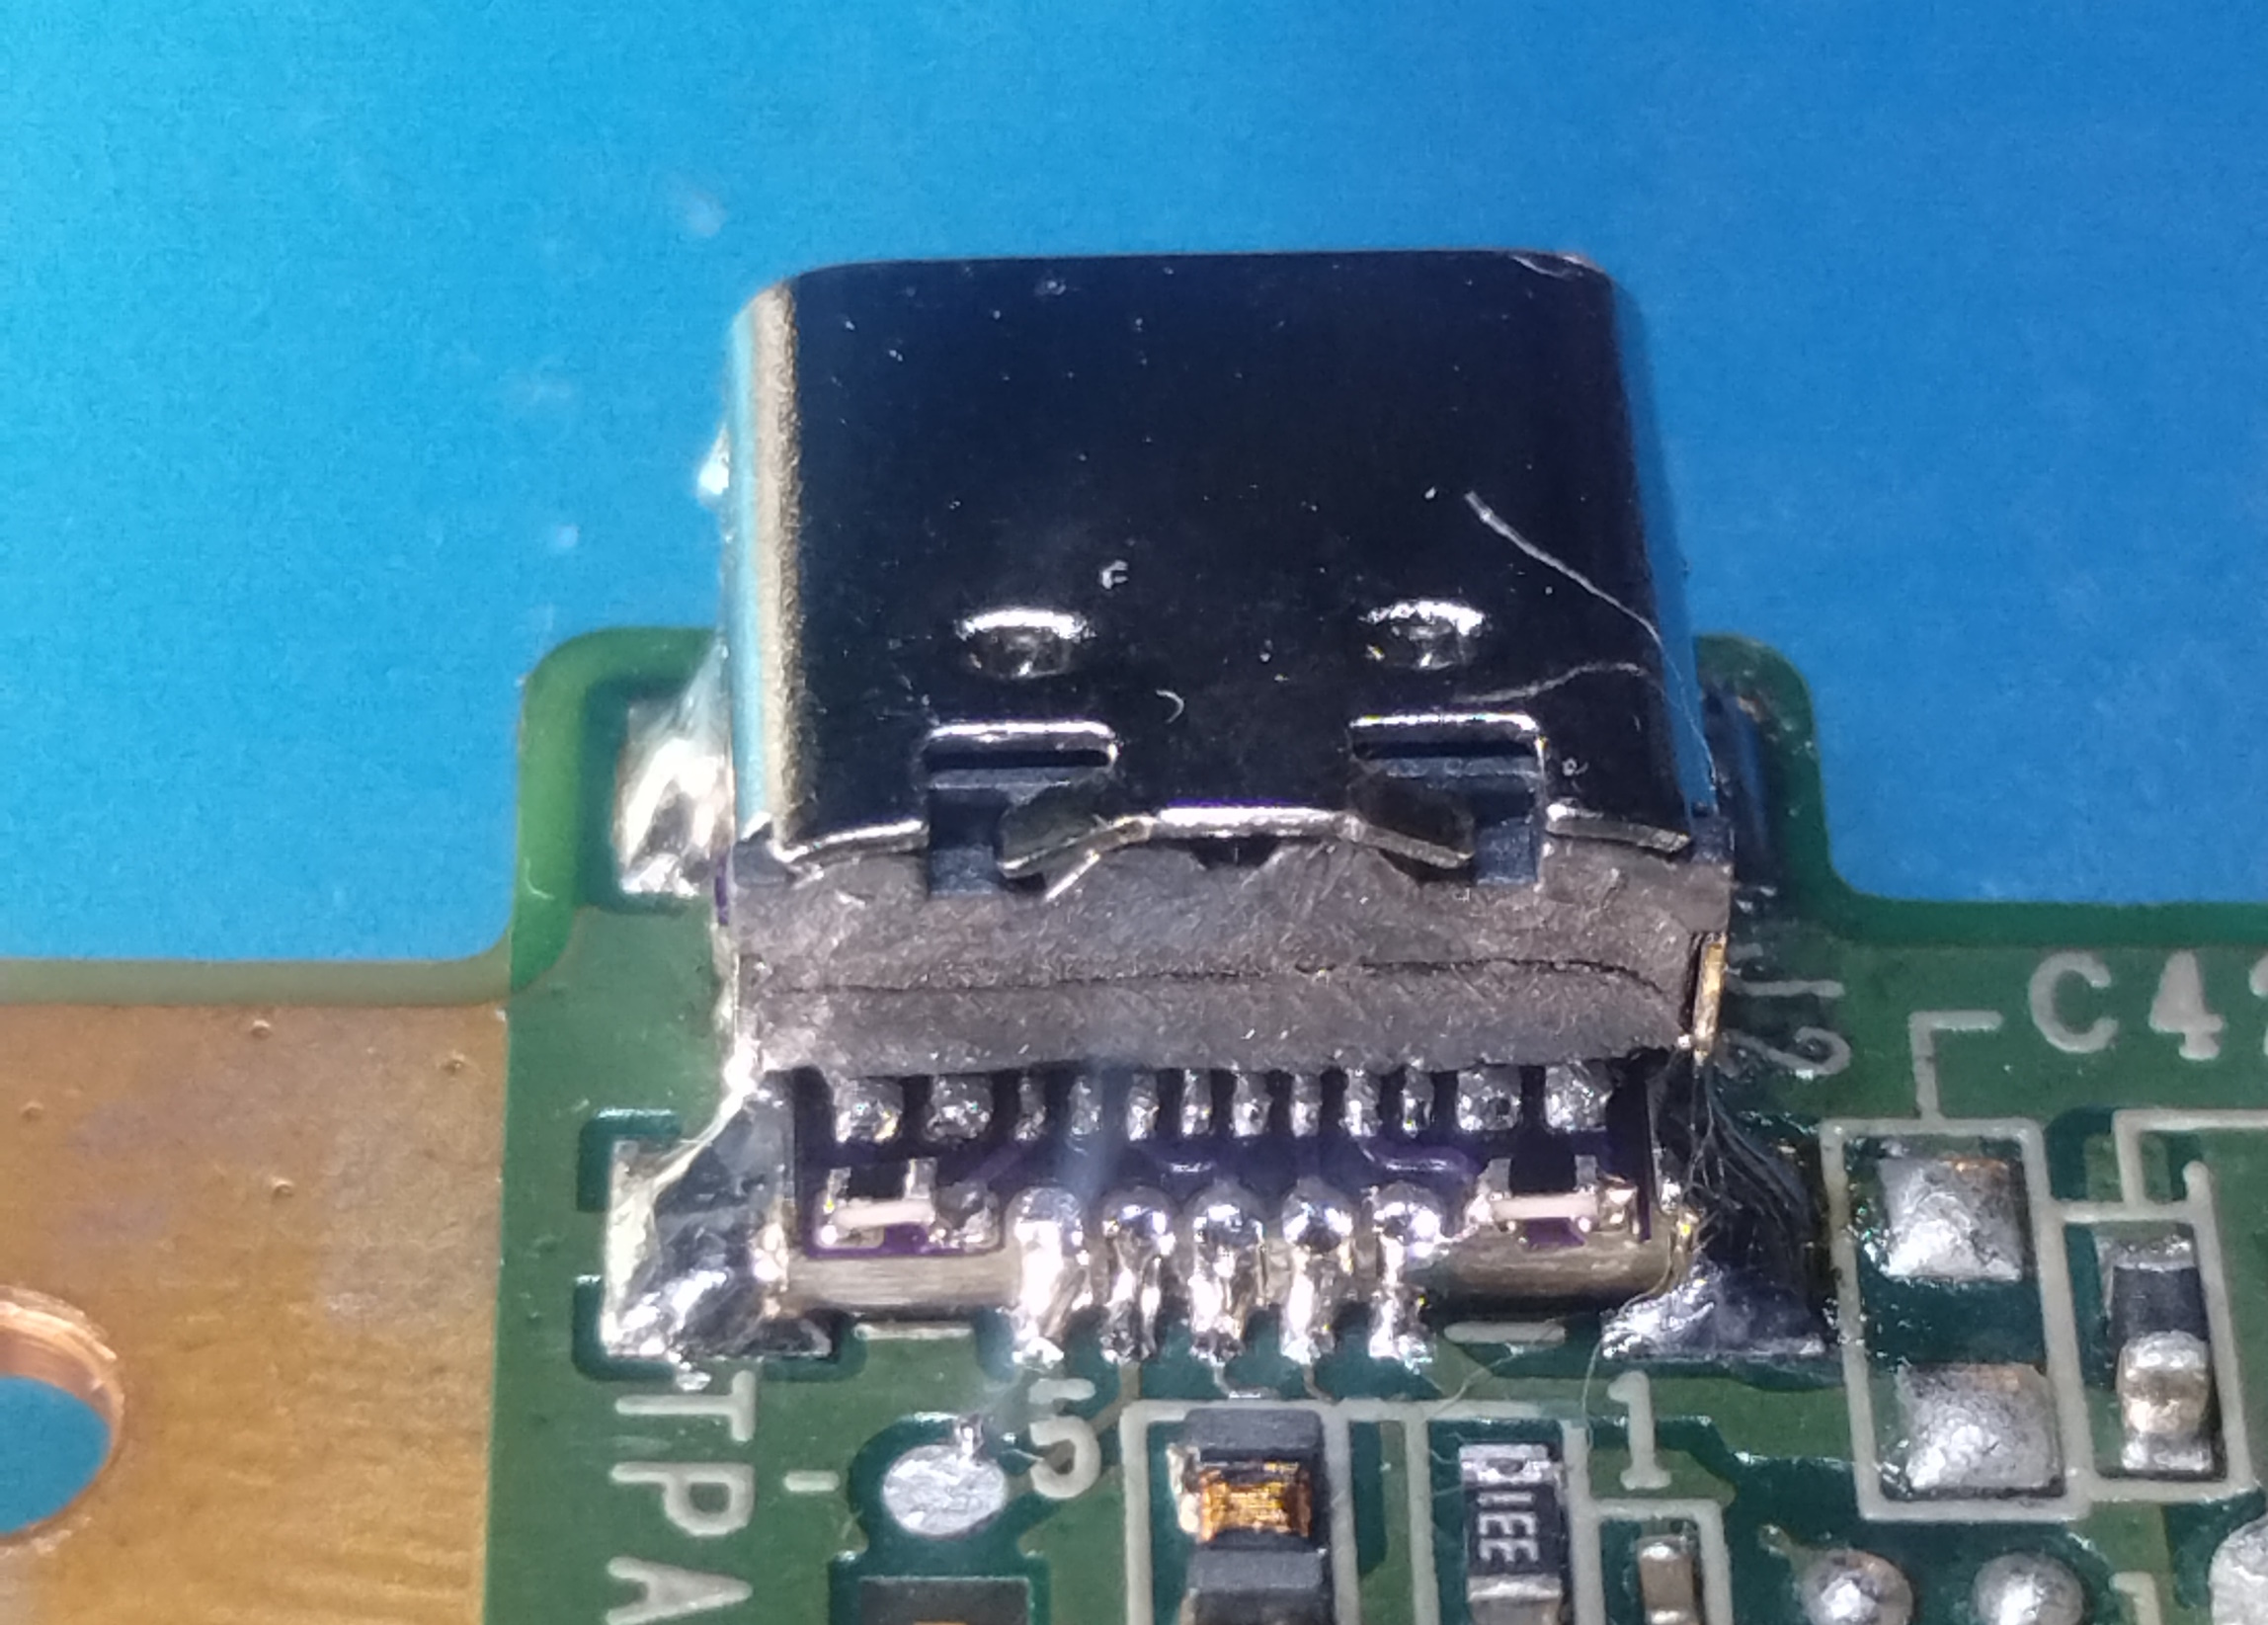
I have done USB C mods to many of the devices I own, and I wanted to make one for my DR-40. This may also work on a DR-40X, but I do not own one to confirm this. This may work on any SMD USB mini port, I have used this pcb on several devices that are not the DR-40.
This mod uses 0402 SMD resistors and a small pitched USB C port, so it will require some soldering experience.
The PCB, of which gerbers are available for in the releases. It has to be 0.8mm thick to stay within the USB mini's original footprint/volume. The PCB can be ordered from any board house, but some may not like the castellated holes or charge extra for them. This PCB will most likely violate the anular ring sizes for your board house. Oshpark will do castellated holes, has 0.8mm availability, is quite cheap, and tolerated the anular ring size violations, but the finished boards may require post processing with a small knife.
2 0402 4.7k SMD resistors. They can be sourced from anywhere, here are some examples: Aliexpress, Ebay, Mouser, Digikey
1 GCT 16 Pin 4105 Horizontal SMD USB C Port. They can be sourced from anywhere, here are some examples: Aliexpress, Ebay, Mouser, Digikey
Basic soldering equipment.
Hobby knife.
Needle nose pliers.
File/Side cutters (Optional).
Disassemble and remove the USB mini port from your DR-40. This can be destructively to the original port (as long as pads are kept intact), or with a hot air station. Use solder wick to make the removed port's pads flat. If your DR-40 has a metalic mesh tape loop ontop of the USB port, keep it safe for later.
Touch up the castellated holes of your PCB with a hobby knife, as they will most certainly arrive with excess material from the pads being drilled. You may also need to file/cut off excess PCB material from its original paneling.
Seat the USB C port as forward as it will go on the pcb, and solder only the front two legs of it to keep it positioned. Next, solder the USB C port's 12 pins to the PCB. Afterwards, solder the two resistors onto their footprints while being careful to not bridge any pins.
Allign the adapter PCB into the silkscreen of the removed USB Mini port, trying to allign it down the middle as best as possible, as well as leaving as little pad depth as possible. Solder the USB C port's shield to the 4 shield pads onto the DR-40 PCB. Finally, solder the adapter's castellated holes to the old USB data/power lines.
Double check all of your work for shorts, especially the castellated holes. Touching up shorts tends to move the resistors, so remain patient. Clean up flux residue. If your DR-40 came with a metalic mesh tape piece ontop of it's original USB mini port, place it ontop of the USB C port.
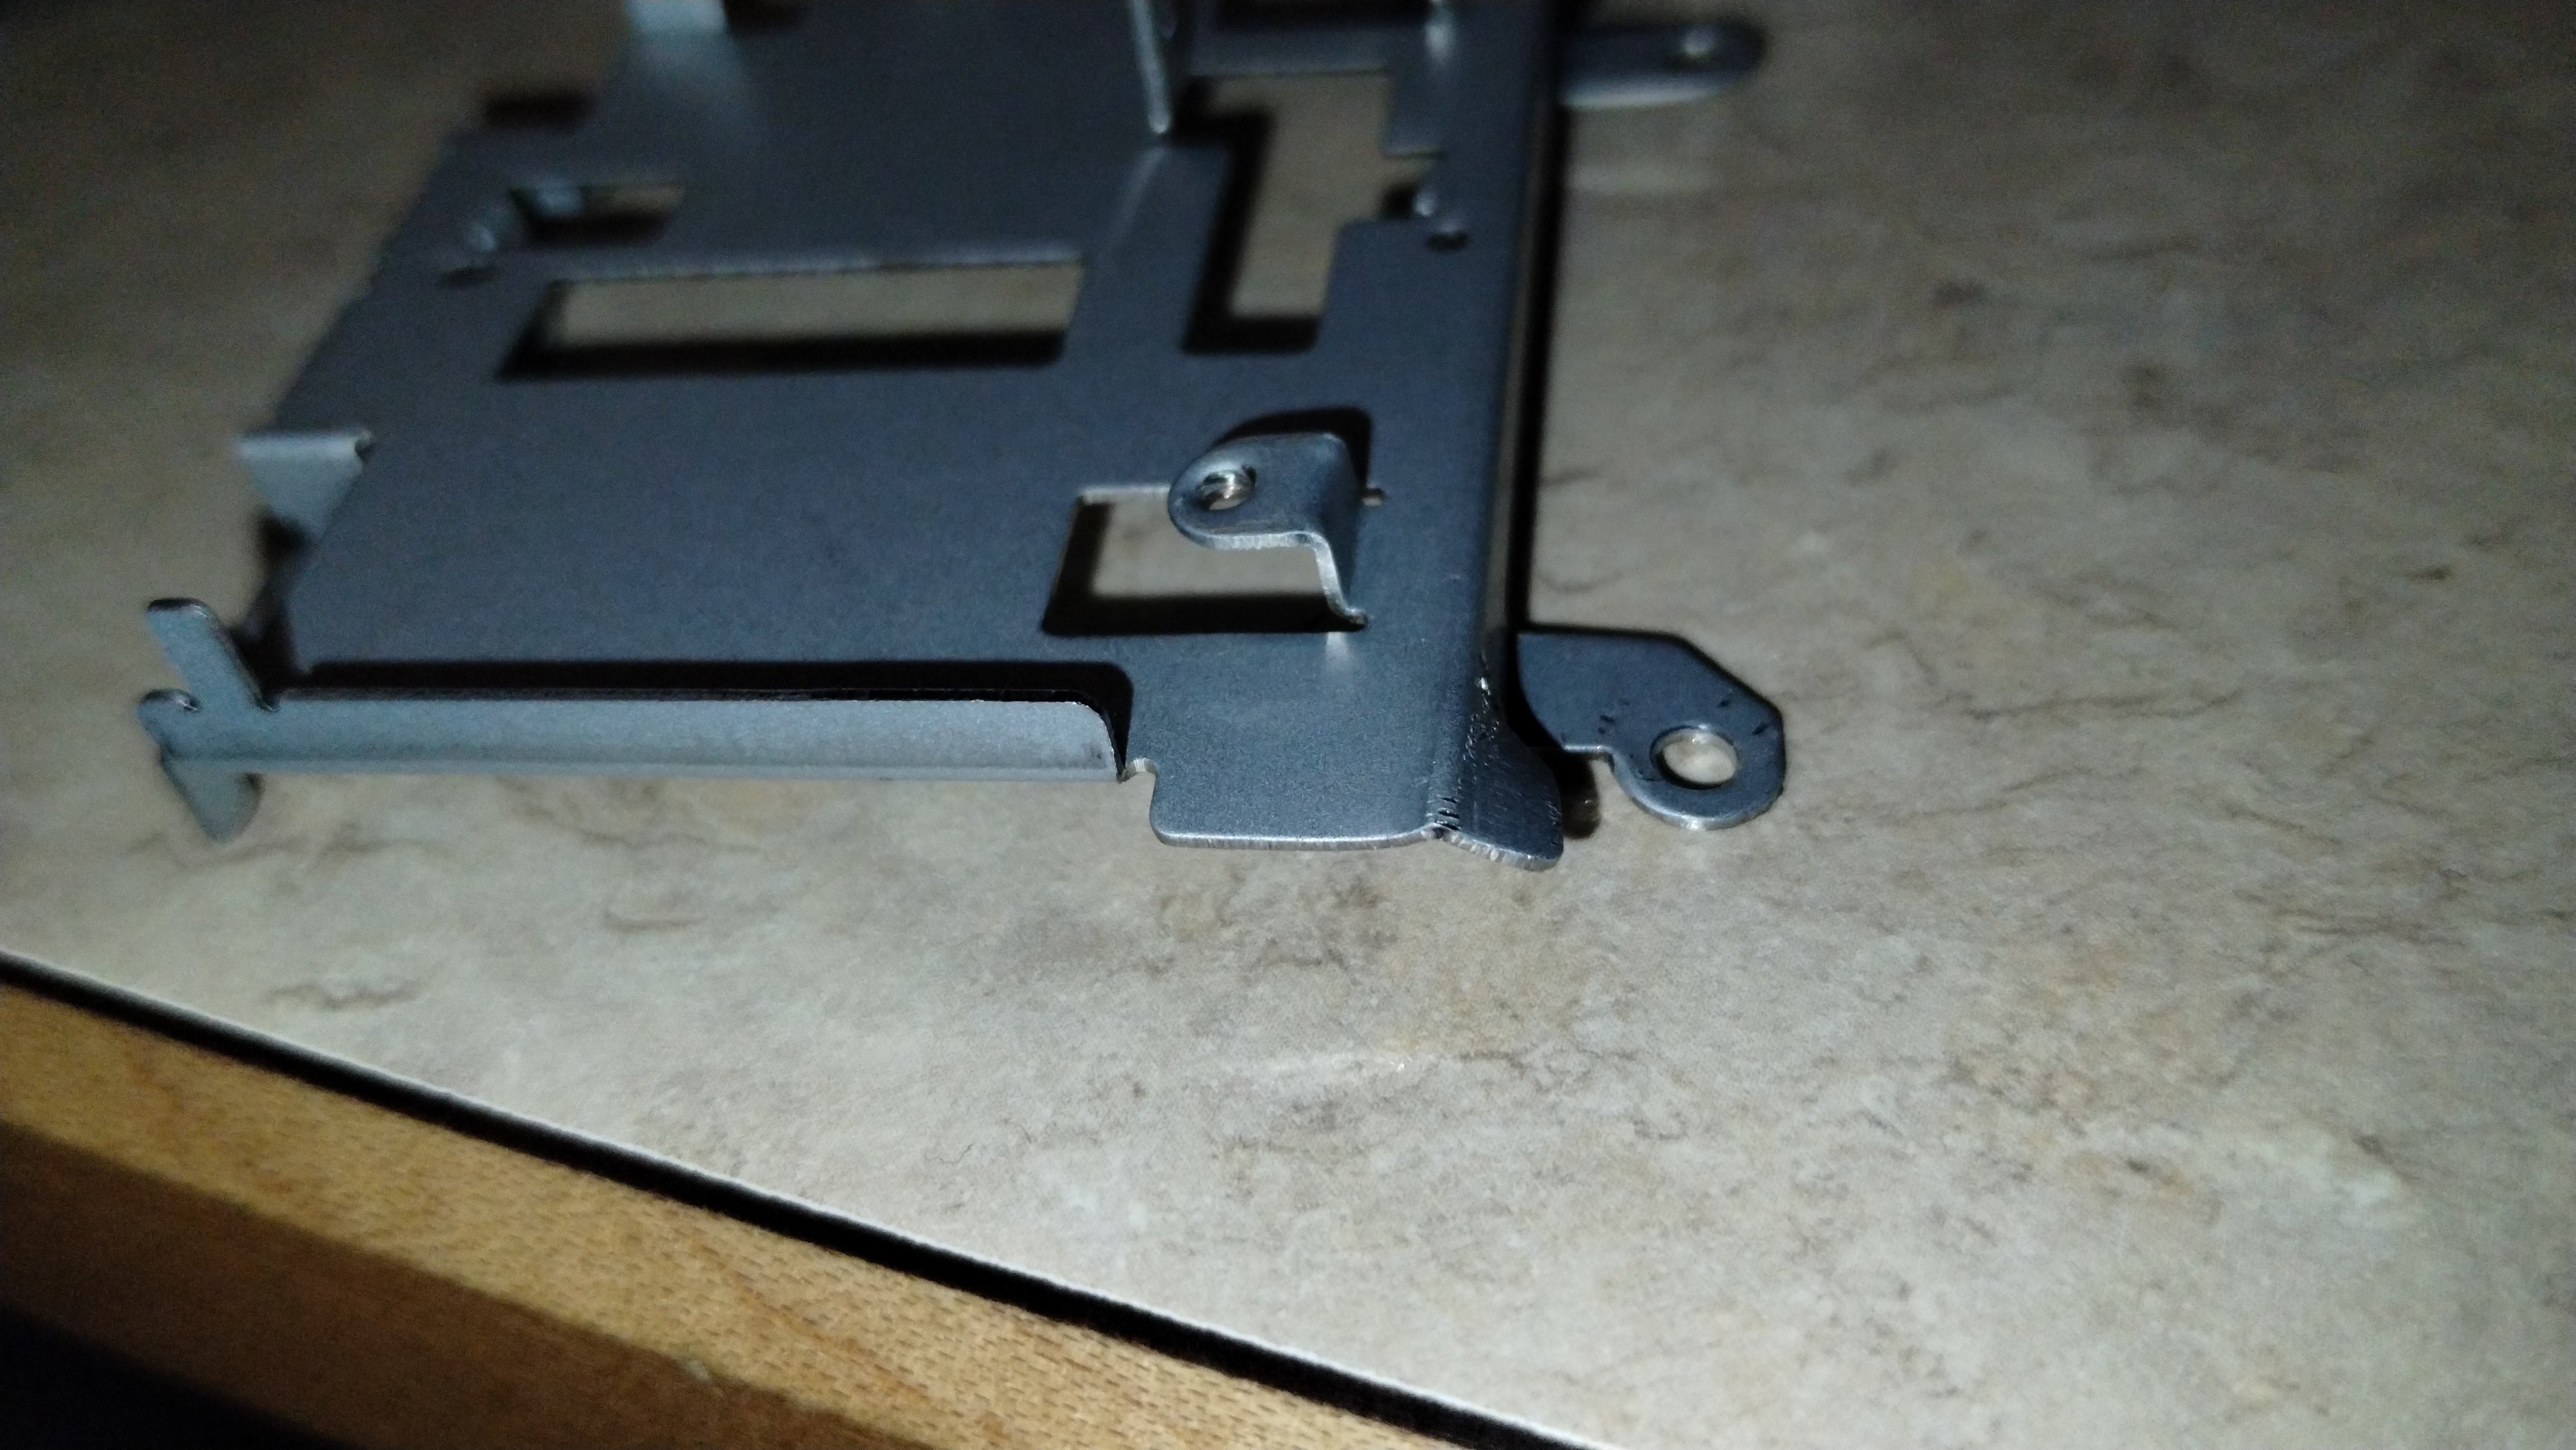
Use pliers to bend a bit of the shielding between the digital and analog board to make room for the USB C port, as shown in the image below.
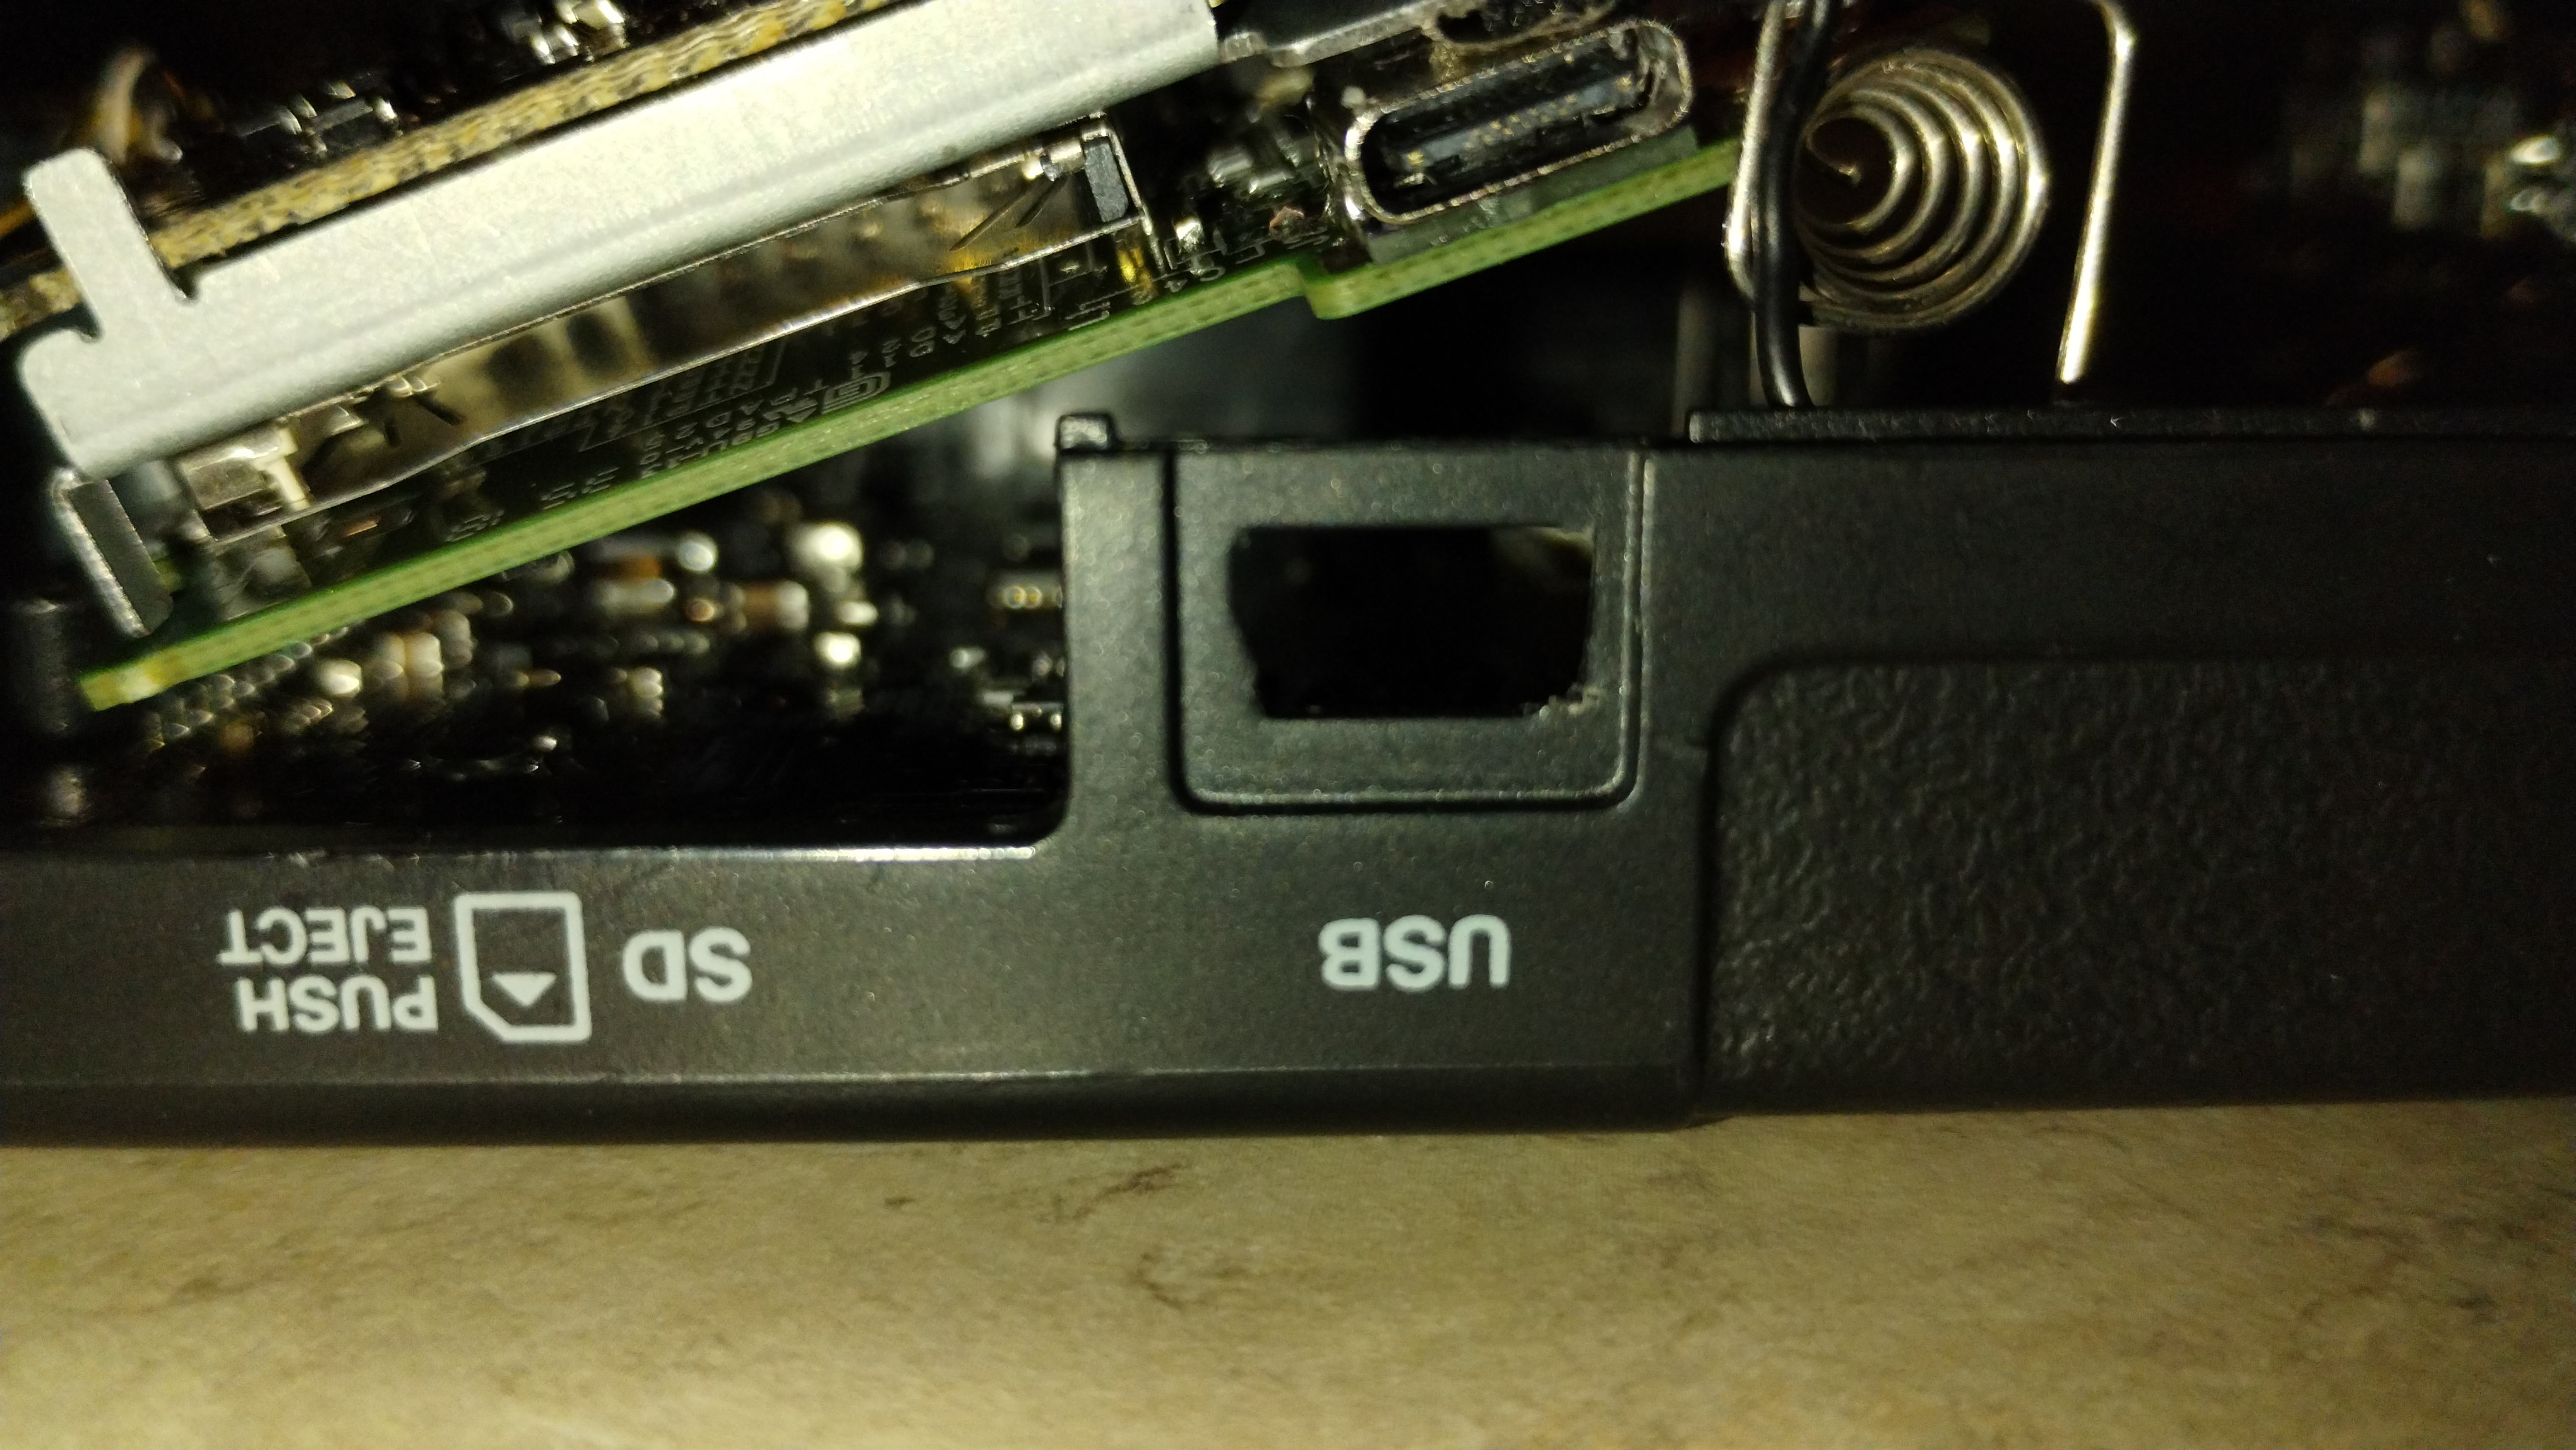
Remove plastic as shown in the image below from the casing to make room for the USB C port. This can be done neatly with a hobby knife and some files. Reassemble enough to test.
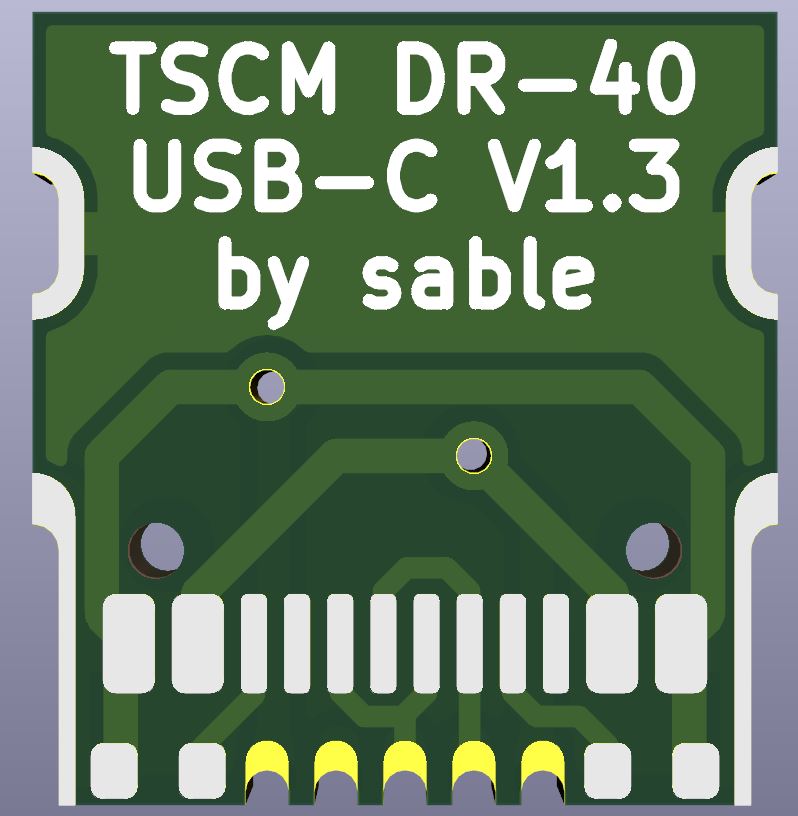
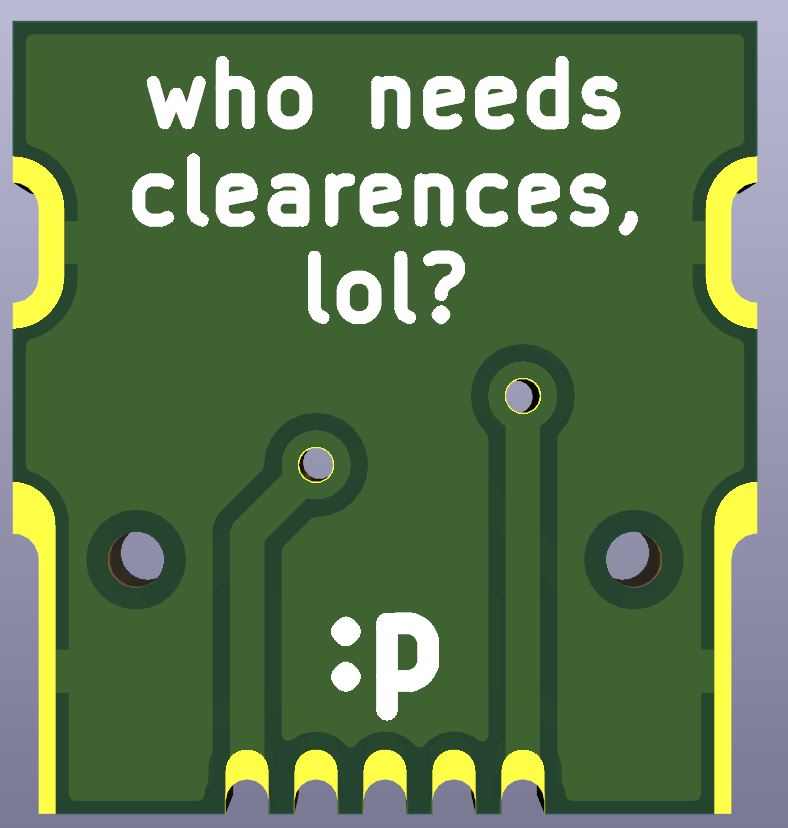
| Qty | Value | Footprint | References |
|---|---|---|---|
| 2 | 5.1K | Resistor_SMD:R_0402_1005Metric | R1, R2 |
| 1 | USB_B_Mini | Connector_USB:USB_Mini-B_Wuerth_65100516121_Horizontal | J1 |
| 1 | USB_C_Receptacle_USB2.0 | Connector_USB:USB_C_Receptacle_GCT_USB4105-xx-A_16P_TopMnt_Horizontal | J2 |
It measures 8.6 × 9.2 mm and has 2 copper layers, 0.96 mm thick.
4 parts. The full list of its parts is on this page, with links to each part's symbol and footprint where PCBKit's library has them.
From the circuitsable/TascamDR40usbc repository on GitHub, at the commit this page was made from: the board is kicad project/tascamusbc.kicad_pcb and its schematic kicad project/tascamusbc.kicad_sch. PCBKit opens the board in the browser, with nothing to install.
Its repository publishes it under the GPL-3.0 licence: you may reuse it on that licence's terms (keep the author's notice, and for a copyleft licence share your changes alike).
joypad-ai/joypad-os
Universal controller firmware for building adapters, dongles, and custom controllers.


hackclub/OnBoard
💡 Join 1,000 teenagers and make your first PCB with a $100 grant!

tardate/LittleArduinoProjects
a collection of "Little Electronic & Arduino Projects", most involving electronics or an Arduino in one way or another!

drandyhaas/KiCadRoutingTools
A set of Python/Rust tools to aid routing in KiCad

osy/XG_Mobile_Station
Open source eGPU dock for ROG Ally and ROG Flow

Luos-io/luos_engine
Open-source and real-time orchestrator for cyber-physical-systems, to easily design, test and deploy embedded applications and digital twins.

NVNTLabs/switch2-SDEX2M2
Micro SD Express to M.2 NVME Adapter for Nintendo Switch 2