Skip to the content
2 layers102 × 98.7 mmRavine, the printed circuit board in 3D

keyborb

Size
102 × 98.7 mm
Copper layers
2
Thickness
1.6 mm
Parts
41
Nets
38
Pads
669
Tracks, vias
281, 75
Pours
1
Routed
Yes
KiCad
KiCad 9.0 (file 20241229)
Created
24 Aug 2025
Updated
9 Feb 2026

Overview

Ravine is an open-source printed circuit board by car-kaboomer, from the car-kaboomer/ravine repository on GitHub, published under the MIT licence. It is a 2-layer board of 102 × 98.7 mm with 41 parts on 38 nets, routed with 281 tracks and 75 vias.

Its parts include 16 diodes and 16 switches.

README

README.md

Ravine

A split, hummingbird-inspired, ergogenerated 30% keyboard, with a palm key.

v2 is planned.
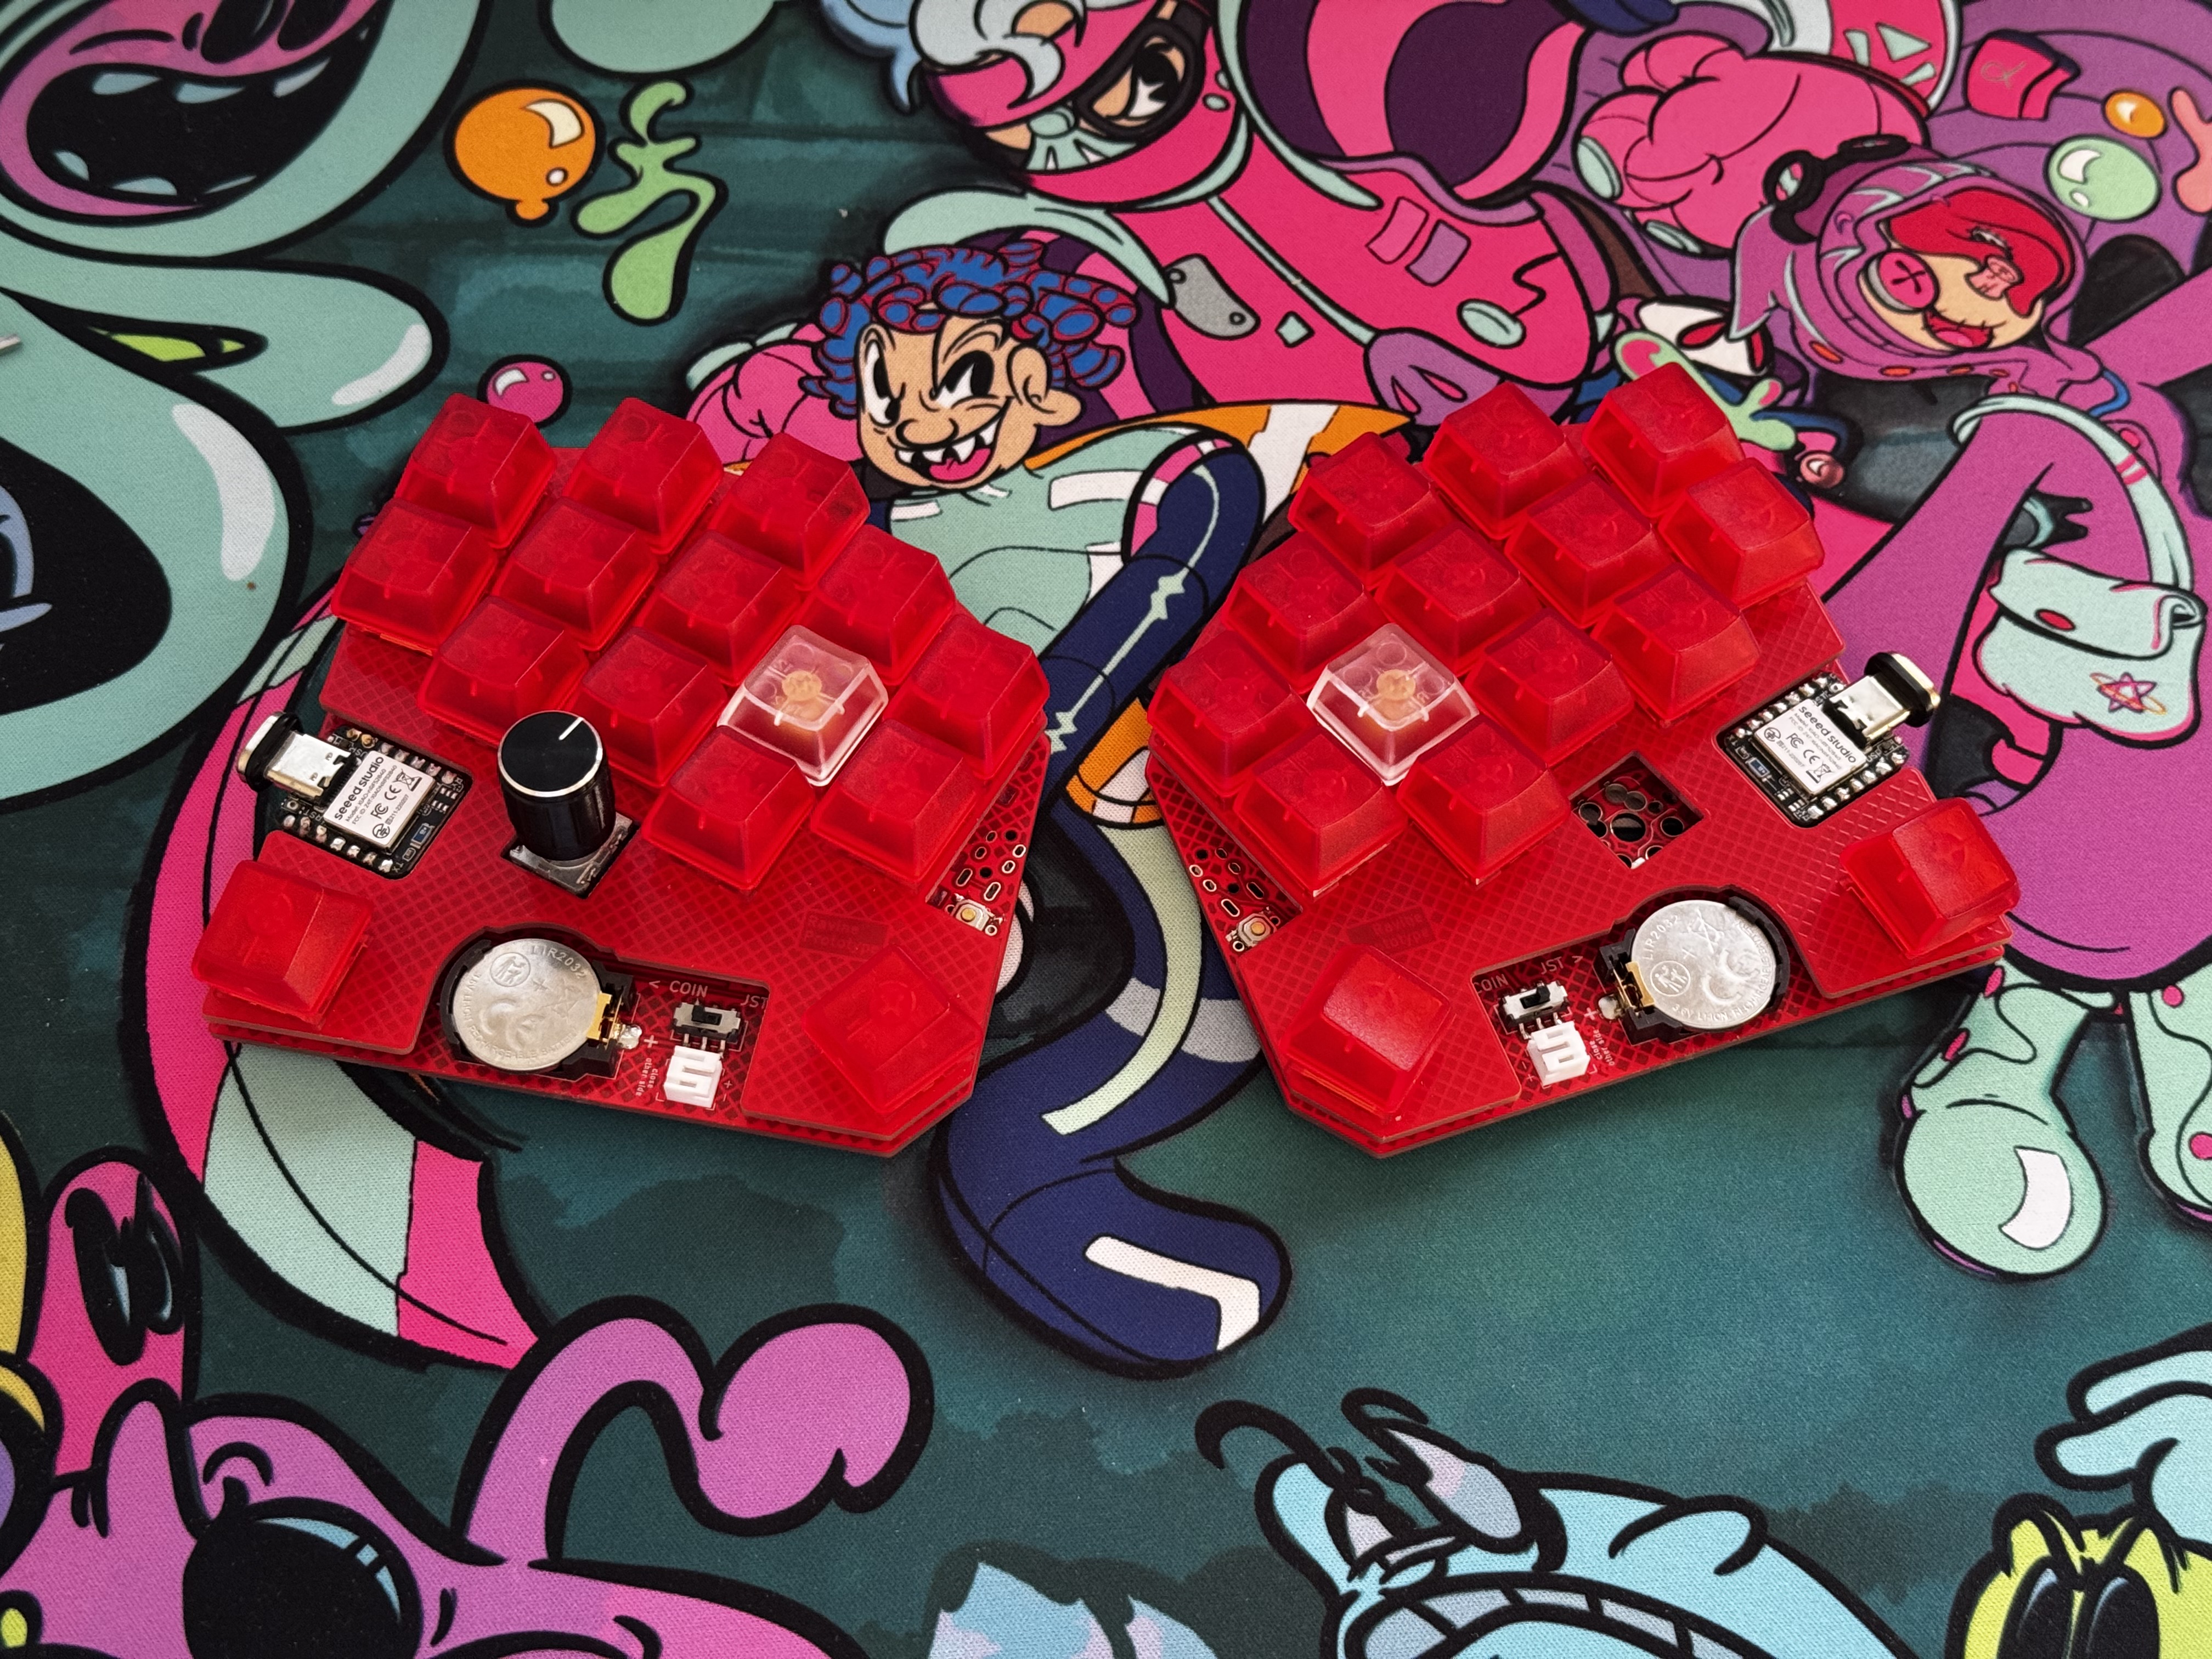
red_top

Features

  • 23332+1 plus a palm key, for a 6th point of contact,
  • Reversible & 100x100mm (very cheap),
  • Simultaneous hotswap compatibility with chocv1, v2, and MX,
  • Optional rotary encoder on each half,
  • Xiao nRF52840 (wireless) MCU,
  • Compatibility with a 2032 coin cell AND jst-connected lipo.

The pcb in v1/production is tested; completely functional with xiao nrf52840.
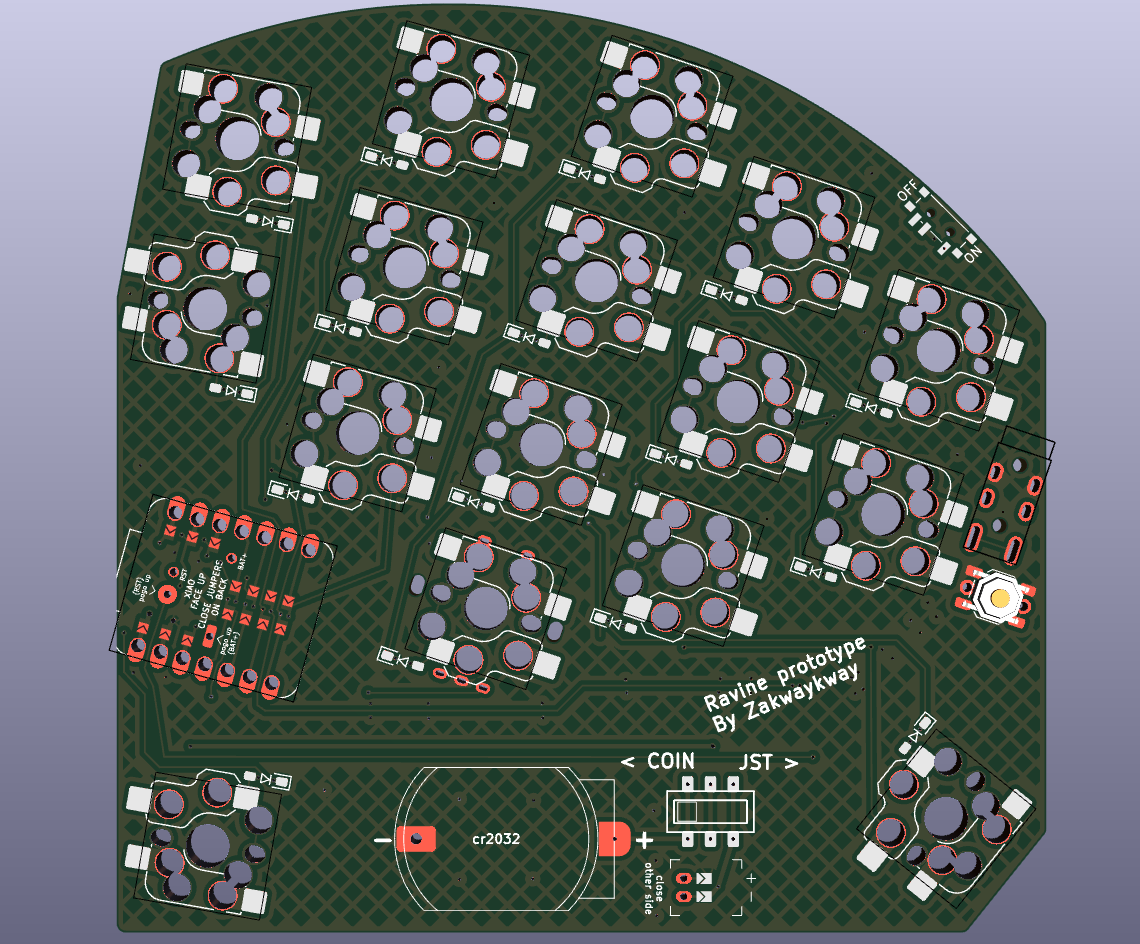
pcb

Notes

  1. There is a TRRS connector footprint: it is NOT FUNCTIONAL, until ZMK supports half-duplex (single-wire) UART support. No wired split.wb
  2. On the right half's front, the battery swapper switch's silkscreen reads: <COIN JST>. This is incorrect. To select a battery, the slider should be set closest to the desired battery, on both halves. (Out for coins, in for JSTs.)
  3. I find it the palm key to be a little bit cramped, due to the 100x100 size. I'll definitely make it wider on v2.

Assembly

Components

  • todo

Build guide

  1. On back face: tin 1 pad on each diode, and on each planned hotswap socket. (simultaneous Choc & MX is possible!) If you plan on using an encoder, do not tin the socket pads there.'
  2. Insert all hotswap sockets, and reflow their tinned pads.
  3. For diodes, I place and reflow one at a time, because they are a lot smaller & tend to jump around.
  4. Then, solder diodes' and sockets' 2nd (untinned) pads.
  5. Still on back face: close MCU's jumpers, and JST's jumpers.
  6. On front face: solder reset button, power switch slider, and MCU sockets.
  7. Notes for battery and connectors:
  • If planning on only using JST, I suggest not adding the coin holder, as there's virtually no space for a battery (unless the encoder's spot is unpopulated). I have 302025, which fits, but is really at the limit. You'll want a battery 3mm thick or less (xx30xx), in order for it to fit under the plate.
  • If using a coin cell, ensure it is rechargeable. Xiao nrf52840 has a charging circuit, which CAN MAKE BAD THINGS HAPPEN to non-rechargeable batteries.
  • If you are not planning on using both battery types, it is safe to bodge the slider's center pads with the correct pads, instead of using a slider. SEE NOTE 2
  1. Considering the above, solder JST &or coin cell holder & battery selection slider switch.
  2. Solder pogos. If male pins aren't soldered to the mcu yet, do that BEFORE adding pogos—doing it after is very tedious and annoying.
  3. Enjoy your new keyboard! Send me pics, suggestions, or comments @zakwaykway on discord :))

ZMK module (wireless firmware) can be found at zmk-keyboard-ravine.

Thanks:

Initial ergogen configuration inspired by ezxzeng's sweep_squared_rot. Impossible without ergogen, zmk, and the many who have open-sourced the footprints, pcbs, and firmwares I've consulted for inspiration and guidance. Thank you.

Parts

41
QtyValueFootprintReferences
16footprints:hs-mx-choc_revSW1, SW2, SW3, SW4, SW5, SW6, SW7, SW8, SW9, SW10, SW11, SW12, SW13, SW14, SW15, SW16
16footprints:diode_revD1, D2, D3, D4, D5, D6, D7, D8, D9, D10, D11, D12, D13, D14, D15, D16
1ceoloide:battery_connector_jst_ph_2JST1
1footprints:alps-skqg_revB1
1footprints:xiao-pogo-rev
1ceoloide:rotary_encoder_ec11_ec12RE1
1ceoloide:reset_switch_tht_topRST1
1slider-mss22d18_revXX1
1ceoloide:trrs_pj320a (reversible, symmetric)TRRS1
1ceoloide:power_switch_smd_sidePWR1
1bs-2032-8_revCR1

Similar boards

  • 2 layers70 × 35 mmTLF35584 breakout, the printed circuit board in 3D

    TLF35584 breakout

    rusefi/rusefi

    rusefi - GPL internal combustion engine control unit

    41 parts1.2k
  • 2 layers270 × 11 mmDaylight Disco, the printed circuit board in 3D

    Daylight Disco

    VoronDesign/Voron-Hardware

    Cool Hardware designed by the Voron Design group

    41 parts1.1kGPL-3.0
  • 2 layers27.5 × 48.3 mmICE40DevBoard, the printed circuit board in 3D

    ICE40DevBoard

    hackclub/OnBoard

    💡 Join 1,000 teenagers and make your first PCB with a $100 grant!

    41 parts915
  • 2 layers45 × 25 mmEasy PD Sink, the printed circuit board in 3D

    Easy PD Sink

    openwch/ch32v003

    CH32V003 is an ultra-cheap RISC-V MCU with 2KB SRAM, 16KB flash, and up to 18 GPIOs that sells for under $0.10

    41 parts599
  • 2 layers97 × 78.5 mmDumbpad, the printed circuit board in 3D

    Dumbpad

    imchipwood/dumbpad

    Simple 4x4 numpad with rotary encoder. Powered by QMK via ATmega32u4 Pro Micro

    41 parts517GPL-2.0
  • 2 layers37 × 15 mmCanTactDist, the printed circuit board in 3D

    CanTactDist

    bondus/KlipperToolboard

    A 3D printer tool head controller board

    41 parts373GPL-3.0
  • 2 layers20.3 × 69.7 mmPG attiny404, the printed circuit board in 3D

    PG attiny404

    fabiansteiner/OpenValve

    3D-printable pinch valve for irrigation and sensor-driven liquid control.

    41 parts276CERN-OHL-S-2.0

Questions

How big is the Ravine PCB?

It measures 102 × 98.7 mm and has 2 copper layers, 1.6 mm thick.

What parts does the Ravine use?

41 parts. The full list of its parts is on this page, with links to each part's symbol and footprint where PCBKit's library has them.

Where can I download the Ravine KiCad files?

From the car-kaboomer/ravine repository on GitHub, at the commit this page was made from: the board is v1/ravine.kicad_pcb and its schematic v1/ravine.kicad_sch. PCBKit opens the board in the browser, with nothing to install.

Can I use the Ravine design in my own project?

Its repository publishes it under the MIT licence: you may reuse it on that licence's terms (keep the author's notice, and for a copyleft licence share your changes alike).