2 layers
Nrf bga
github-linguist/linguist
Language Savant. If your repository's language is being reported incorrectly, send us a pull request!
12 parts14kMIT

 buchbergerd/LibreRover
A small open-source, open-hardware, cheap and expandable robot.
Arduino Nano Breakout is an open-source printed circuit board by buchbergerd, from the buchbergerd/LibreRover repository on GitHub, published under the MIT licence. It is a 2-layer board of 30.5 × 55.9 mm with 12 parts on 64 nets, routed with 103 tracks and 0 vias.
It belongs with the robots and motor control and interfaces and adapters boards and the AVR (ATmega, ATtiny) boards of this library.
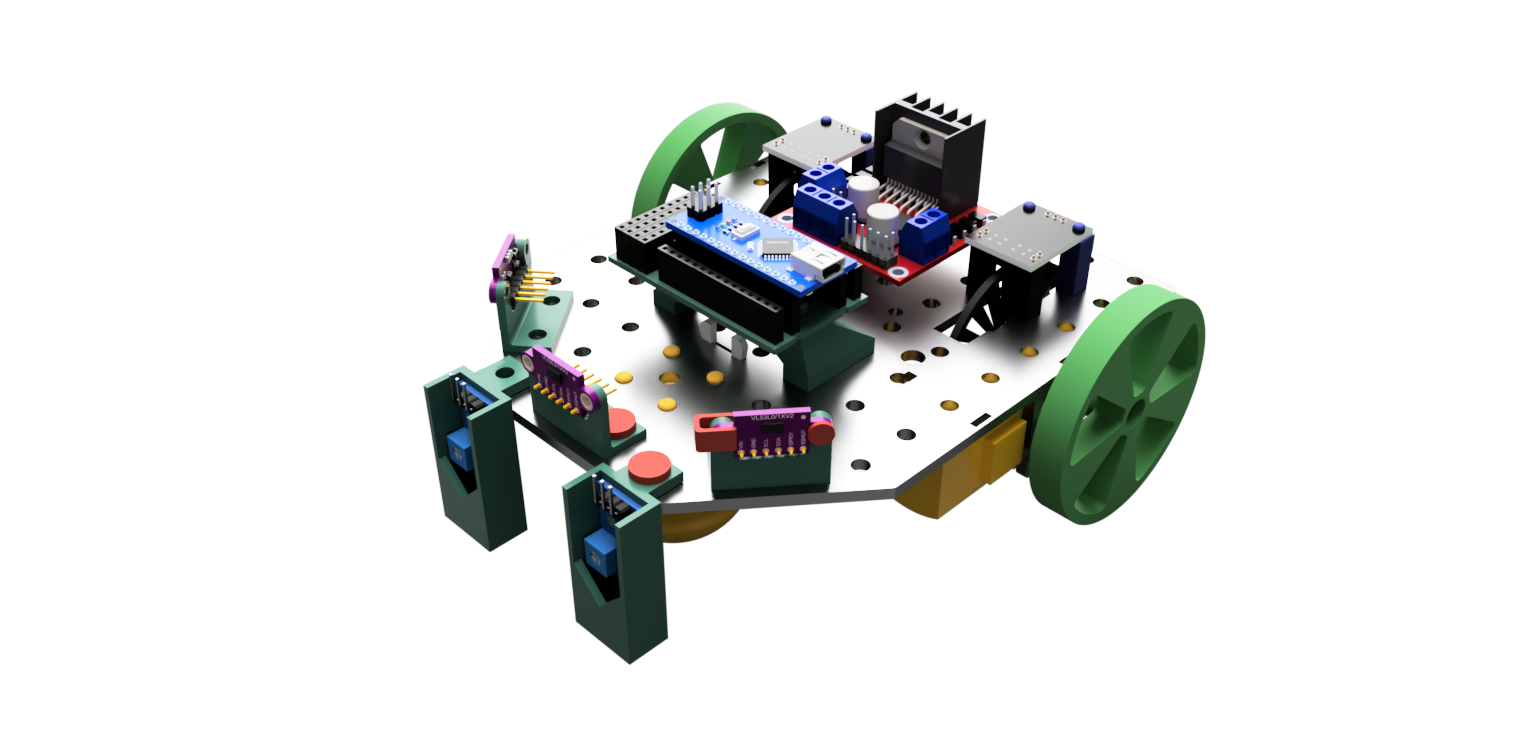
LibreRover is a open-source, open-hardware educational robot designed for Arduino and robotics workshops.
The hardware parts mostly can be 3D printed. It is designed to fit affordable breakout boards. It is modular and expandable: If you want an encoder, use it. If not, no problem. More sensors? Just print the parts and stick it to the robot. By using breakout boards for all sensors, the wiring is very flexible, at the cost of lots of wires thorugh the air. For a more permanent setup, consider hot glue and good cable management.
The Arduino framework is used. Feel free to choose an Arduino Nano (simple), an ESP32 (has WiFi) or another microcontroller. Several classes for an easy start are provided and can be used as needed:
Motor: This makes a simple motor more accessible by taking care of the direction pins and PWM speed control. It is intended to be used with an L298N motor driver.EncoderMotor: A motor and an encoder together form an EncoderMotor. This class handles both, so the user can easily set the speed and make a wheel move a certain amount.If you use the Arduino IDE, make sure to add the files in software/lib/LibreRover to your project. As an Alternative, consider using PlatformIO.
| Component | Quantity | Estimated Cost | Notes |
|---|---|---|---|
| Arduino Nano | 1 | 3.40 € | Or compatible clone |
| DC Motors with Encoders | 2 | 2.80 € | TT motor; recommended to buy a set with wheels |
| Motor Driver (HW-201 or L298N) | 1 | 2.50 € | Dual H-bridge driver |
| 9V Battery | 1 | 3.50 € | Power supply |
| Jumper Wires | Several | 3.80 € | For connections |
| Light gate LM393 (for simple encoder) | 2 | 3.20 € | optional |
| HW-201 IR reflection sensor | 2 | 1.30 € | optional |
| VL53L0X ToF distance sensor | 3 | 4.00 € | optional |
| Others | - | 1.00 € | 9 V Battery cable, swith for turning on/off |
Estimated Total Cost: ~17 to 27 € (depending on your setup; excluding 3D printer)
The mechanical parts are in hardware/mechanical. The full assembly is shown in hardware/mechanical/Rover.f3z.
Clamp_Motor_Nose and Clamp_Motor_Body together with Pin_Motor.Simple_pin and friction. The distance sensors can be fixed to their mounts either by another pin (Pin_VL53L0X) or a clamp (Clamp_VL53L0X).9V_Block_Mounting on the bottom side of the frame.When using the provided class for a simple motor, make sure to setup the correct pins and values.
The Motor needs:
255 / (battery voltage) * (max. motor voltage).The EncoderMotor takes
Motor to controlSimpleEncoder attatched to it// Motor(forward_pin, backward_pin, pwm_pin, min_pwm, max_pwm)
Motor motor_left(9, 10, 11, 50, 255 / 9. * 6.5);
// EncoderMotor(motor, encoder, mm_per_revolution, pulses_per_revolution, max_speed)
EncoderMotor enc_motor_left(motor_left, encoder_left, 251, 40, 350);#include <EncoderMotor.h>
// Initialize motors and encoders
void loop() {
// Drive forward 250mm at 150mm/s
motor_left.drive_distance(250, 150);
motor_right.drive_distance(250, 150);
// Wait for completion
while(!motor_left.is_stopped() || !motor_right.is_stopped()) {
// Update speed control and stop motor if target distance is reached
motor_left.tick();
motor_right.tick();
}
}For creating the CAD files, I used these models:
| Qty | Value | Footprint | References |
|---|---|---|---|
| 2 | 3DR | Connector_PinSocket_2.54mm:PinSocket_1x15_P2.54mm_Vertical | J8, J9 |
| 2 | Conn_01x15_Socket | Connector_PinSocket_2.54mm:PinSocket_1x15_P2.54mm_Vertical | J1, J2 |
| 2 | M4 | MountingHole:MountingHole_3.2mm_M3_DIN965_Pad | H1, H1 |
| 1 | Arduino_Nano_Socket | PCM_arduino-library:Arduino_Nano_Socket | A1 |
| 1 | Conn_01x04_Pin | Connector_PinHeader_2.54mm:PinHeader_1x04_P2.54mm_Vertical | J7 |
| 1 | GND | Connector_PinSocket_2.54mm:PinSocket_1x10_P2.54mm_Vertical | J4 |
| 1 | SCL | Connector_PinSocket_2.54mm:PinSocket_1x10_P2.54mm_Vertical | J6 |
| 1 | SDA | Connector_PinSocket_2.54mm:PinSocket_1x10_P2.54mm_Vertical | J5 |
| 1 | VCC | Connector_PinSocket_2.54mm:PinSocket_1x10_P2.54mm_Vertical | J3 |
It measures 30.5 × 55.9 mm and has 2 copper layers, 1.6 mm thick.
12 parts. The full list of its parts is on this page, with links to each part's symbol and footprint where PCBKit's library has them.
From the buchbergerd/LibreRover repository on GitHub, at the commit this page was made from: the board is hardware/pcb/Arduino_Nano_Breakout/Arduino_Nano_Breakout.kicad_pcb and its schematic hardware/pcb/Arduino_Nano_Breakout/Arduino_Nano_Breakout.kicad_sch. PCBKit opens the board in the browser, with nothing to install.
Its repository publishes it under the MIT licence: you may reuse it on that licence's terms (keep the author's notice, and for a copyleft licence share your changes alike).
github-linguist/linguist
Language Savant. If your repository's language is being reported incorrectly, send us a pull request!


google/mozc-devices
Circuit diagrams and firmware source code for Gboard DIY keyboards


hackclub/OnBoard
💡 Join 1,000 teenagers and make your first PCB with a $100 grant!

VoronDesign/Voron-Tap
Tap is a nozzle-based z-probe for the V2 and Trident printer designs. The entire toolhead moves to trigger an optical switch. Tap offers many advantages:

stacksmashing/pico-tpmsniffer
A simple, very experimental TPM sniffer for LPC bus