Skip to the content
PCBKitNew board
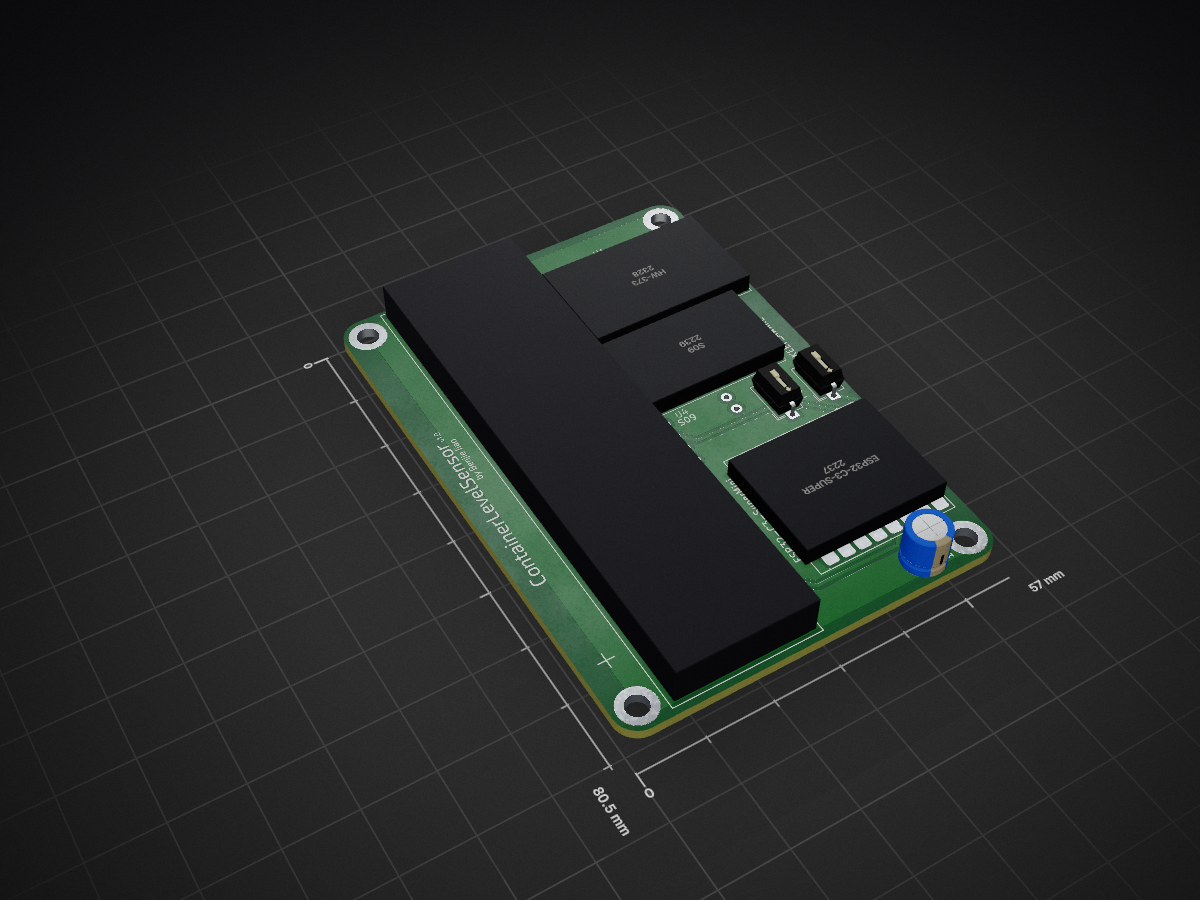
2 layers57 × 80.5 mmContainerLevelSensor, the printed circuit board in 3D

ContainerLevelSensor

benjiao/ContainerLevelSensor

A DIY sensor for measuring the fill level of a container (e.g. our cat food bin), based on an ESP32-C3 and a VL53L0x time-of-flight distance sensor, reporting to Home Assistant over ESPHome.

Size
57 × 80.5 mm
Copper layers
2
Thickness
1.6 mm
Parts
12
Nets
24
Pads
47
Tracks, vias
36, 0
Pours
2
Routed
Yes
KiCad
KiCad 9.0 (file 20241229)
Created
26 Feb 2026
Updated
13 Aug 2026

Overview

ContainerLevelSensor is an open-source printed circuit board by benjiao, from the benjiao/ContainerLevelSensor repository on GitHub, published under the CC-BY-SA-4.0 licence. It is a 2-layer board of 57 × 80.5 mm with 12 parts on 24 nets, routed with 36 tracks and 0 vias.

Its parts include 4 ICs and 1 capacitor. It belongs with the ESP32 and RISC-V boards of this library.

README

README.md

Container Level Sensor

by Benjie Jiao

CC BY-SA 4.0 ko-fi

A DIY sensor for measuring the fill level of a container (e.g. our cat food bin), based on an ESP32-C3 and a VL53L0x time-of-flight distance sensor, reporting to Home Assistant over ESPHome.

For more info, check out the build writeup. If this project was useful to you, consider buying me a coffee.
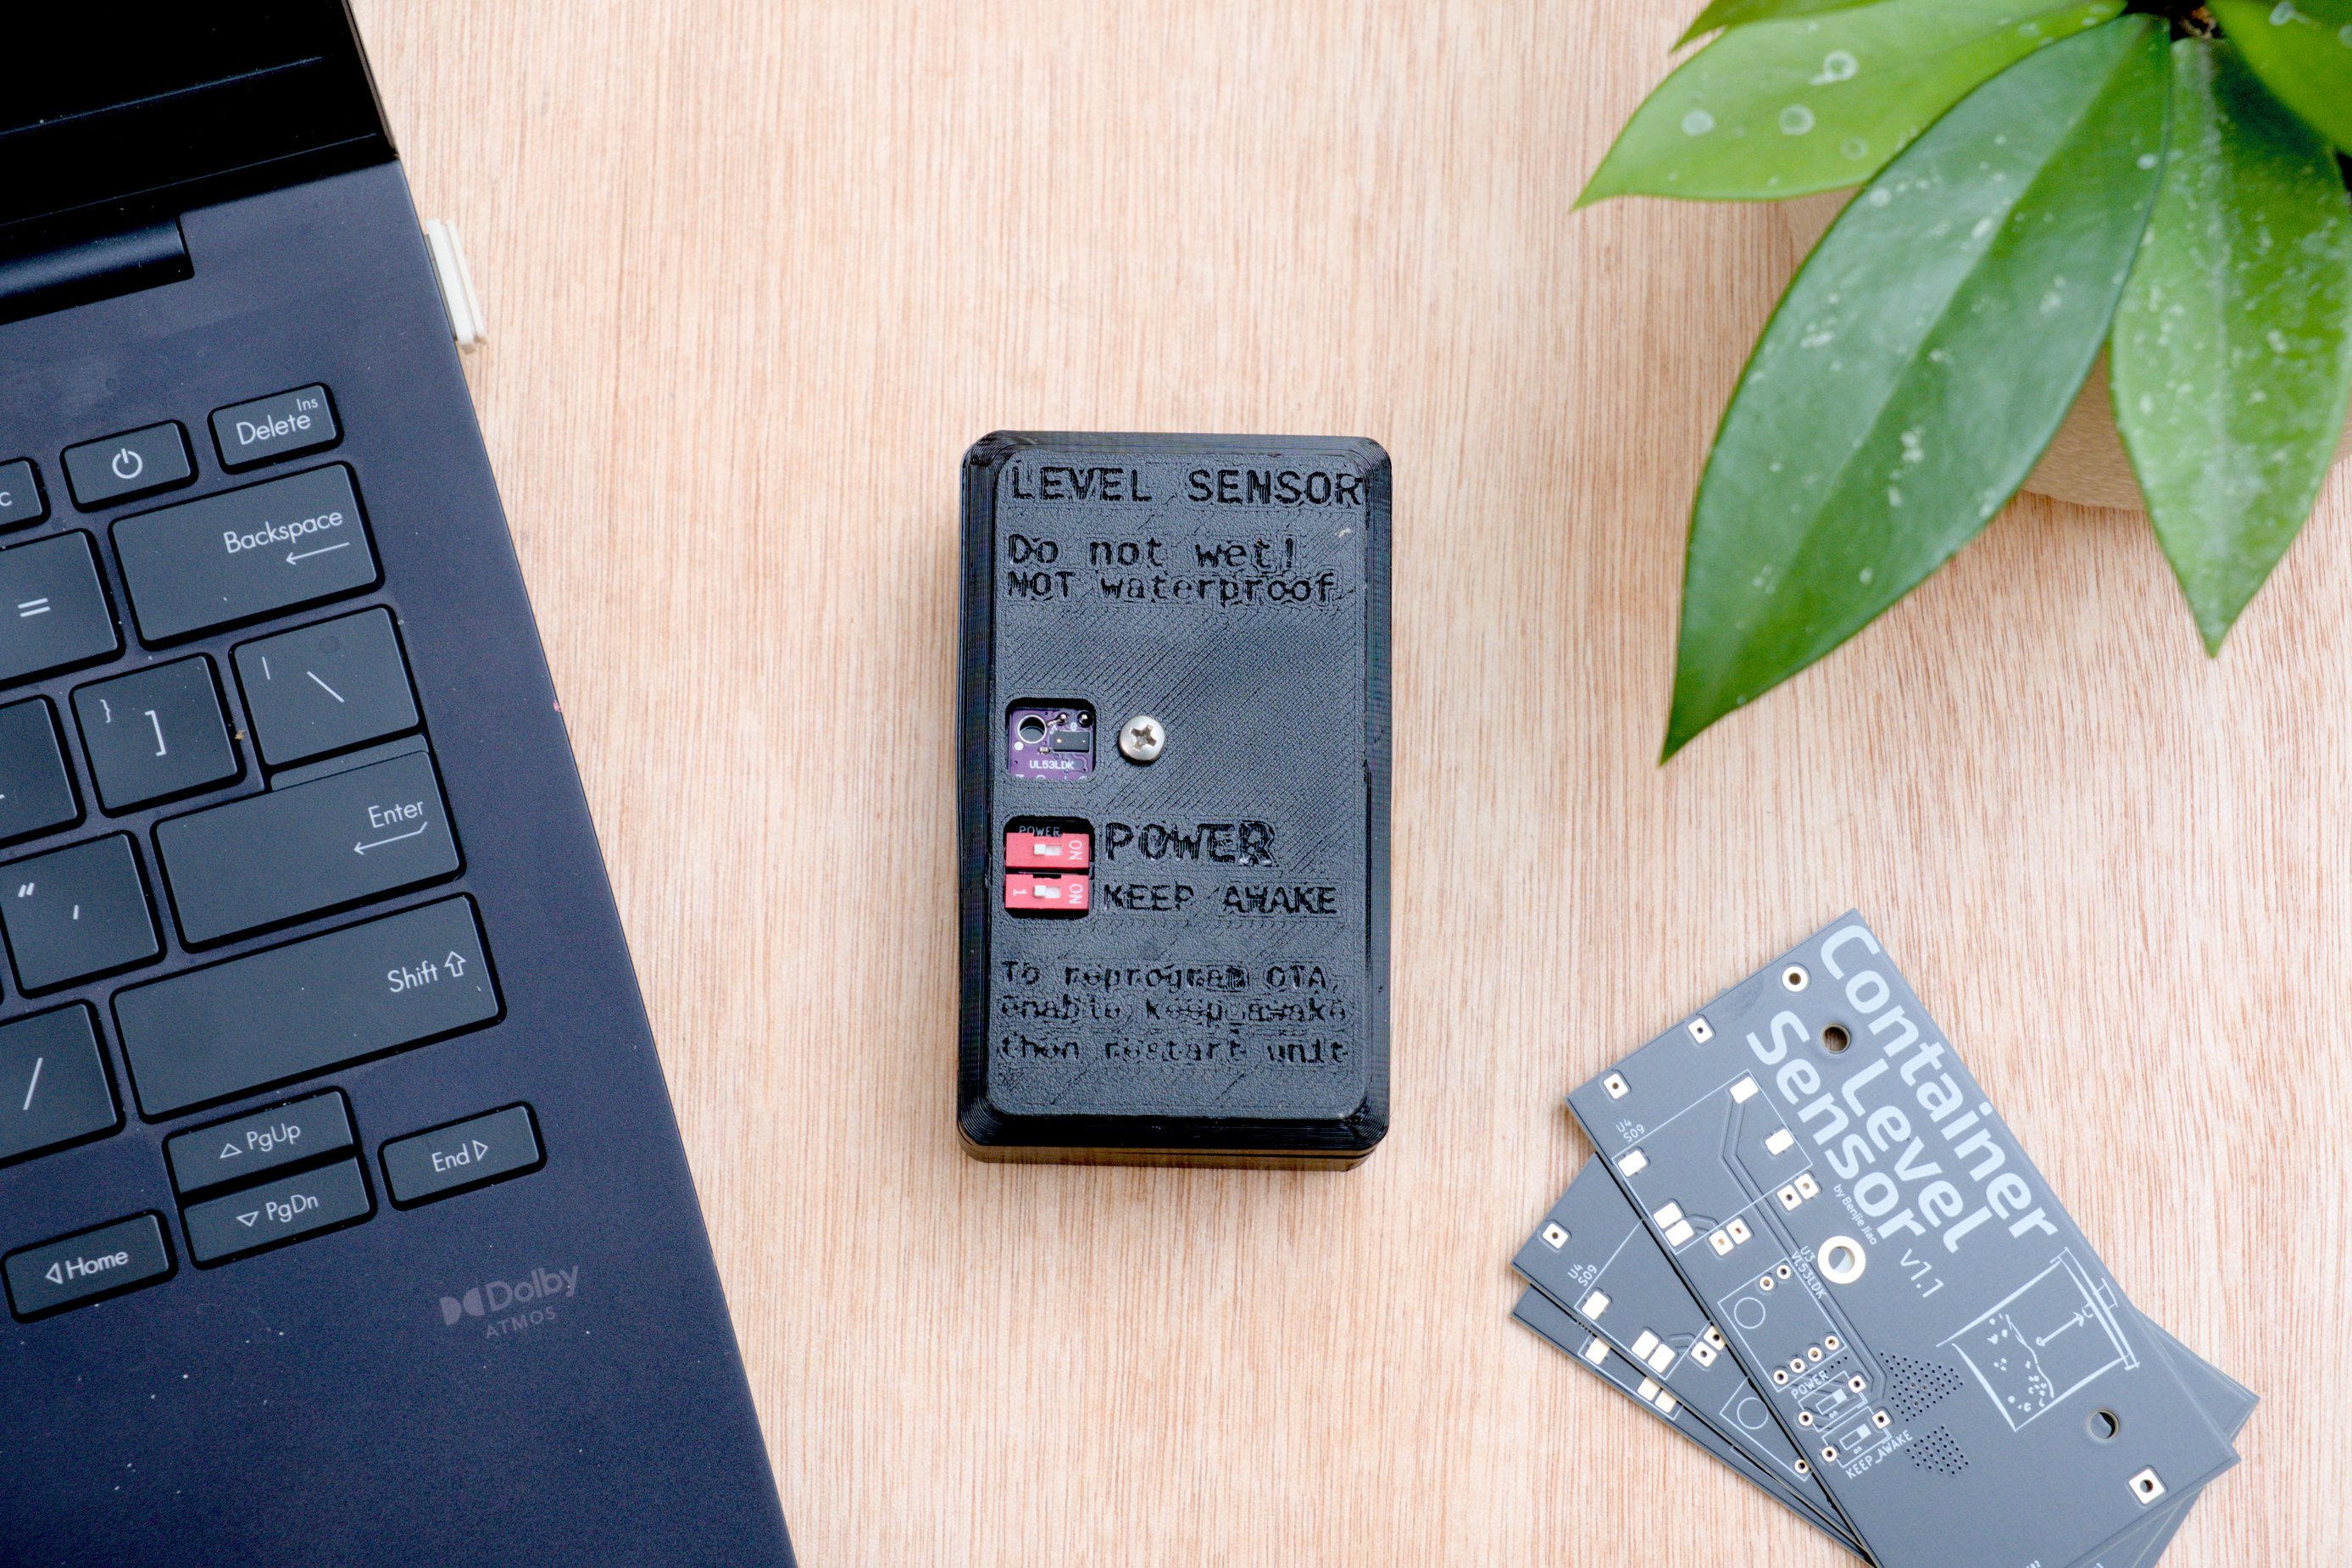
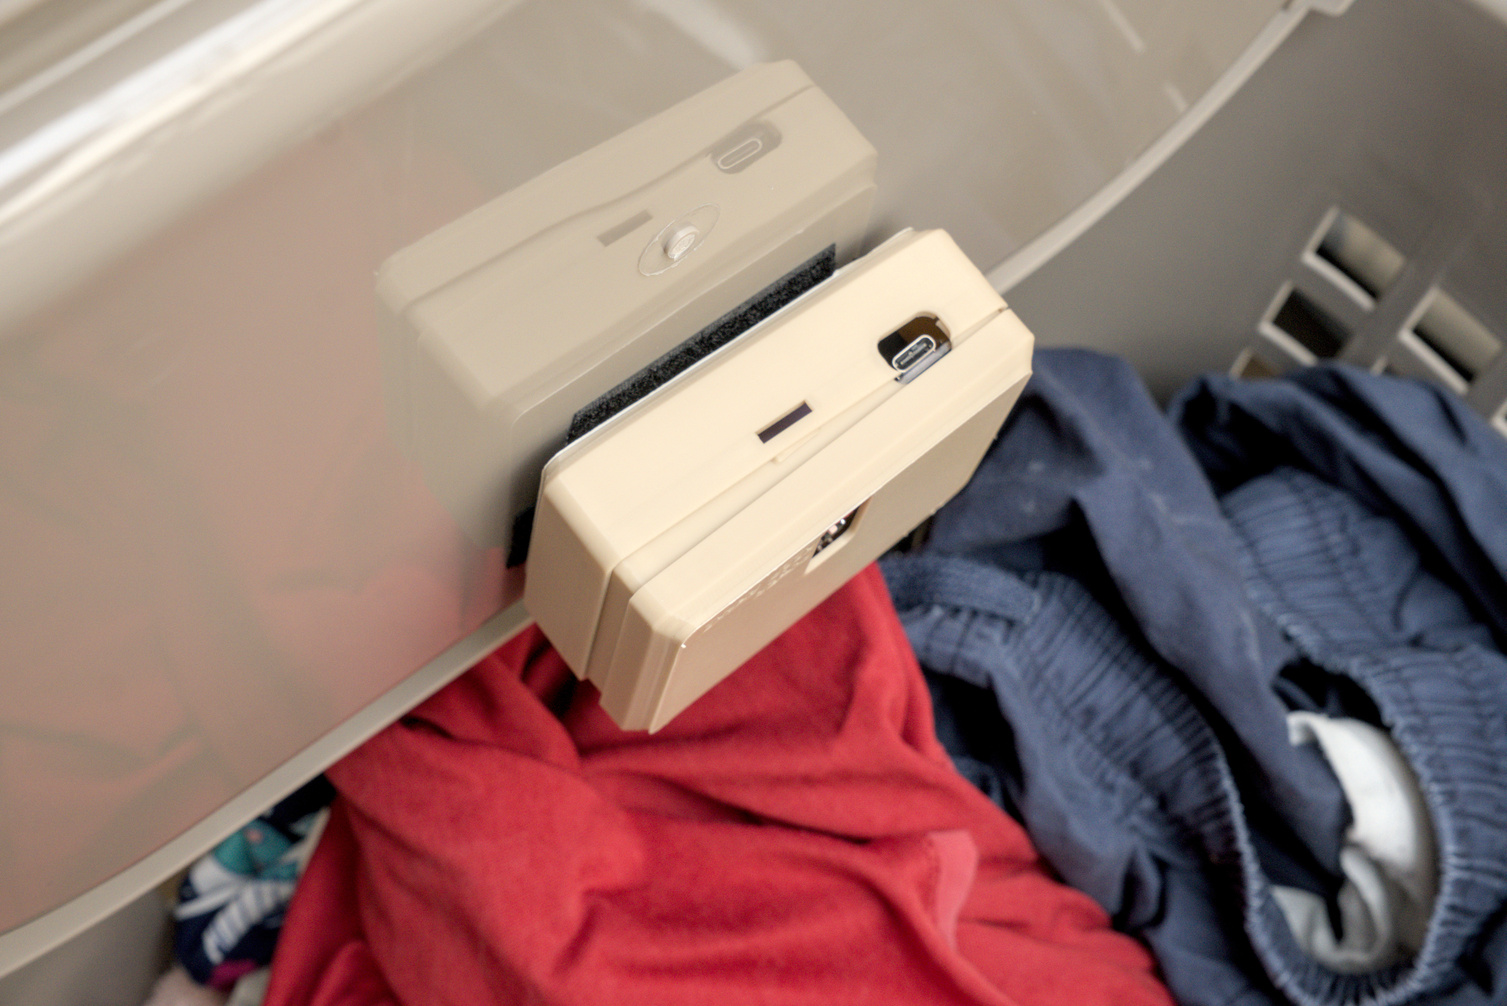
This is meant to be mounted under a container's lid. Like this prototype mounted to monitor our laundry basket.
Repository contents

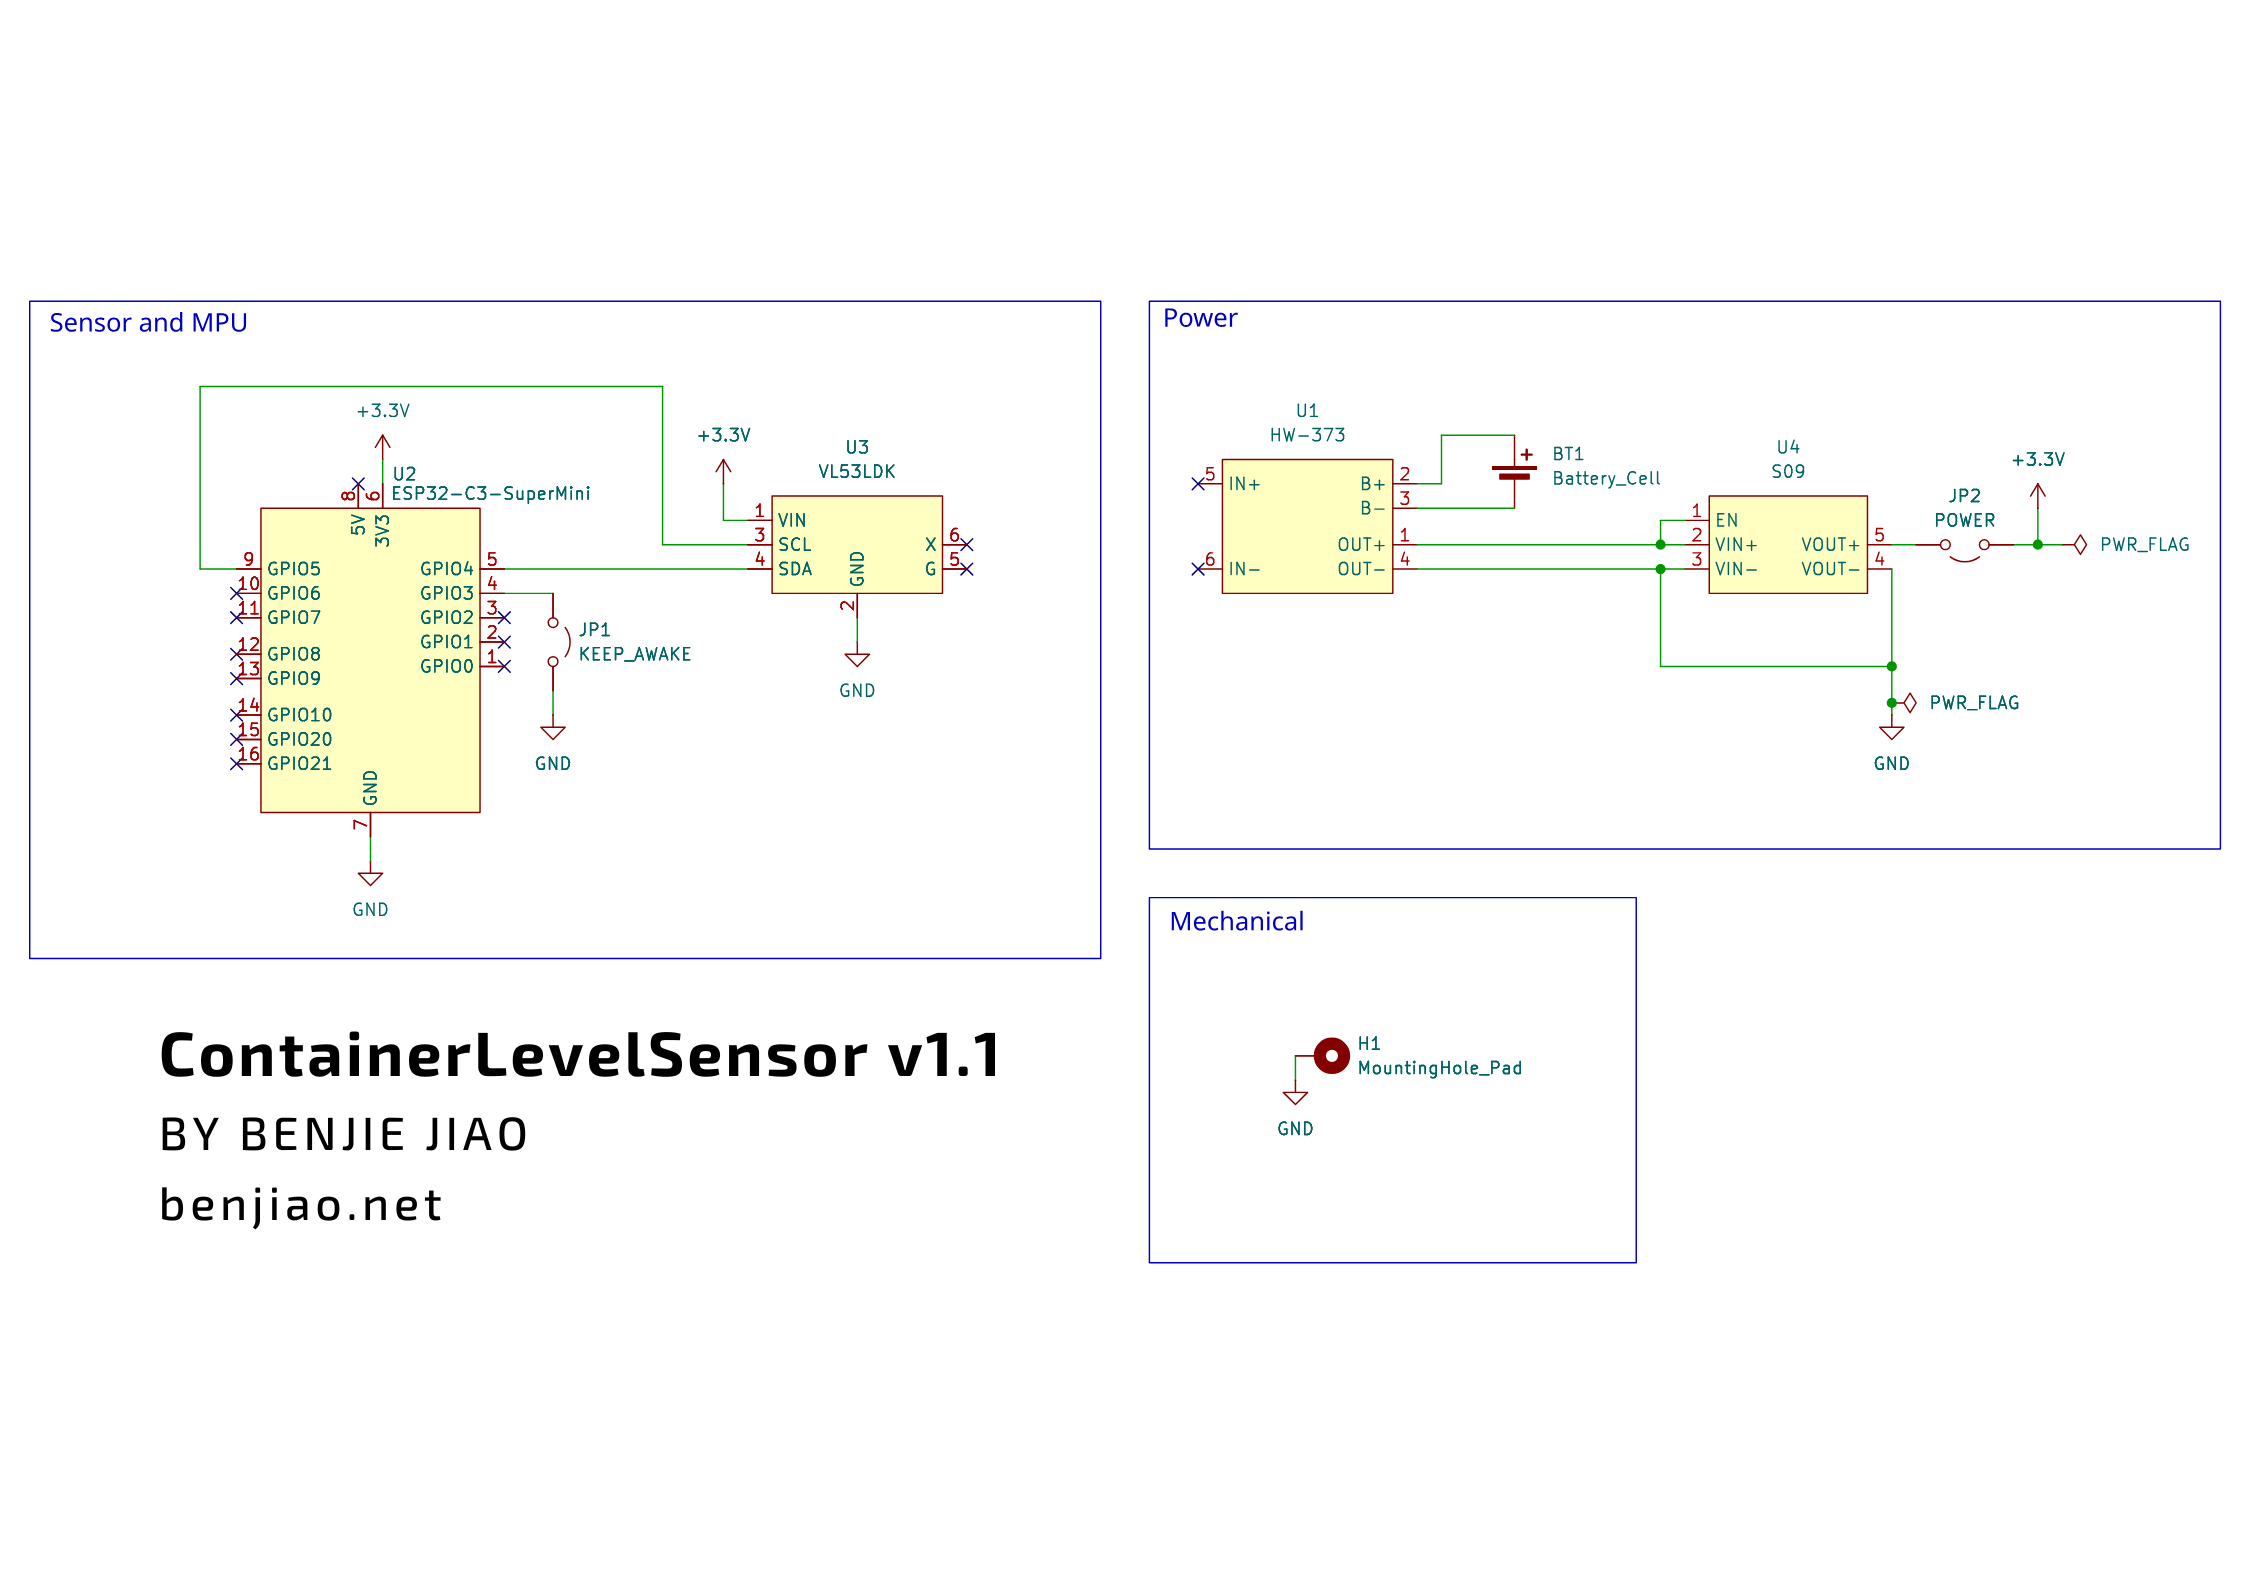
  • hardware/kicad/ContainerLevelSensor/ — KiCad project (schematic + PCB) for the sensor board. Open ContainerLevelSensor.kicad_pro in KiCad to view or edit the design.
    Schematic

  • hardware/kicad/Fabrication/ — Generated Gerber/drill files and a ready-to order .zip, for sending straight to a PCB fab (e.g. PCBWay).

  • hardware/openscad/ContainerLevelSensor.scad — Parametric enclosure, generated with YAPP_Box (included as a git submodule — run git submodule update --init --recursive before opening the .scad file in OpenSCAD). ContainerLevelSensor.stl is the pre-rendered mesh, ready to send to a 3D slicer as-is.

  • hardware/old_revisions/ — Earlier hardware revisions, kept for reference.

  • software/esphome/container-level.yaml — ESPHome firmware configuration for the ESP32-C3. See "Flashing the firmware" below.

Flashing the firmware

  1. In Home Assistant, install the ESPHome add-on from Settings → Add-ons → Add-on Store (search for "ESPHome"), then start it.
  2. Open the ESPHome add-on's web UI (or the ESPHome dashboard panel in the sidebar) and add a new device, then replace its generated YAML with the contents of software/esphome/container-level.yaml.
  3. The add-on manages Wi-Fi credentials and secrets for you — when prompted, enter your Wi-Fi SSID/password; these are stored in its own secrets.yaml.
  4. Replace the placeholder api.encryption.key and ota.password values in the config with your own (the dashboard can generate these for you when creating the device).
  5. Connect the ESP32-C3 board over USB to the machine running Home Assistant (or use "Wirelessly" for subsequent updates once initially flashed), then click Install in the ESPHome dashboard for that device.
  6. Once flashed, the device auto-connects to Home Assistant via the ESPHome integration, exposing the raw VL53L0x Distance reading and a computed Level percentage.

The Keep Awake Jumper pin (GPIO3) holds the board awake for reflashing/debugging; otherwise the board deep-sleeps between readings to save battery. Adjust bottom_distance in the Level sensor's lambda to match the distance (in meters) from the sensor to the bottom of your container.

License

This work is licensed under a Creative Commons Attribution-ShareAlike 4.0 International License.

CC BY-SA 4.0

Parts

12
QtyValueFootprintReferences
4MountingHole_PadMountingHole:MountingHole_3.2mm_M3_DIN965_PadH1, H2, H3, H4
1100uFbenjiaomodular:Capacitor_Radial_D5.0mm_P2.5mmC1
1Battery_CellBattery:BatteryHolder_MPD_BH-18650-PCBT1
1ESP32-C3-SuperMinibenjiaomodular:ESP32-C3-SuperMini_EdgeU2
1HW-373benjiaomodular:Module_HW-373_Li-Ion_ChargingU1
1KEEP_AWAKEButton_Switch_THT:SW_DIP_SPSTx01_Slide_6.7x4.1mm_W7.62mm_P2.54mm_LowProfileJP1
1POWERButton_Switch_THT:SW_DIP_SPSTx01_Slide_6.7x4.1mm_W7.62mm_P2.54mm_LowProfileJP2
1S09benjiaomodular:Module_S09_DC_to_DC_EdgeU4
1VL53LDKbenjiaomodular:Module_VL53LDK_Distance_SensorU3

Questions

How big is the ContainerLevelSensor PCB?

It measures 57 × 80.5 mm and has 2 copper layers, 1.6 mm thick.

What parts does the ContainerLevelSensor use?

12 parts. The full list of its parts is on this page, with links to each part's symbol and footprint where PCBKit's library has them.

Where can I download the ContainerLevelSensor KiCad files?

From the benjiao/ContainerLevelSensor repository on GitHub, at the commit this page was made from: the board is hardware/old_revisions/ContainerLevelSensor v1.0/kicad/ContainerLevelSensor/ContainerLevelSensor.kicad_pcb and its schematic hardware/kicad/ContainerLevelSensor/ContainerLevelSensor.kicad_sch. PCBKit opens the board in the browser, with nothing to install.

Can I use the ContainerLevelSensor design in my own project?

Its repository publishes it under the CC-BY-SA-4.0 licence: you may reuse it on that licence's terms (keep the author's notice, and for a copyleft licence share your changes alike).

More from benjiao/ContainerLevelSensor

1
  • 2 layers44 × 80 mmContainerLevelSensor, the printed circuit board in 3D

    ContainerLevelSensor

    benjiao/ContainerLevelSensor

    A DIY sensor for measuring the fill level of a container (e.g. our cat food bin), based on an ESP32-C3 and a VL53L0x time-of-flight distance sensor, reporting to Home Assistant over ESPHome.

    8 partsCC-BY-SA-4.0

Similar boards

  • 2 layersNrf bga, the printed circuit board in 3D

    Nrf bga

    github-linguist/linguist

    Language Savant. If your repository's language is being reported incorrectly, send us a pull request!

    12 parts14kMIT
  • 2 layers66.9 × 74.5 mmDeskHop, the printed circuit board in 3D

    DeskHop

    hrvach/deskhop

    Fast Desktop Switching Device

    12 parts7.9kGPL-3.0
  • 2 layers40 × 15 mmSensors, the printed circuit board in 3D

    Sensors

    google/mozc-devices

    Circuit diagrams and firmware source code for Gboard DIY keyboards

    12 parts3kApache-2.0
  • 2 layers42.7 × 56.5 mmTle6240 driver, the printed circuit board in 3D

    Tle6240 driver

    rusefi/rusefi

    rusefi - GPL internal combustion engine control unit

    12 parts1.2k
  • 2 layers49 × 25 mm5v boost regulator, the printed circuit board in 3D

    5v boost regulator

    hackclub/OnBoard

    💡 Join 1,000 teenagers and make your first PCB with a $100 grant!

    12 parts915
  • 2 layers28.3 × 10.3 mmTap Photosensor PCB, the printed circuit board in 3D

    Tap Photosensor PCB

    VoronDesign/Voron-Tap

    Tap is a nozzle-based z-probe for the V2 and Trident printer designs. The entire toolhead moves to trigger an optical switch. Tap offers many advantages:

    12 parts716GPL-3.0
  • 2 layers25.4 × 70.4 mmTpmsniffer, the printed circuit board in 3D

    Tpmsniffer

    stacksmashing/pico-tpmsniffer

    A simple, very experimental TPM sniffer for LPC bus

    12 parts696