2 layers20.3 × 25.9 mm
HoLiSheet LG G3 Lensadapter
beniroquai/HoLiSheet
This adds a rotator and light-sheet illumination to your inverted microscope for continuous 3D volume imaging of plankton
3 parts

 beniroquai/HoLiSheet
This adds a rotator and light-sheet illumination to your inverted microscope for continuous 3D volume imaging of plankton
HoLiSheet is an open-source printed circuit board by beniroquai, from the beniroquai/HoLiSheet repository on GitHub. It is a 2-layer board of 22.4 × 31.4 mm with 13 parts on 12 nets, routed with 42 tracks and 0 vias.
This is the repository for the Holographic LightSheet Microscope that enables 3D imaging using a rotating capillary and an embedded light-sheet illumination. By applying a constant flow, the immersed sample can be captured continously to record high-throughput 3D information of e.g. plankton.
This documentation will give you a very brief walk through to replicate the first version of the stand-alone device that brings at least the Li in HoLiSheet to you microscope.
If you find errors or something is unclear to you, please report an error in order to improve the documetnation or the setup itself.
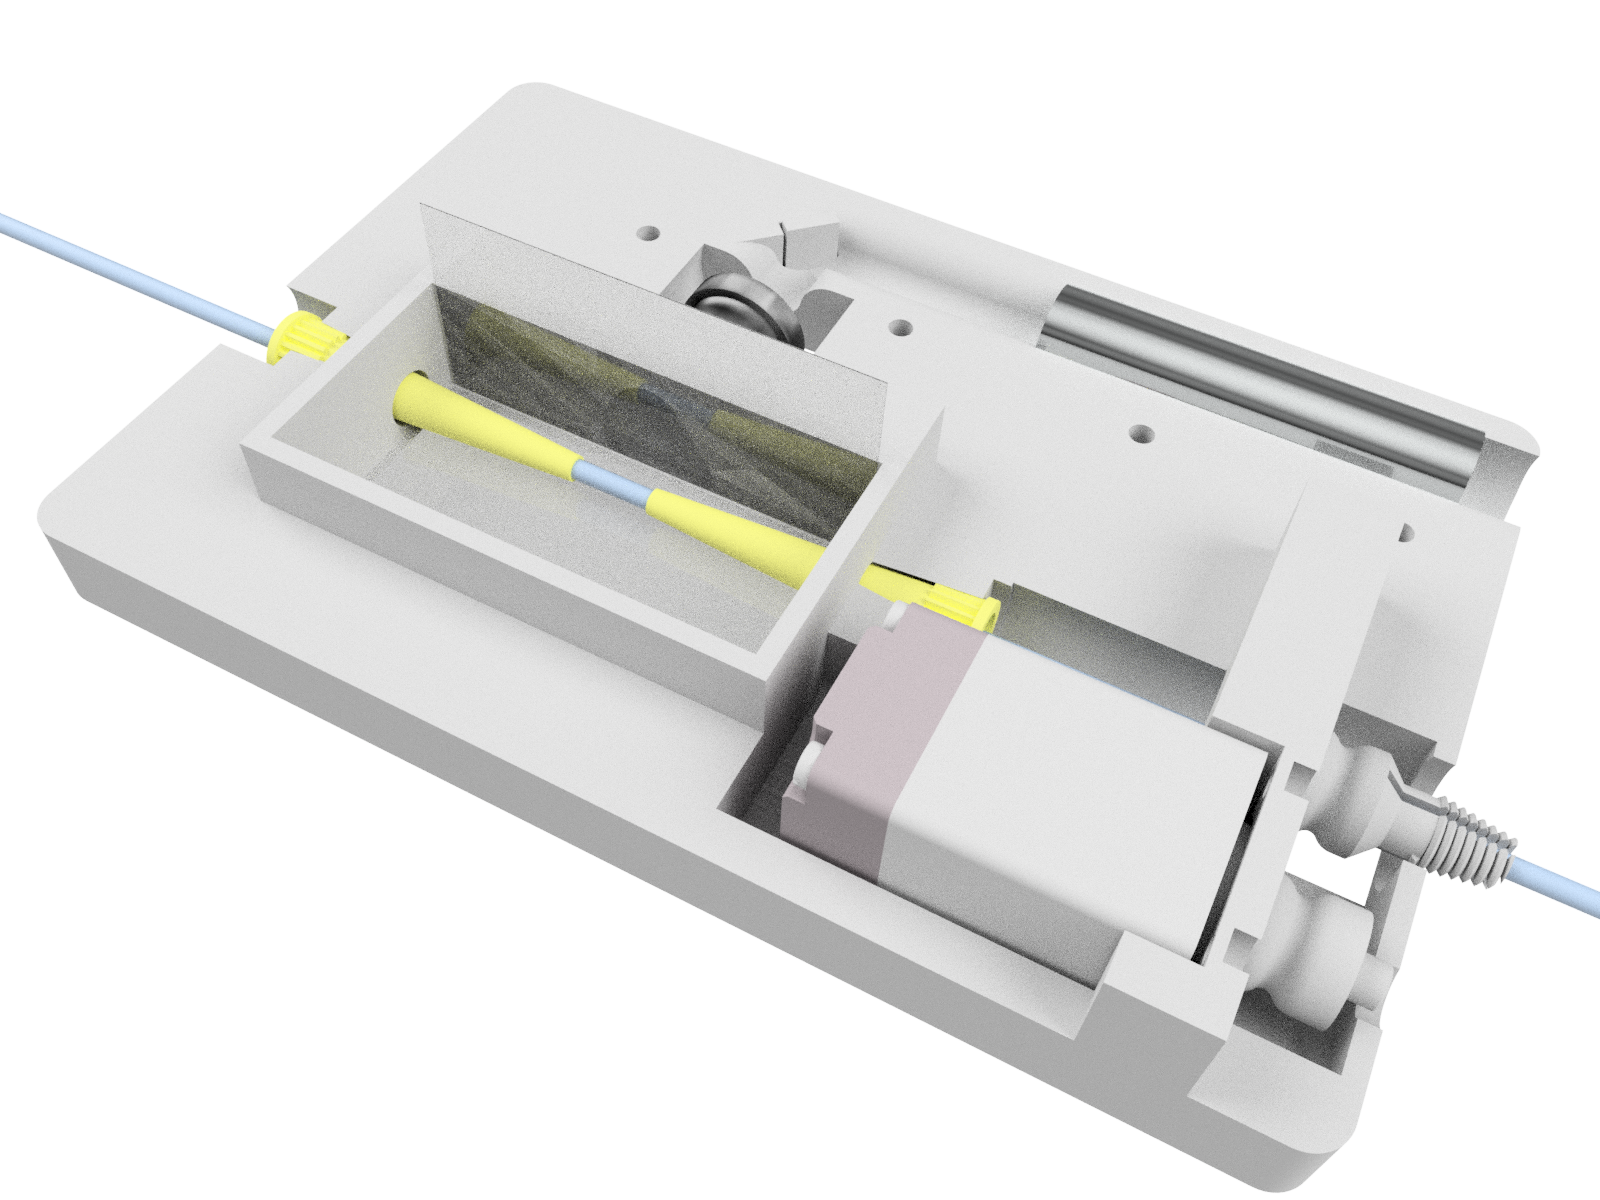
The idea behind this method lays in the need to continously capture 3D imaging data from marine samples. The prototye was developed with the help of the openUC2 toolbox. The final solution was compiled into a stand alone device as depicted in the image above. It hosts a 2mm FEP tube that is immersed in a water chamber to match refractive indices. The system can be sealed with the help of 100µm pipette tips that get cut at the diameter of the FEP tube. They work as an automatic centering mechanism and also seal the connection due to their smooth surface. A NEMA8 stepper motor and O-ring act as a rotating mechanism.
The light sheet is created with a laser-diode and a cylindrical lens. In the most frugal case, you can also use a 5mm LED that creates an astigmatic focus that gets reimaged into the sample (i.e. capillary) plane by a CCTV lens that acts as a microscope objective lens with relatively long working distance.
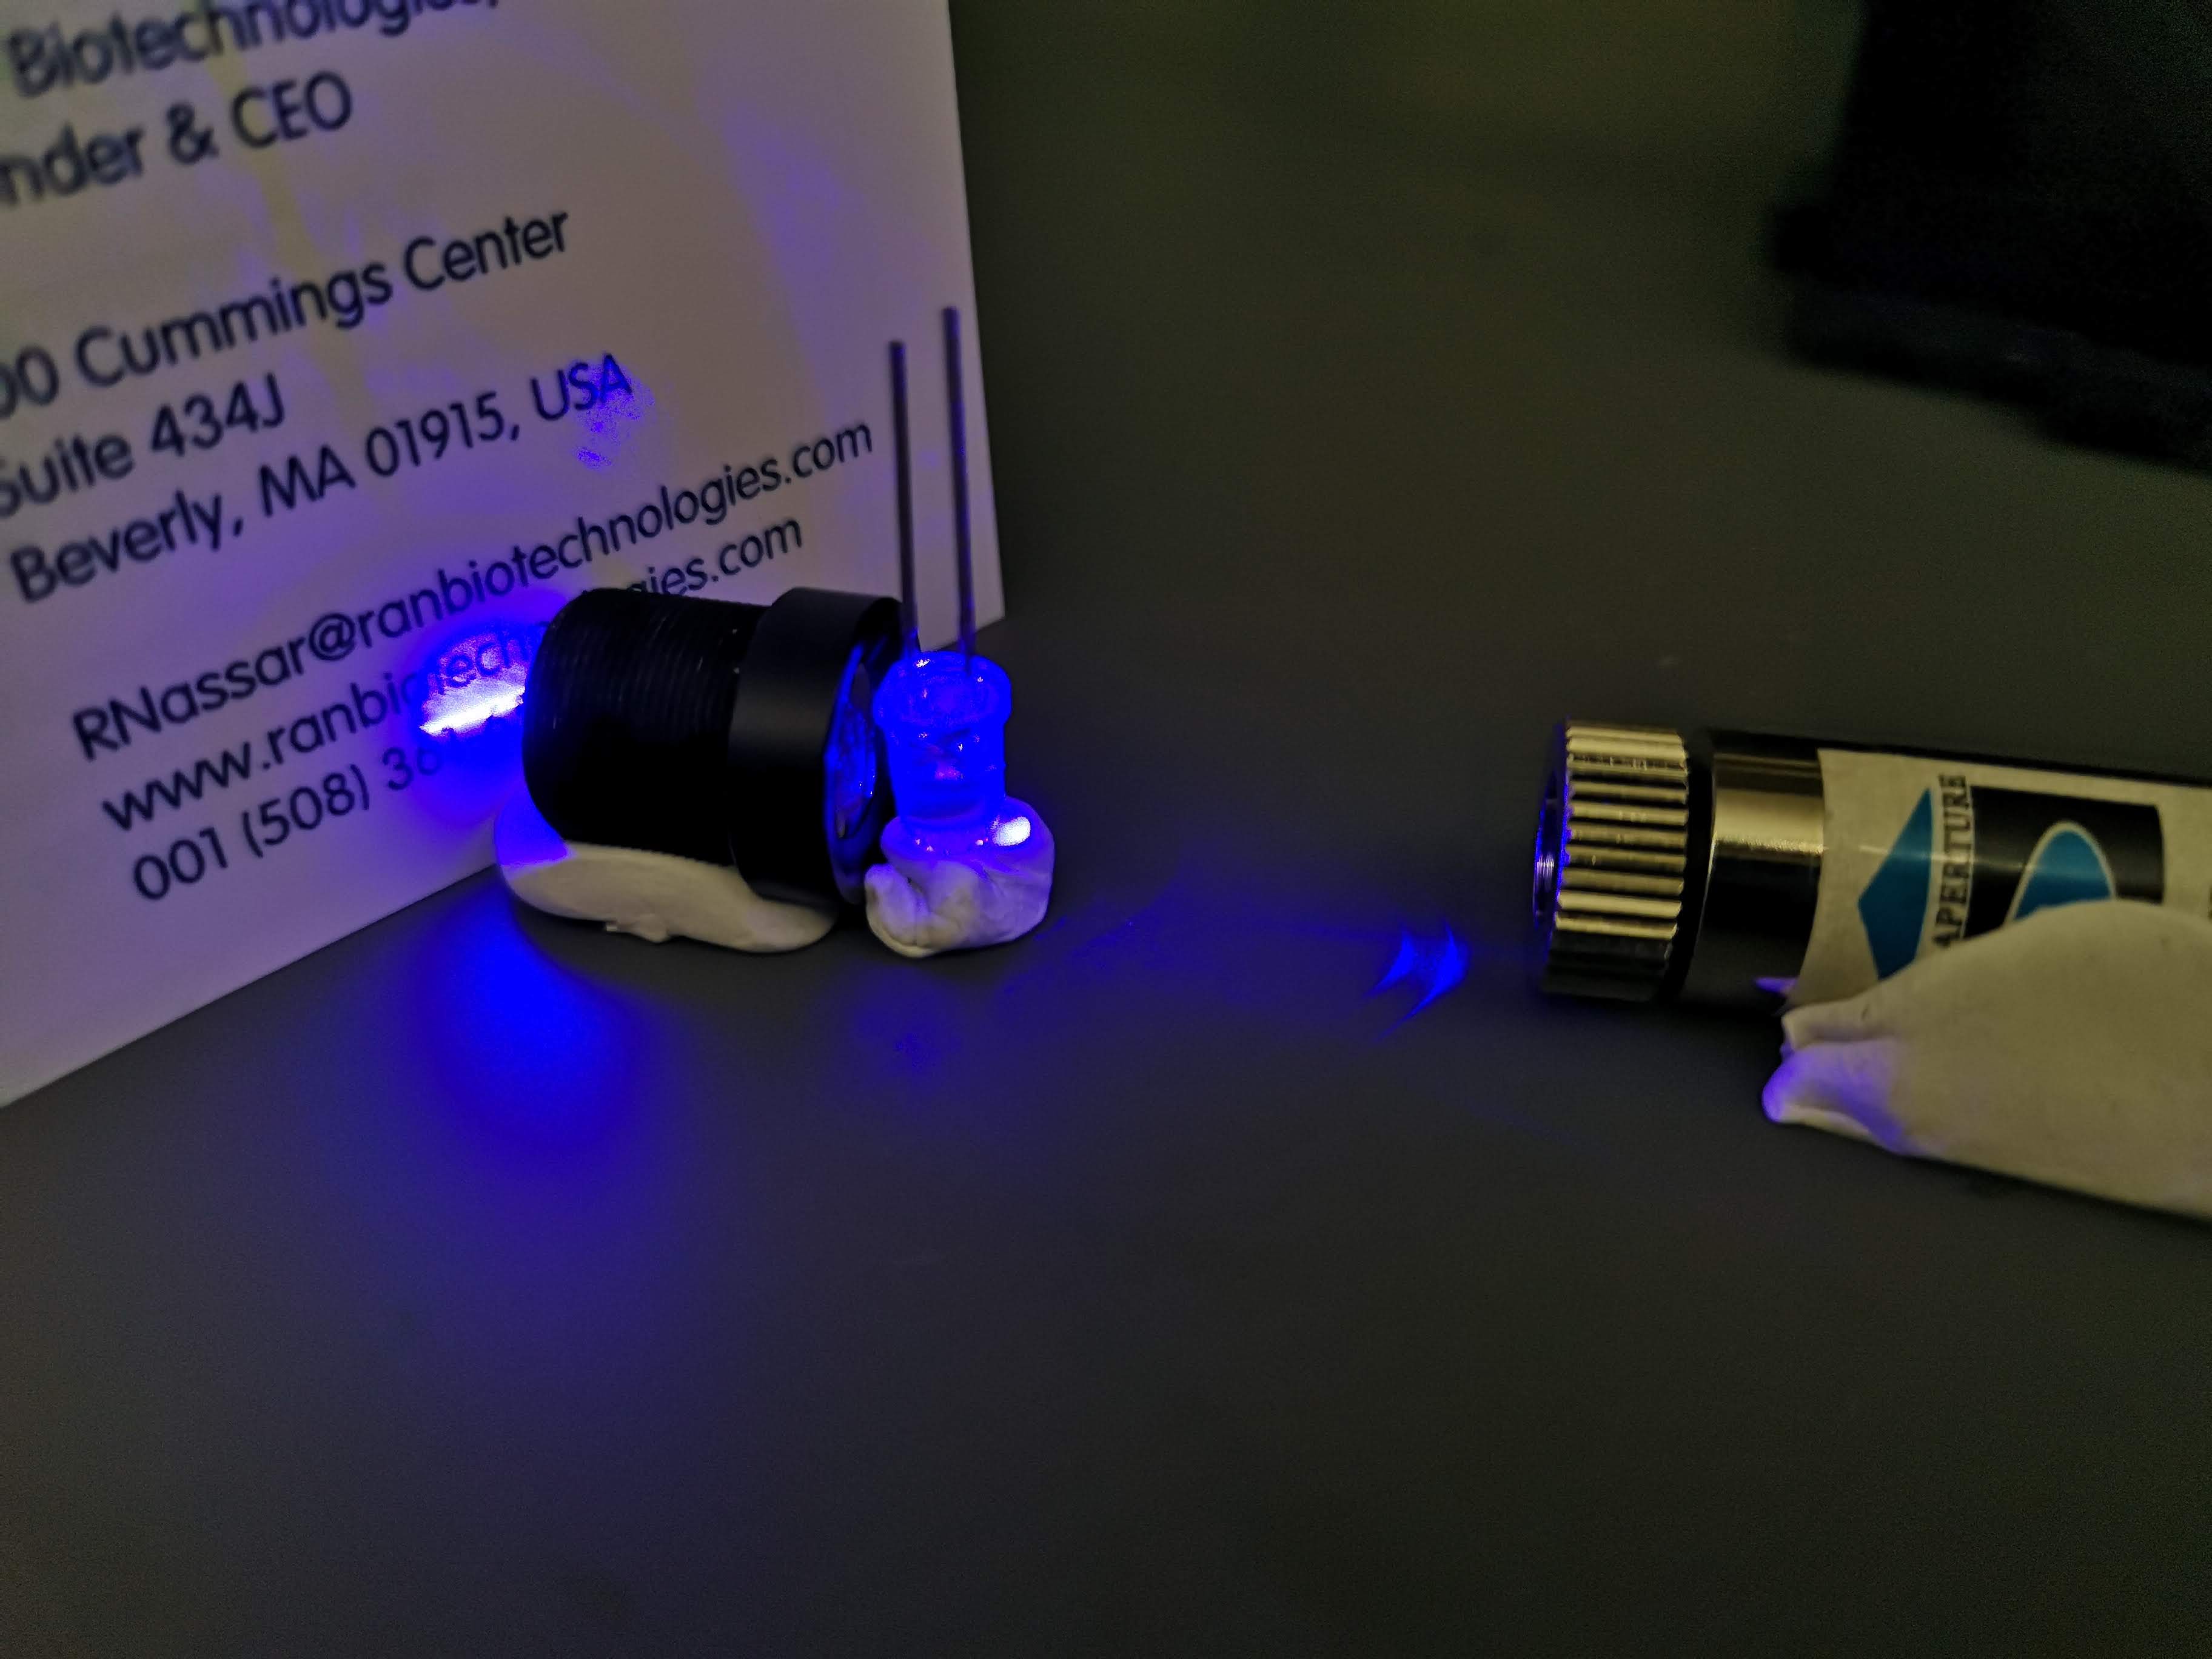
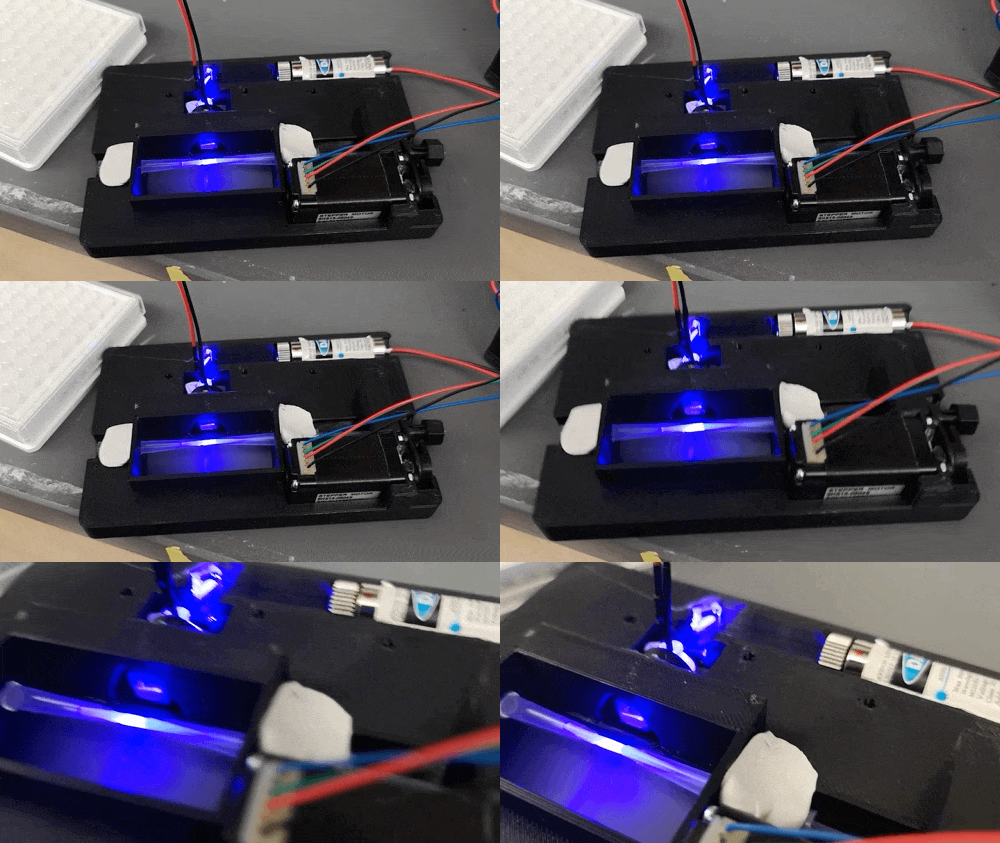
Figure: Prototyping the LS Here a 450nm laser diode is first focussed by the clear barrel shape of a blue LED and then reimaged by the CCT lens
The laser control and motion of the stepper motor is done by the UC2-REST firmware. It is a work-in-progress and we suggest you to reach out to us through an issue when you're keen on using the software.
Please use the following header for the ESP32 WEMOS R1 + CNC Shield v3: pindef_lightsheet_tomo_PID_espwemos.h. Have a look at the UC2-REST for additional information.
We forked the beautiful ImSwitch and adapted many functionalities (e.g. continous stepper motor rotation) into their framework. The beniroquai fork implements the above mentioned Firmware UC2-REST. Also here: It is a work-in-progress and we encourage you to reach out to us if you need help. :-)
Additionally, you need the ImSwitchConfig's' that will host the HoLiSheet hardware configuration as it can be found here
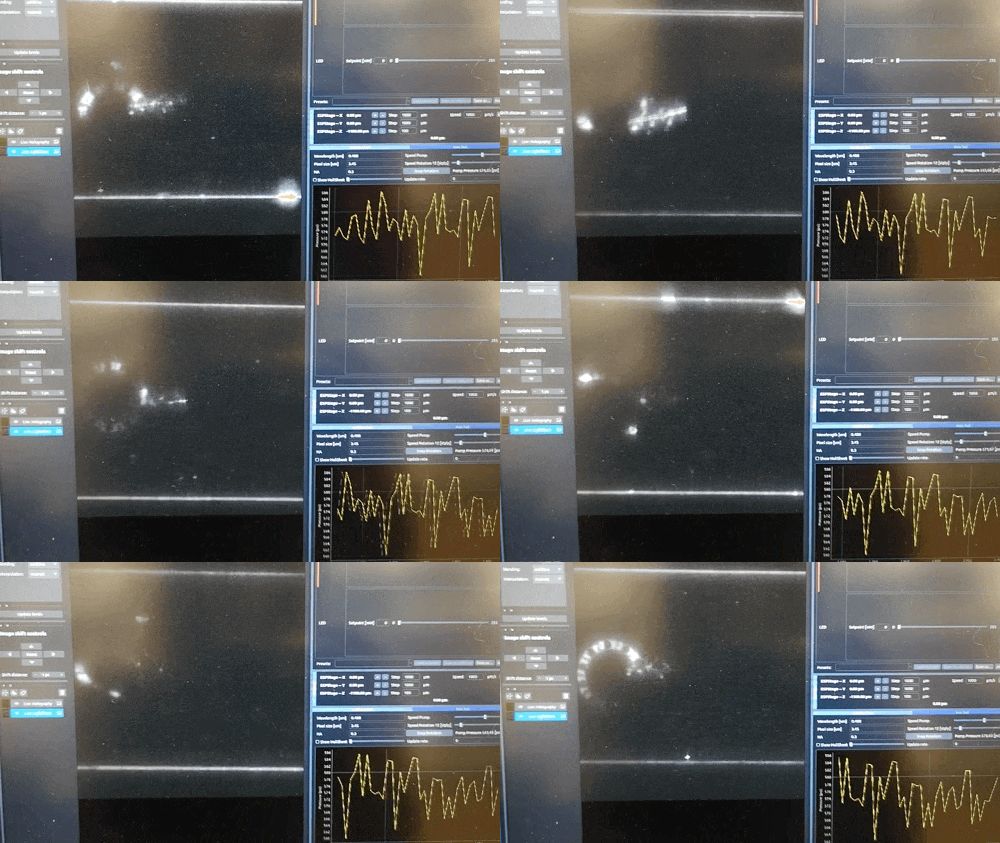
The HoLiSheet plugin inside ImSwitch visualizes the realtime measurments of a pressure sensor that can actively control the UC2 syringe pump to ensure a constant flow or let the pump operate in start/stop mode. The holographic and ligh-sheet output can be seen here:
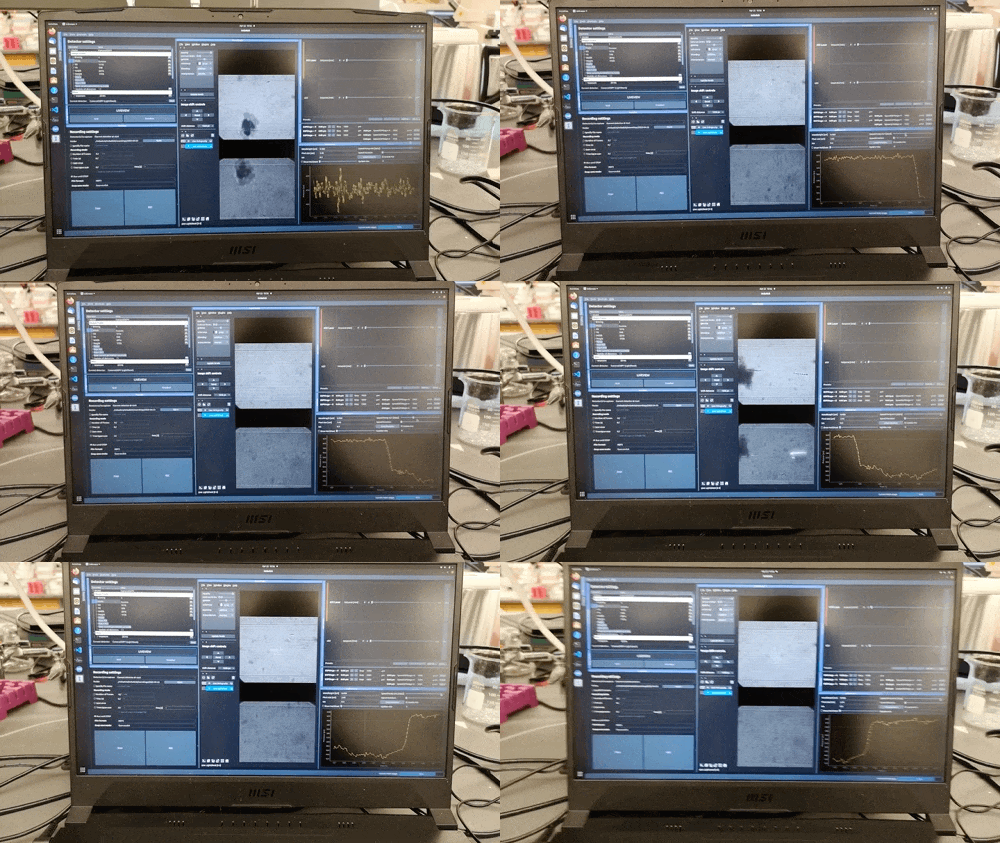
A full tutorial on how to use the electronics will follow soon. A YouTube Video can give you an in depth explanation already.
A ESP32-Python client to control the motors that are connected to e.g. the CNC-Shield v3 can be found here ESP32Client.py. This does not require ImSwitch.
Below we describe how the device can be build and assembled in order to replicate the whole system as shown in the rendering above.
Below you will find all components necessary to build the HoLiSheet module.
All these files in the folder ./STL need to be printed. We used a Prusa i3 MK3 using PLA Prusament (Galaxy Black) at layer height 0.3 mm and infill 80%.
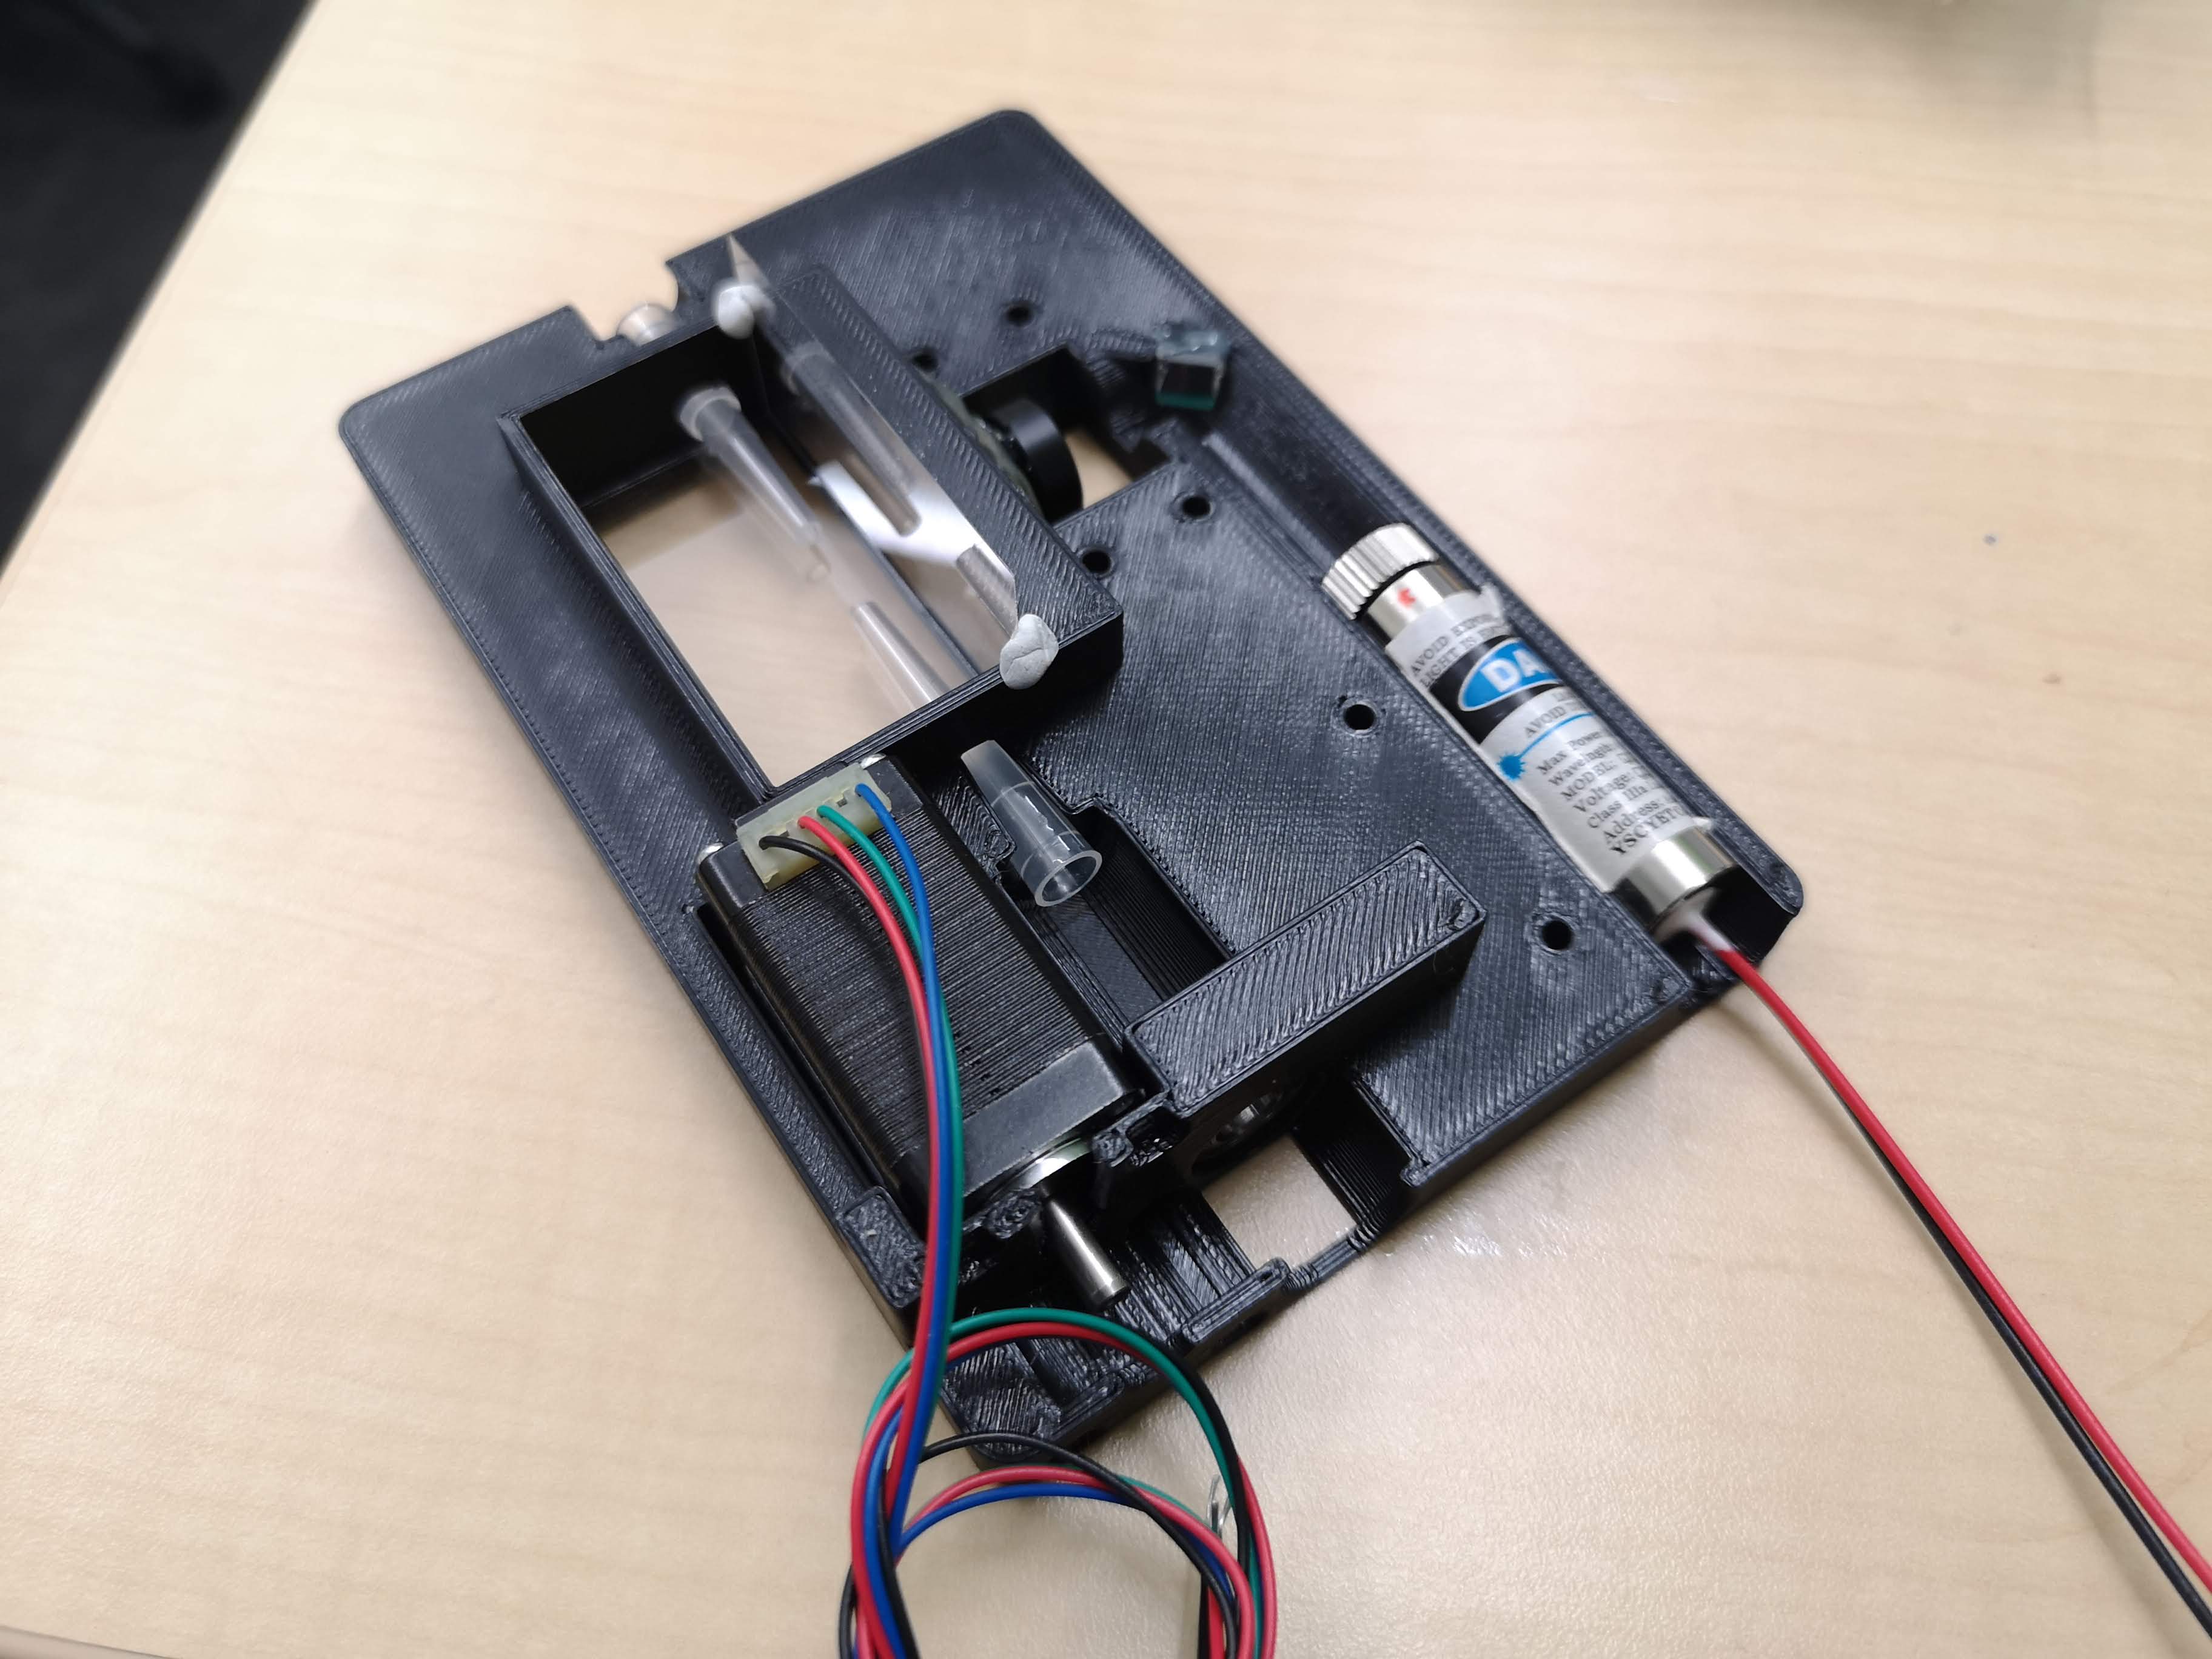
This is used in the current version of the setup
| Type | Details | Price | Link |
|---|---|---|---|
| 2x 100µm Pipette Tips | |||
| 450nm Laser diode | |||
| M3 Screws 912 / cyl. head | |||
| Silicone | |||
| Syringe + Needle | |||
| Mirror, 5mm dia, 2mm thick. | |||
| NEMA 8 stepper motor | |||
| FEP tube, 130x2x0.5mm | |||
| 5mm clear LED | |||
| Roll Bearing 3/8'' | |||
| O-ring 25mm | |||
| CNC Shield v3 + 1xA4988 | |||
| ESP32 WEMOS R1 | |||
| 12V Powersupply | |||
| USB micro | |||
| 30x24mm coverslips |
The original design files are in the INVENTOR folder.
We develop a dedicated Electronics module called UC2 Feather. Alternatively you can use an ESP32 Wemos d32 in conjunction with an CNC Shield v3 and A4988 stepper motor drivers or any solution you wold like the most.
These are the parts needed for the DEVICE IMAGE MISSING
Fill the syringe with silicone, add the tip and apply sealant at the edges where the coverslip will sit
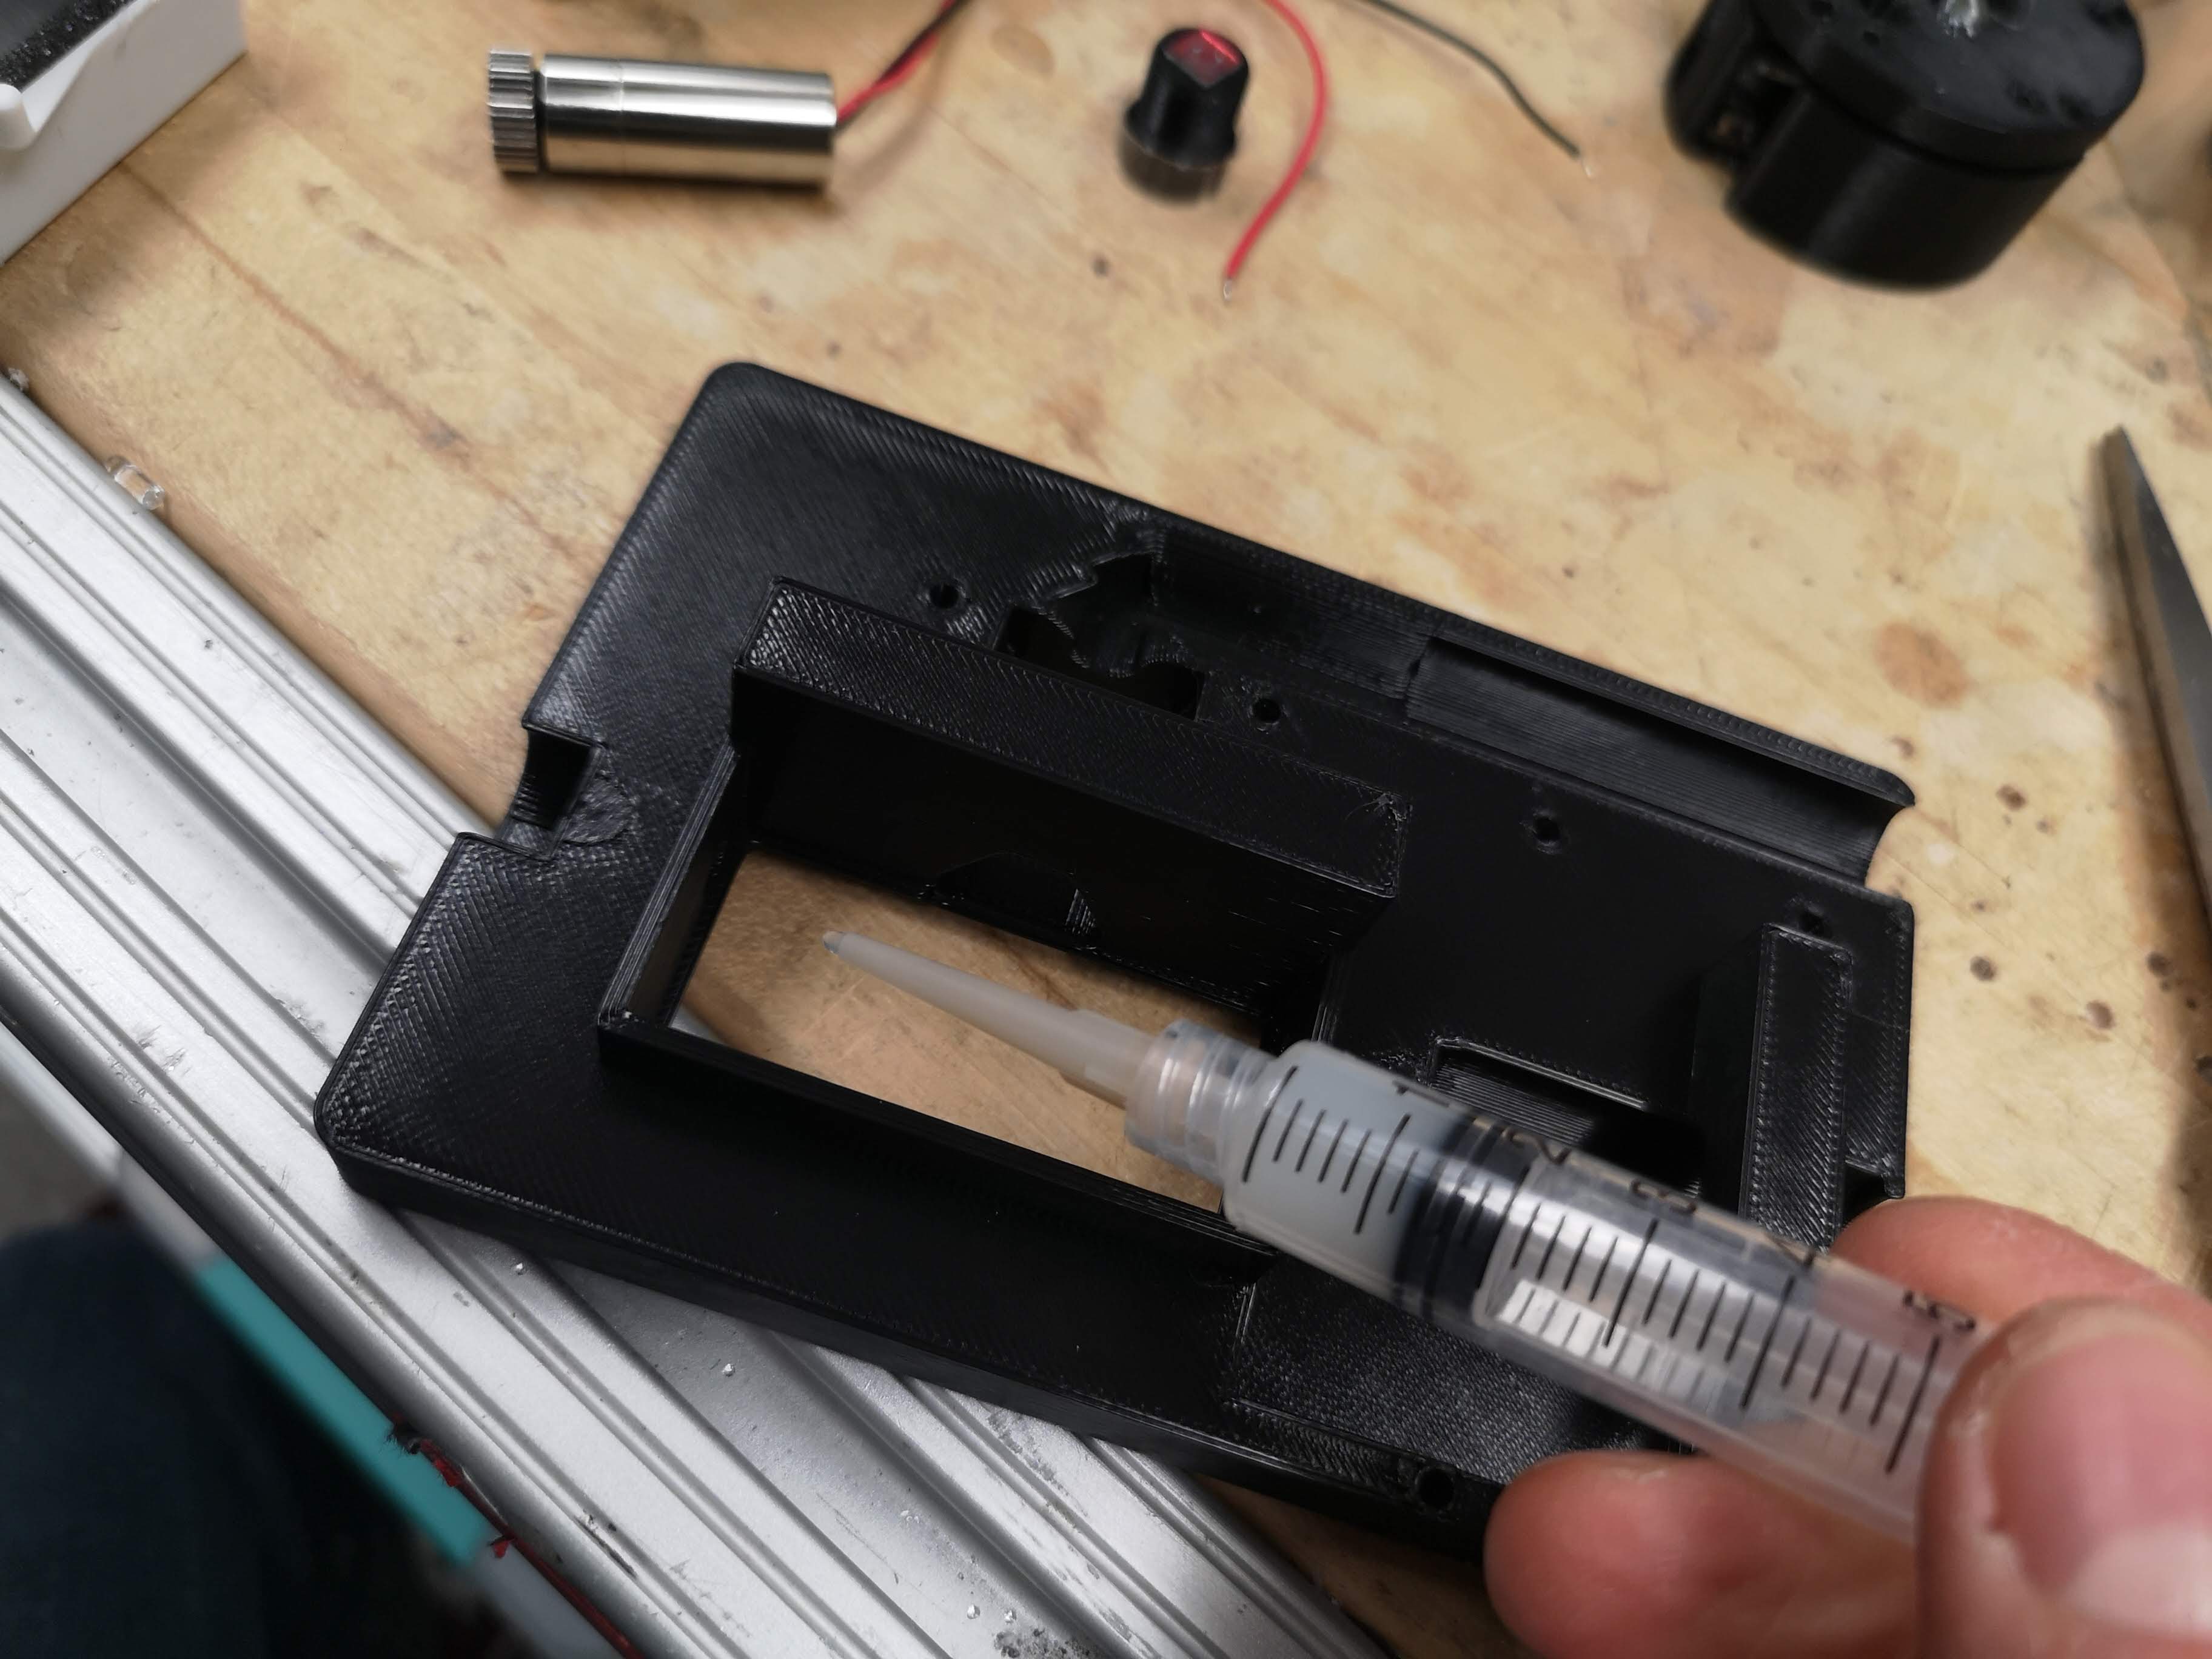
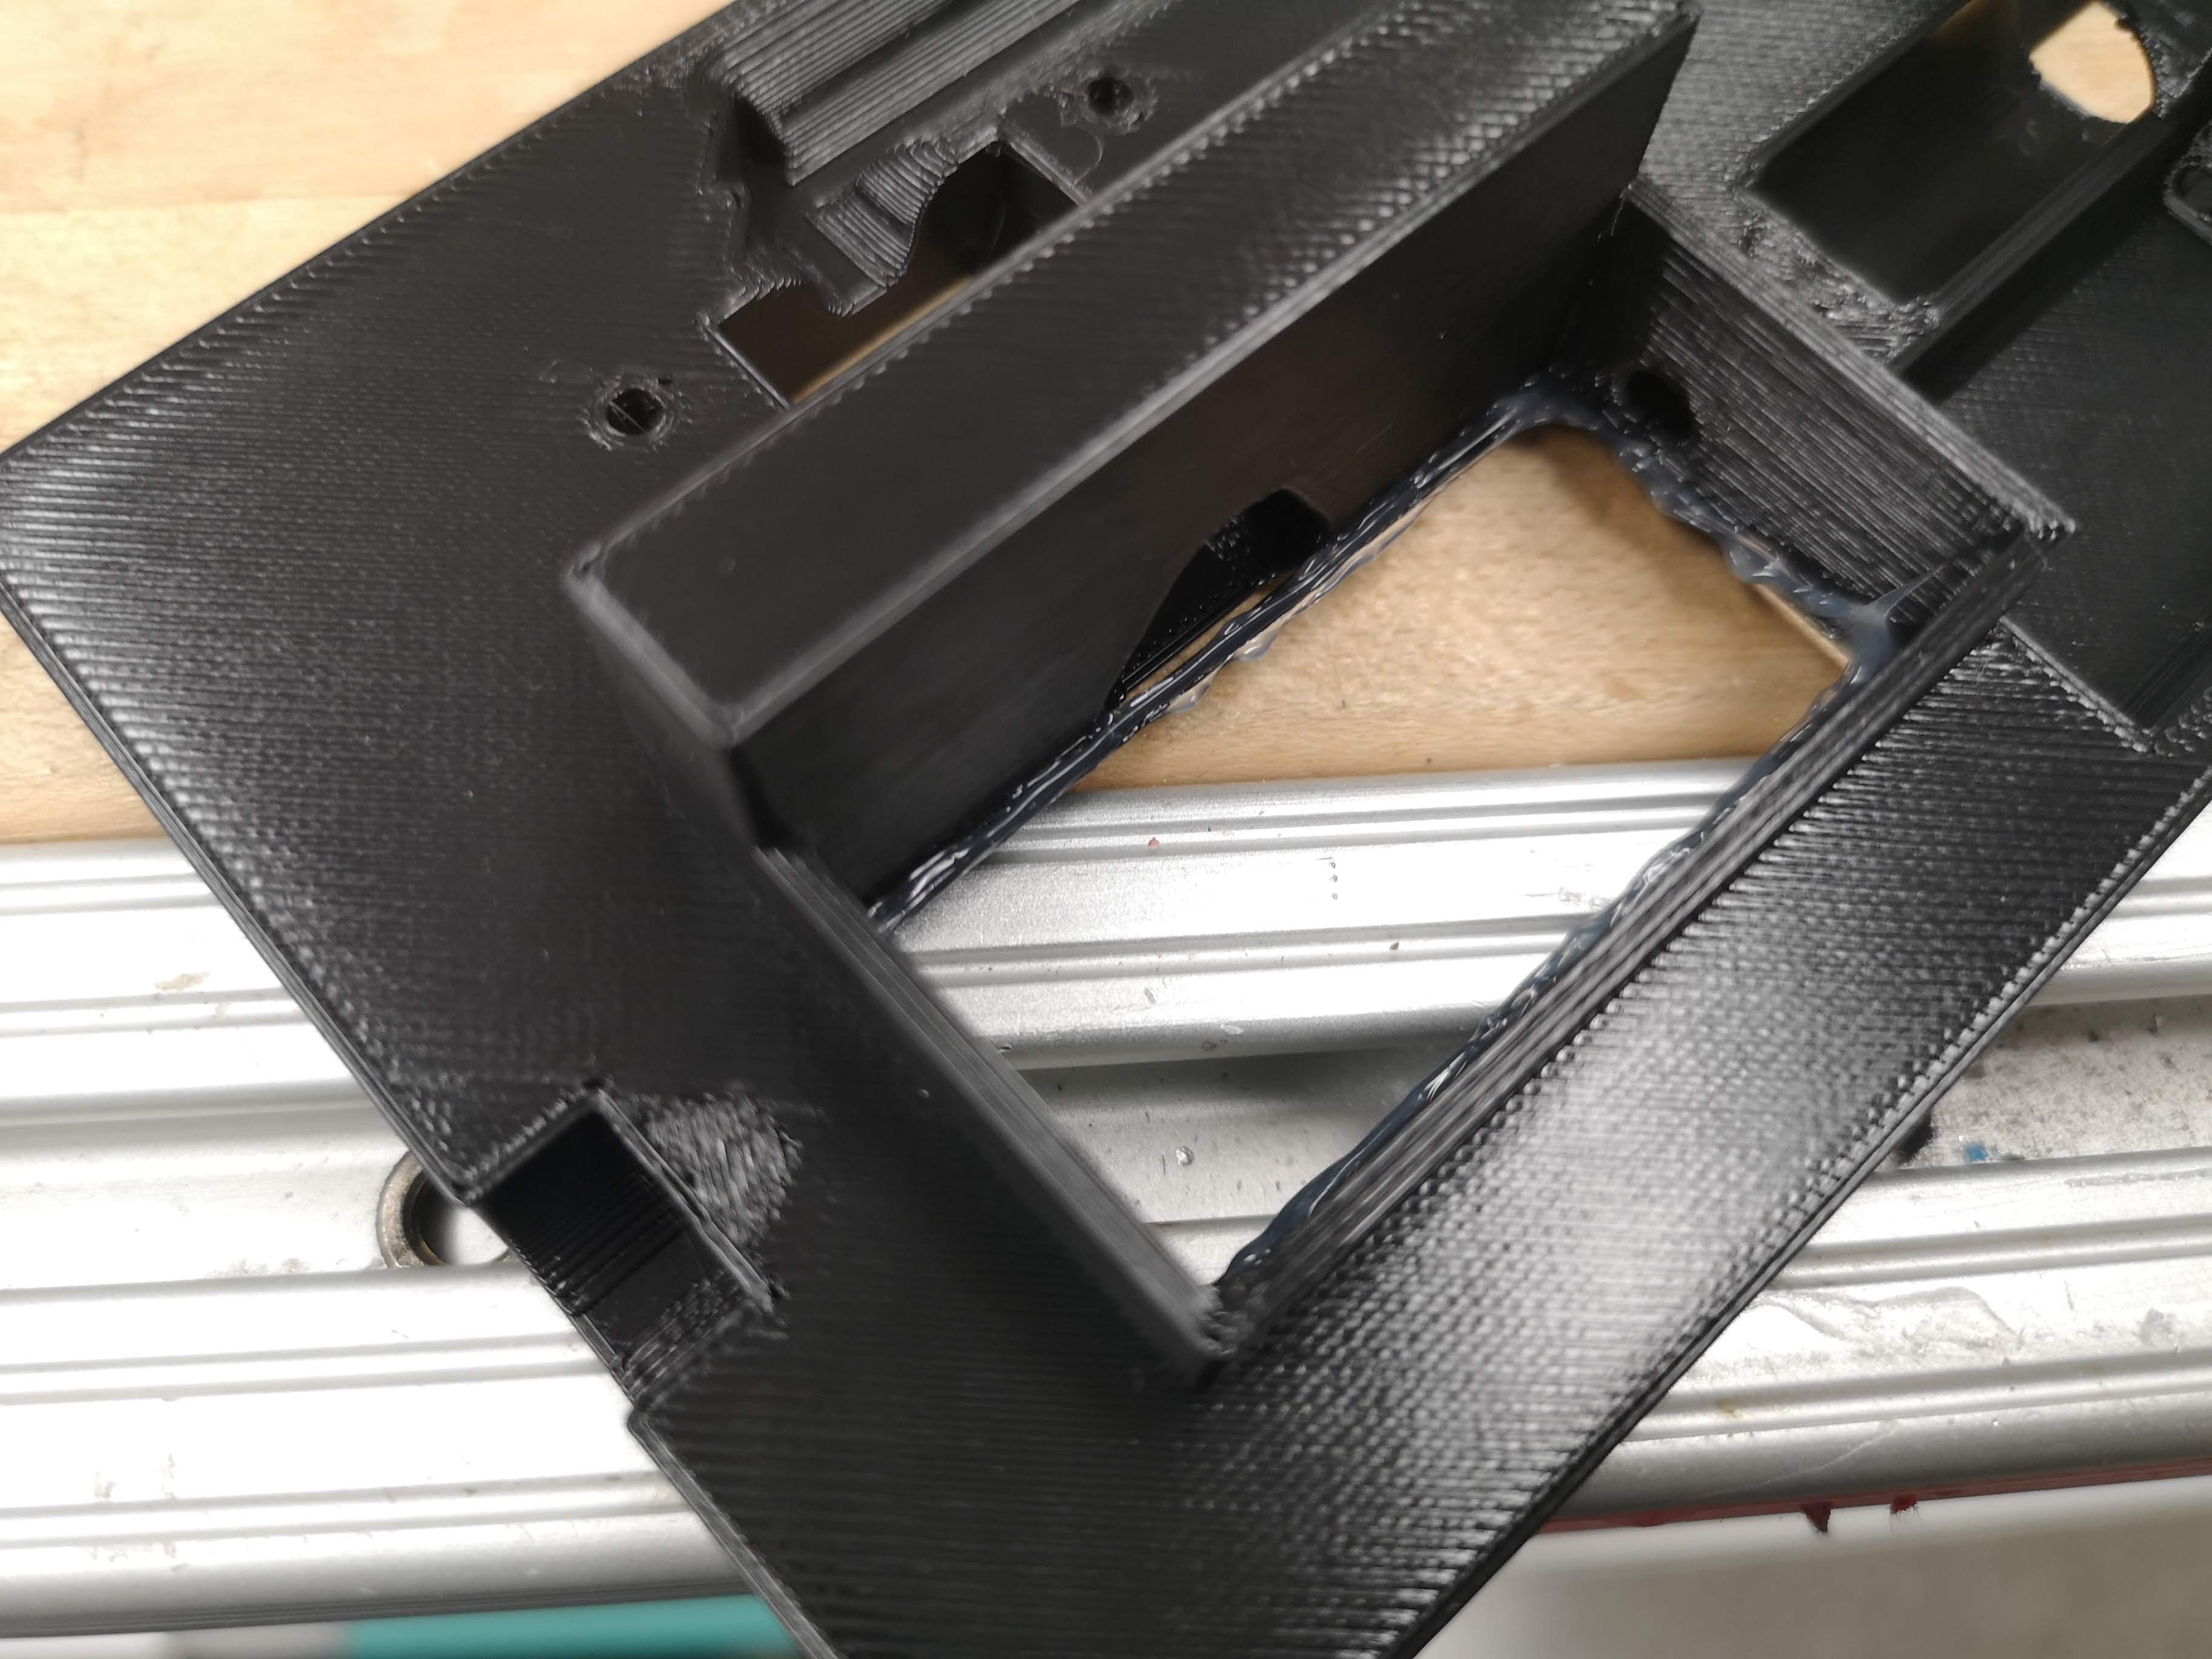
Carefully add the two coverslips at the lower and upper regions, add enough sealant
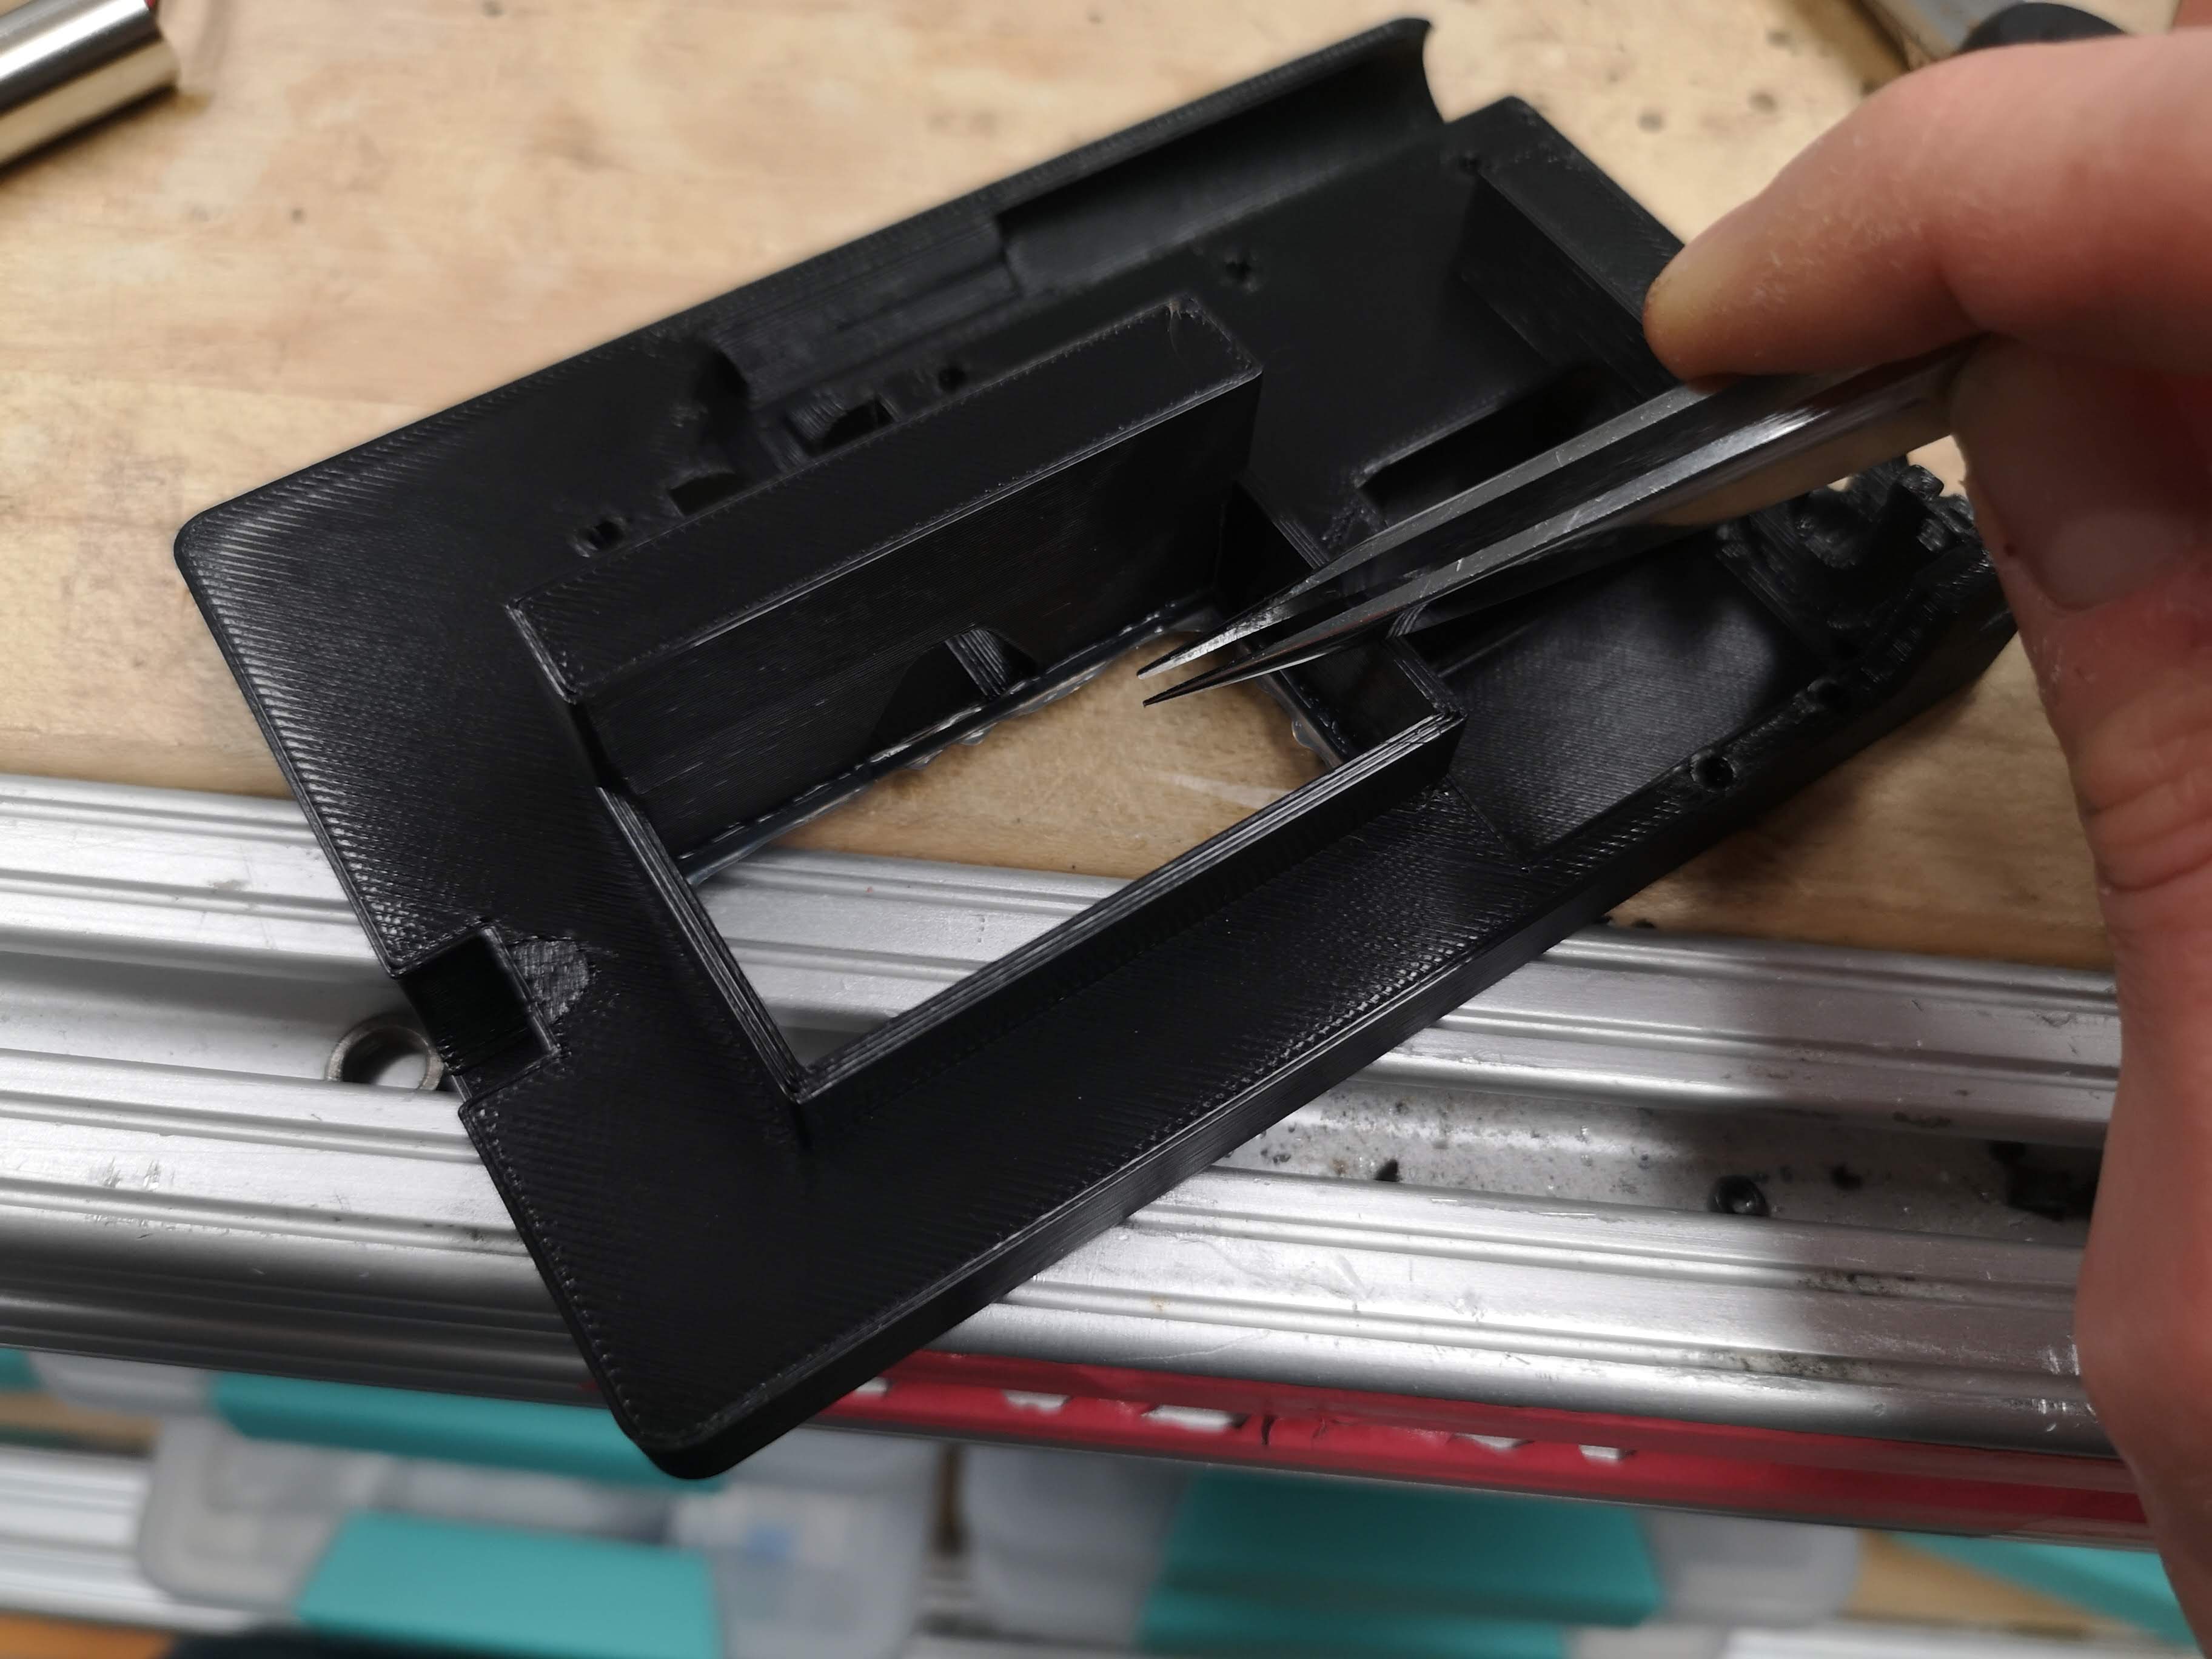
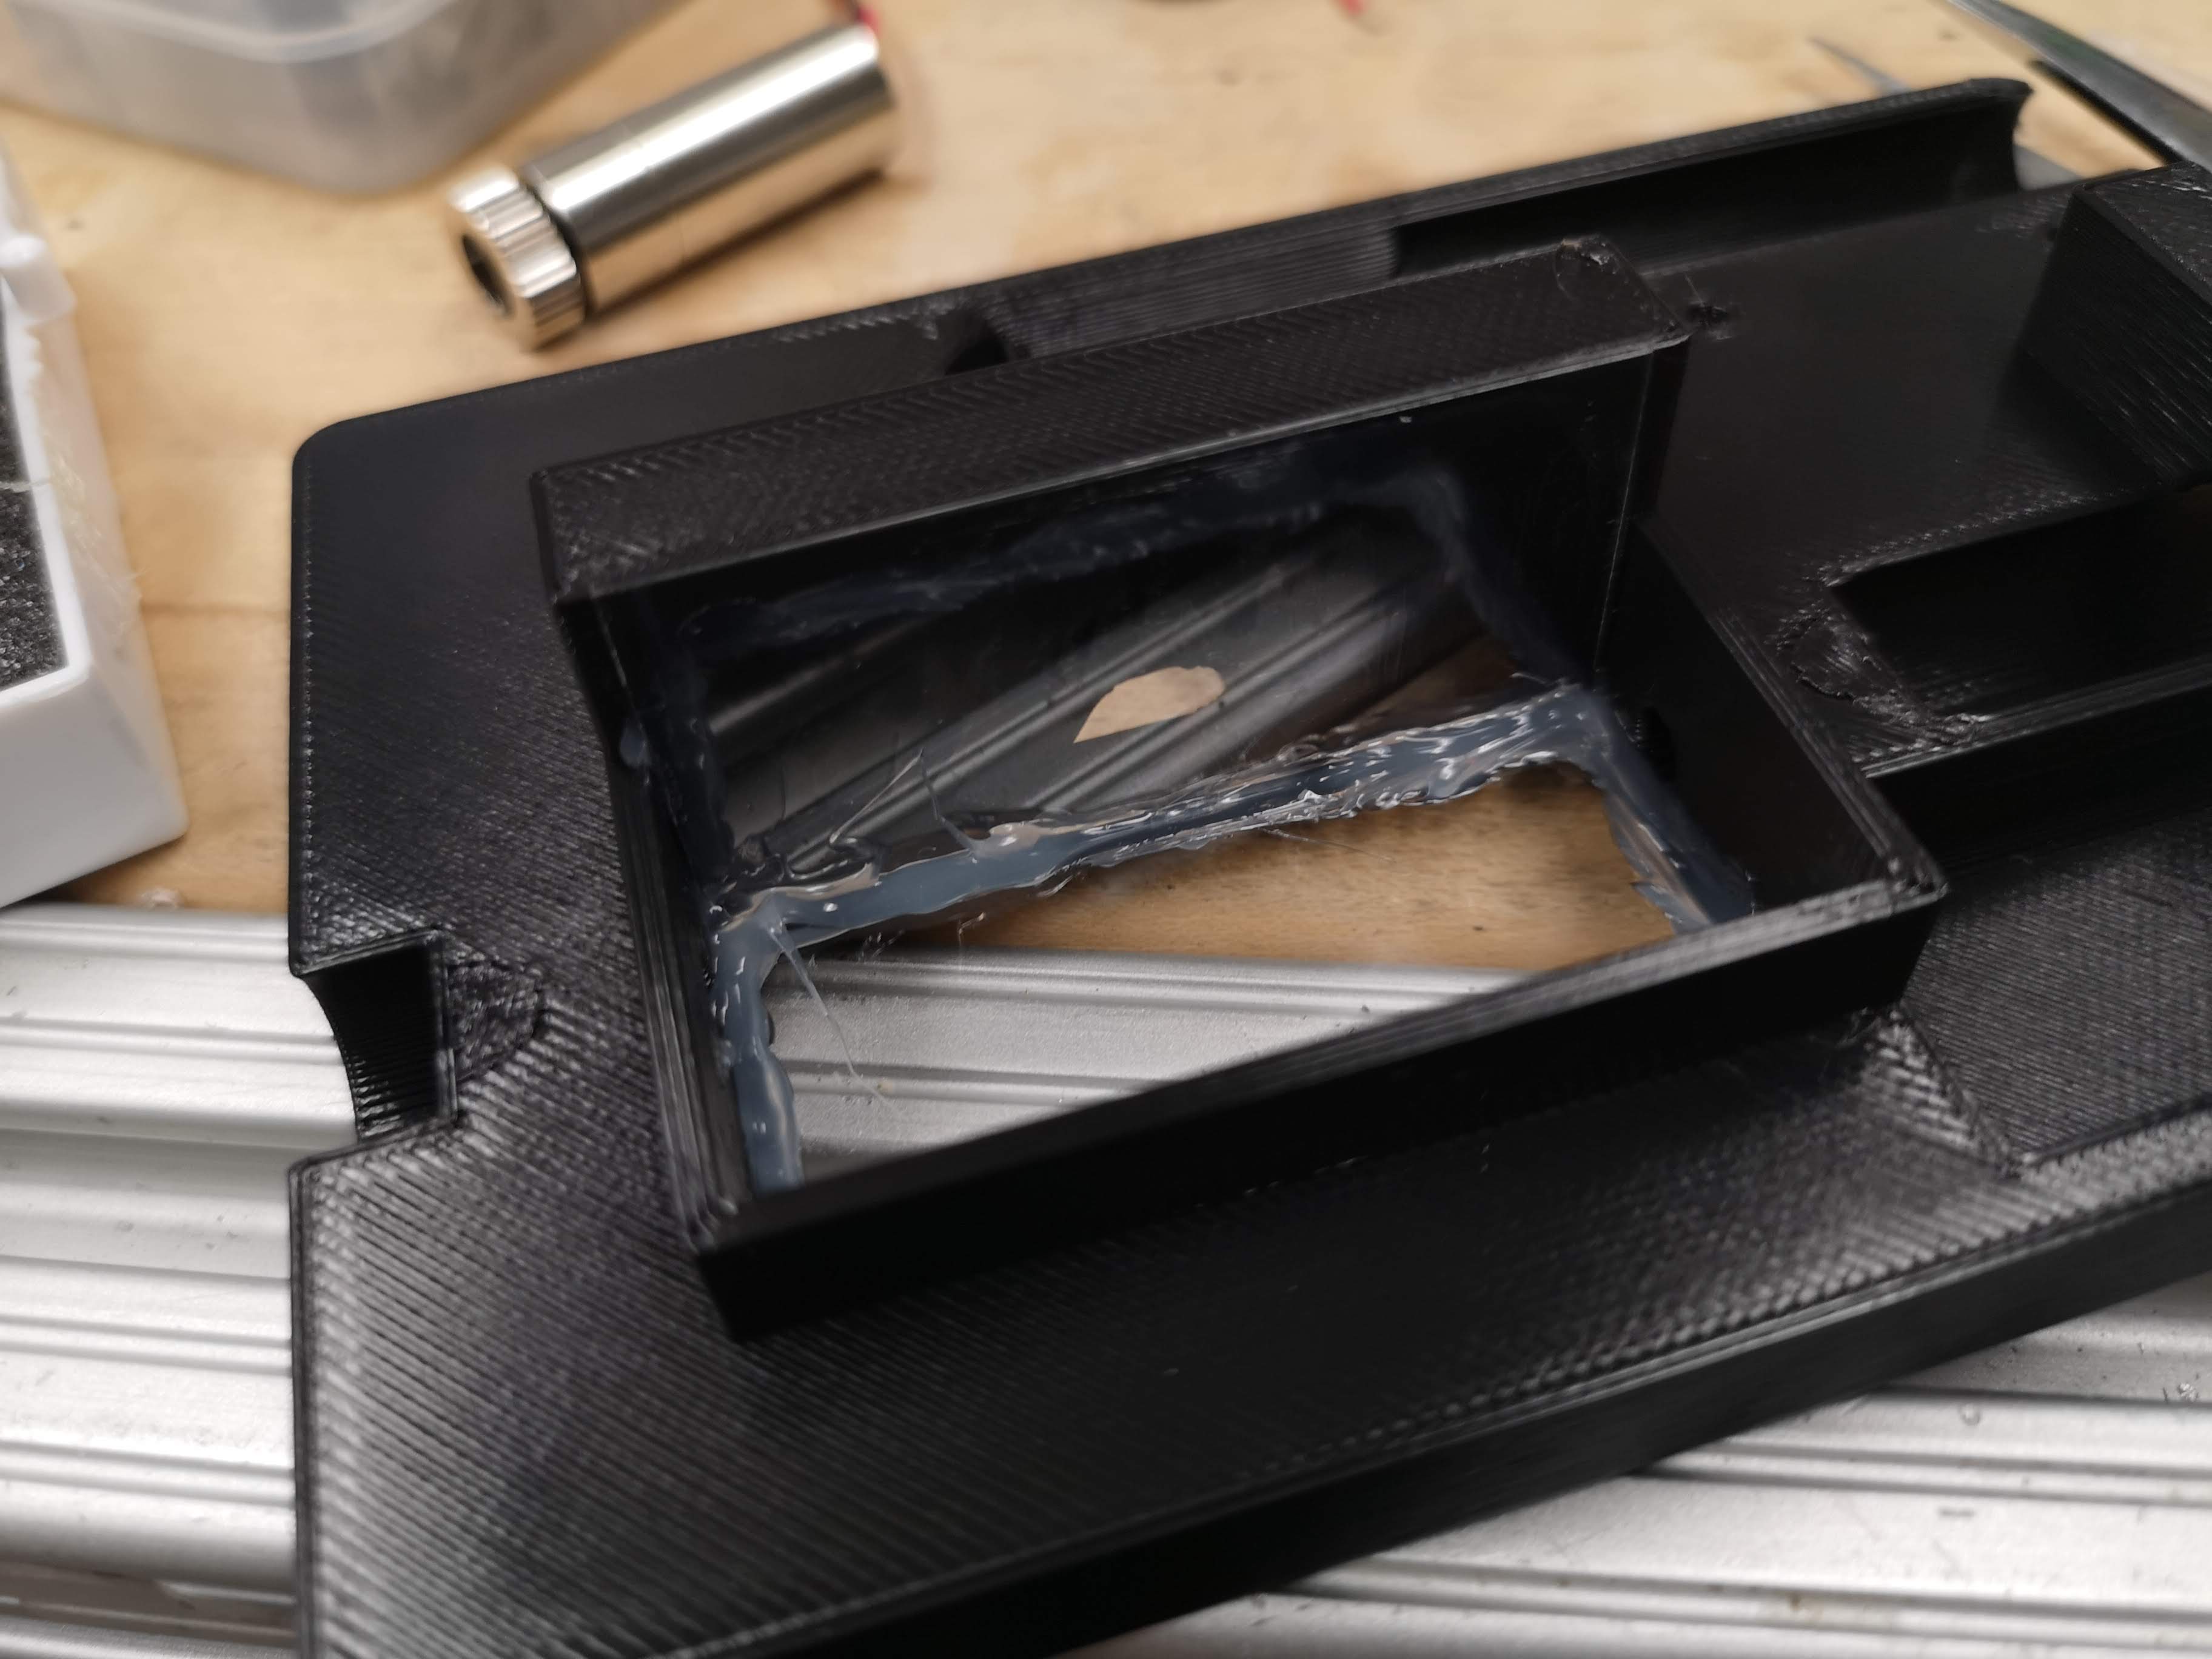
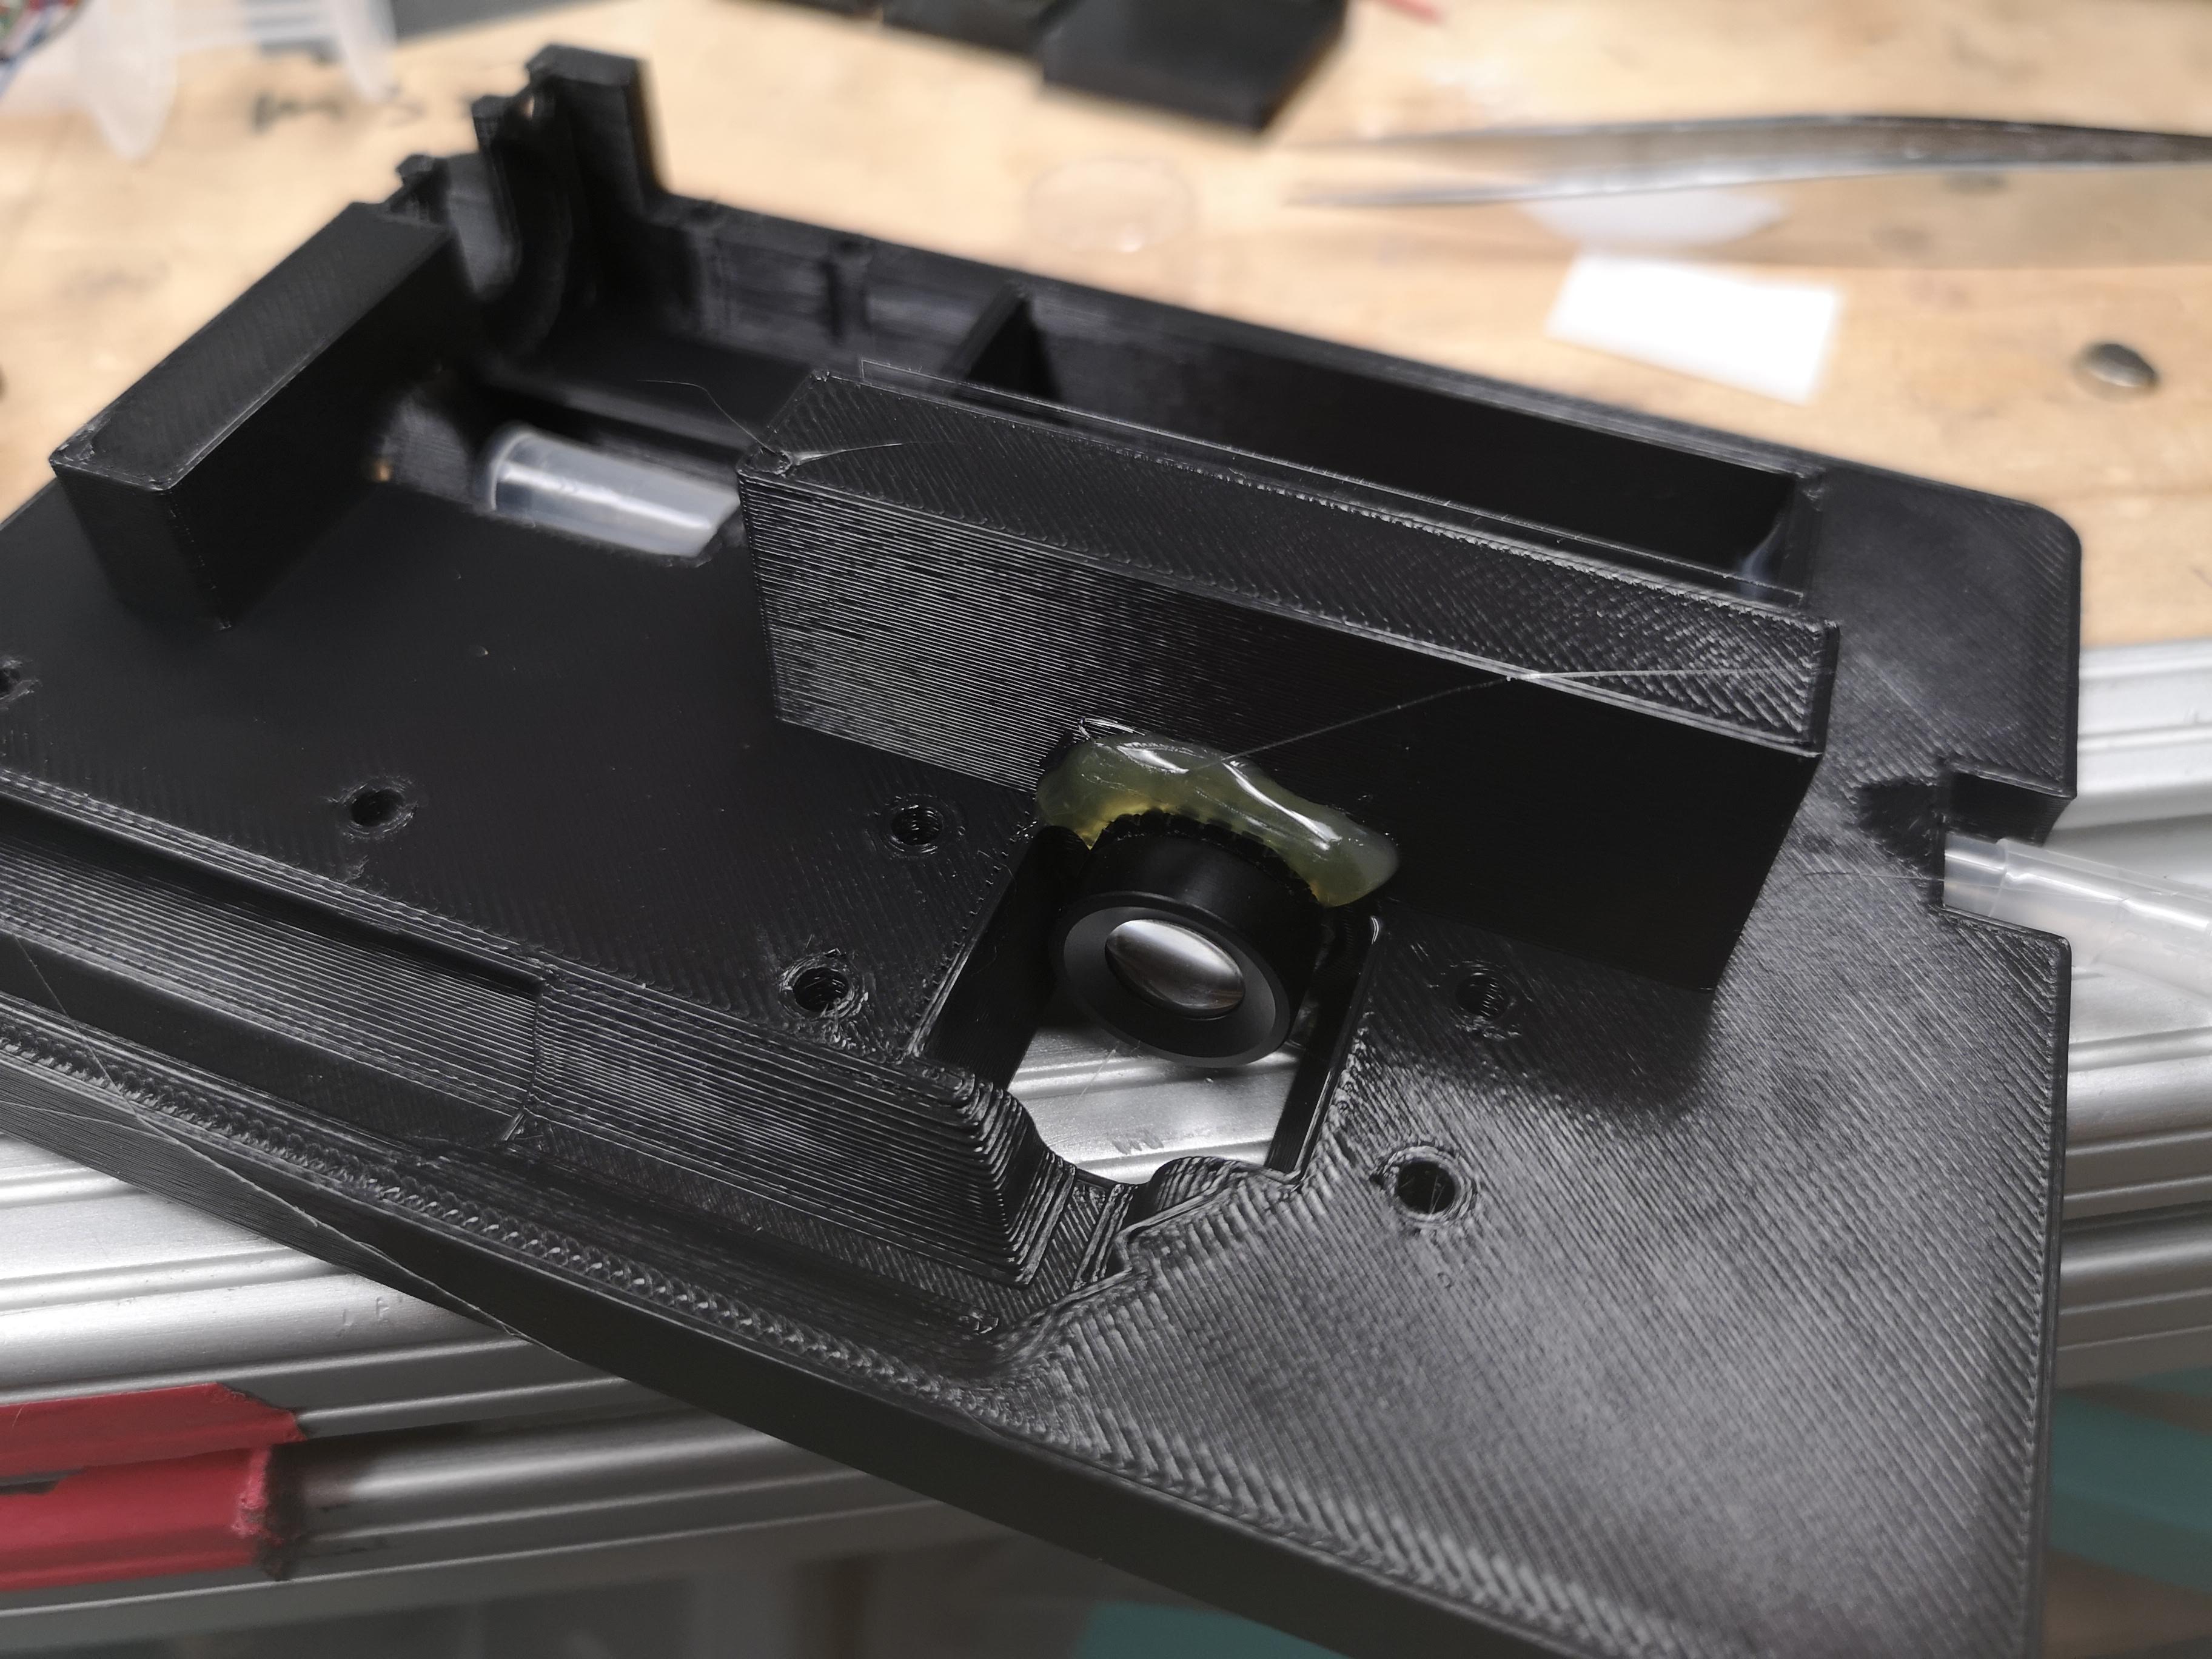
Mount the M12 CCTV lens
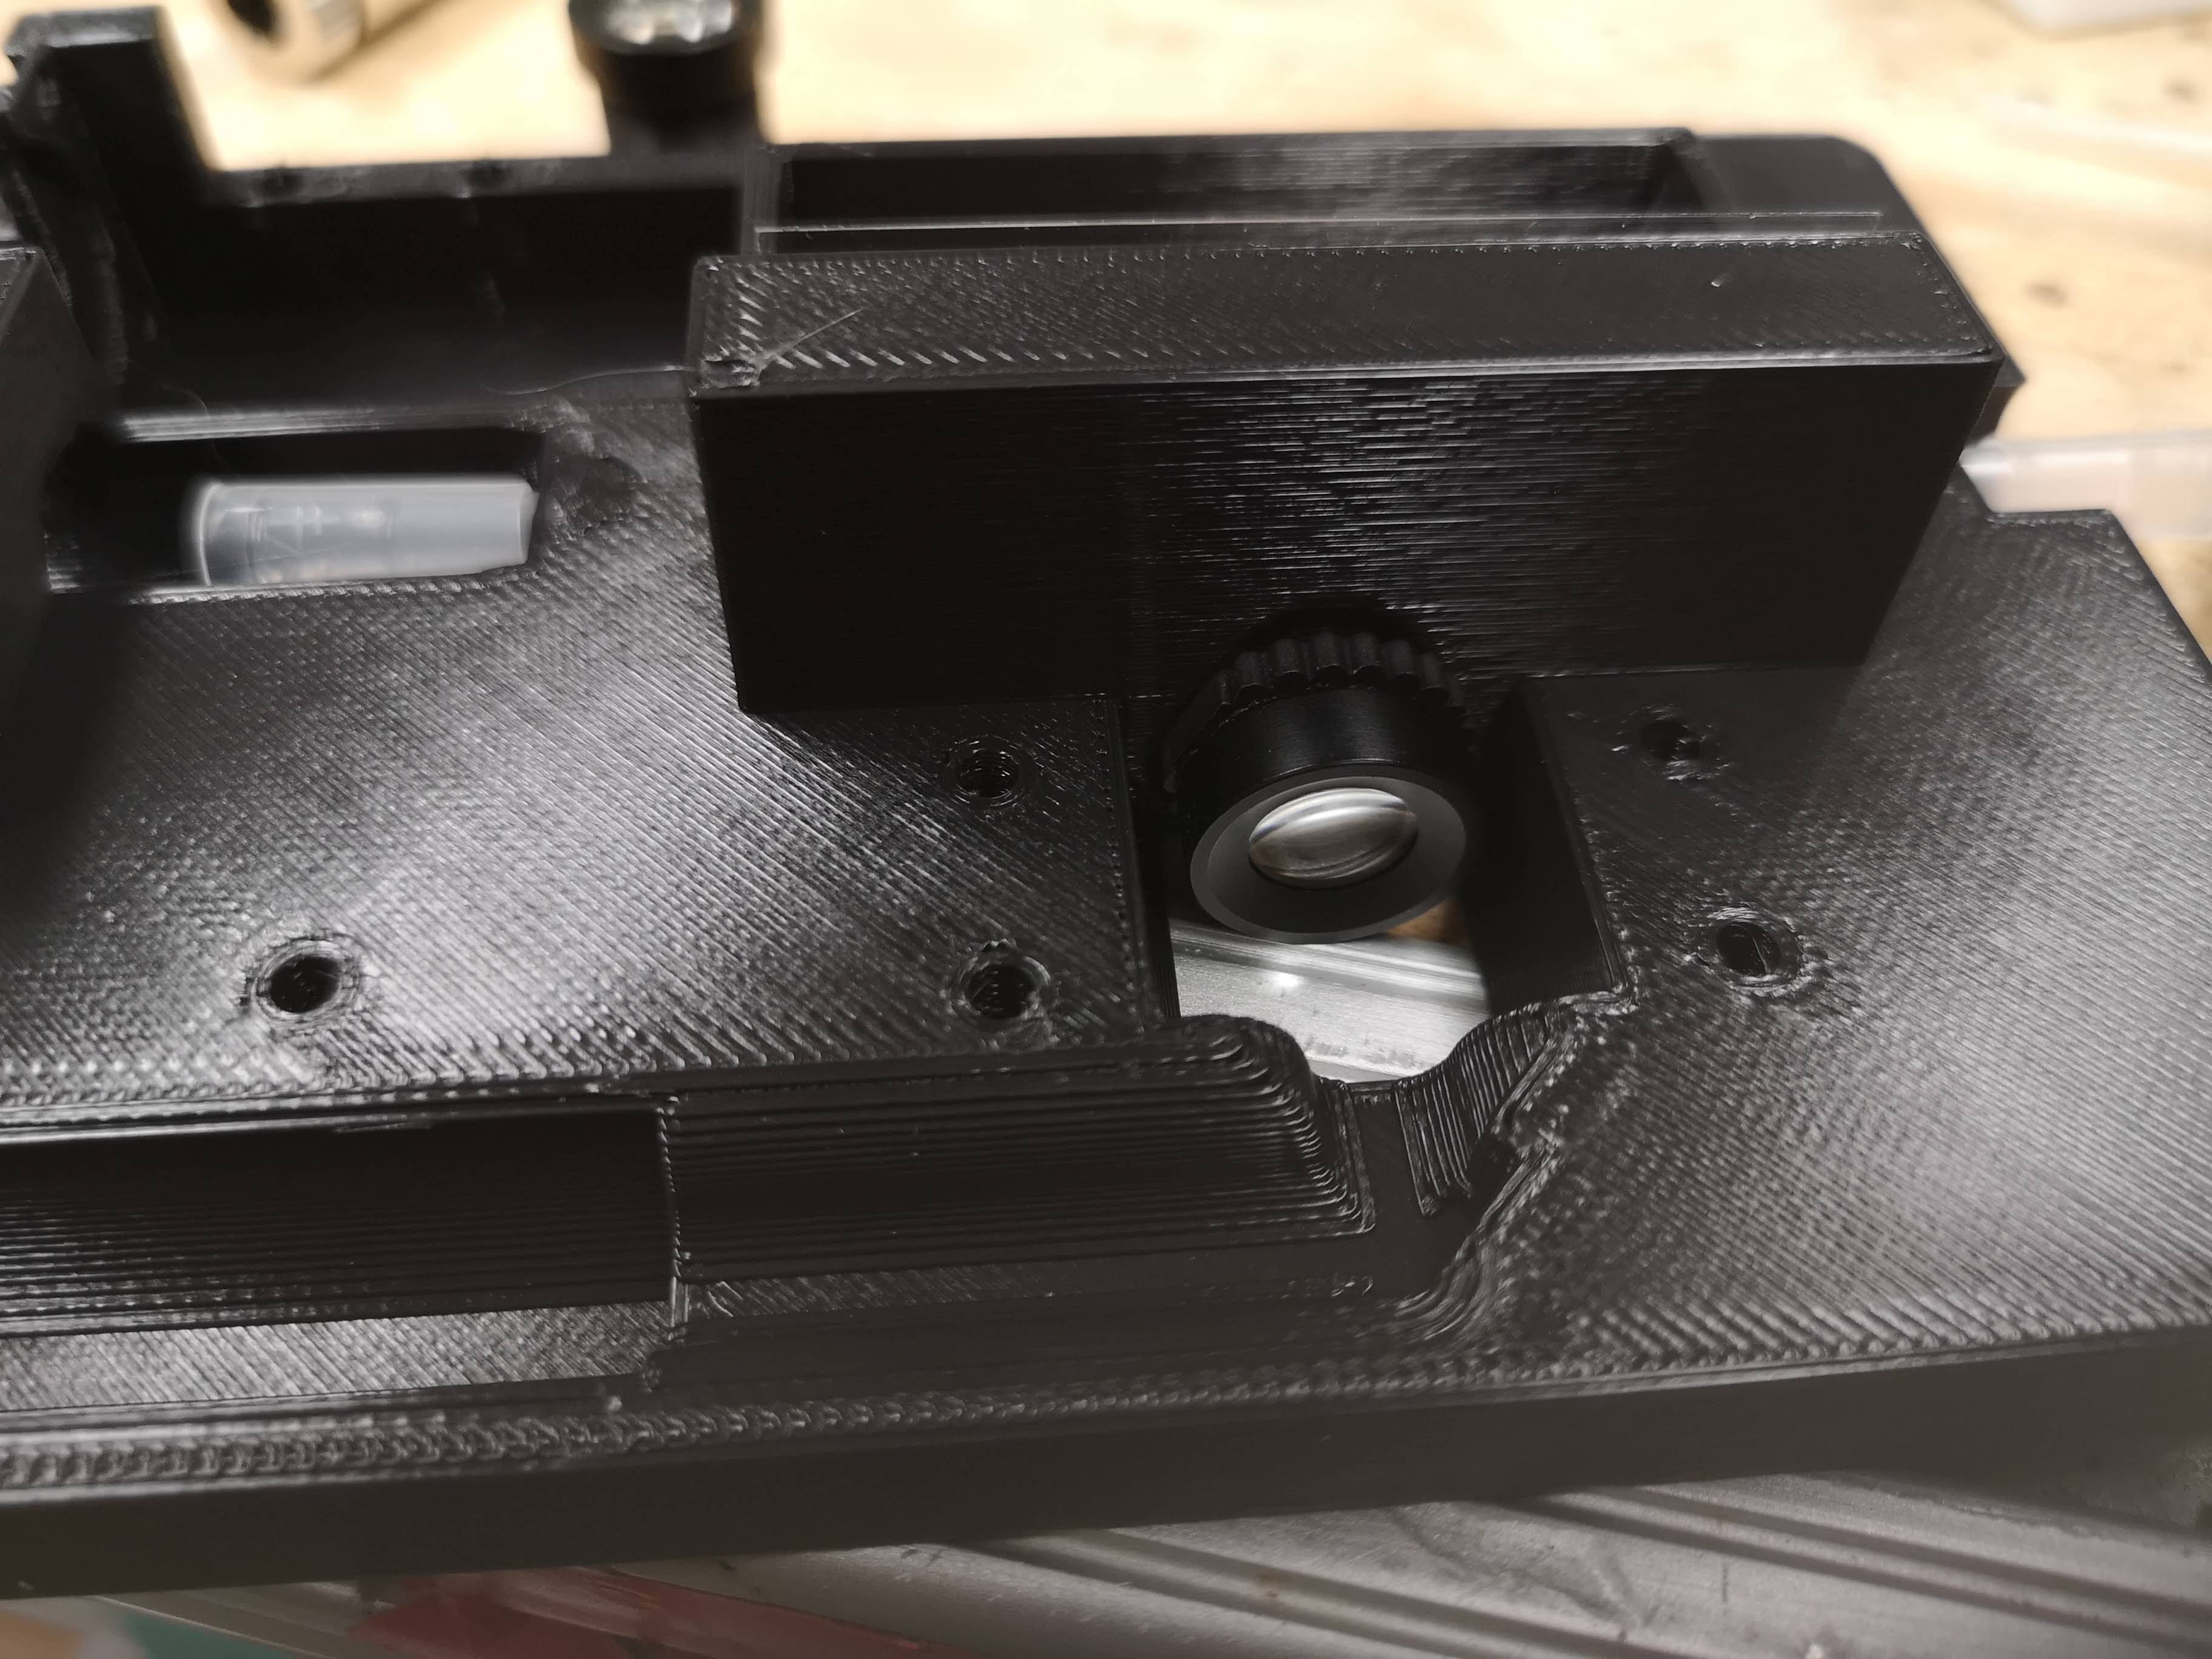
Optional: Mount the M12 nut to add better focussing of the M12 lens with hotglue
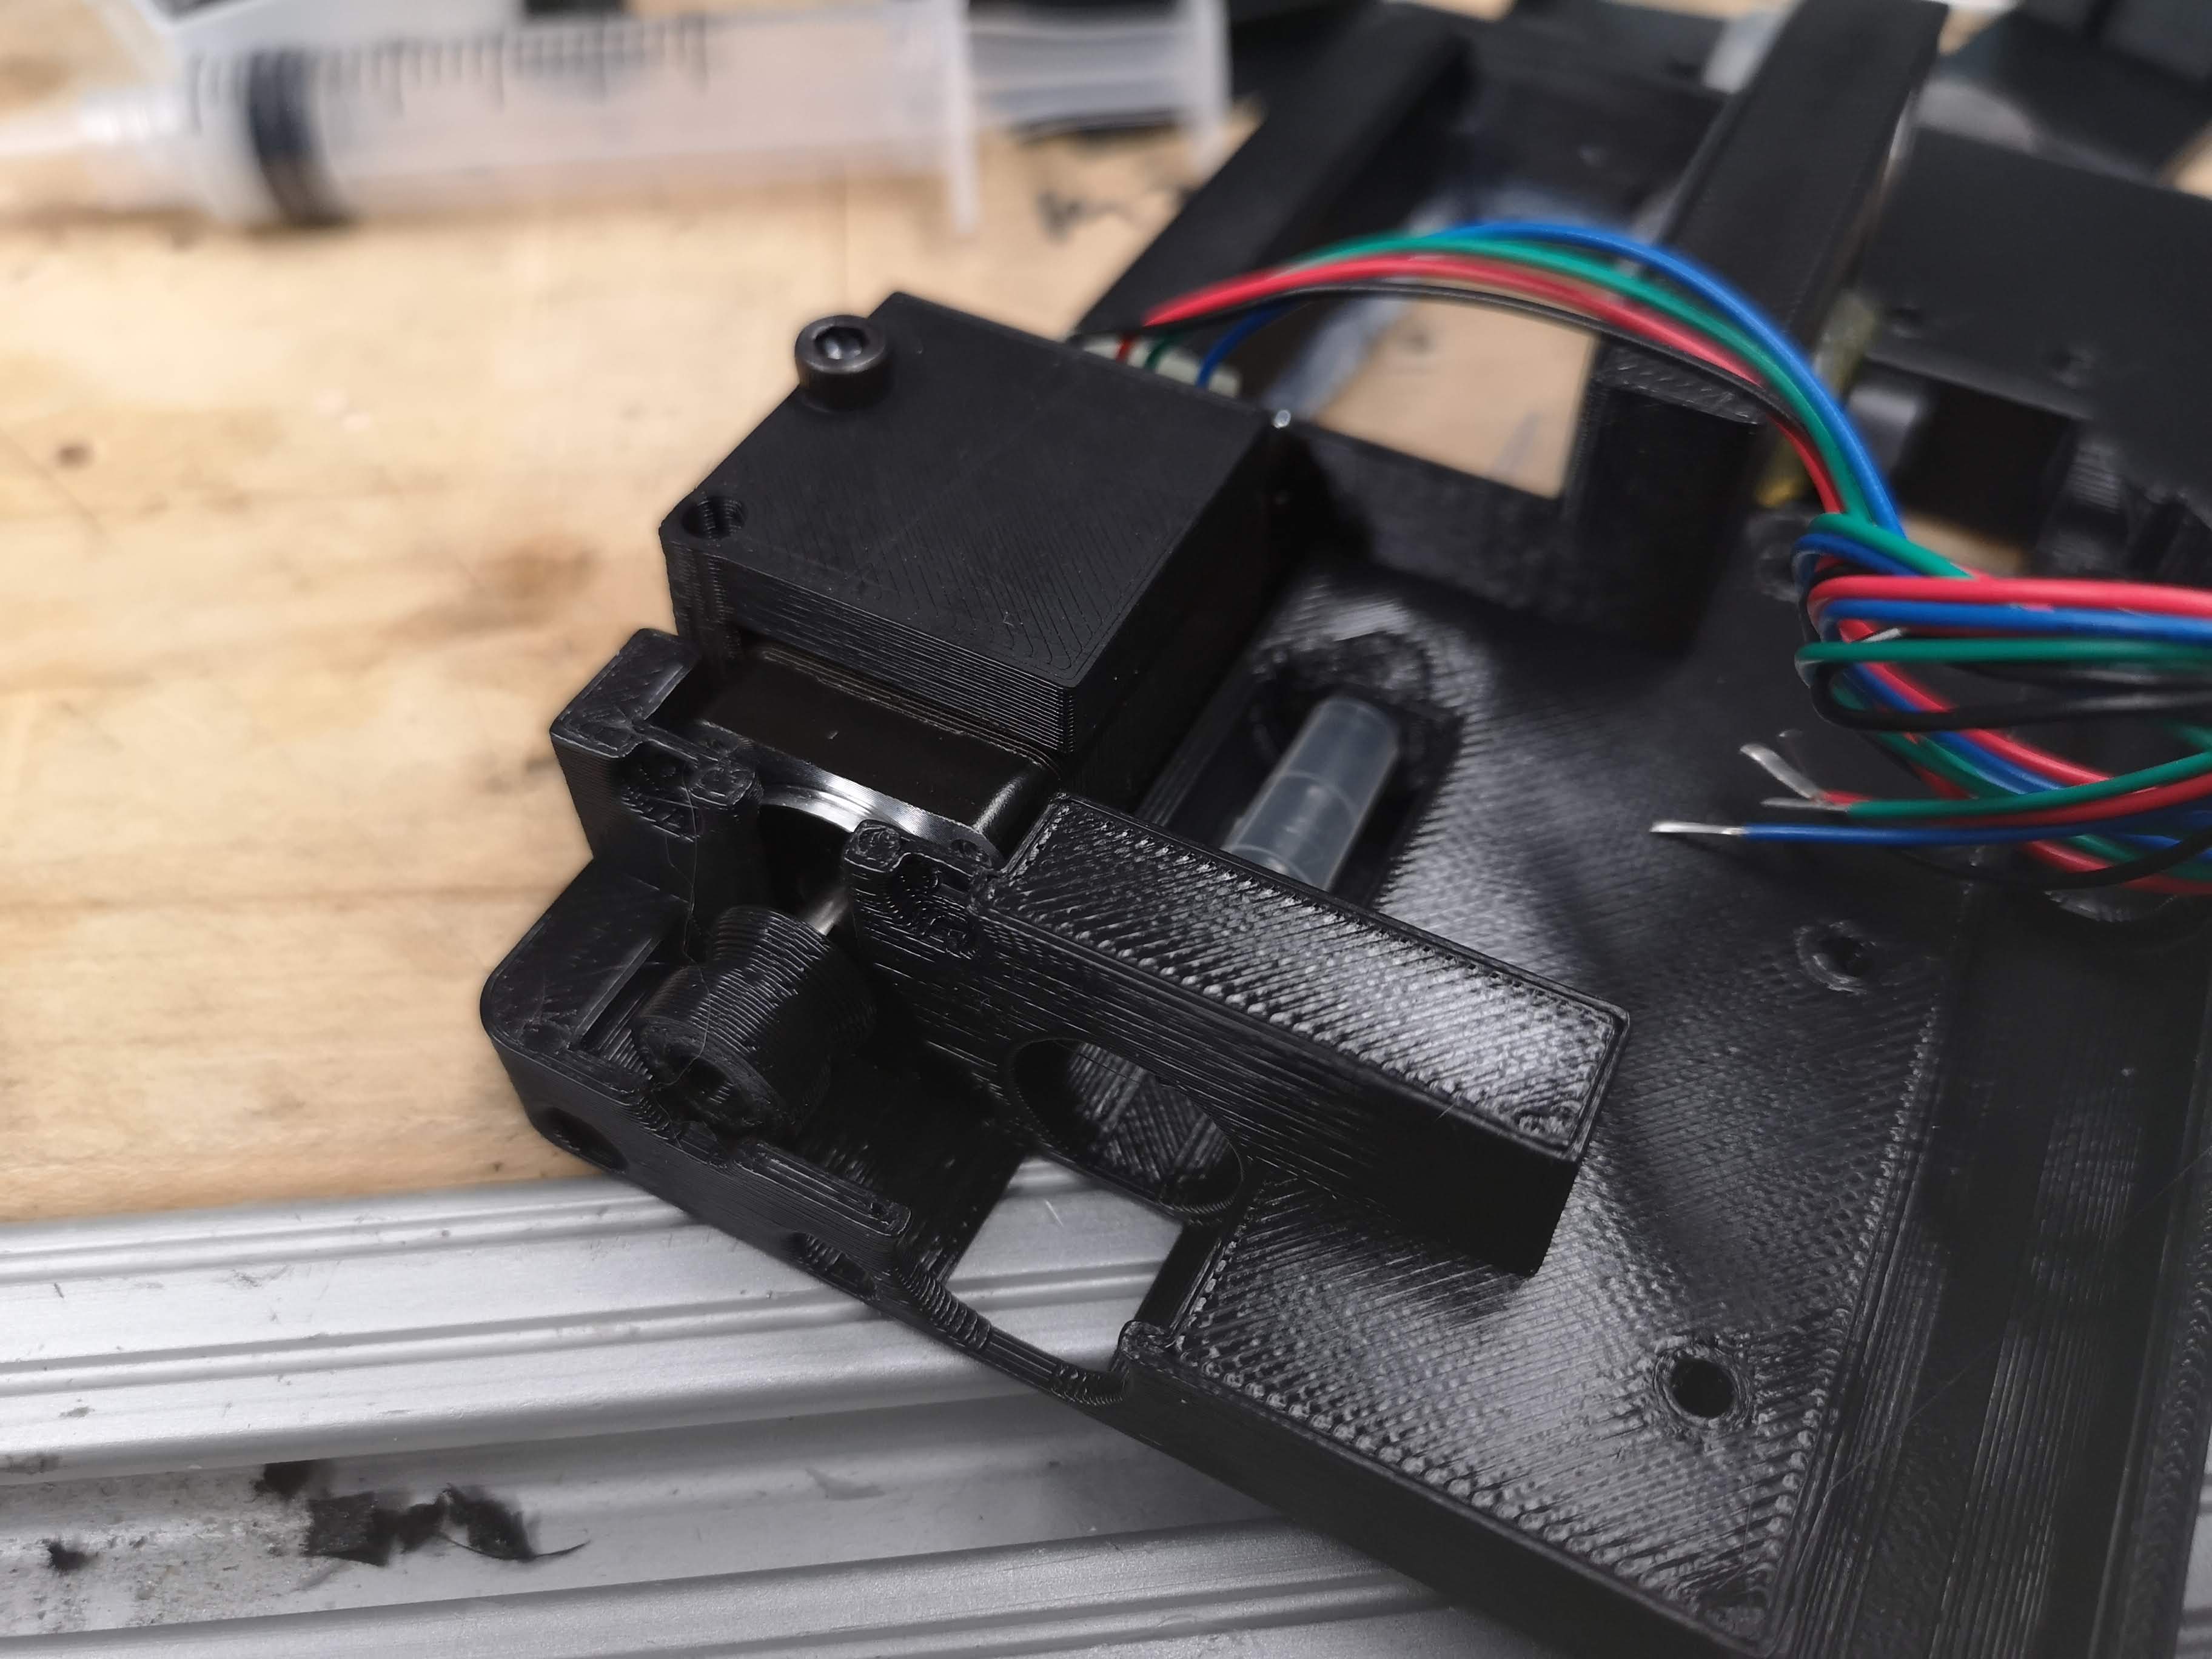
Add the Oring guide to the NEMA8 motor and place it in the desired location, add the motor holder, screw it
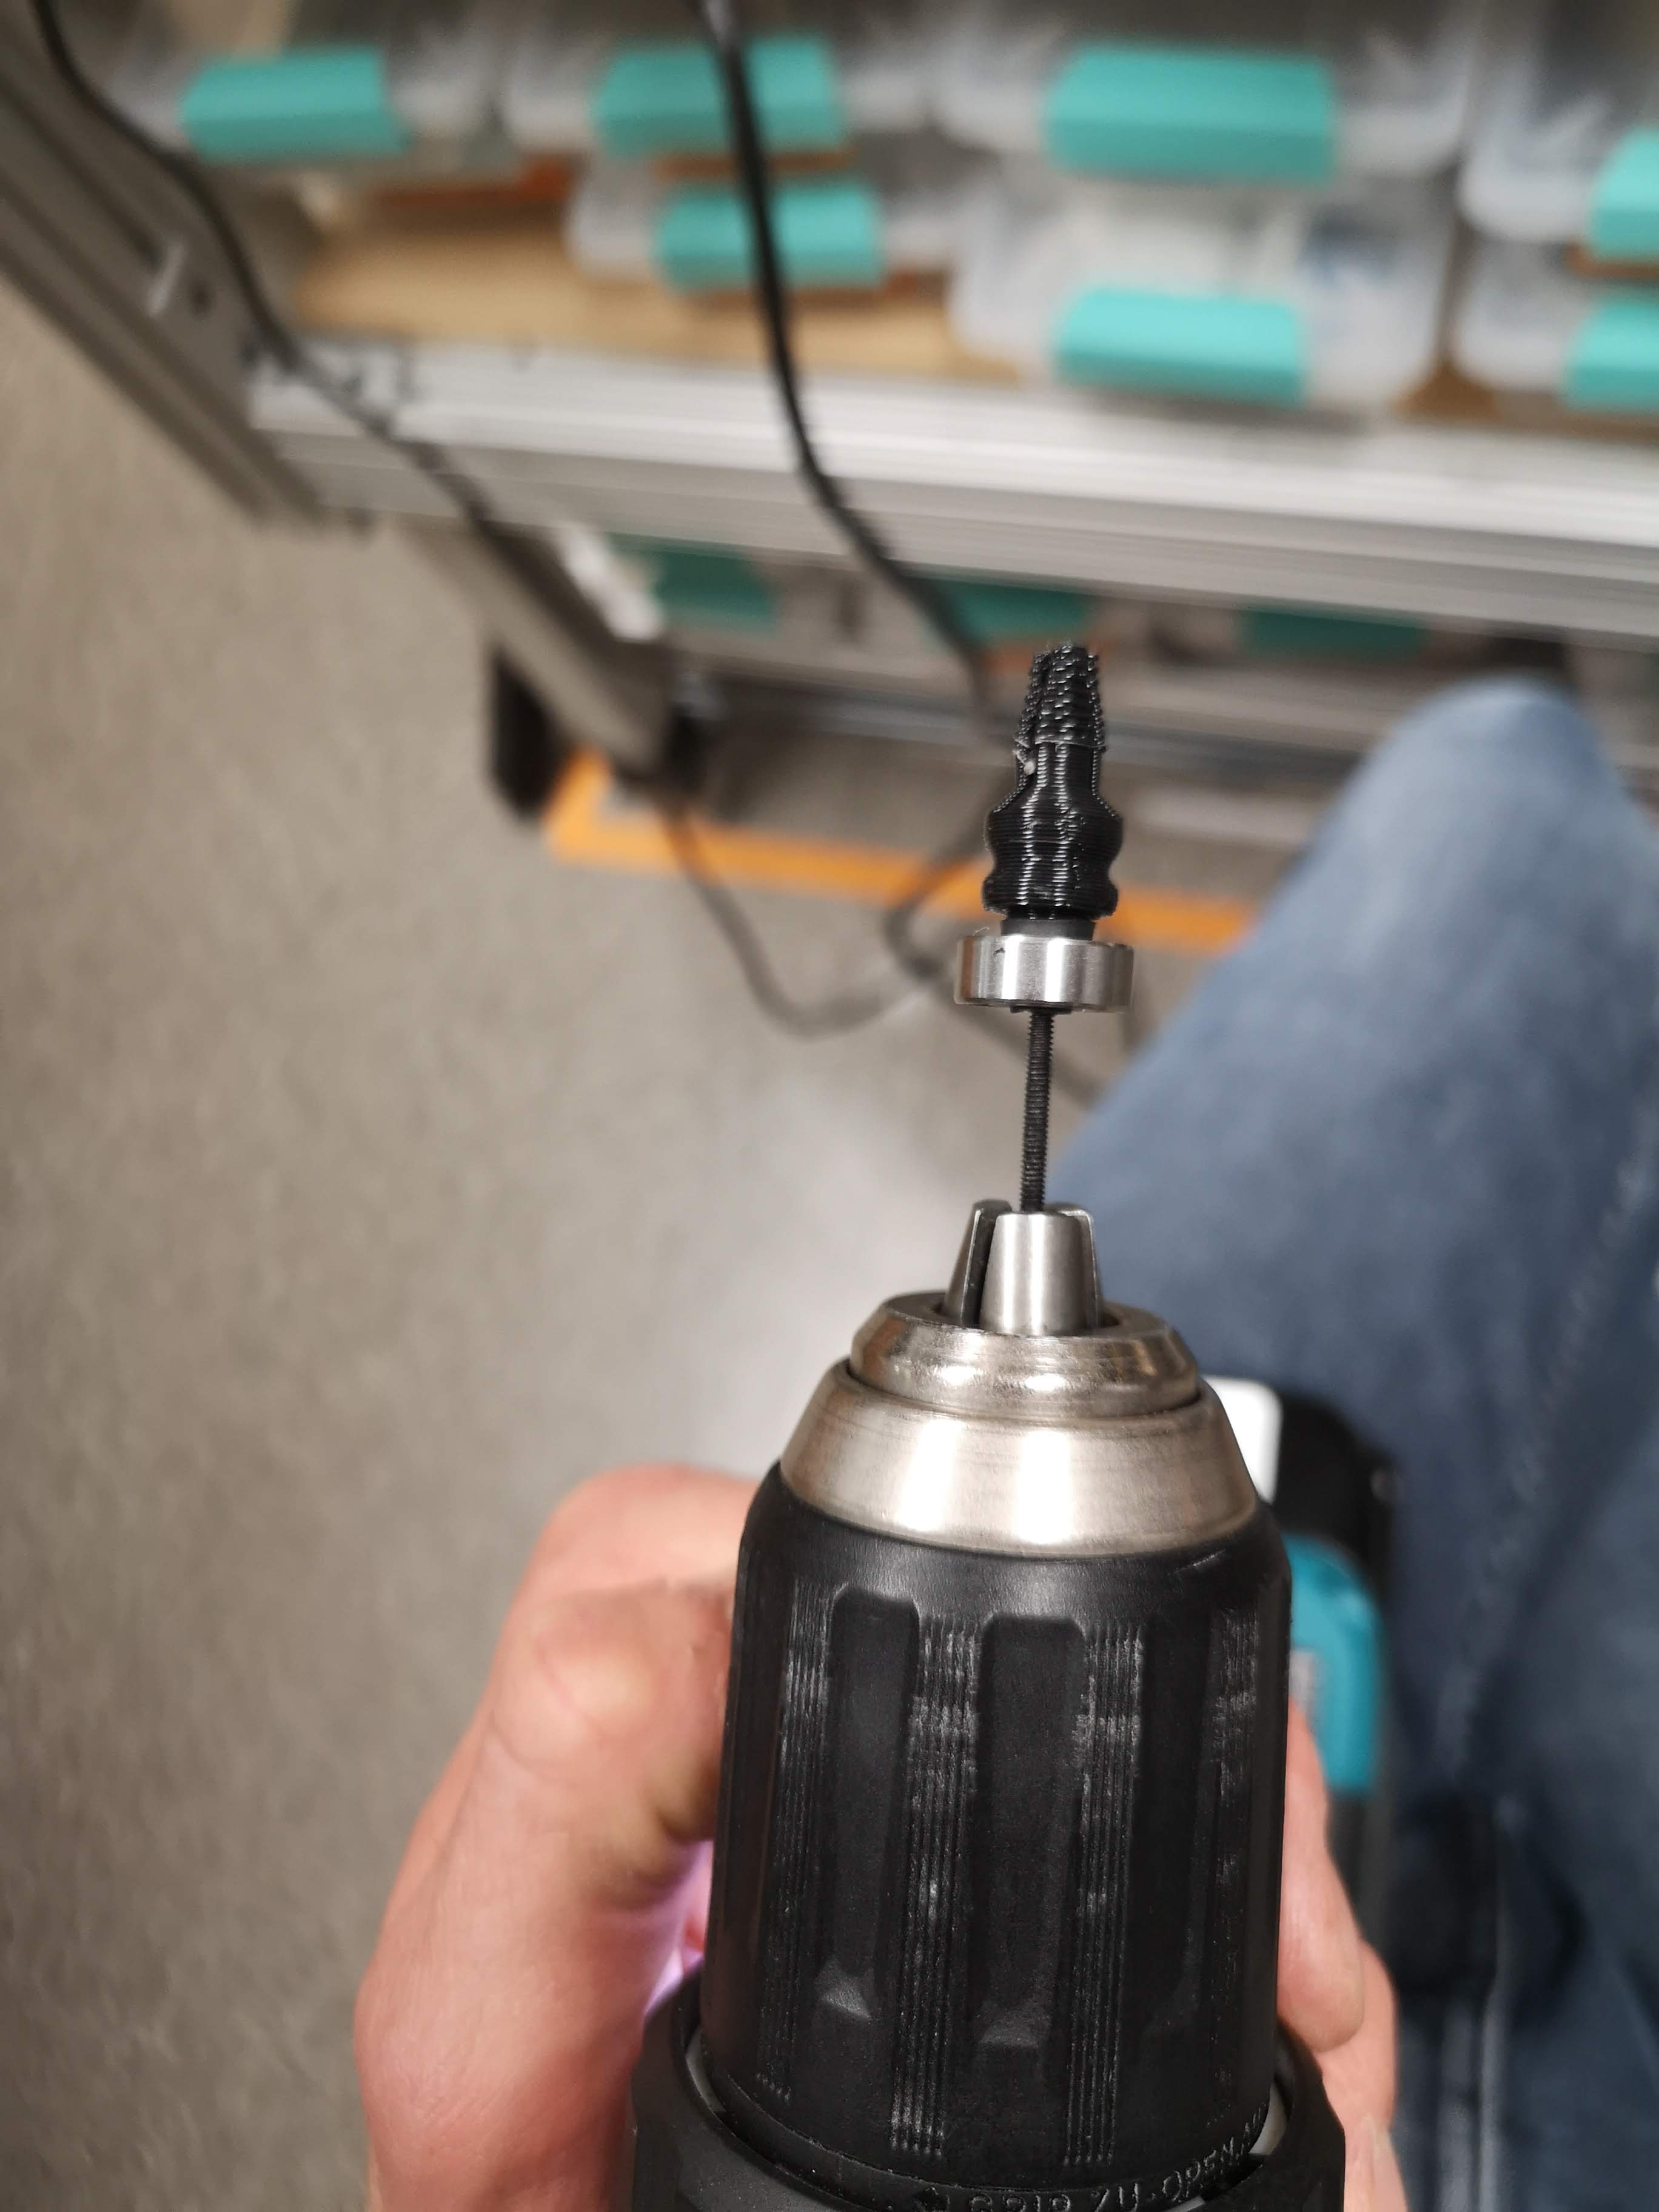
Optional: If the 3d printer is not printing precise enough, widen the hole of the FEP tube holder with an M2 screw and a screw driver:
Add the bearing to the FEP tube fixation mechanism
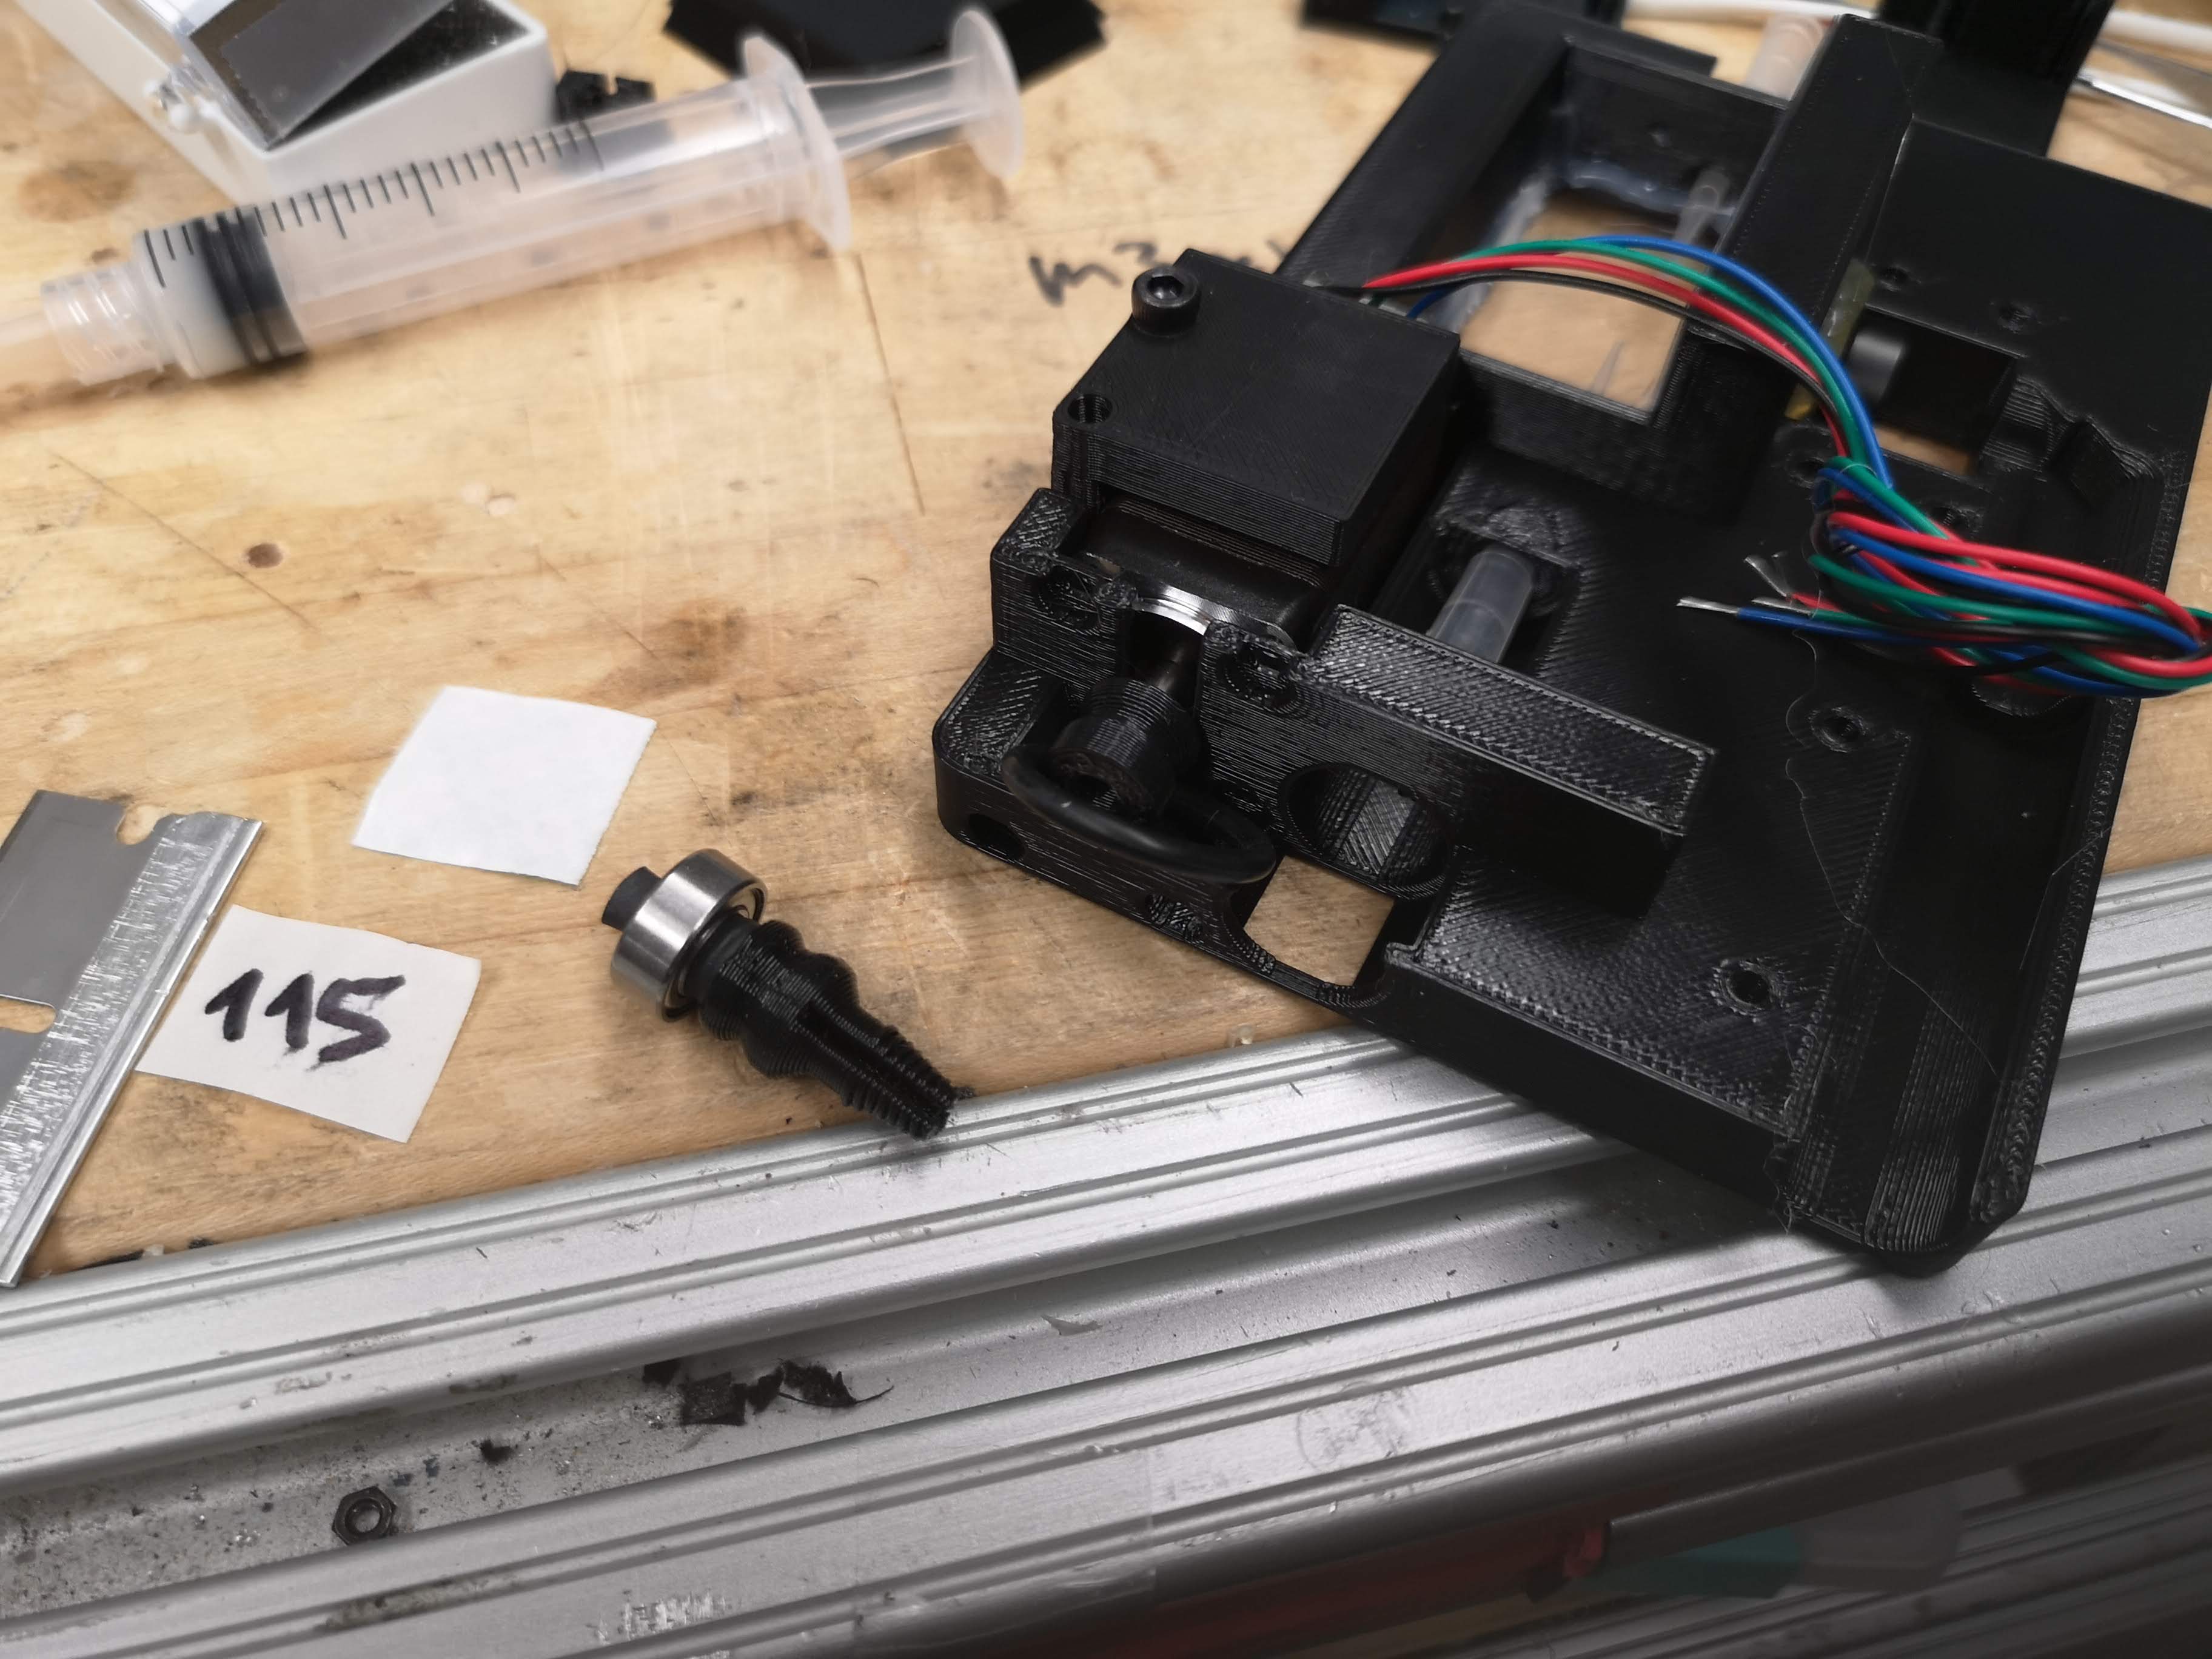
Add the bearing to the designated hole in the assembly before adding the "115" Oring
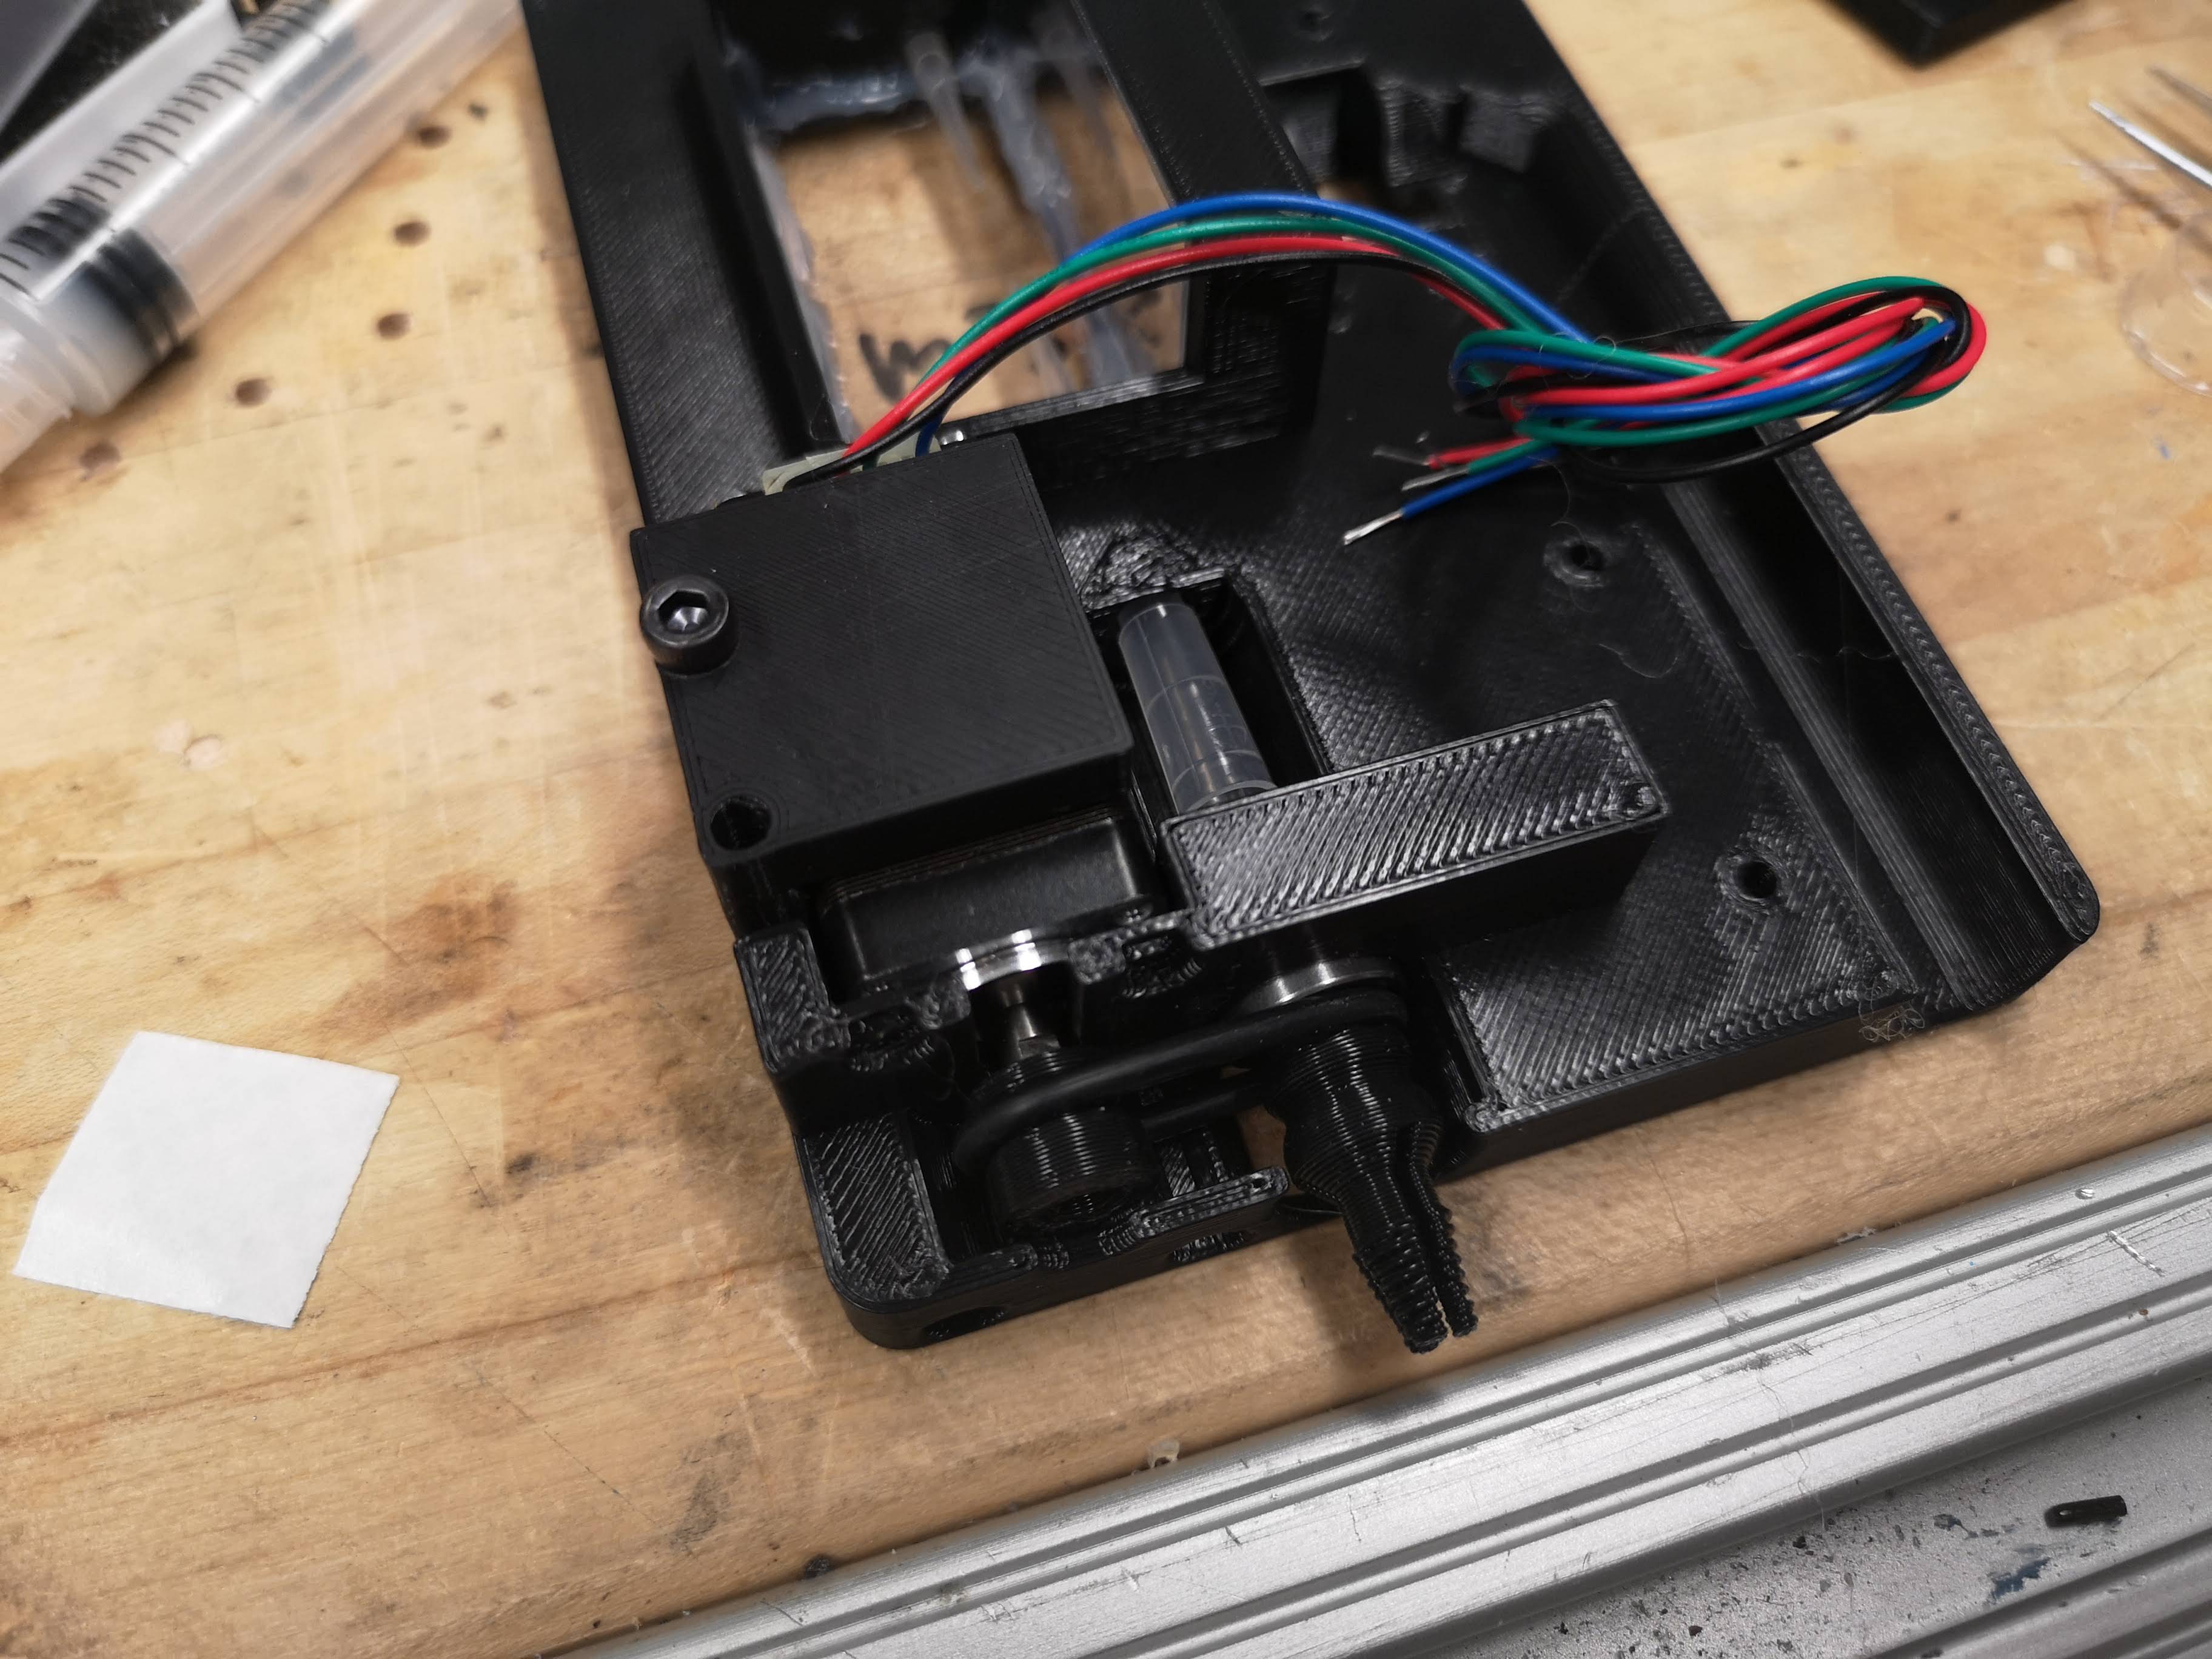
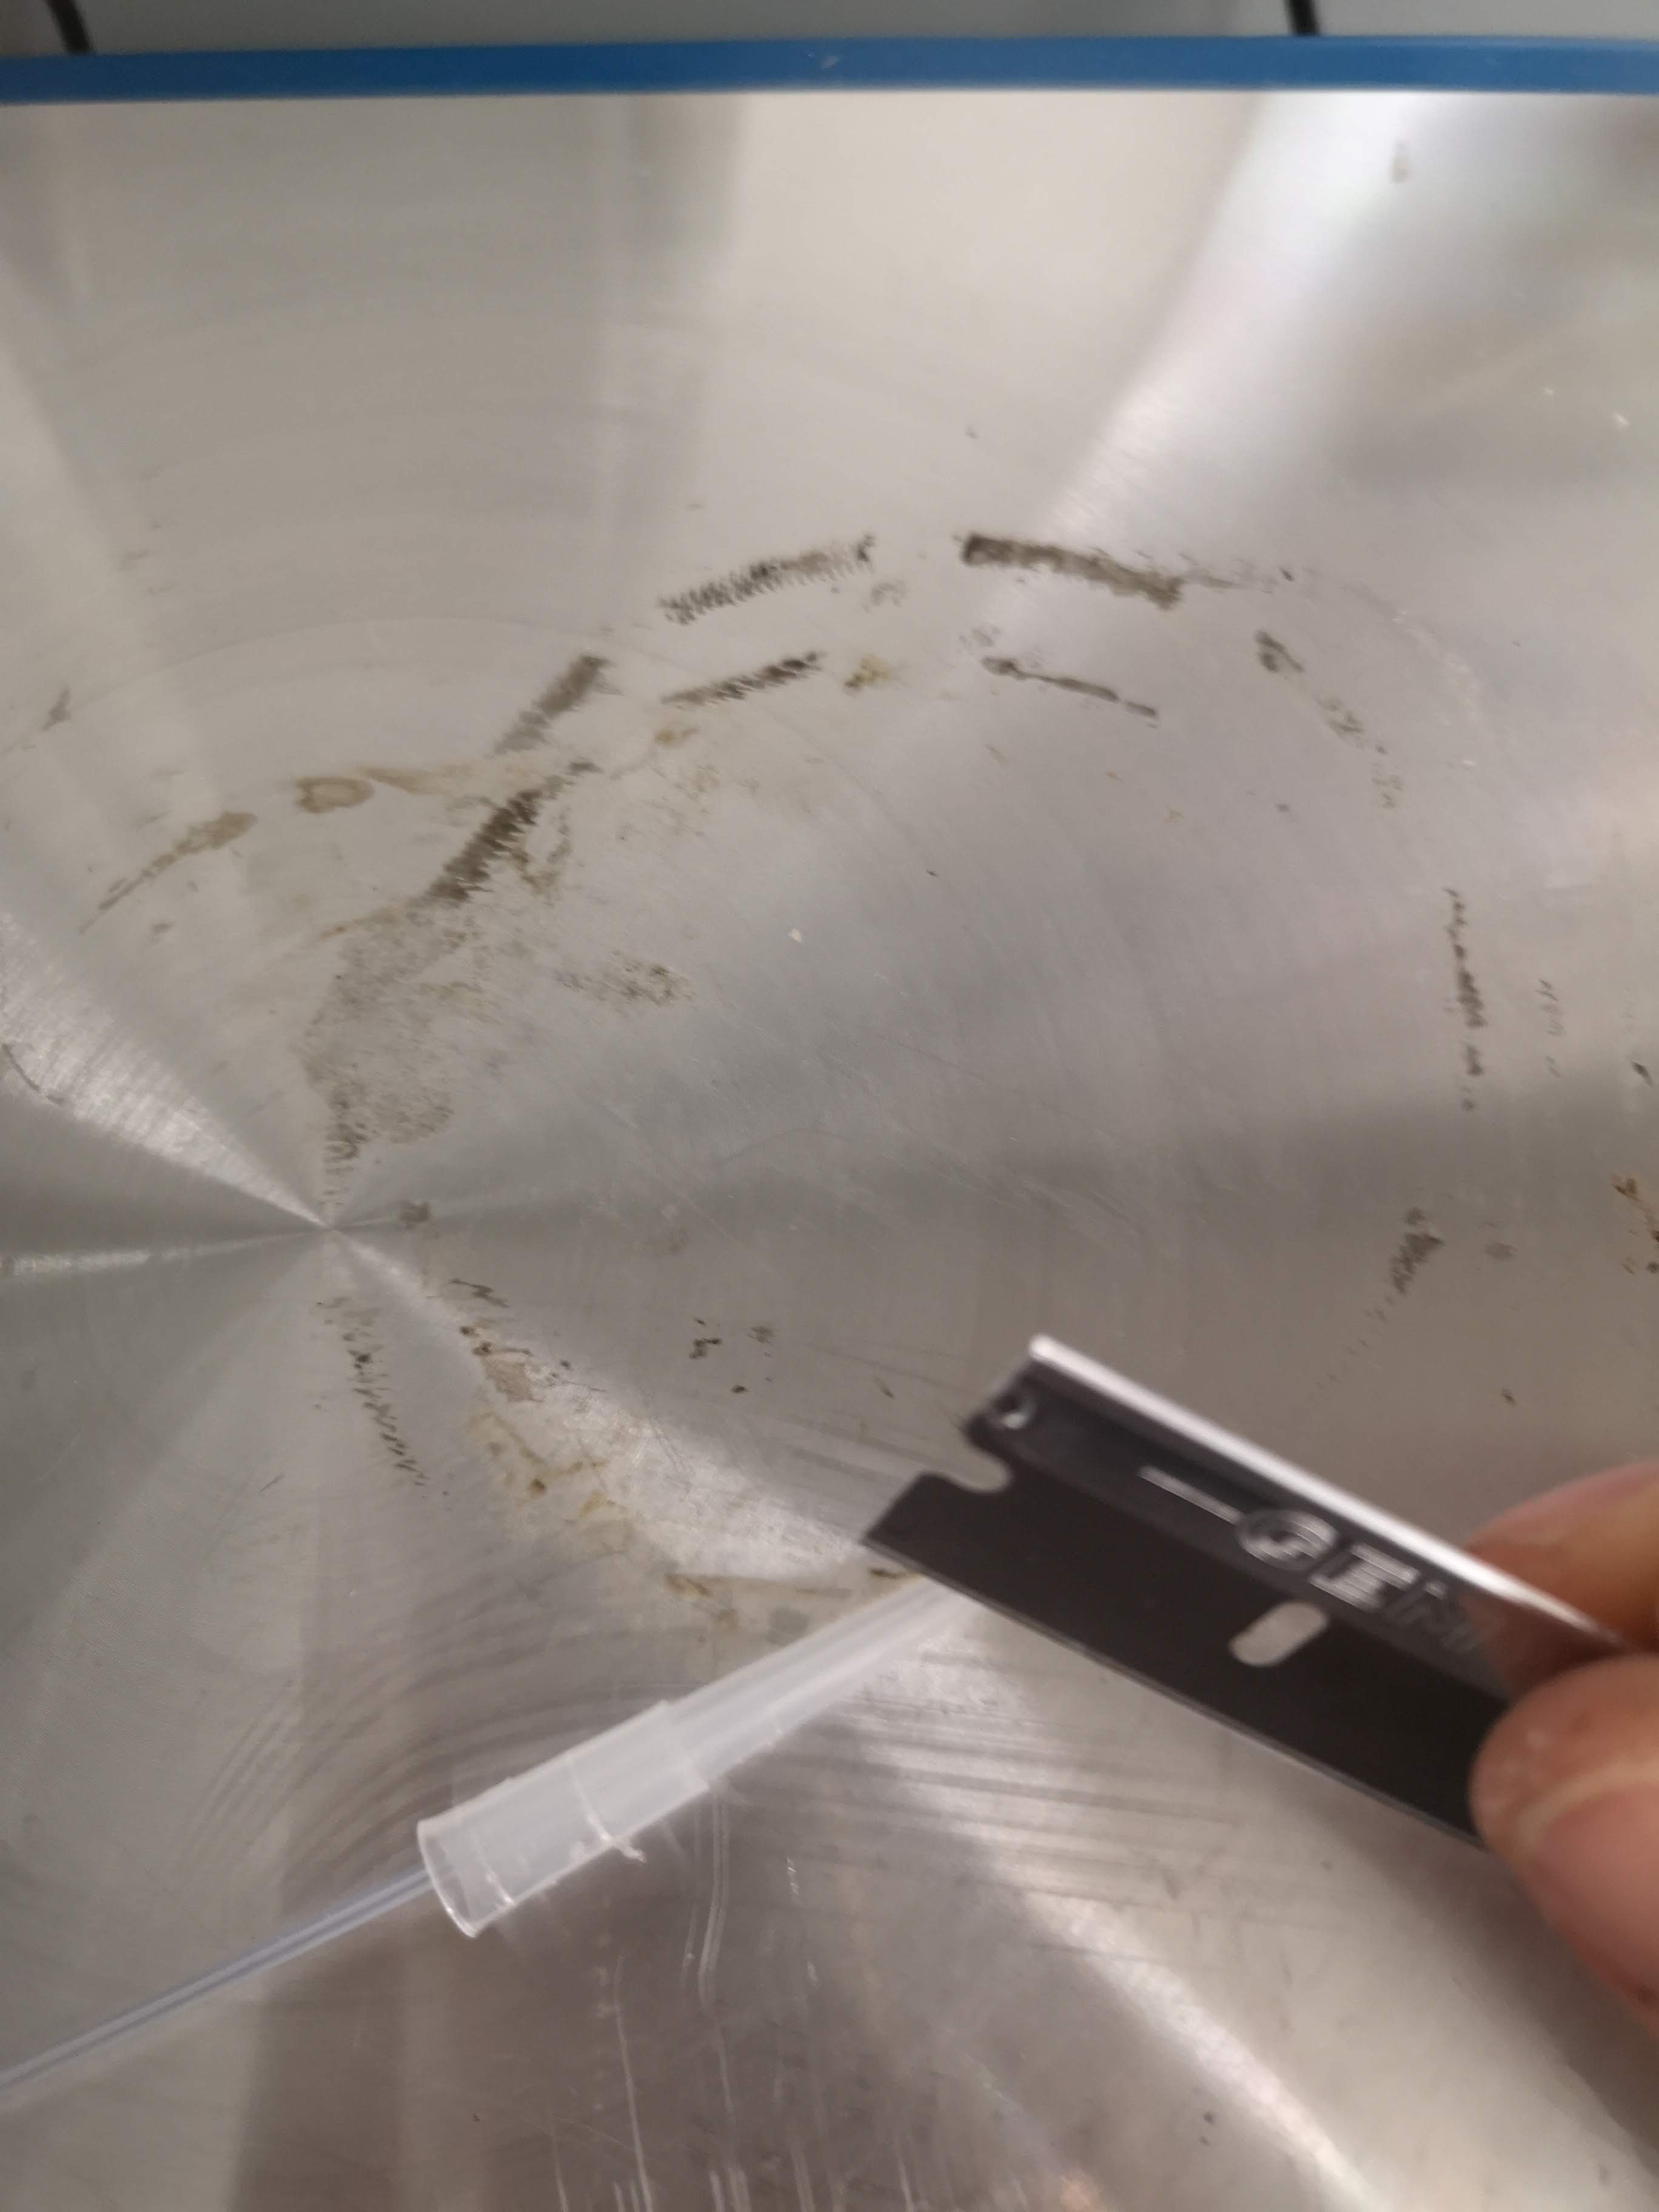
Prepare the pipette tips by cutting them just at the edge of the FEP tube, this enables smooth rotation but still seals the mechanism; This requires several tries. The cut has to be straight/perpendicular to the FEP tube
Add the pipette tips such that they are ~5mm from each other, add lots of silicone sealant everywhere necessary but not in the optical train
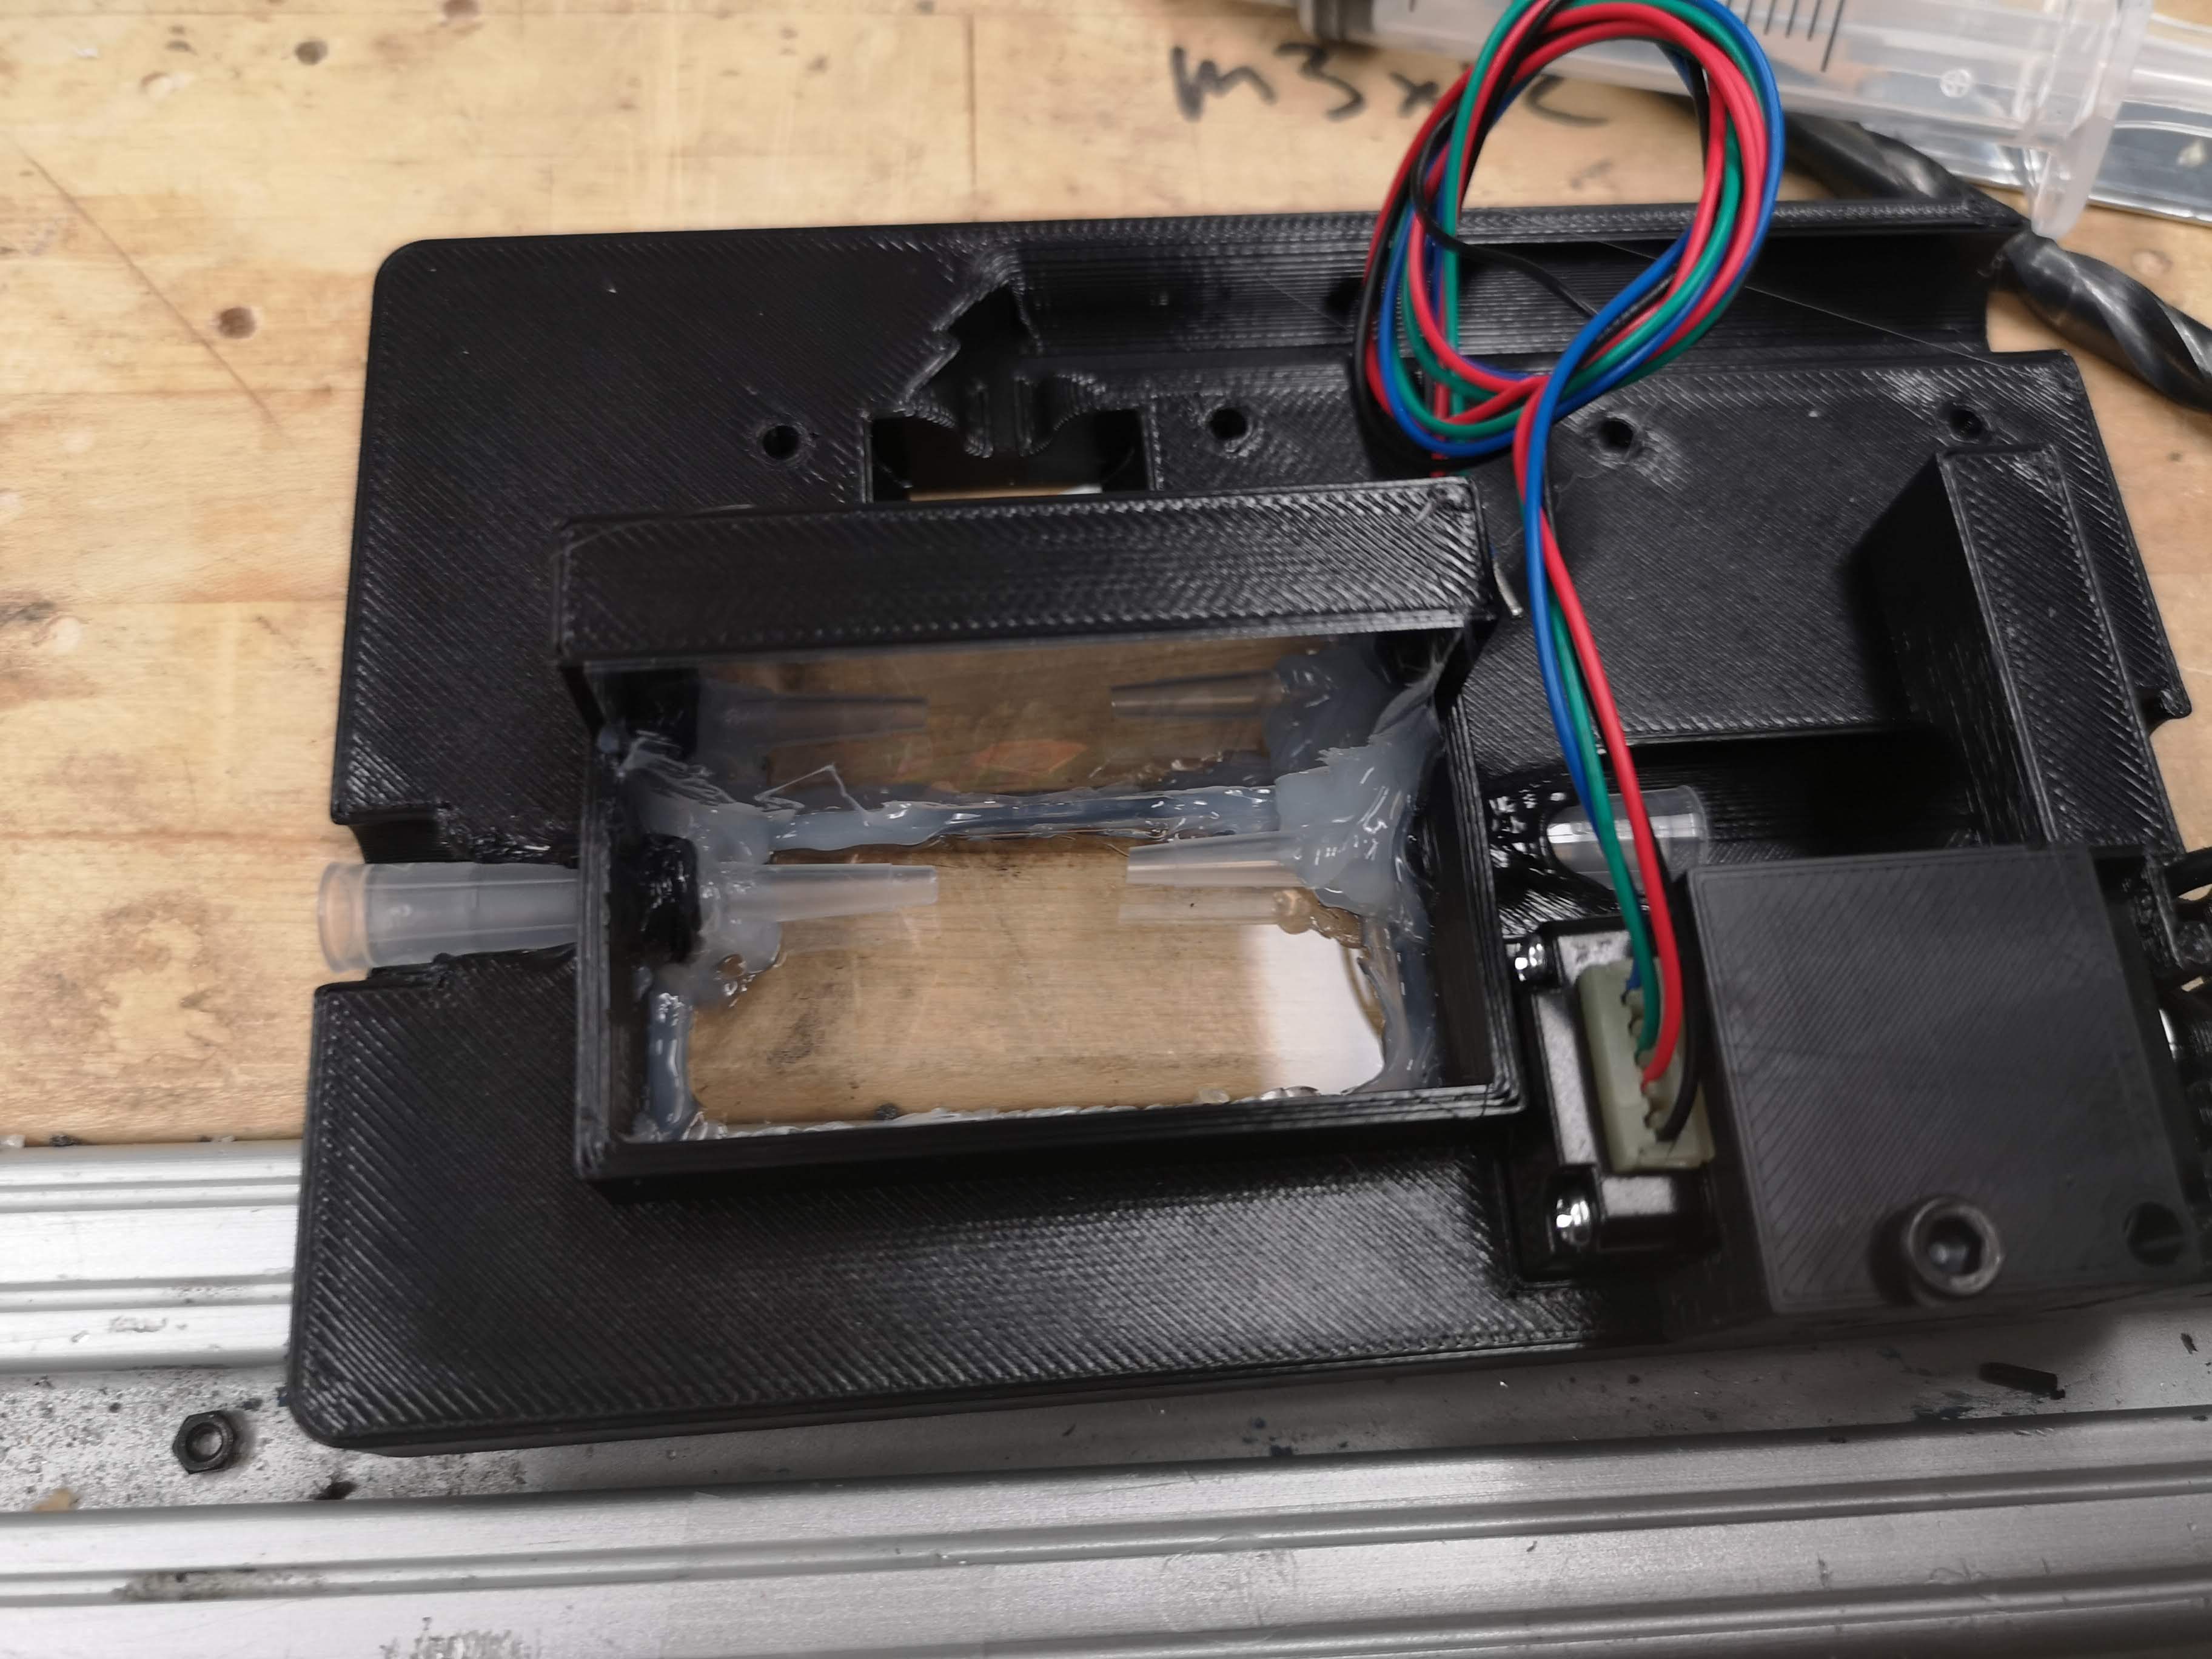
Add the FEP tube
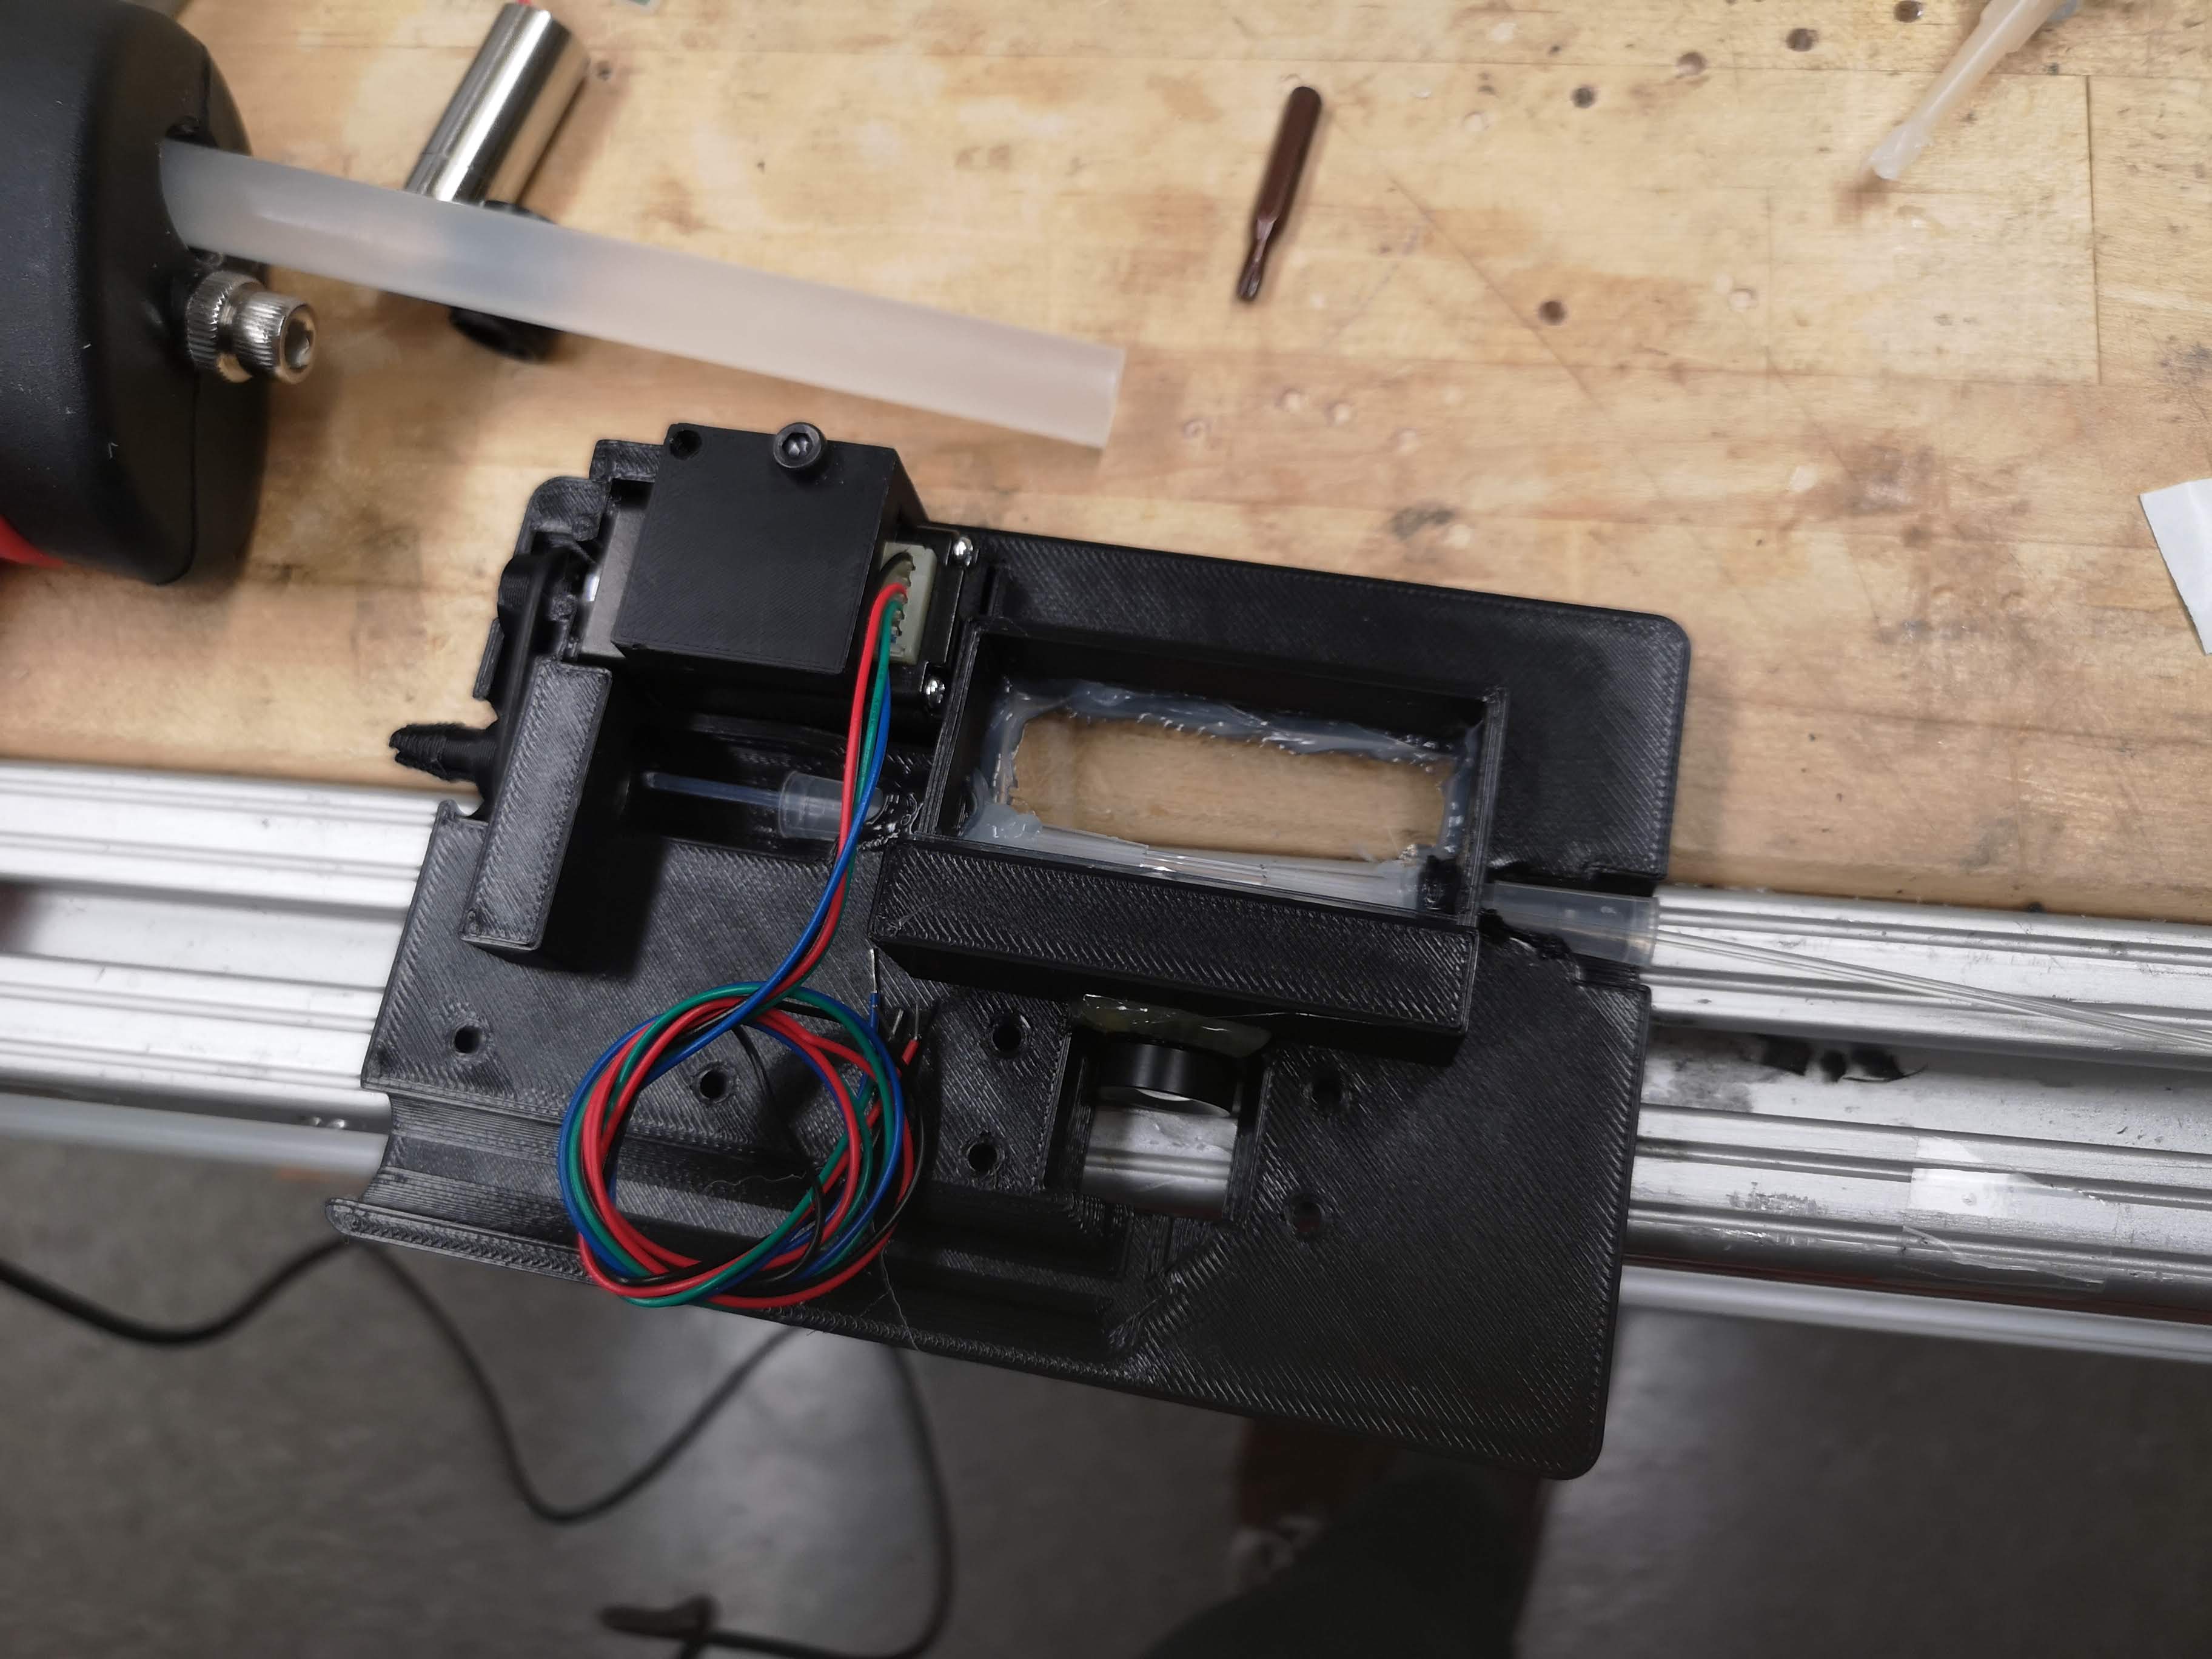
Almost done
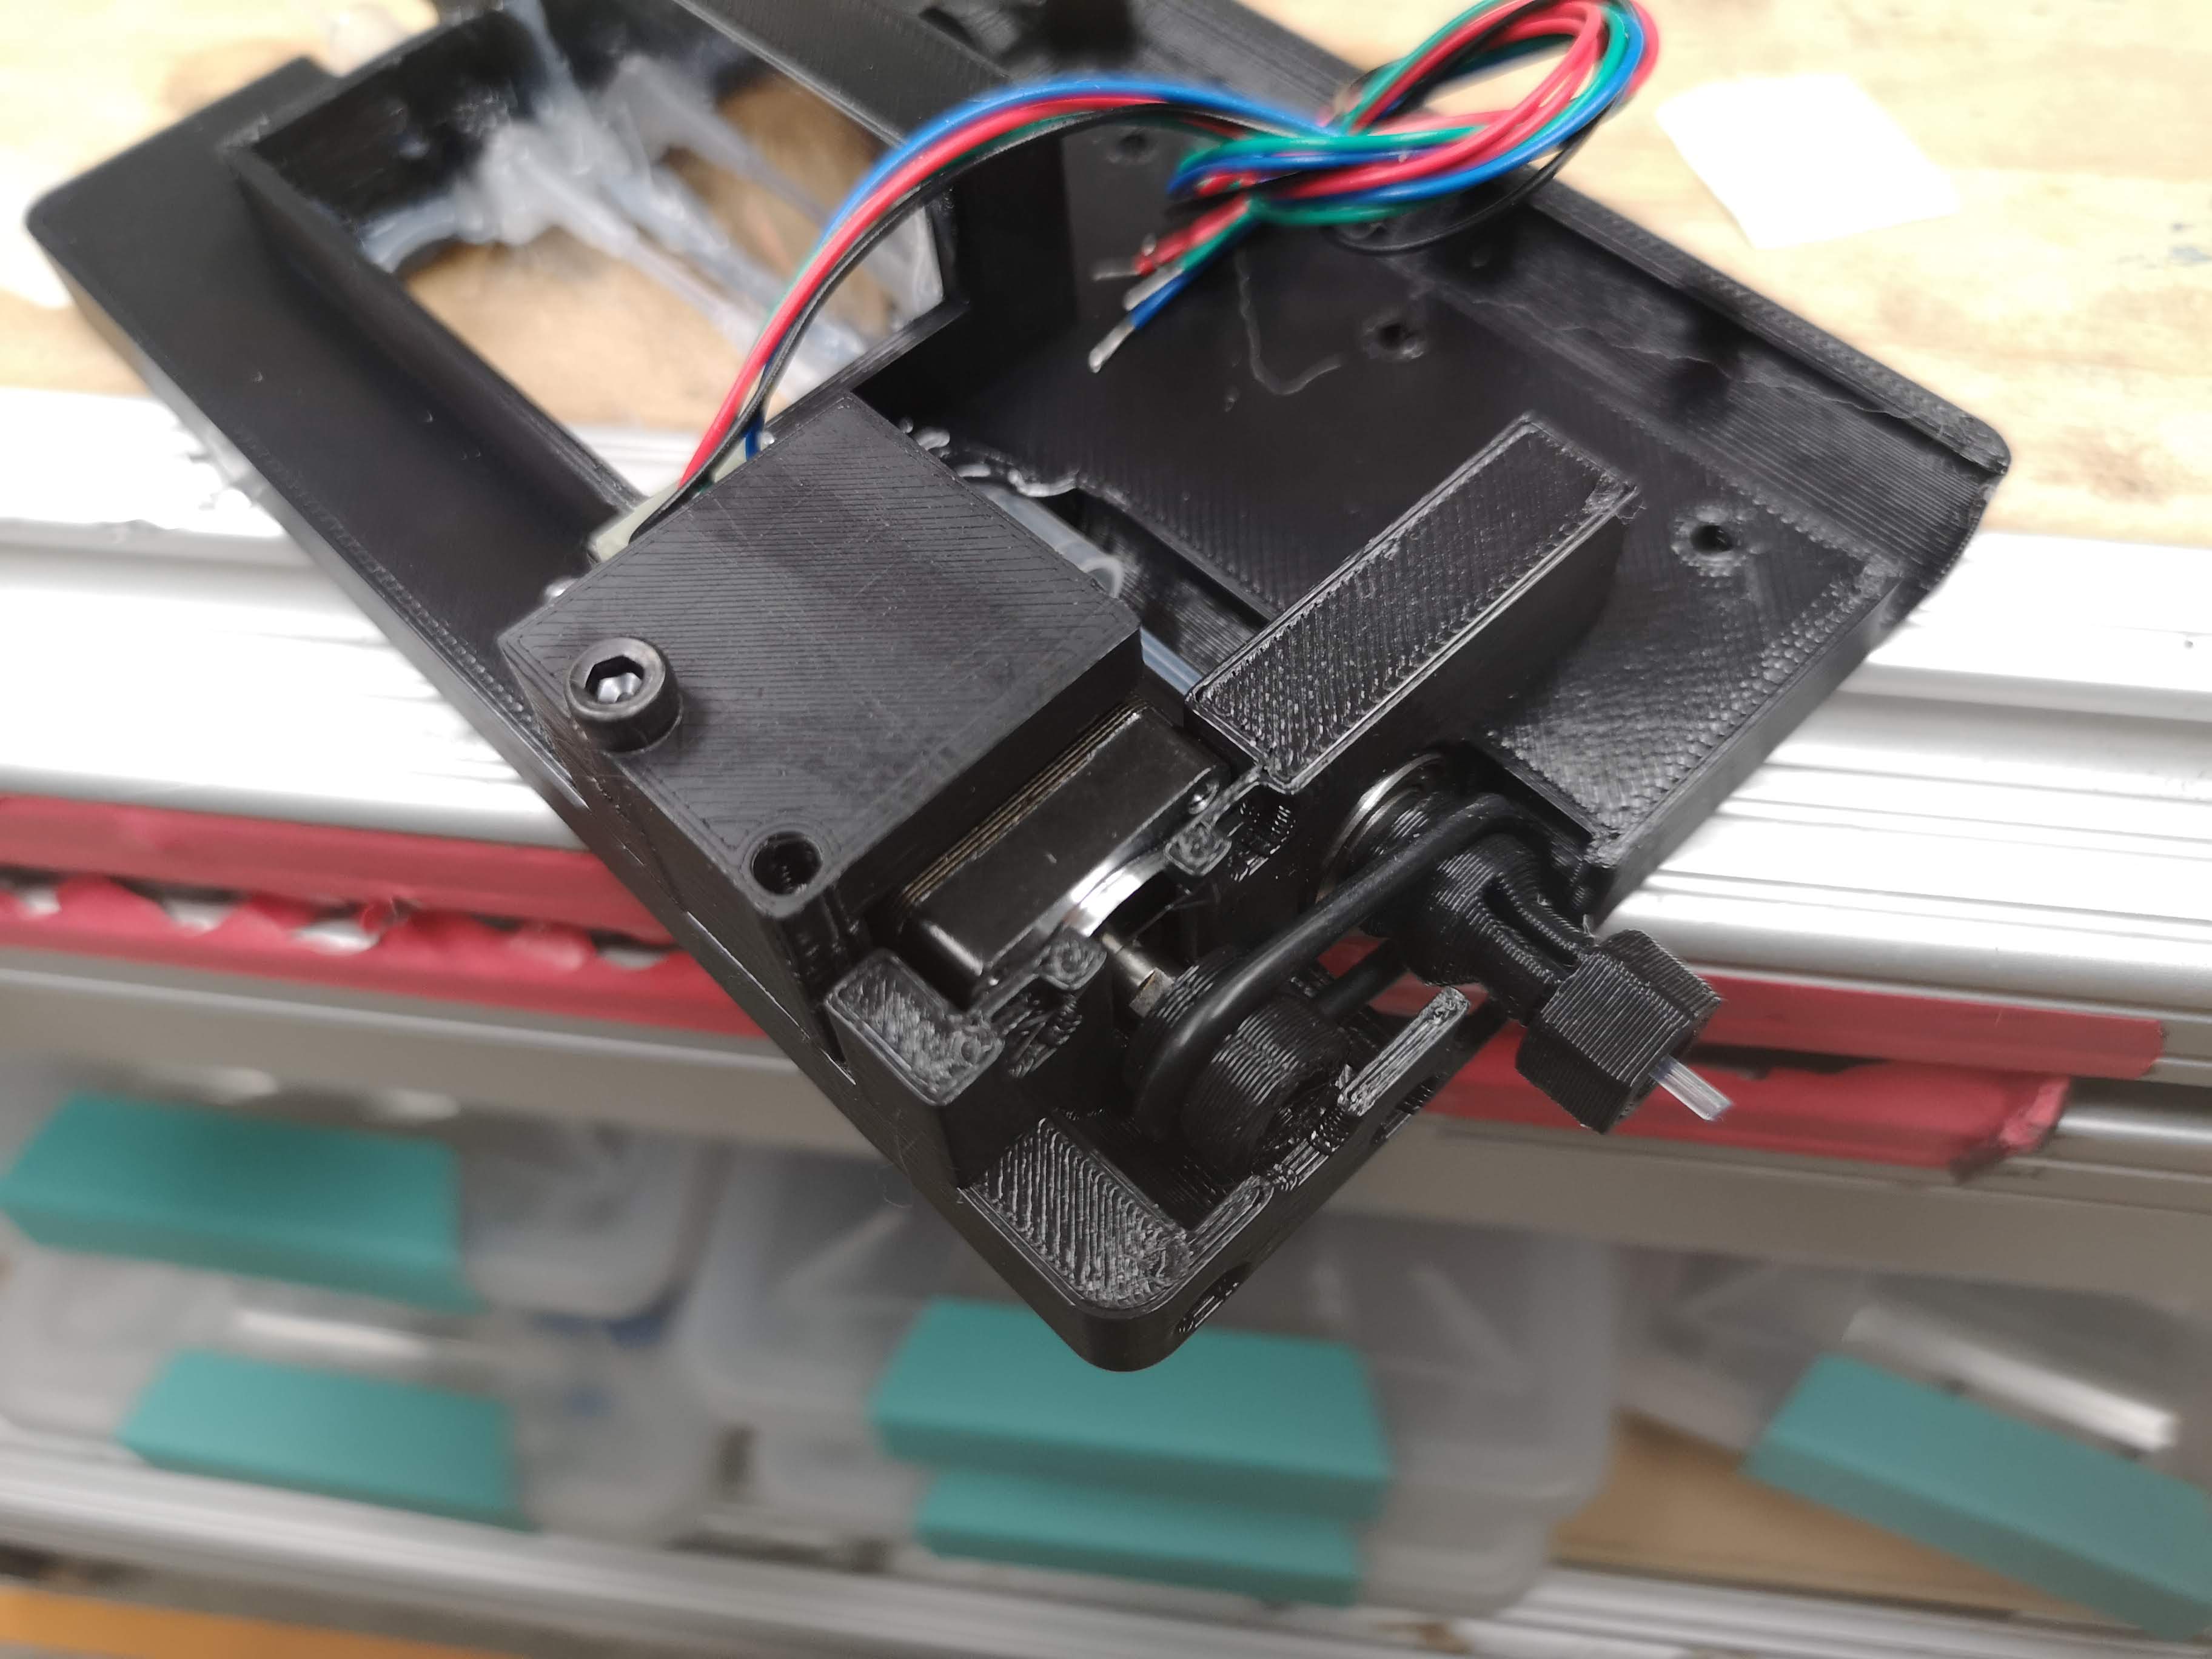
Add the laser; Make sure that it's collimated and that the fast axis is oriented correctly
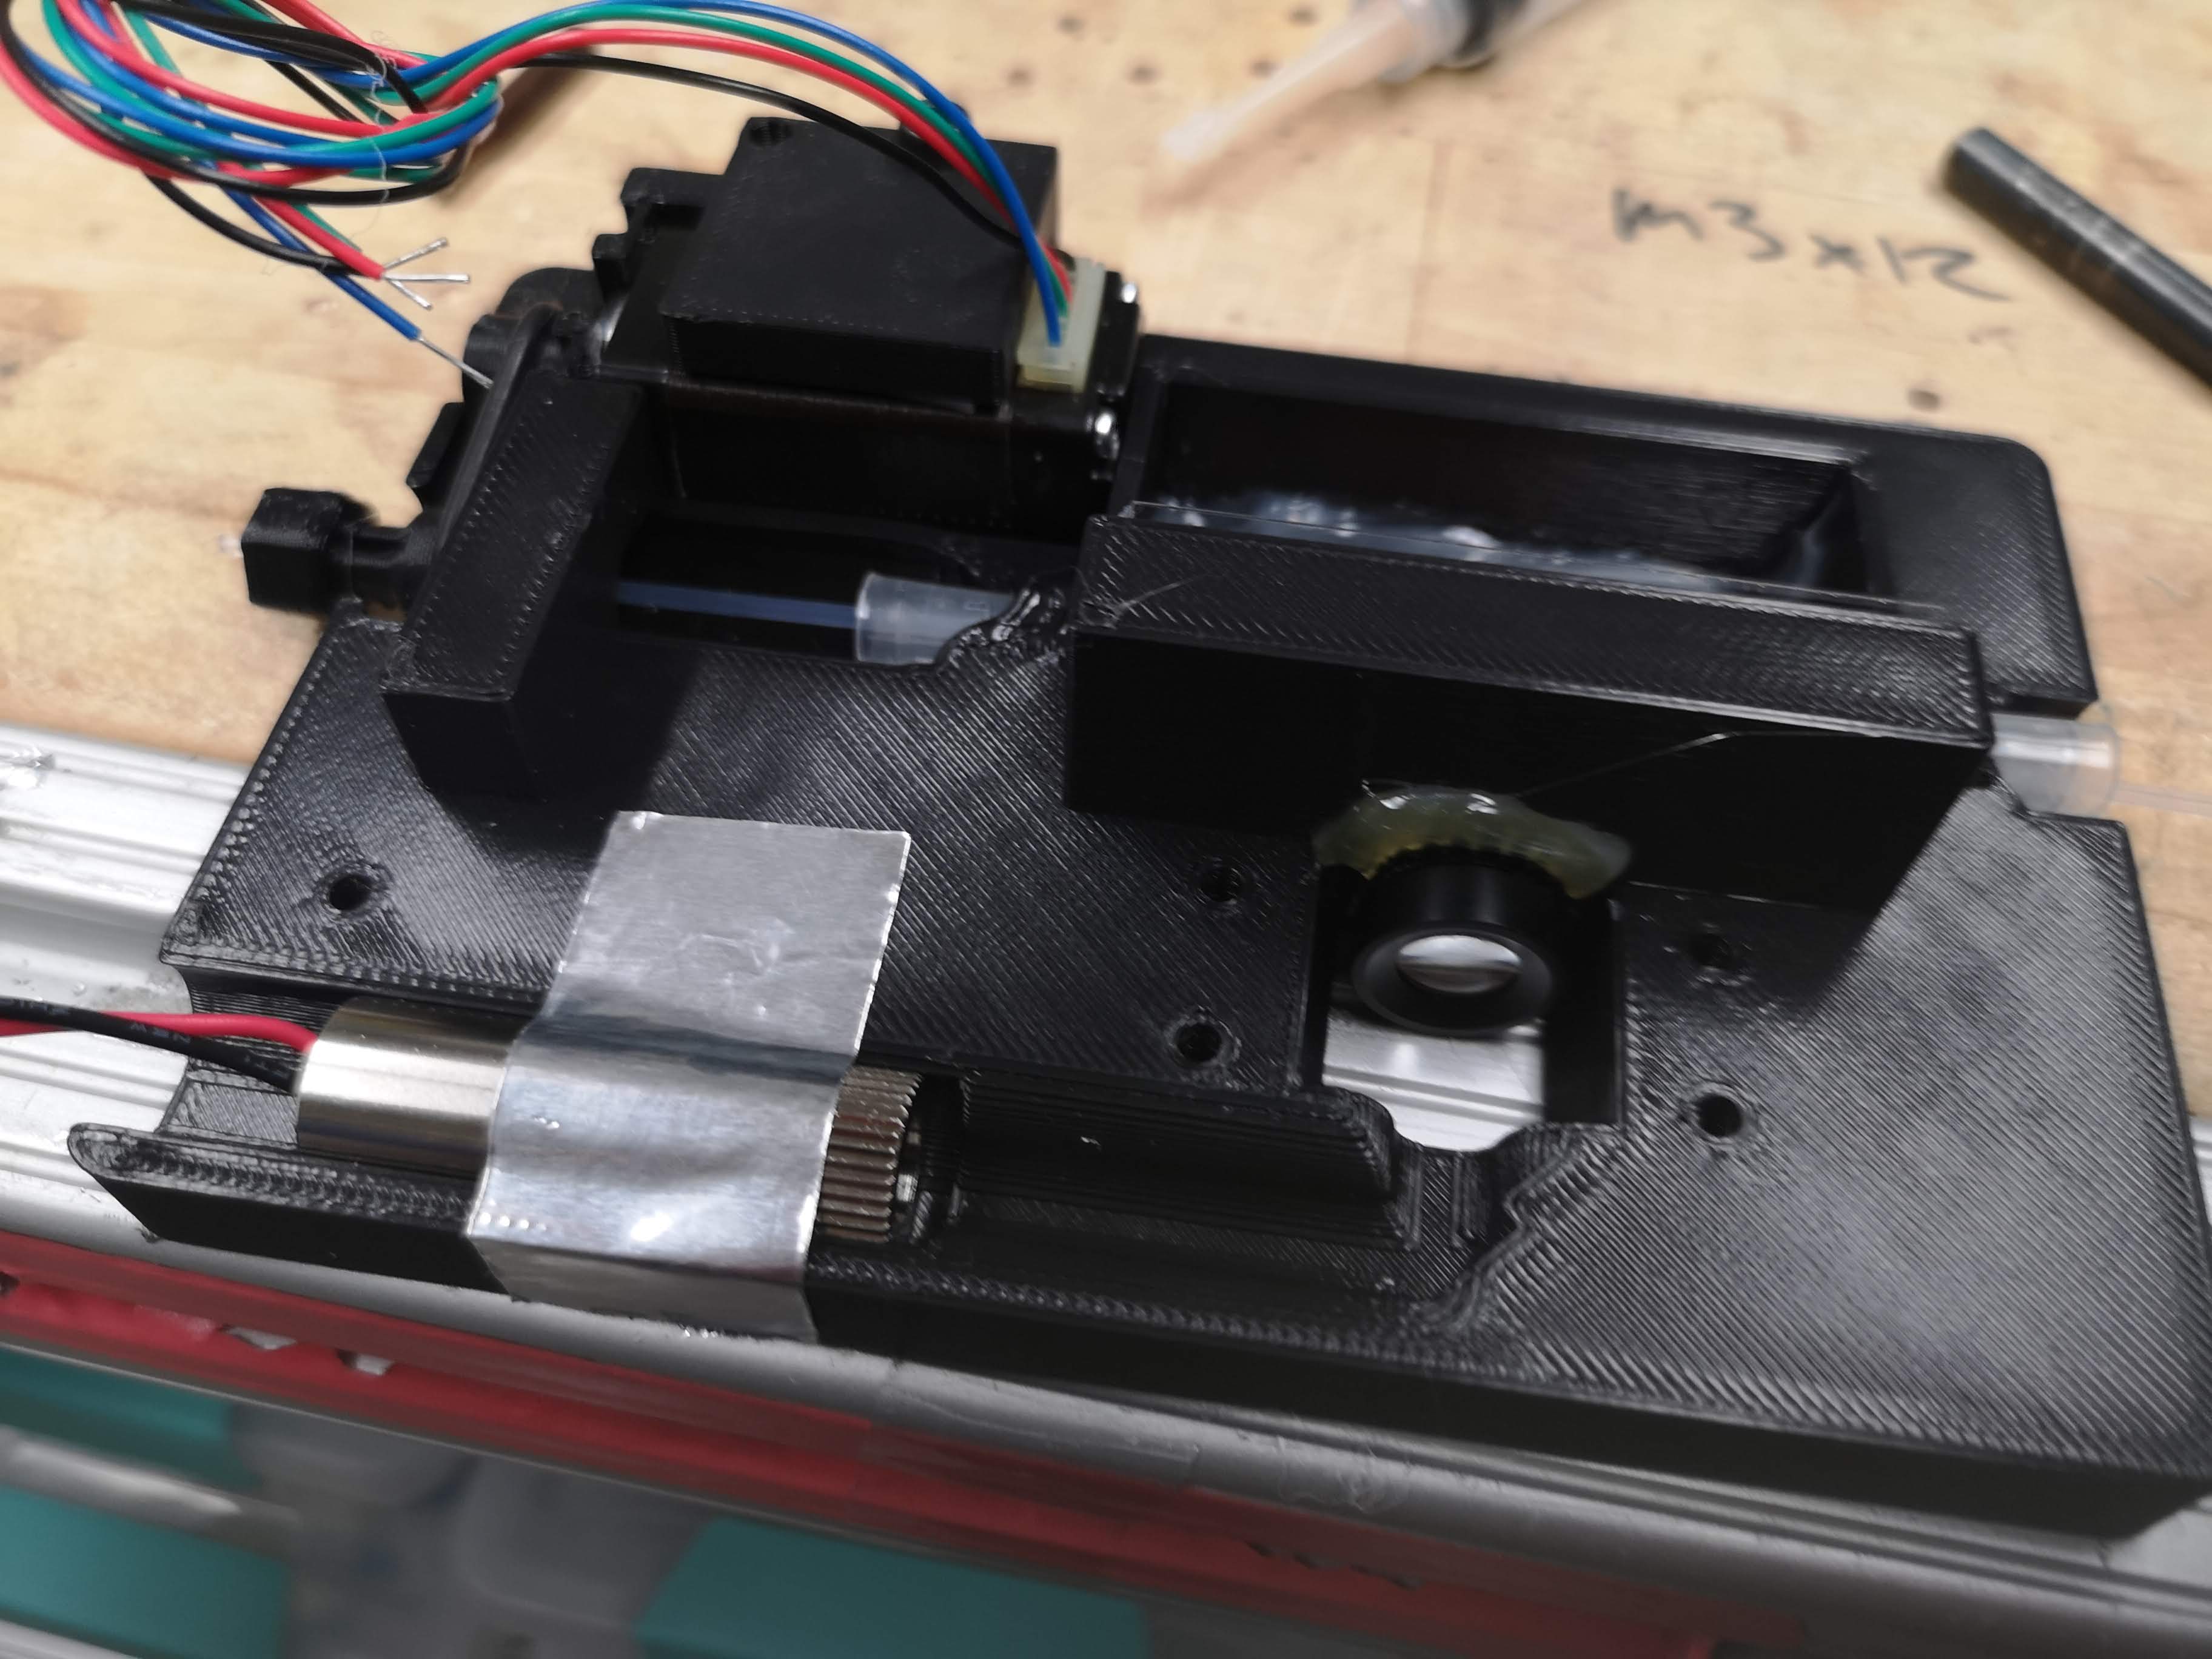
Mount the mirror (the new mechanism helps to stere it better) with a drop of glue(no fast glue!)
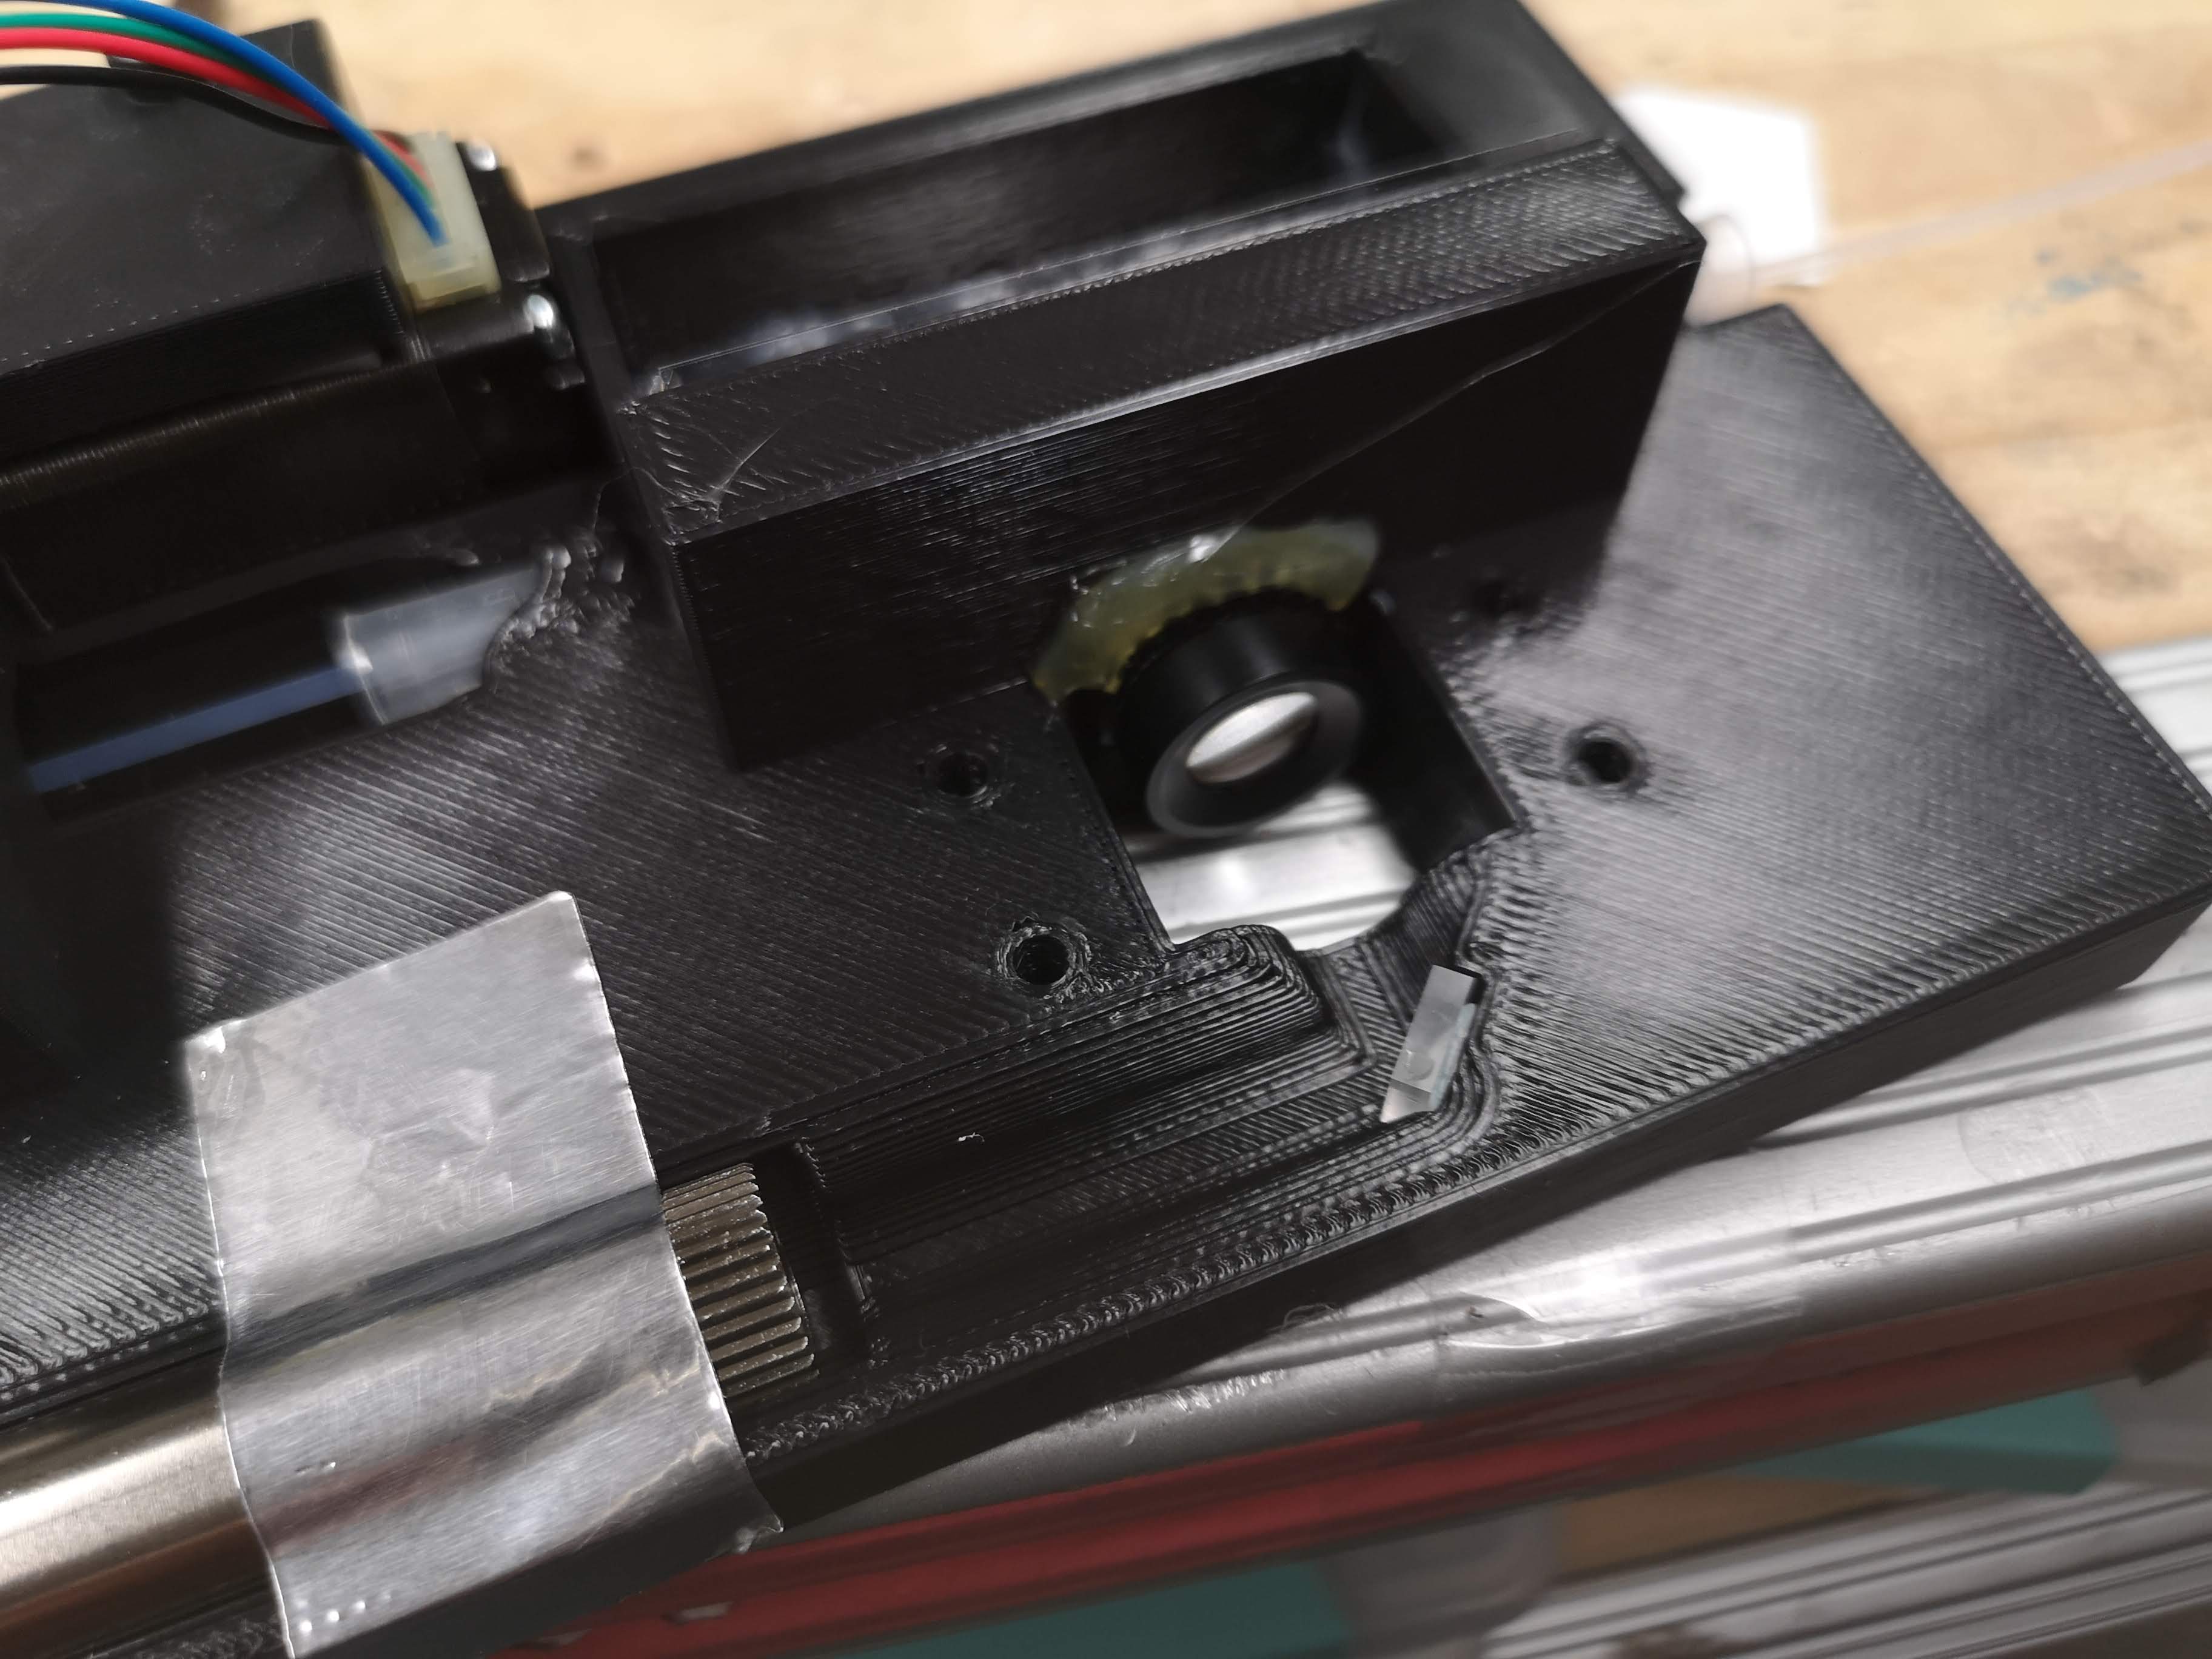
Add the LEd in the led holder and place it in front of the CCTV lens (focus will be shortly before its BFP)
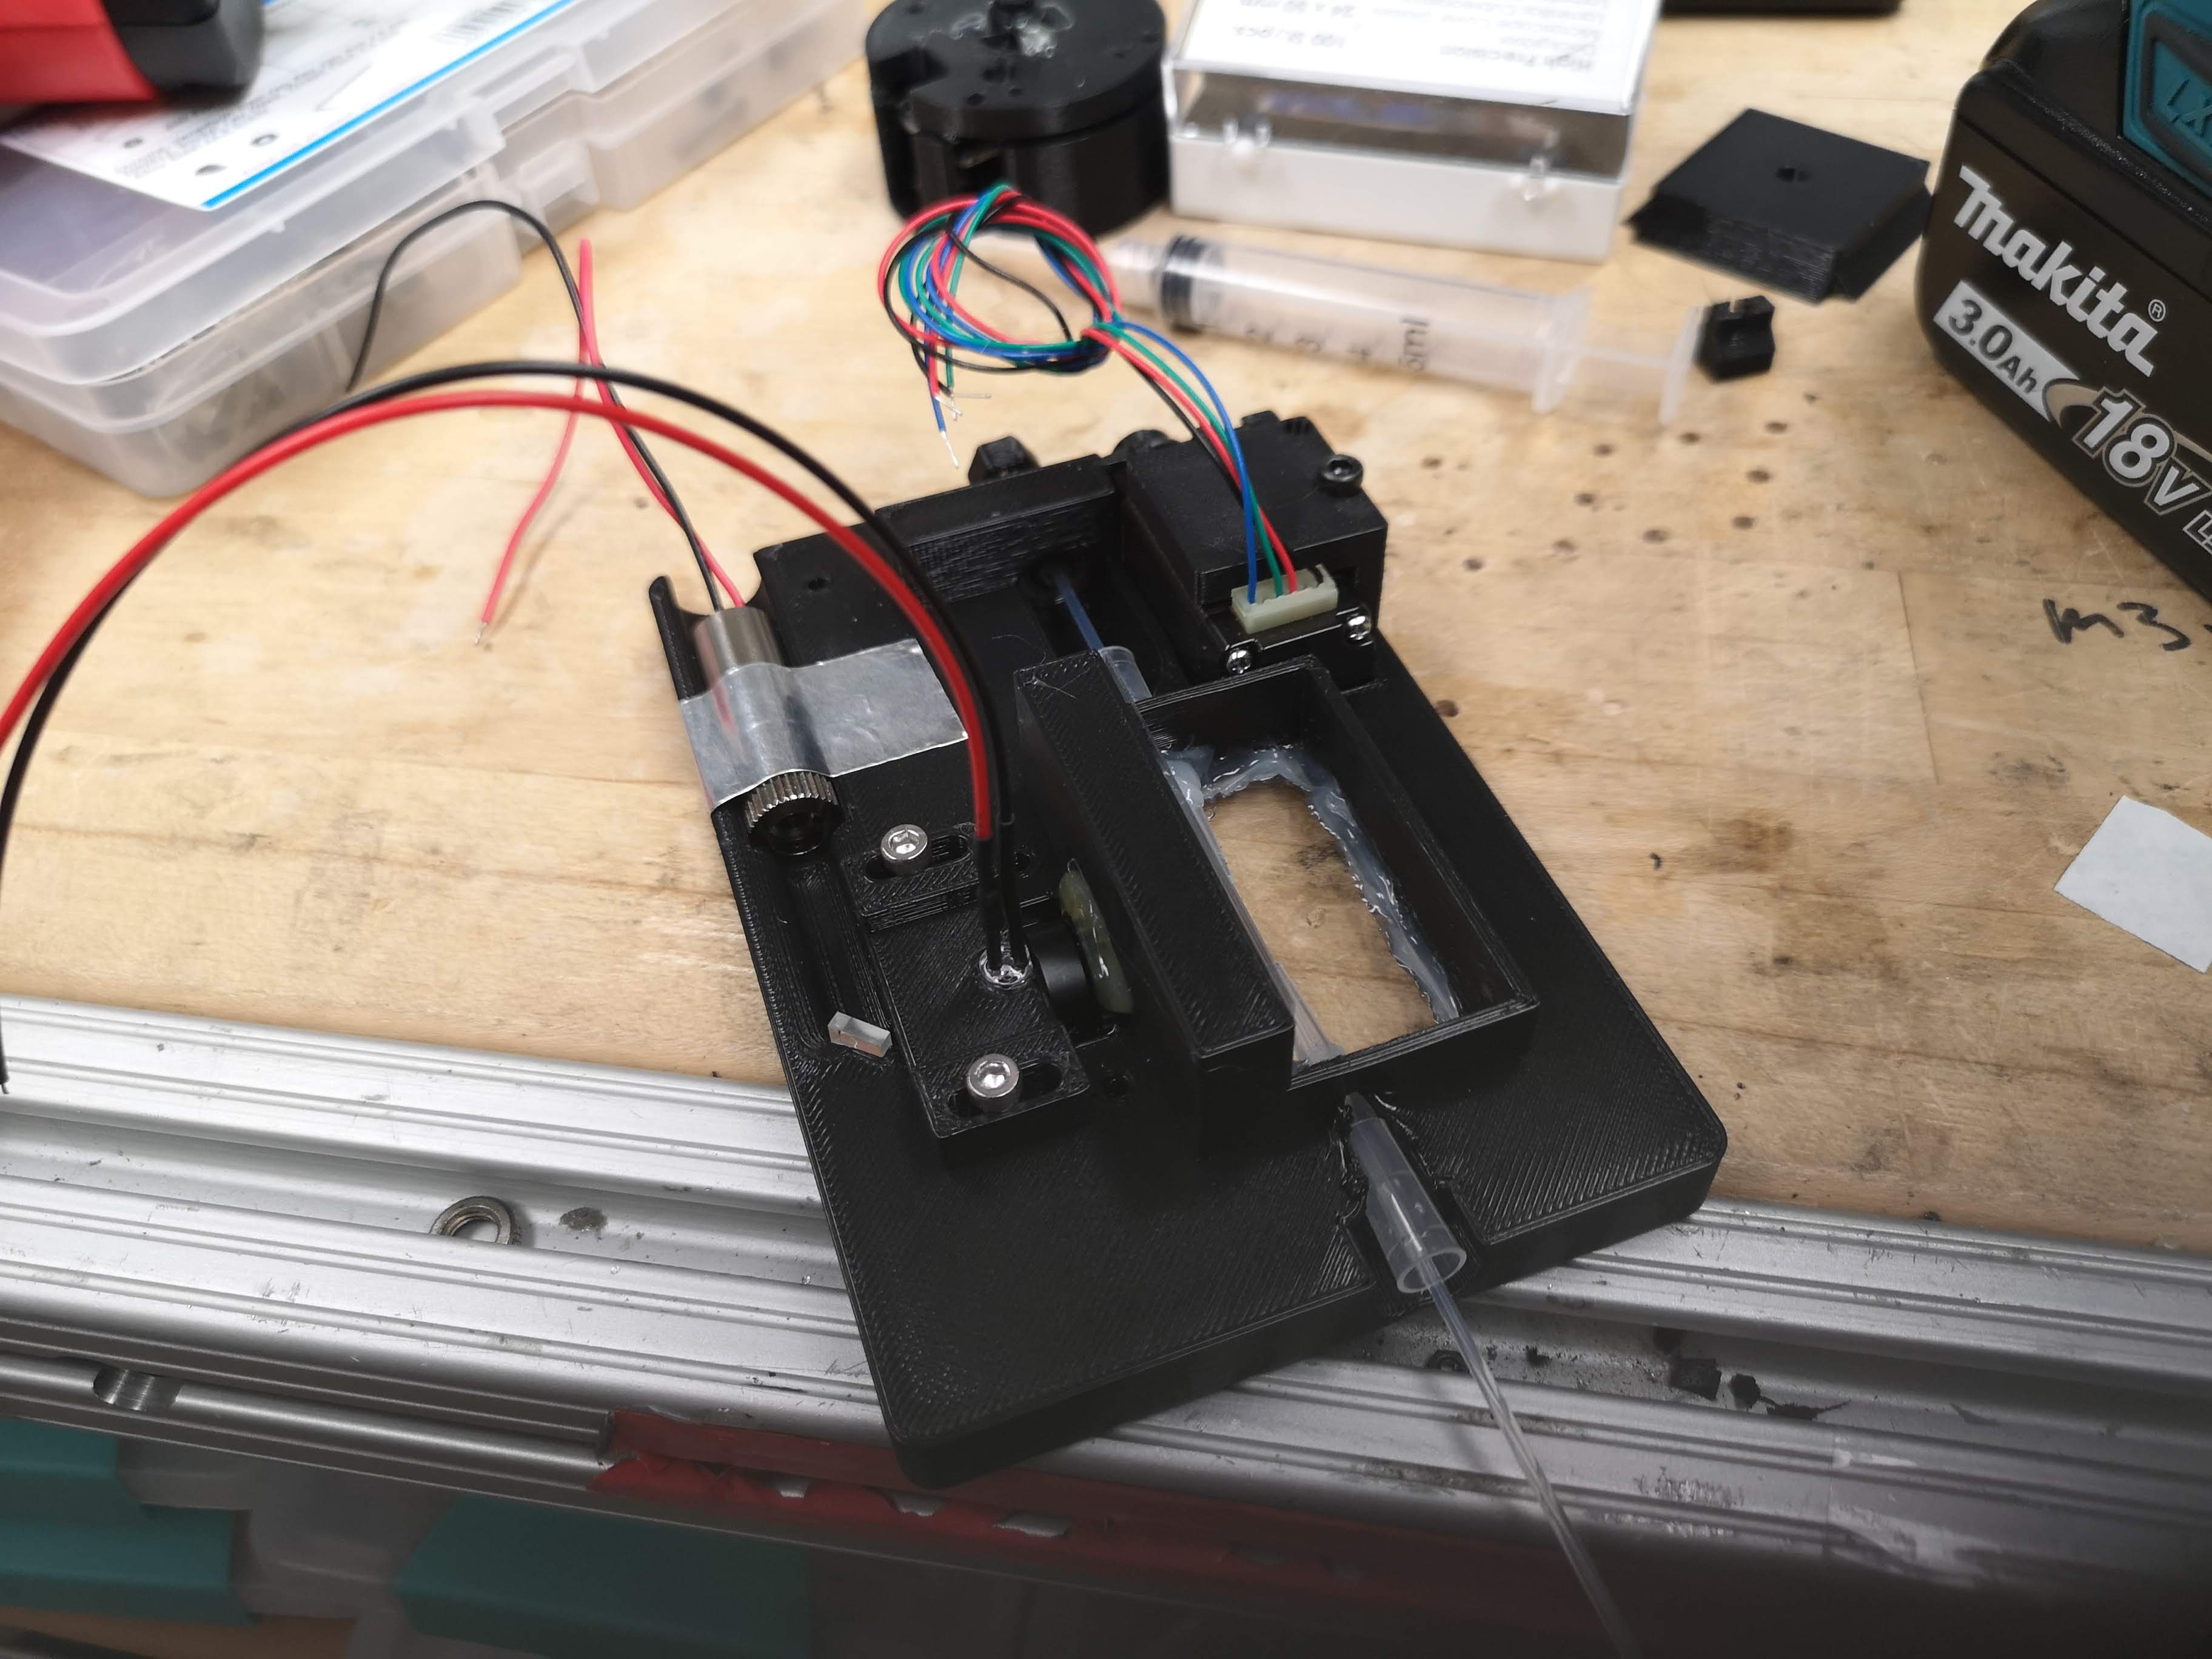
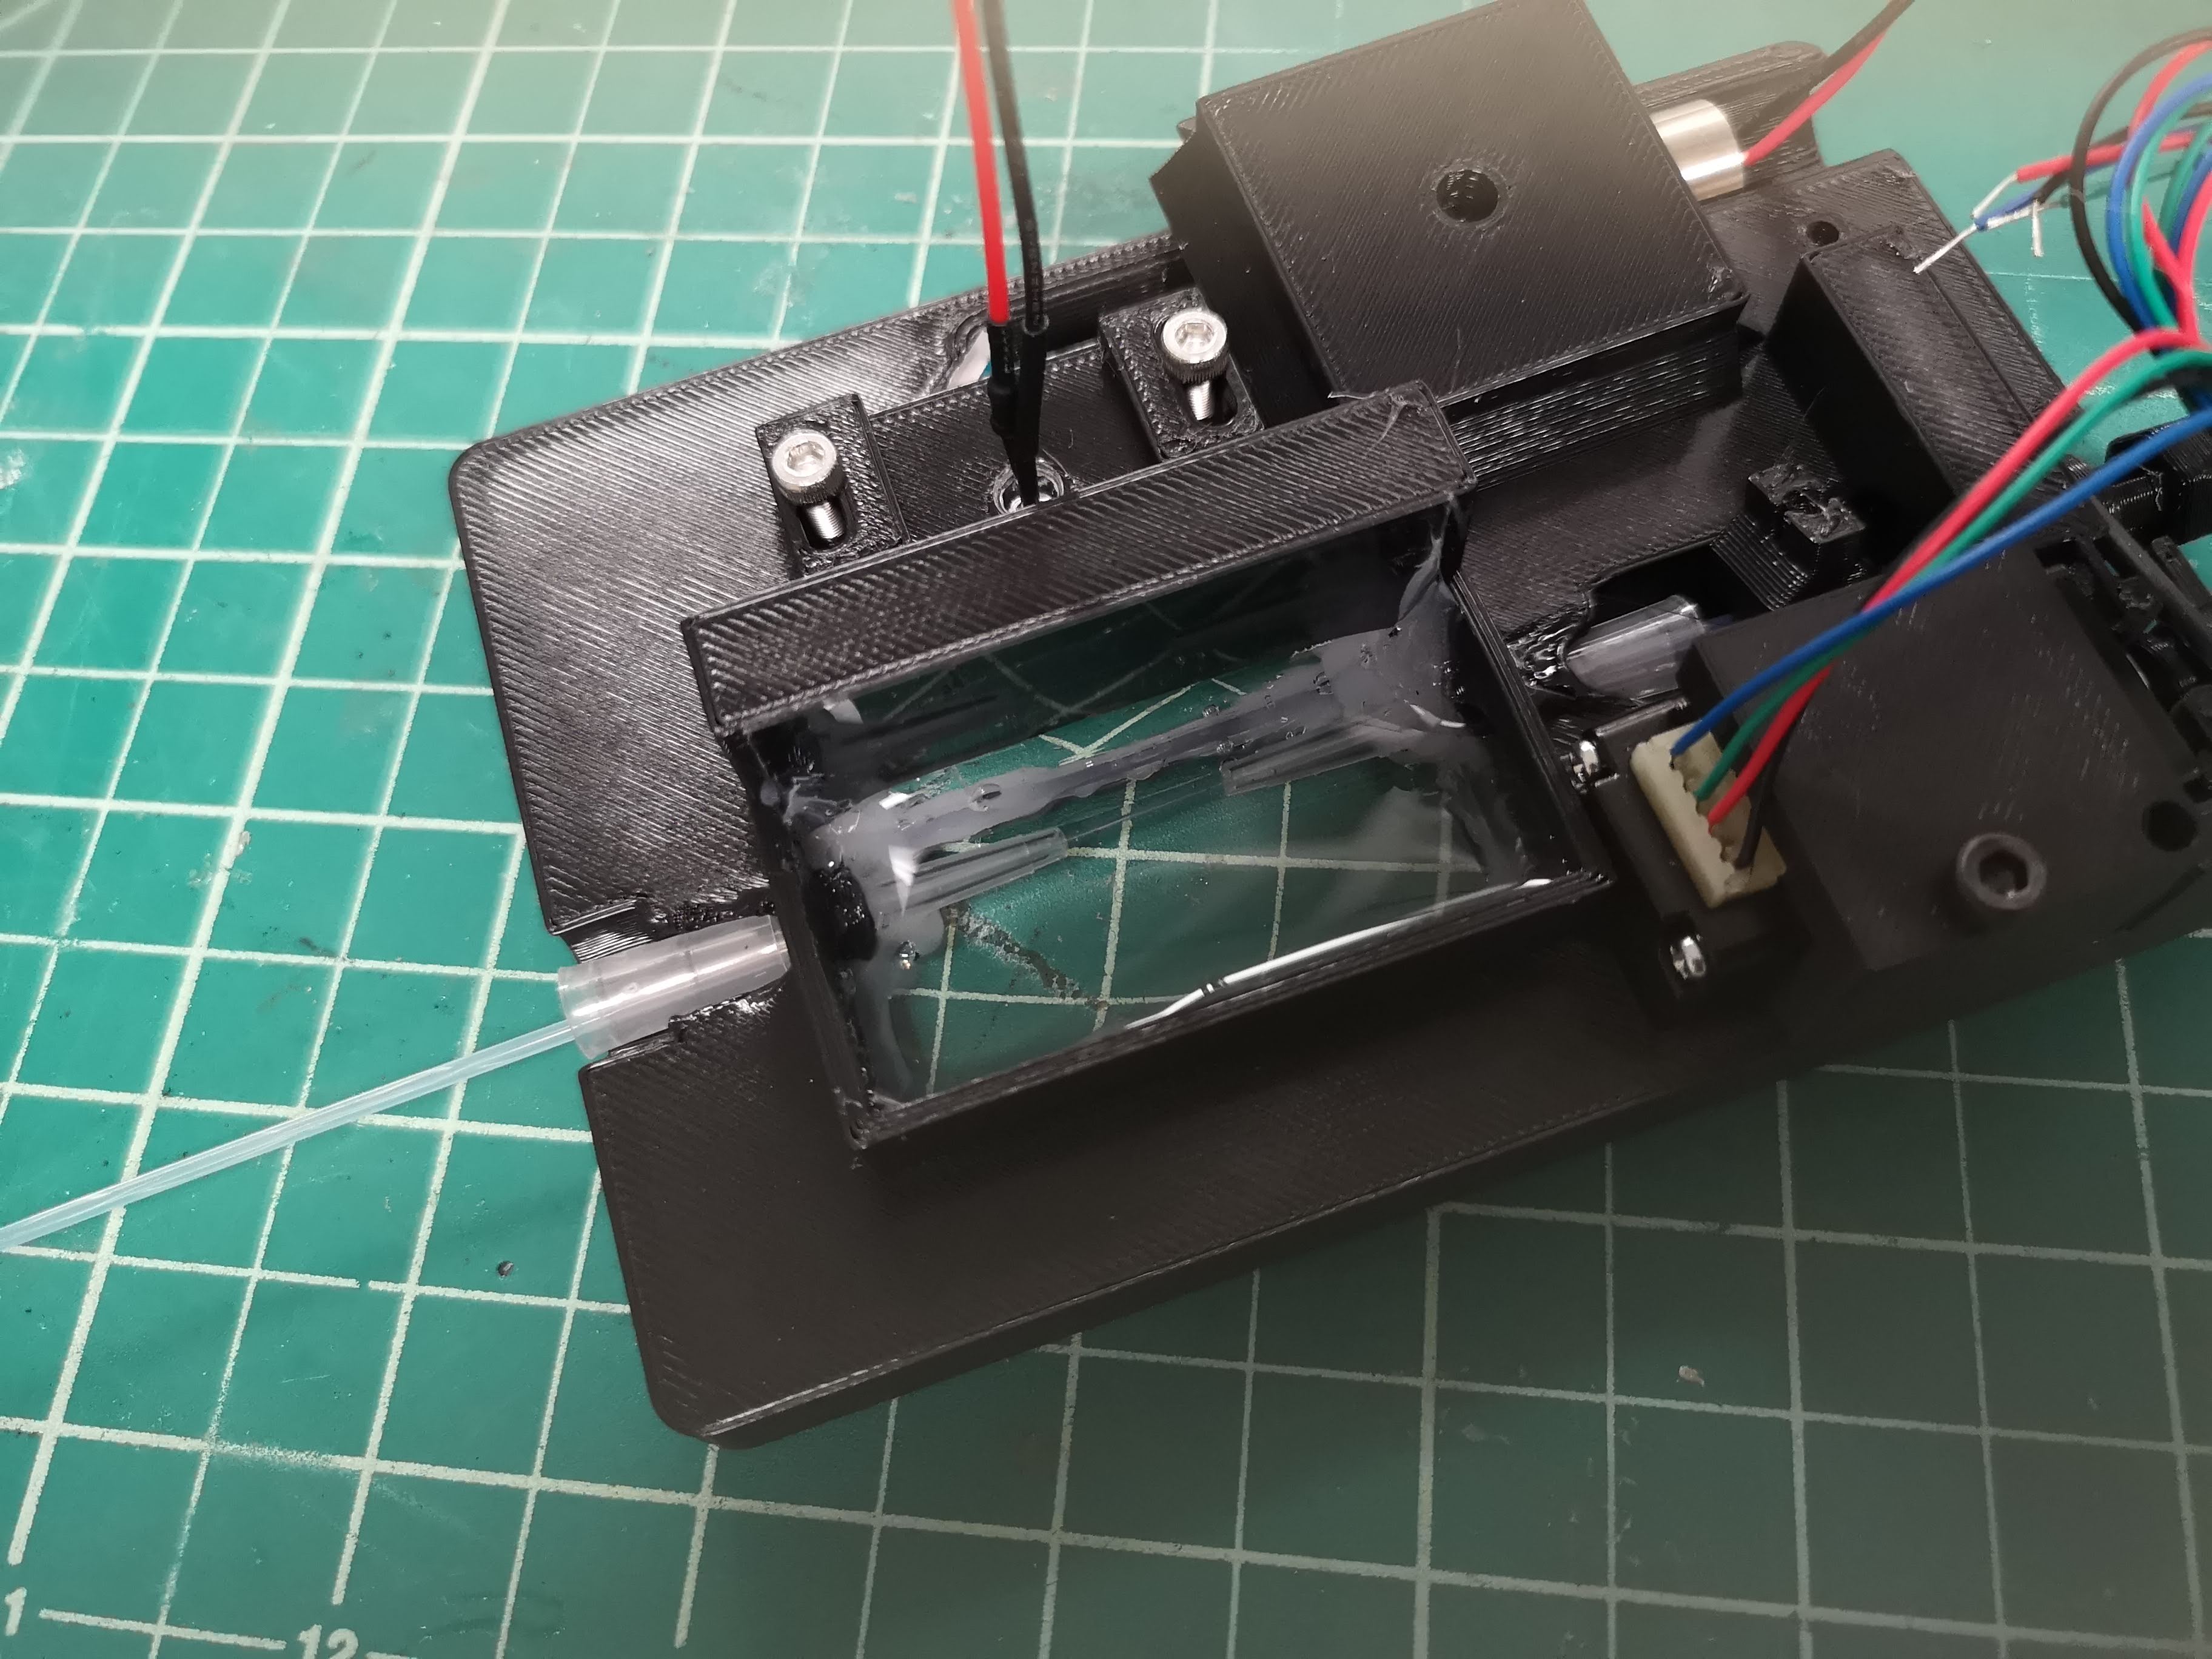
Wire everything
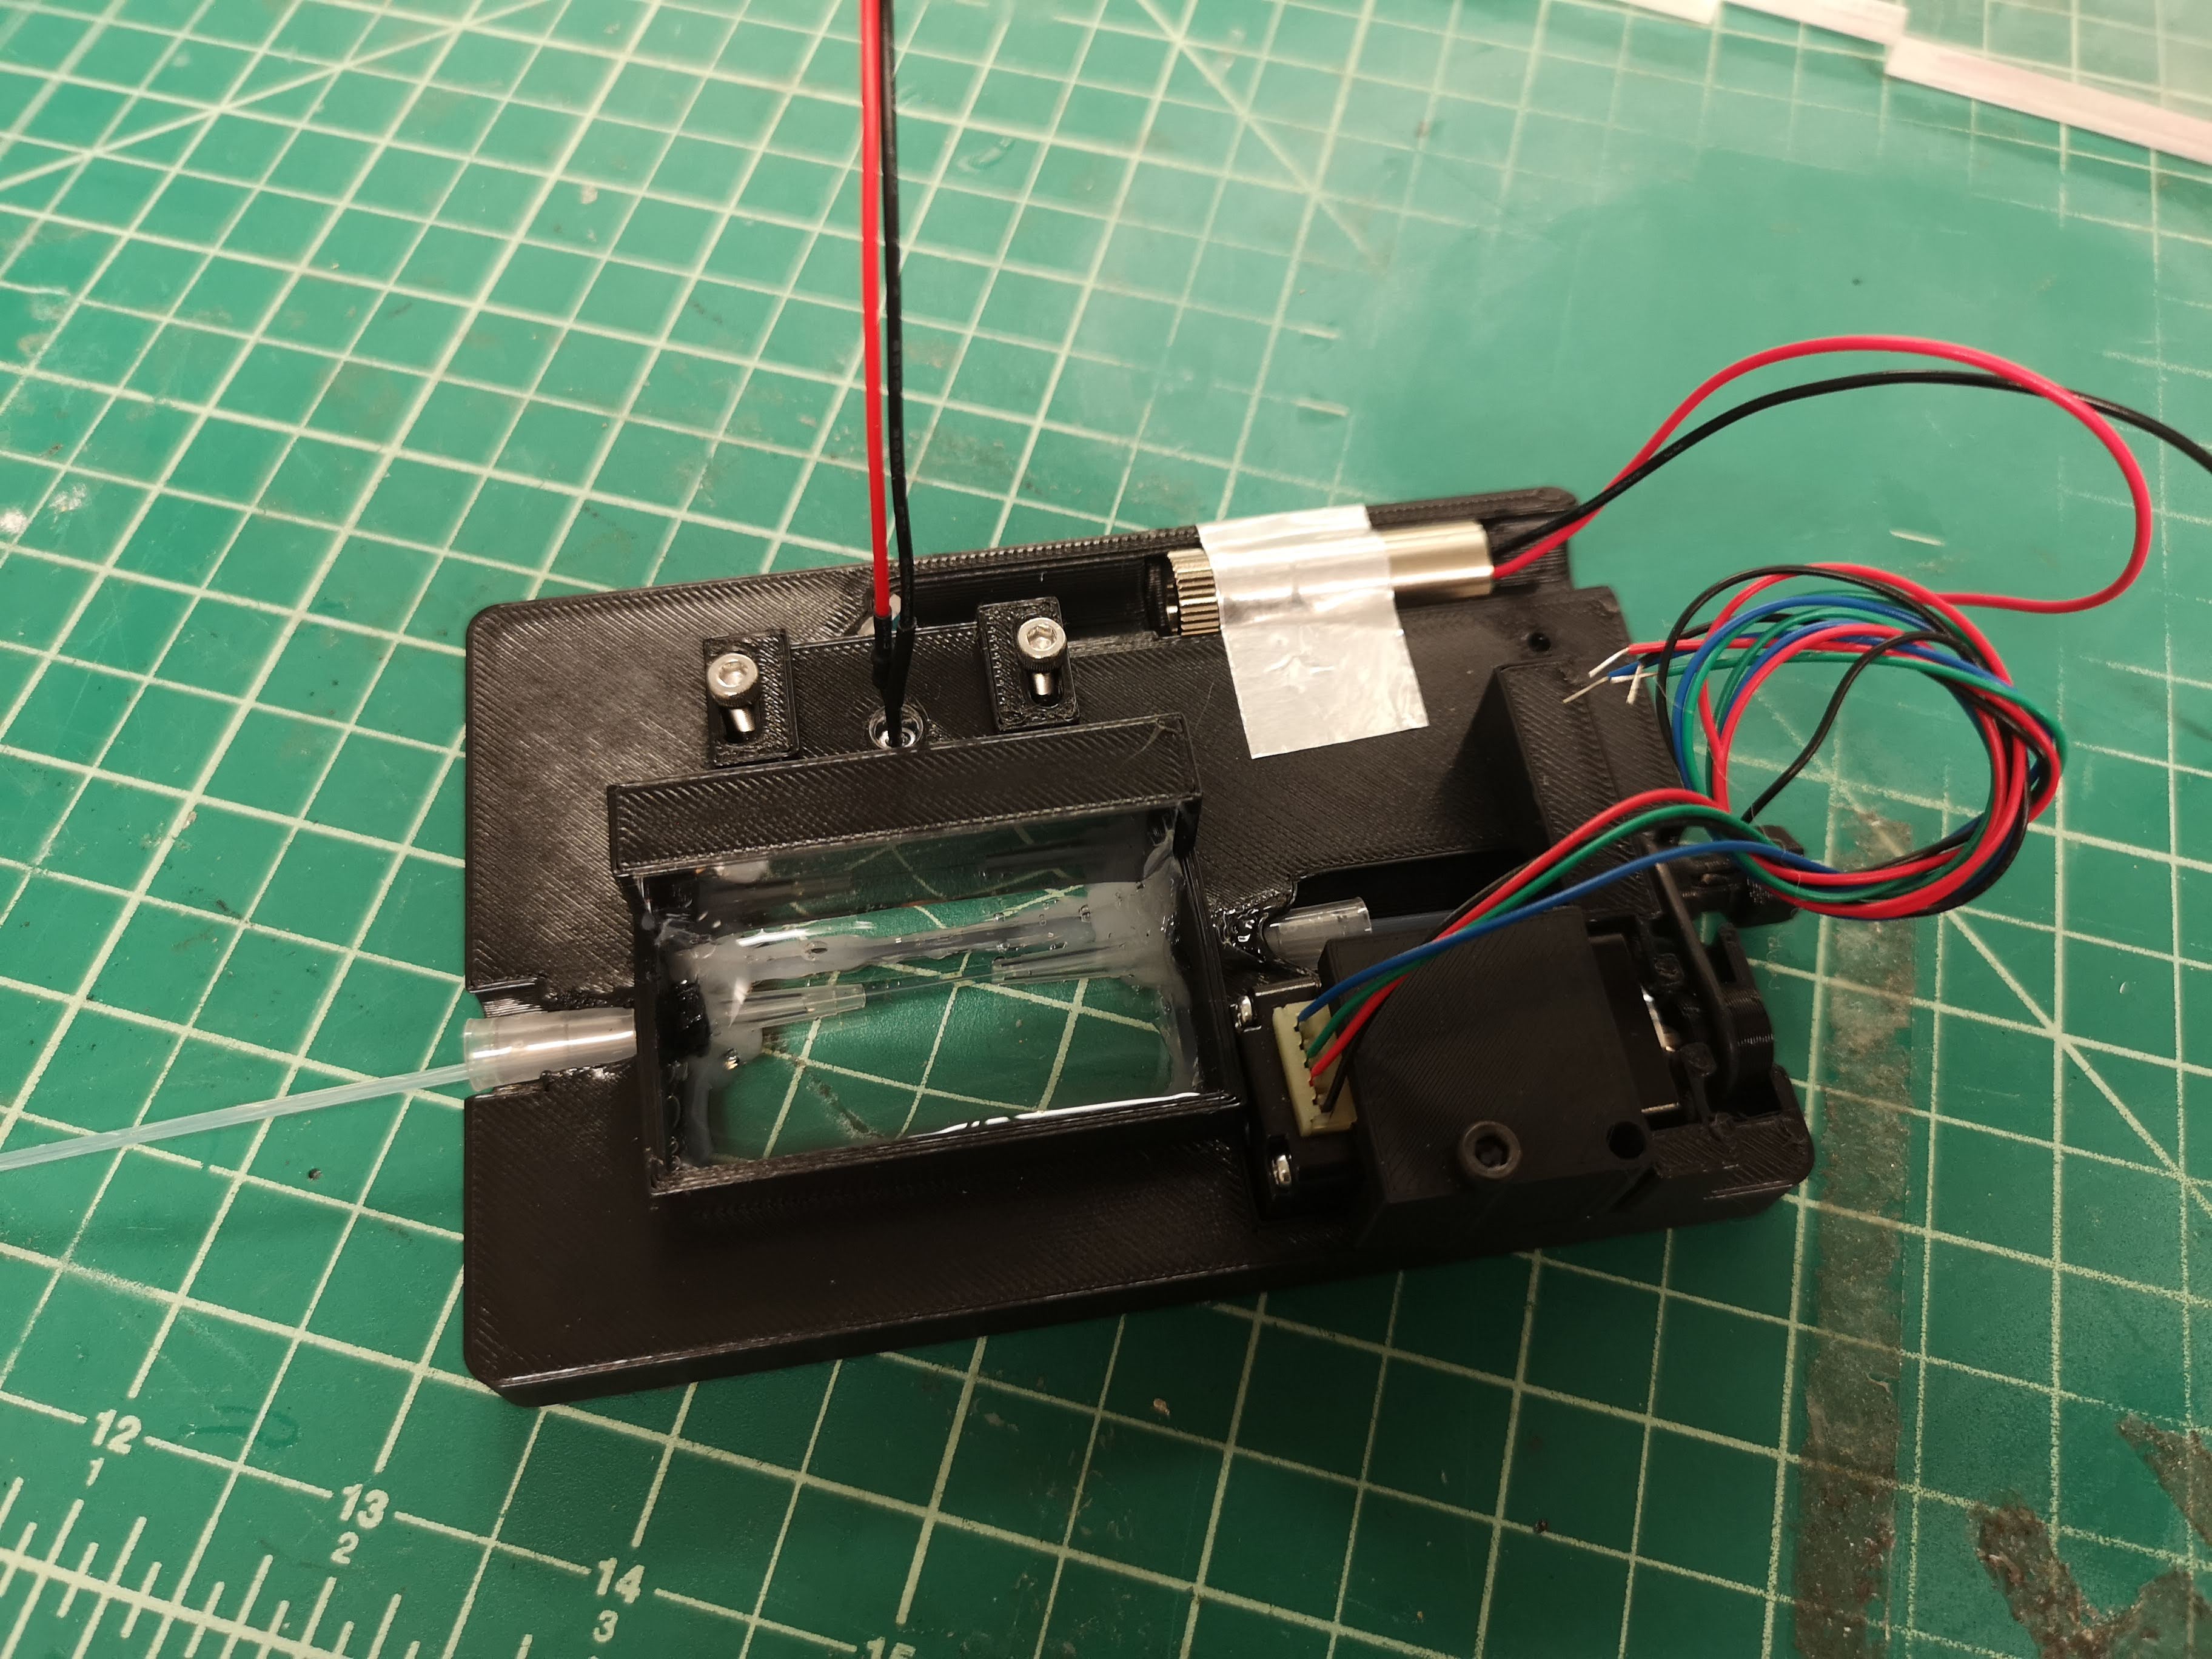
Done
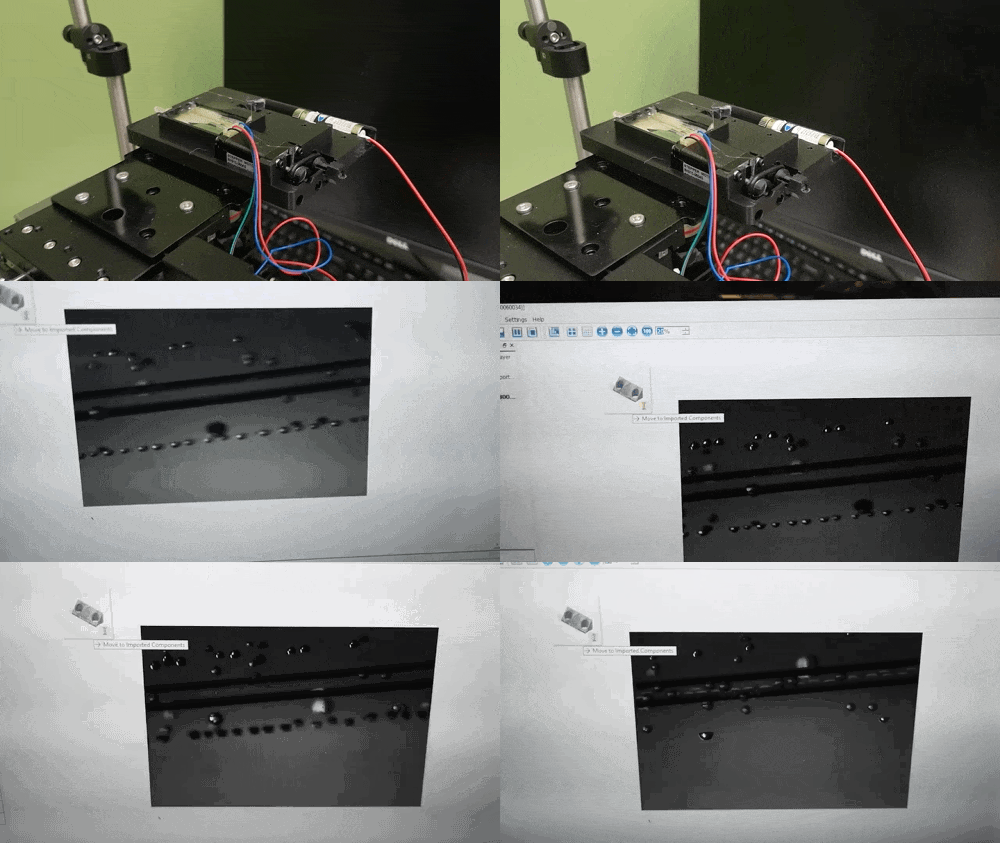
Algae
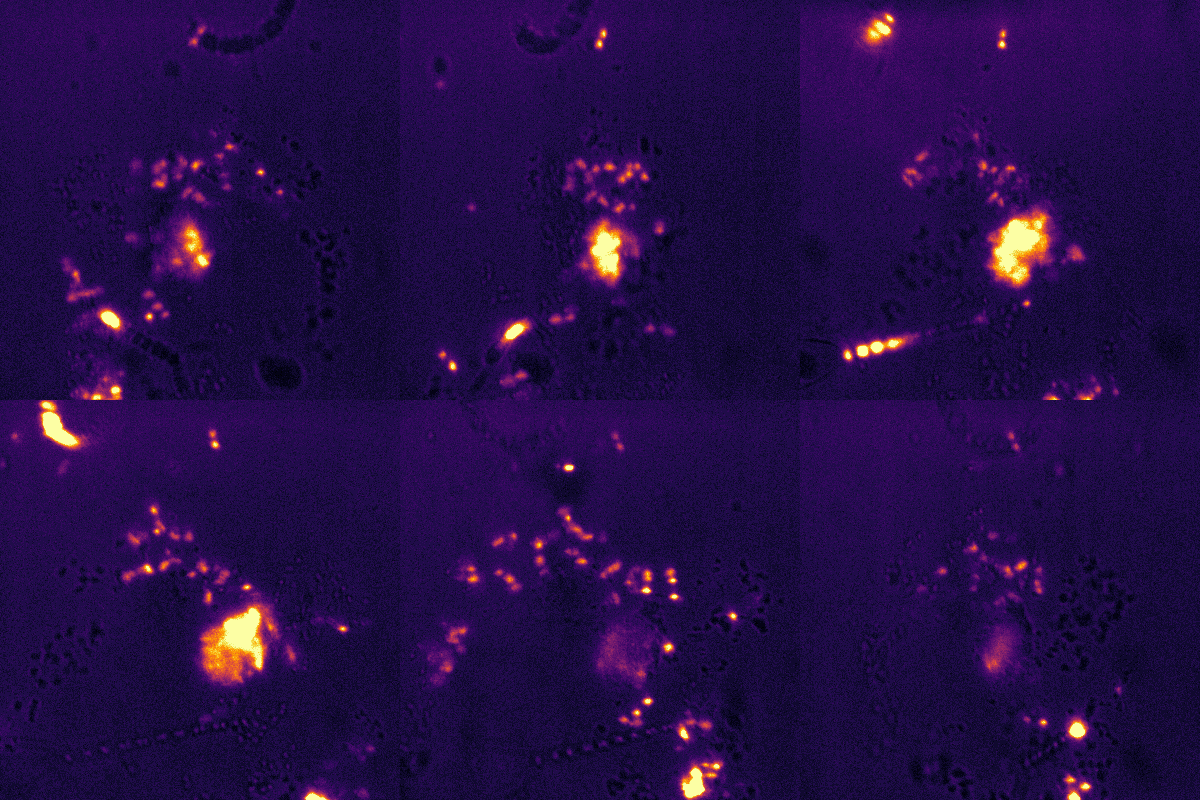
Light-sheet in ImSwitch
fully wired
on squid
Light-sheet and Holography (same sample, simulation)
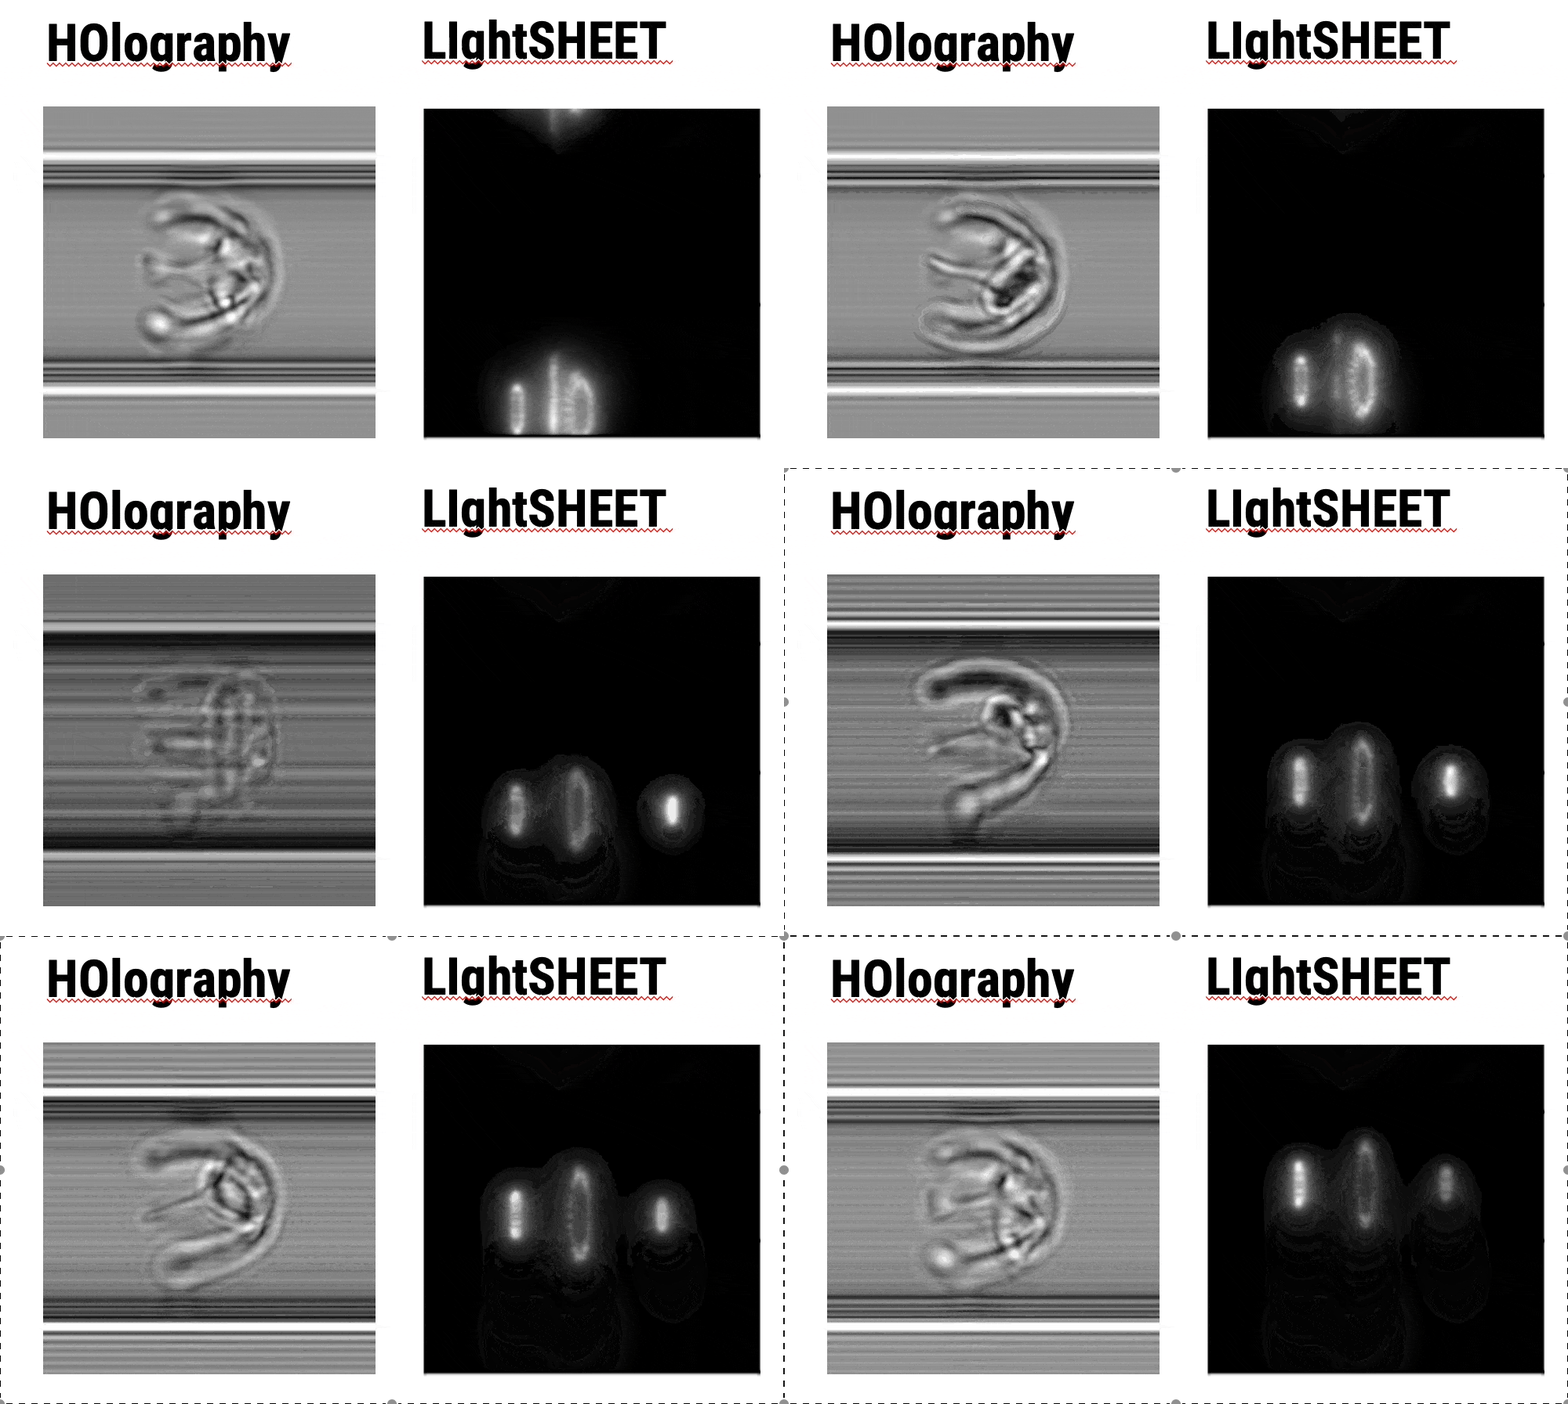
Light-sheet and Holography (different samples)
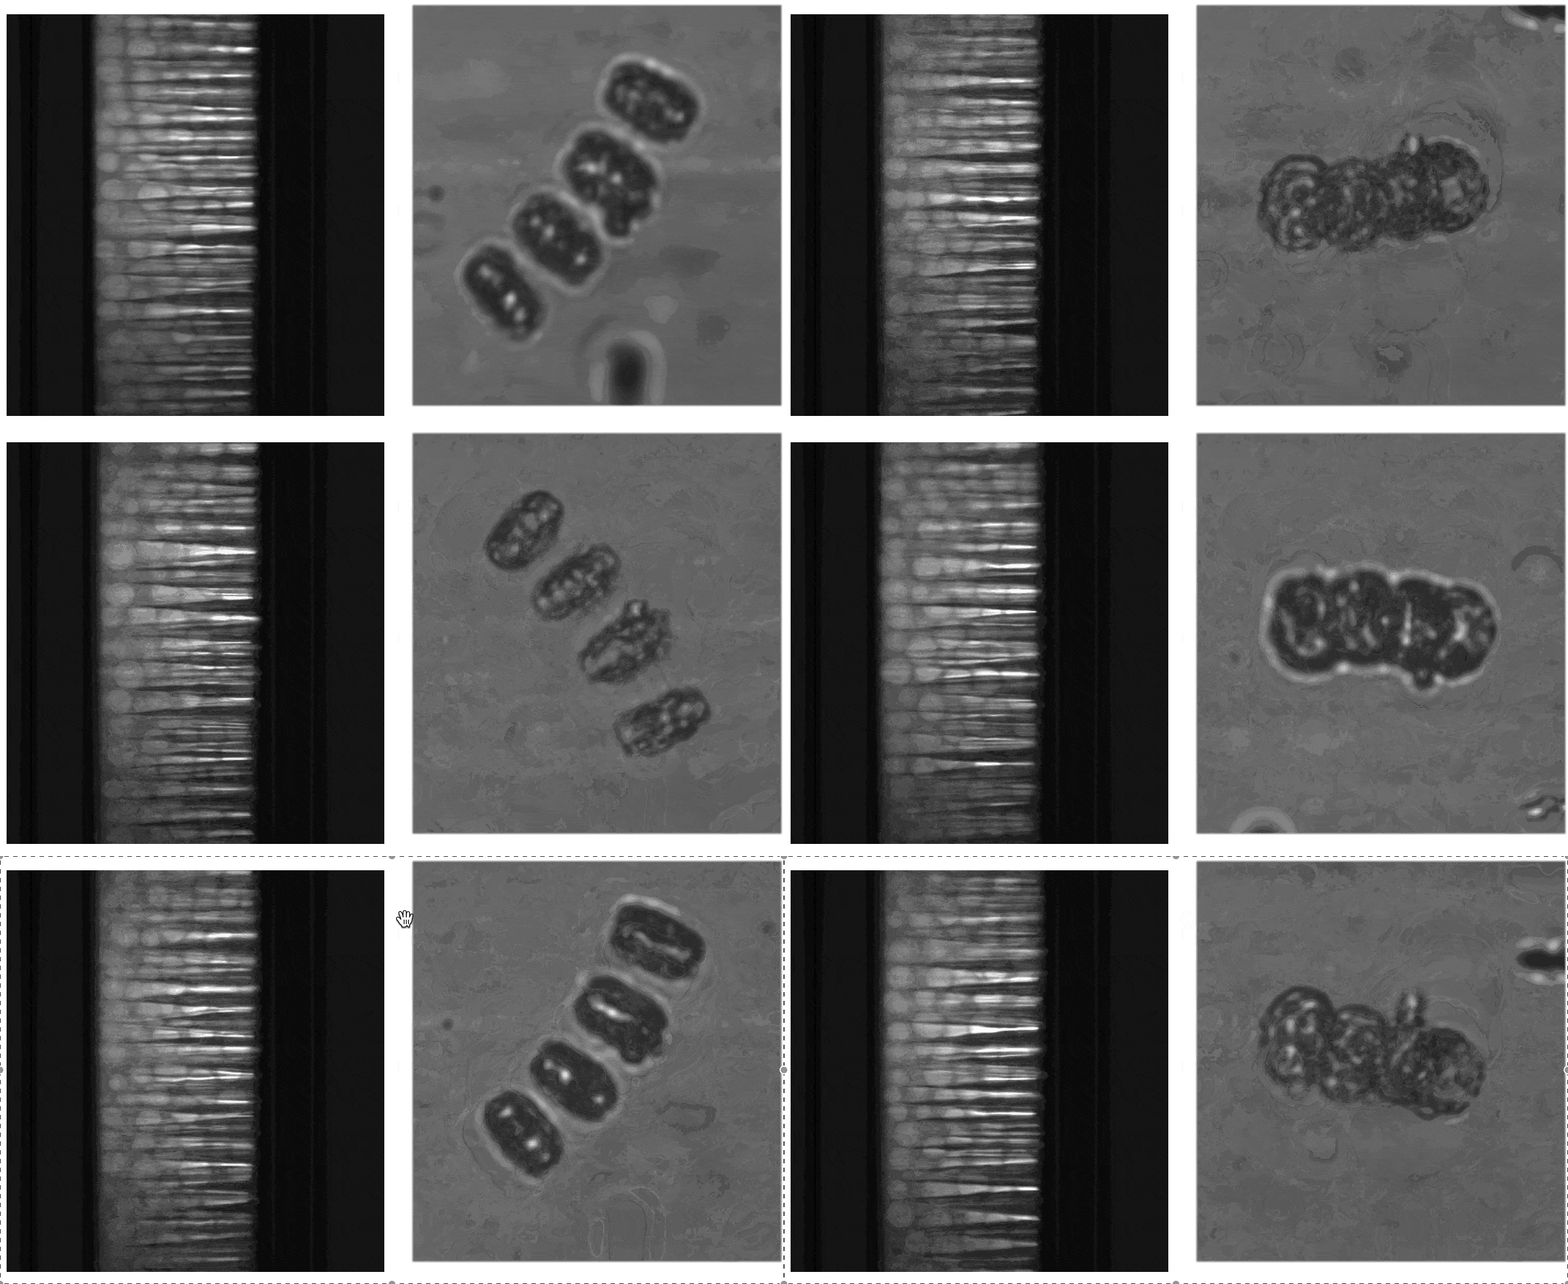
Light-sheet and Holography (same samples)
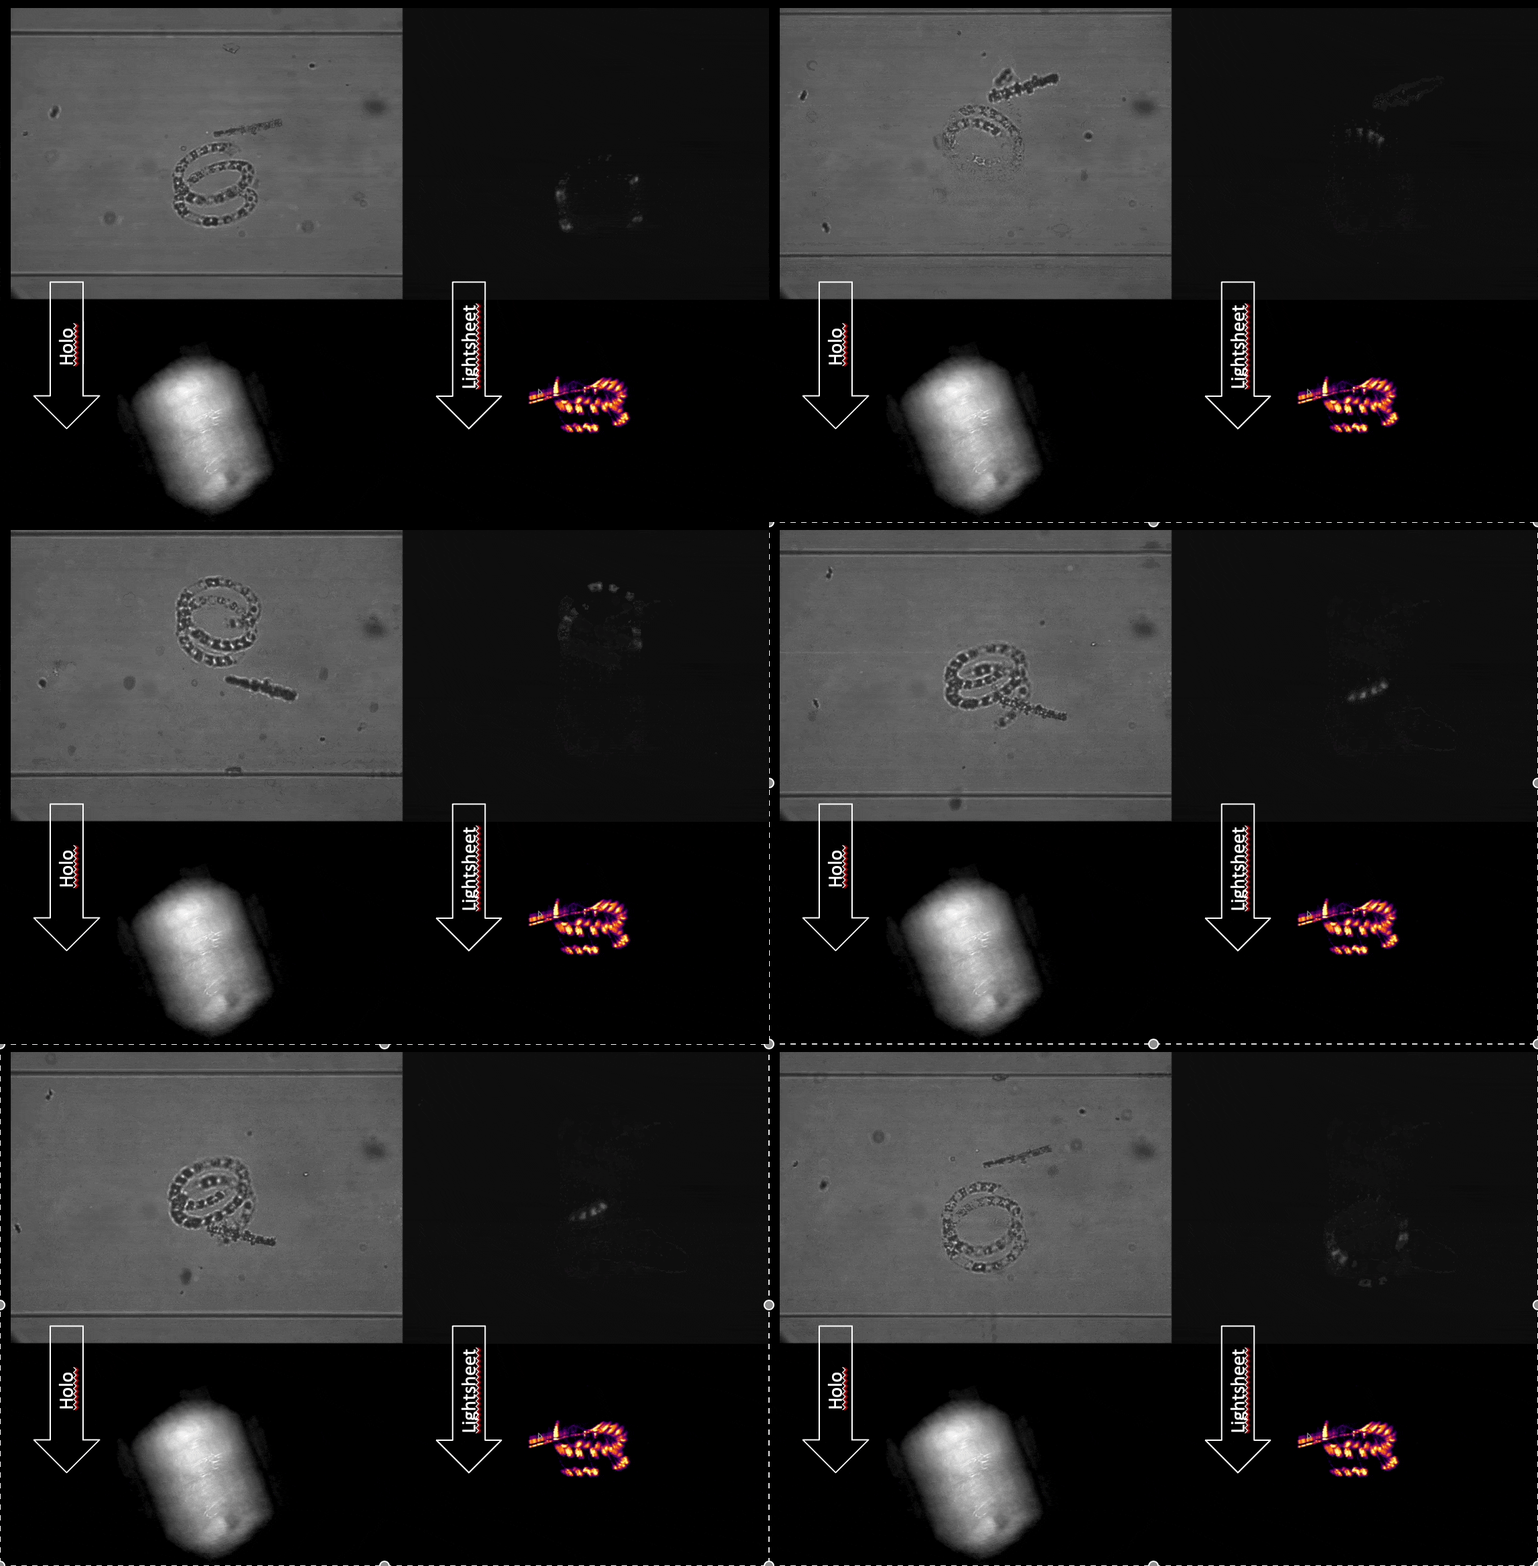
You can find a very nice discussion on how to reconstruct the data here: https://forum.image.sc/t/reconstructing-tomographic-light-sheet-data-2d-slice-into-cylindrical-3d-volume/65616/6
Basic idea: fill the 3D space from 2D slices
This project is open so that anyone can get involved. You don't even have to learn CAD designing or programming. Find ways you can contribute in CONTRIBUTING
This project is open-source and is released under the CERN open hardware license. Our aim is to make the kits commercially available. We encourage everyone who is using our Toolbox to share their results and ideas, so that the Toolbox keeps improving. It should serve as a easy-to-use and easy-to-access general purpose building block solution for the area of STEAM education. All the design files are generally for free, but we would like to hear from you how is it going.
You're free to fork the project and enhance it. If you have any suggestions to improve it or add any additional functions make a pull-request or file an issue.
Please find the type of licenses here
REMARK: All files have been designed using Autodesk Inventor 2019 (EDUCATION)
If you find this project useful, please like this repository, follow us on Twitter and cite the webpage! :-)
| Qty | Value | Footprint | References |
|---|---|---|---|
| 6 | Conn_01x01_Male | footprints:PinHeader_1x01_P1.00mm_Horizontal | J2, J4, J5, J6, J7, J8 |
| 4 | , , , | ||
| 1 | Conn_01x06 | Connector_PinHeader_1.00mm:PinHeader_1x06_P1.00mm_Vertical_SMD_Pin1Left | J3 |
| 1 | Conn_01x06 | Connector_PinHeader_2.54mm:PinHeader_1x06_P2.54mm_Vertical | J1 |
The 12 most common of 13 parts.
beniroquai/HoLiSheet
This adds a rotator and light-sheet illumination to your inverted microscope for continuous 3D volume imaging of plankton


samyk/magspoof
A portable device that can spoof/emulate any magnetic stripe, credit card or hotel card "wirelessly", even on standard magstripe (non-NFC/RFID) readers.

fossasia/pslab-scripts
Pocket Science Lab - Scripts for Sensor Experiments


willem-pennings/balancing-cube
A cube that balances itself in a corner or edge using reaction wheels

VoronDesign/Voron-Hardware
Cool Hardware designed by the Voron Design group

hoglet67/RGBtoHDMI
Bare-metal Raspberry Pi project that provides pixel-perfect sampling of Retro Computer RGB/YUV video and conversion to HDMI
It measures 22.4 × 31.4 mm and has 2 copper layers, 1.6 mm thick.
13 parts. The full list of its parts is on this page, with links to each part's symbol and footprint where PCBKit's library has them.
From the beniroquai/HoLiSheet repository on GitHub, at the commit this page was made from: the board is KICAD/HoLiSheet/HoLiSheet.kicad_pcb and its schematic KICAD/HoLiSheet/HoLiSheet.kicad_sch. PCBKit opens the board in the browser, with nothing to install.
Its repository states no licence, so its author keeps all rights: ask beniroquai before reusing the design.