4 layers178.8 × 171.2 mm
Audio Amplifier
anasarif23/Spectrum-Audio-Amp
Stereo audio preamp with EQ, spectrum display, and class-D power amplifier — designed in KiCad.
248 parts

 aoishik/AOILED1
A WLED(Audio Reactive) Based LED Strips Controller for 12v LED Strips
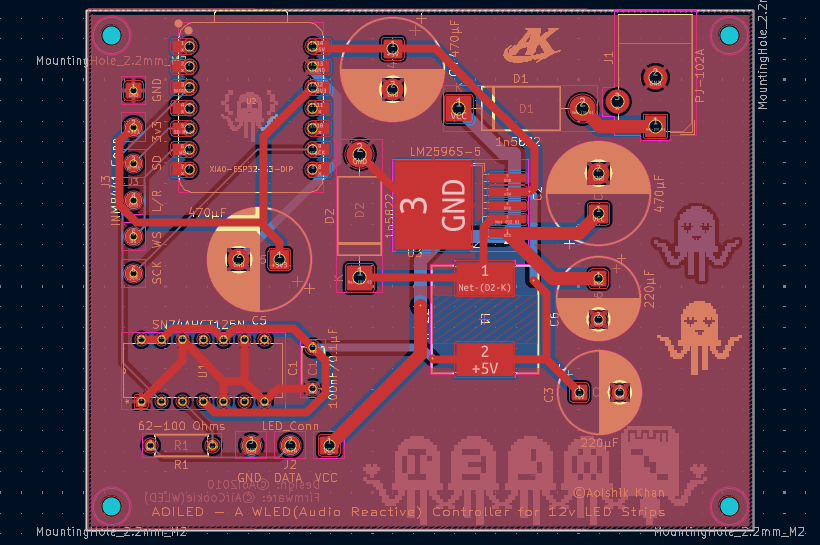
LEDCONTROL is an open-source printed circuit board by aoishik, from the aoishik/AOILED repository on GitHub. It is a 2-layer board of 82.1 × 64 mm with 26 parts on 30 nets, routed with 108 tracks and 5 vias.
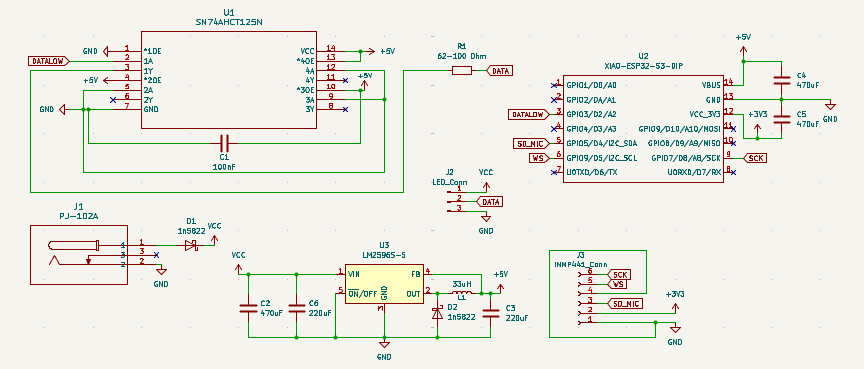
It is built around the SN74AHCT125N, LM2596S-5.0 and PJ-102A. Its parts include 6 capacitors, 3 ICs, 3 connectors, 2 diodes and 1 resistor. It belongs with the audio and music and lEDs and displays boards and the ESP32 boards of this library.


A WLED(Audio Reactive) Based LED Strips Controller for 12v LED Strips
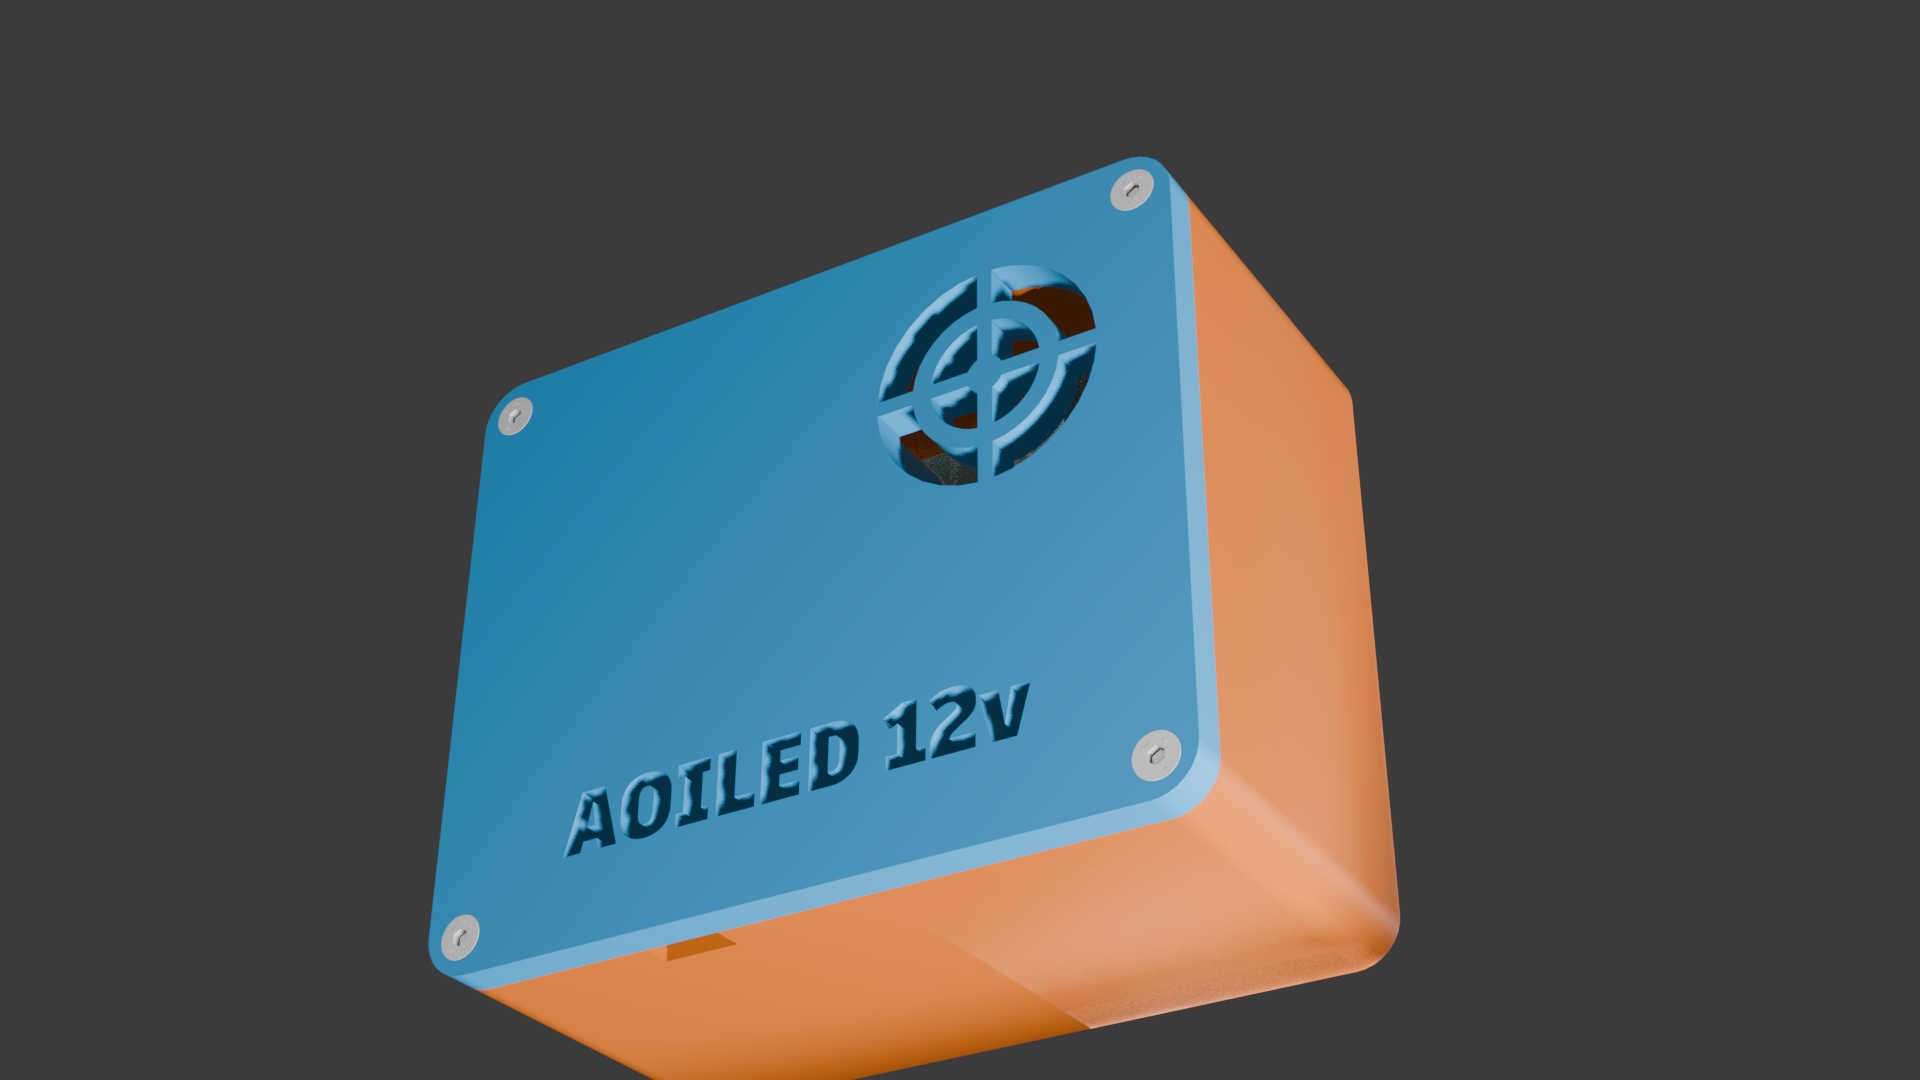
I wanted to create a LED strip controller that could be used to control 12v WS2811 LED strips. It also supports audio based effects using WLED'S Audio Reactive Mode. I wanted to use and test the WLED Firmware also.
Believe it or not, this was my third time using Fusion 360 and KiCad! I watched numerous tutorials and guides and did a lot of googling, but in the end, I'm pretty proud of the final product. I had the most struggle figuring out the tolerances and dimensions. Also in KiCad, I had a lot of trouble with footprints and making sure everything was aligned properly and the traces were correct(but it became a little long traces and some may not look good).
BOM (from BOM.csv):
| Name | Qty | Purpose | Cost (USD) | Link | Distributor |
|---|---|---|---|---|---|
| JST SM 3pin Male | 1 | For connecting the LED Strips | $0.08 | Buy | Quartz Components |
| JST SM 3pin Female | 1 | For connecting the LED Strips | $0.08 | Buy | Quartz Components |
| 24AWG High Voltage Silicone Wire 3000V - Red | 1 | Connecting the INMP441 to the PCB | $0.20 | Buy | Robu |
| PCB | 1 | 2-layers PCB | $11.85 | Buy | JLCPCB |
| 3d Printing of Case Shipping | 1 | For the Case Shipping Charges by Souptik Samanta | $3.25 | Reference | Souptik Samanta via Printing Legion |
| WS2811 Neopixel LED Strip 60LED/MTR - 12V Addressable LED Strip (5 Meter Pack) | 1 | LED | $6.60 | Buy | Quartz Components |
| 24AWG High Quality Ultra Flexible Silicone Wire - Yellow | 2 | Connecting the INMP441 to the PCB | $0.20 | Buy | Robu |
| 24AWG High Quality Ultra Flexible Silicone Wire - Blue | 2 | Connecting the INMP441 to the PCB | $0.20 | Buy | Robu |
| M3 X 25mm Hex (Allen) CSK SS 304 Screw (Dia. 3mm, Length 25mm) | 4 | Screws | $0.15 | Buy | OnlyScrews |
| M3 X 6mm Brass Threaded Inserts (Dia. 3mm, Length 6mm) | 4 | Screws Inserts | $0.15 | Buy | OnlyScrews |
| SN74AHCT125N | 1 | Level Shifting of Data | $1.10 | Buy | Robu |
| 68 ohms resistor | 44 | Resistance | $0.15 | Buy | Robu |
| XIAO ESP32S3 | 1 | MCU | $9.90 | Buy | RoboCraze |
| INMP441 I2S Microphone | 1 | For Audio | $2.10 | Buy | Robo Craze |
| 1n5822 Diode | 2 | Diode | $0.51 | Buy | Robu |
| LM2596S-5.0 | 1 | Step Down Voltage | $0.73 | Buy | Robu |
| SRR1208-330YL-BOURNS-2.8A 33uH ±15% 3.8A SMD, 12.7×12.7mm Power Inductor | 1 | 12v to 5v | $1.25 | Buy | Robu |
| Nichicon-220uF 50V | 2 | Decoupling | $0.50 | Buy | Robu |
| Nichicon 470uf 50v | 3 | Decoupling | $1.05 | Buy | Robu |
| 100nf Disc Capacitor | 8 | Decoupling | $0.10 | Buy | Robu |
| PJ-102A | 2 | 12v Power Input (QTY is 2 because minimum order quantity is 2) | $3.23 | Buy | Lion Circuits |
| Shipping | 1 | Shipping Charges | $1.32 | N/A | Shipping Charges |
| TAX | 1 | Tax | $1.30 | N/A | Indian Govt. |
Others:
| Schematic | PCB Layout |
|---|---|
 |  |
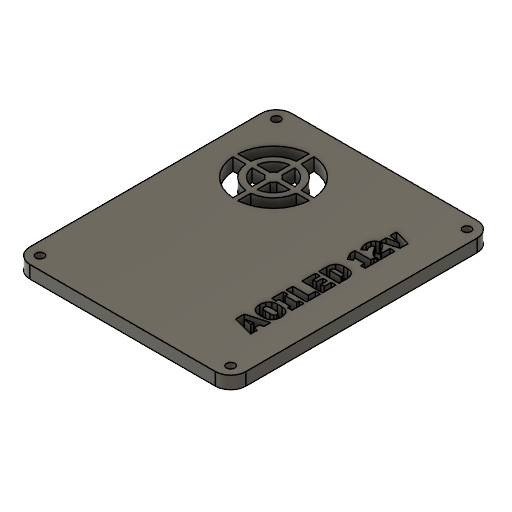
| Case Top | Case Bottom |
|---|---|
 | 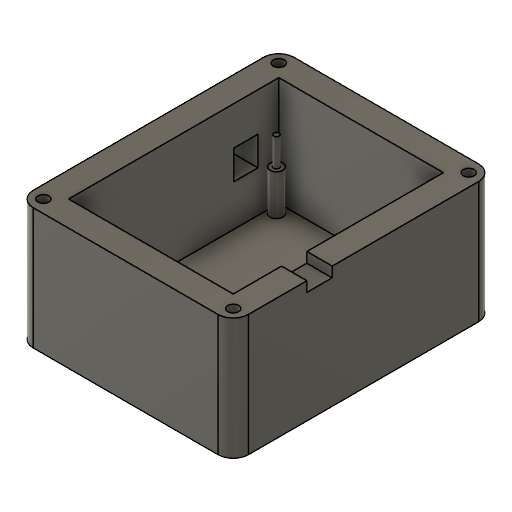 |
| Assembled Case | PCB VIEW |
|---|---|
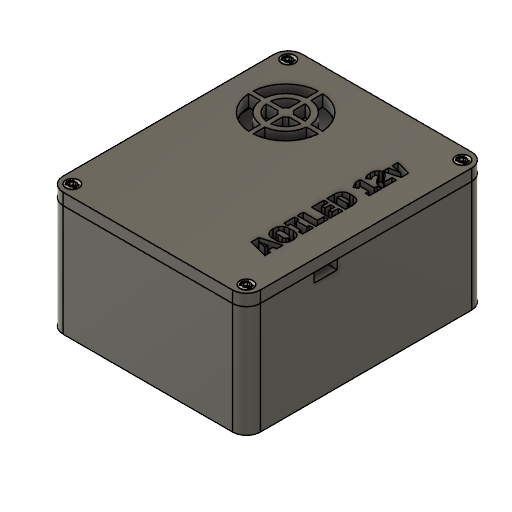 | 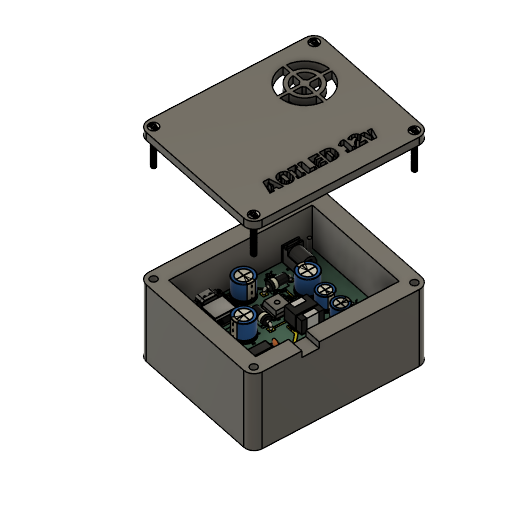 |
The firmeare I used is WLED. It is a premade firmare by Aircoookie and it is open source. Here is the link to it: Github | Wiki | Flasher(Official) | Flasher(Third Party)
Thank You for Understanding.
| Qty | Value | Footprint | References |
|---|---|---|---|
| 3 | 470µF | Capacitor_THT:CP_Radial_D12.5mm_P5.00mm | C2, C4, C5 |
| 3 | G*** | akemi:010_hearts_09mm | WLED, WLED, WLED |
| 2 | 1n5822 | Diode_THT:D_DO-201AD_P15.24mm_Horizontal | D1, D2 |
| 2 | 220µF | Capacitor_THT:CP_Radial_D10.0mm_P5.00mm | C3, C6 |
| 1 | 100nF/0.1µF | Capacitor_THT:C_Disc_D5.0mm_W2.5mm_P5.00mm | C1 |
| 1 | 33µH | SRR1208-330YL:IND_BOURNS_SRR1208 | L1 |
| 1 | 62-100 Ohms | Resistor_THT:R_Axial_DIN0207_L6.3mm_D2.5mm_P7.62mm_Horizontal | R1 |
| 1 | G*** | akemi:050_dev_06mm | WLED |
| 1 | G*** | akemi:999_wled_12mm | WLED |
| 1 | INMP441_Conn | Connector_Wire:SolderWire-0.25sqmm_1x06_P4.5mm_D0.65mm_OD2mm | J3 |
| 1 | LED_Conn | Connector_Wire:SolderWire-0.5sqmm_1x03_P4.8mm_D0.9mm_OD2.3mm | J2 |
| 1 | LM2596S-5 | Package_TO_SOT_SMD:TO-263-5_TabPin3 | U3 |
| 1 | LOGO | LOGO:AKlogo | G*** |
| 1 | PJ-102A | Connector_BarrelJack:BarrelJack_CUI_PJ-102AH_Horizontal | J1 |
| 1 | SN74AHCT125N | SN74ahct125n:N14 | U1 |
| 1 | XIAO-ESP32-S3-DIP | OPL_XIAO:XIAO-ESP32S3-DIP | U2 |
The 22 most common of 26 parts.
It measures 82.1 × 64 mm and has 2 copper layers, 1.6 mm thick.
26 parts, built around the SN74AHCT125N, LM2596S-5.0 and PJ-102A. The full list of its parts is on this page, with links to each part's symbol and footprint where PCBKit's library has them.
From the aoishik/AOILED repository on GitHub, at the commit this page was made from: the board is PCB/LEDCONTROL.kicad_pcb and its schematic PCB/LEDCONTROL.kicad_sch. PCBKit opens the board in the browser, with nothing to install.
Its repository states no licence, so its author keeps all rights: ask aoishik before reusing the design.
anasarif23/Spectrum-Audio-Amp
Stereo audio preamp with EQ, spectrum display, and class-D power amplifier — designed in KiCad.


CodapopKSP/UntitledSpaceCraft
The entire project files from the Untitled Space Craft brand of Kerbal controllers.


amigalisa/RGBSvideoConverter
RGB to SVideo converter for Amiga computers

stefanofinetti/MF_OverHead_Panel
Complete project for the Airbus A319/320/321/330 OverHead Panel