2 layers103 × 30.5 mm

 a-hungrybookworm/crescendo
A custom synthesizer!
Crescendo is an open-source printed circuit board by a-hungrybookworm, from the a-hungrybookworm/crescendo repository on GitHub. It is a 2-layer board of 144.3 × 81 mm with 9 parts on 20 nets, routed with 77 tracks and 0 vias.
Its parts include 5 switches and 1 connector. It belongs with the audio and music boards and the ESP32 boards of this library.
A crescendo is a custom MIDI keyboard capable of producing music from several different instruments and recording it as a MIDI file.
The Crescendo was built for the Hack Club YSWS Programme Halflife, drawing inspiration from the starter project [MIDI-Keypad](https://github.com/SharKingStudios/Starbie/blob/main/README.md](https://github.com/KaiPereira/MIDI-Keypad/tree/master).
This project was built using the following components:
Drawing inspiration from the [MIDI-Keypad](https://github.com/SharKingStudios/Starbie/blob/main/README.md](https://github.com/KaiPereira/MIDI-Keypad/tree/master), I decided to make a minimal, budget-friendly version of this keypad - featuring 7 capacitive touch keys for each of the natural notes, volume, transpose, metronome & tempo, sounds of different instruments, and a recording feature. I have been playing the piano for six years now, so even if I don't know enough about PCB design, I do know a bit about music.
Initially, I searched up part prices and decided which ones I could use, due to my costly microcontroller I had to cut down on other costs.
Then, I figured out how to install all the libraries, and then connected the components on the schematic. Initially, I didn't understand how the capacitive touch keys worked, so I added actual touch sensors to my BOM and my schematic - I was so happy when I could remove them! (- $3)
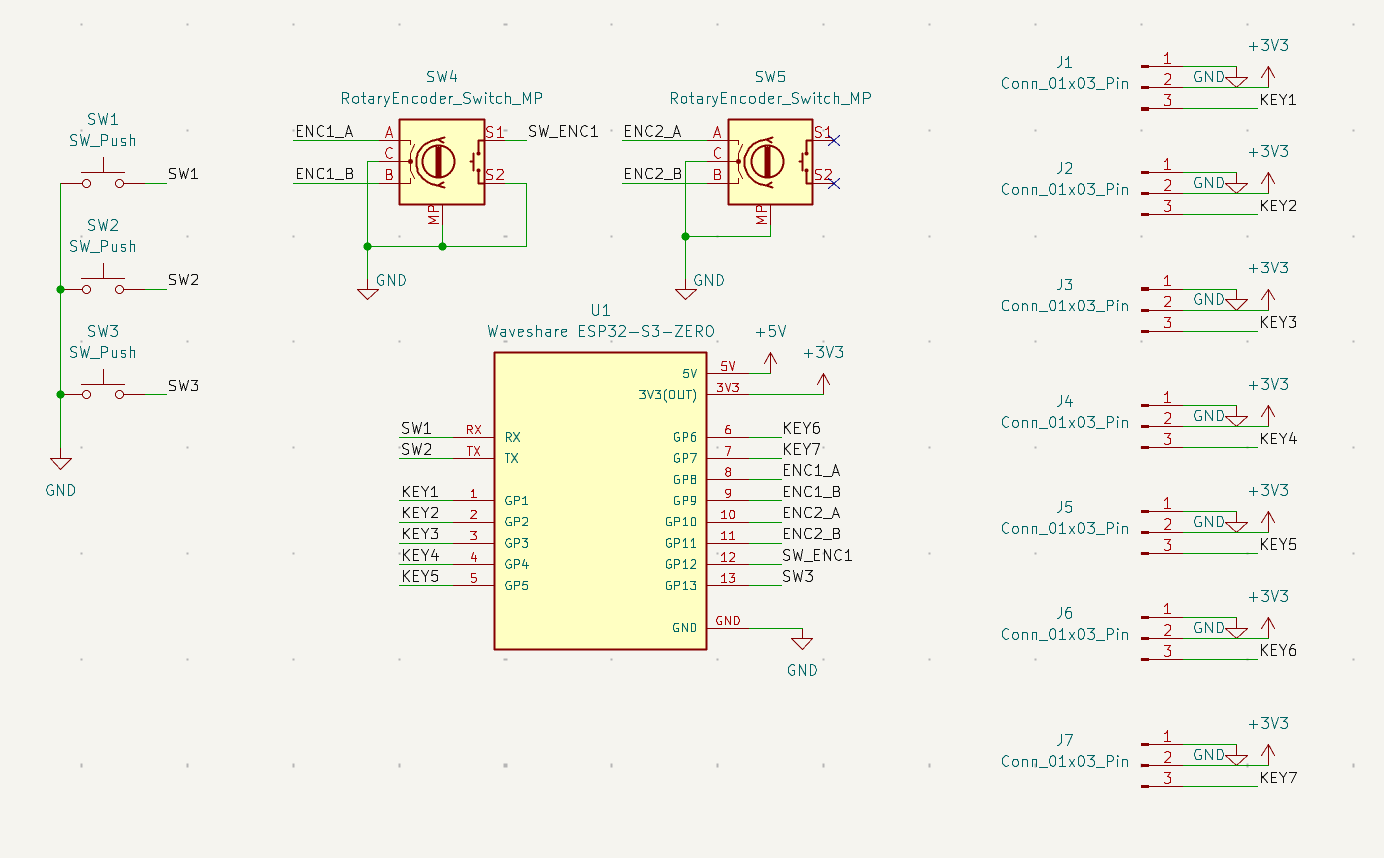 ^ My initial schematic with 7 touch sensors
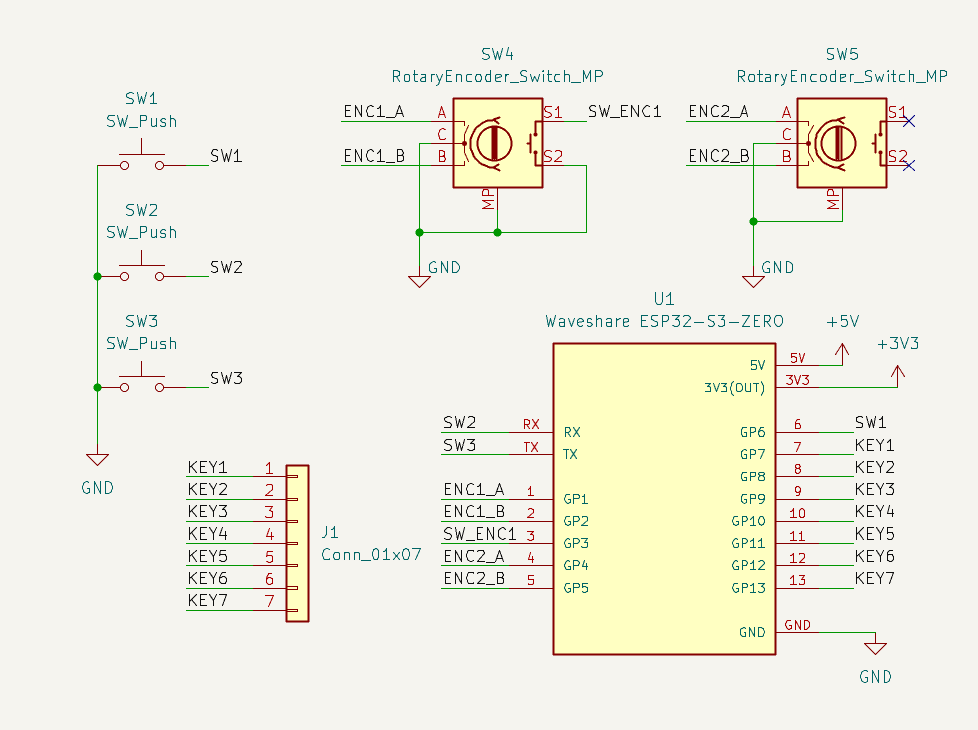
I used all the pins on my esp32-s3, and my final schematic looks like this-
After assigning footprints, I updated the PCB from the schematic and began to make my rectangular capacitive touch keys. I've decided to make them 2x5 cm - big enough to play them, but small enough that the PCB size doesn't increase drastically. I made the traces as direct as possible, and routed them. I used the front copper layer for all the traces except the ground ones, as I found that I had enough space for all of them.
I then added doodles to the front and the back, and finally, I added the 3D models from the MIDI repo and the Week 1 Starbie care package.
This was one of the first hardware projects I've done, and the first music-realted project I've done. I learnt a lot, including how to -
As soon as I finish the firmware - I will update this column >_<.
| Part | What it's for | Qty | Unit | Total | Vendor |
|---|---|---|---|---|---|
| XIAO-ESP32-C3 | Microcontroller | 1 | $7.74 | $7.74 | Robu.in |
| MAX98357A Amplifier | Amp for the speaker | 1 | $2.00 | $2.00 | Robu.in |
| DHT11 | Environment sensor | 1 | $0.53 | $0.53 | Robocraze.com |
| MPU6050 | Accelerometer & gyroscope | 1 | $1.56 | $1.56 | Robocraze.com |
| 0.96 OLED | Display | 1 | $1.75 | $1.75 | Robocraze.com |
| Kailh Switches (pack of 10) | Controls (buttons) | 1 | $1.45 | $1.45 | Meckeys.com |
| Blank DSA Keycaps (Set of 5) | Keycaps for the buttons | 1 | $1.03 | $1.03 | Meckeys.com |
| Speaker (1 Watt 8 Ohm oval mini) | Talking! | 1 | $0.51 | $0.51 | Probots |
| PCB | Circuitry & connections | 1 | $9.30 | $9.30 | Robu.in |
| Parts subtotal | — | — | — | $25.87 | — |
| Tax & shipping | — | — | — | $3.06 | — |
| Total | — | — | — | $28.93 | — |
Final schematic-
This is my current PCB-
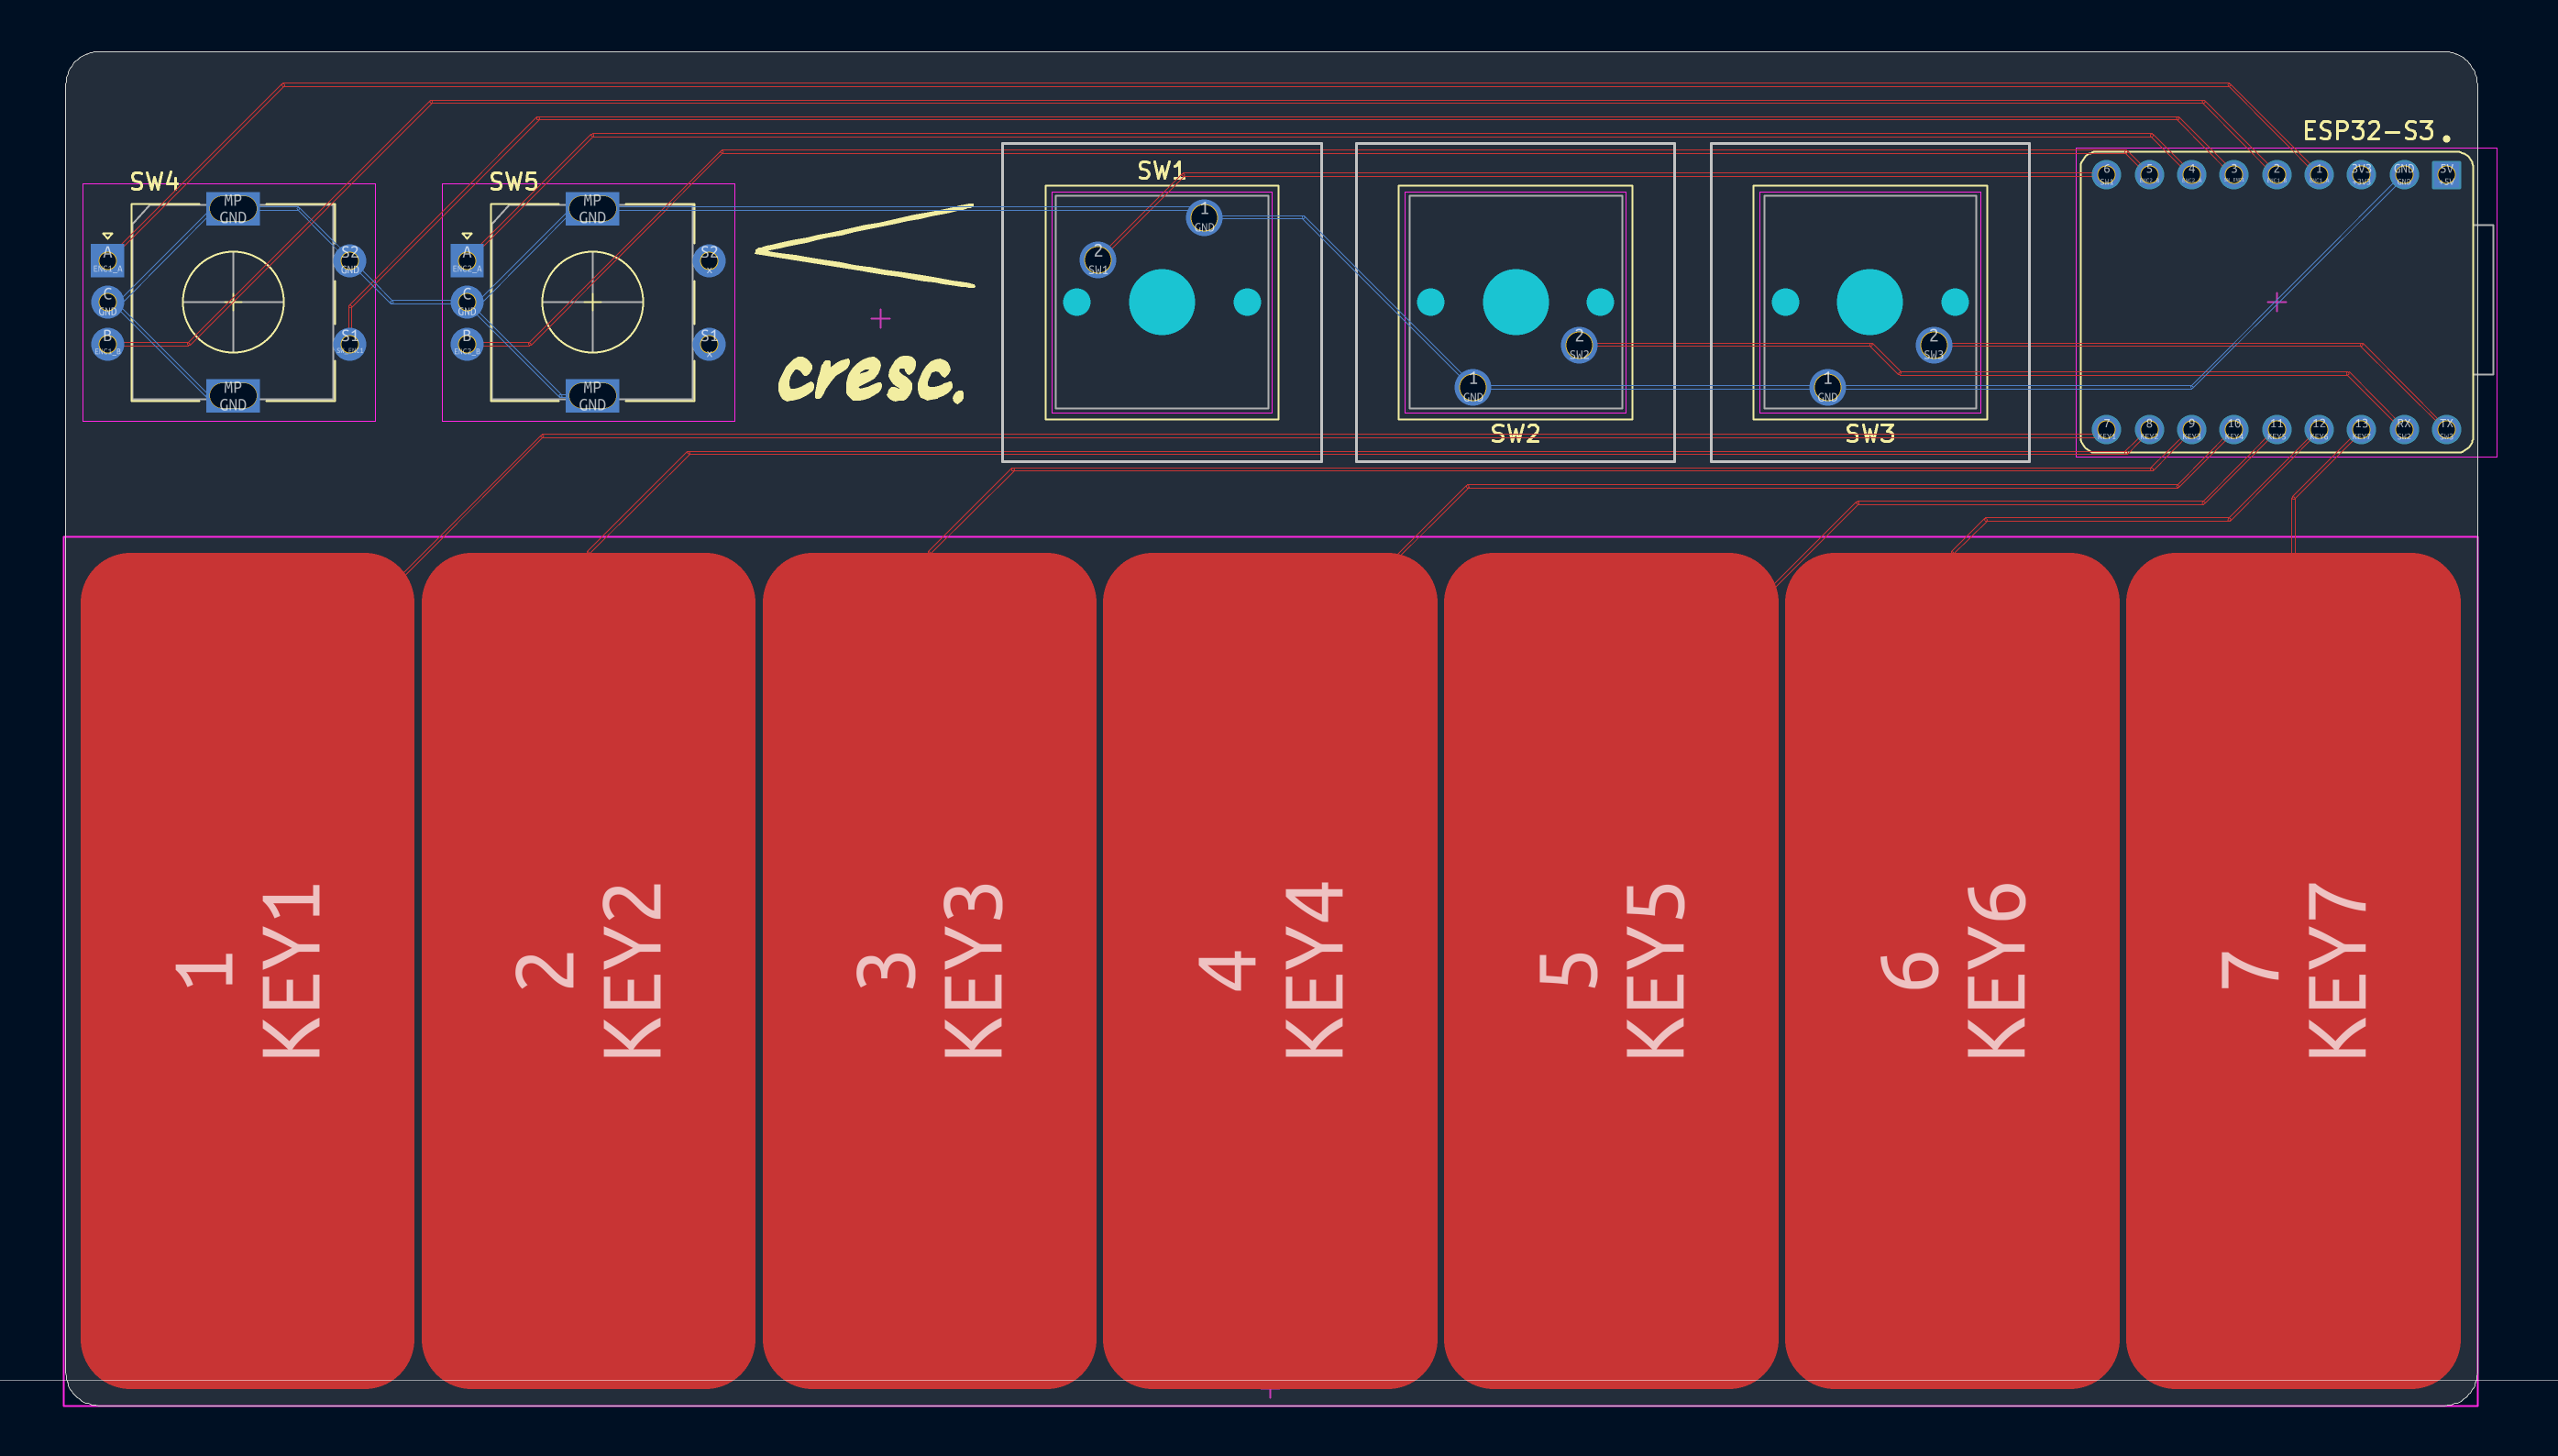
And its backside-
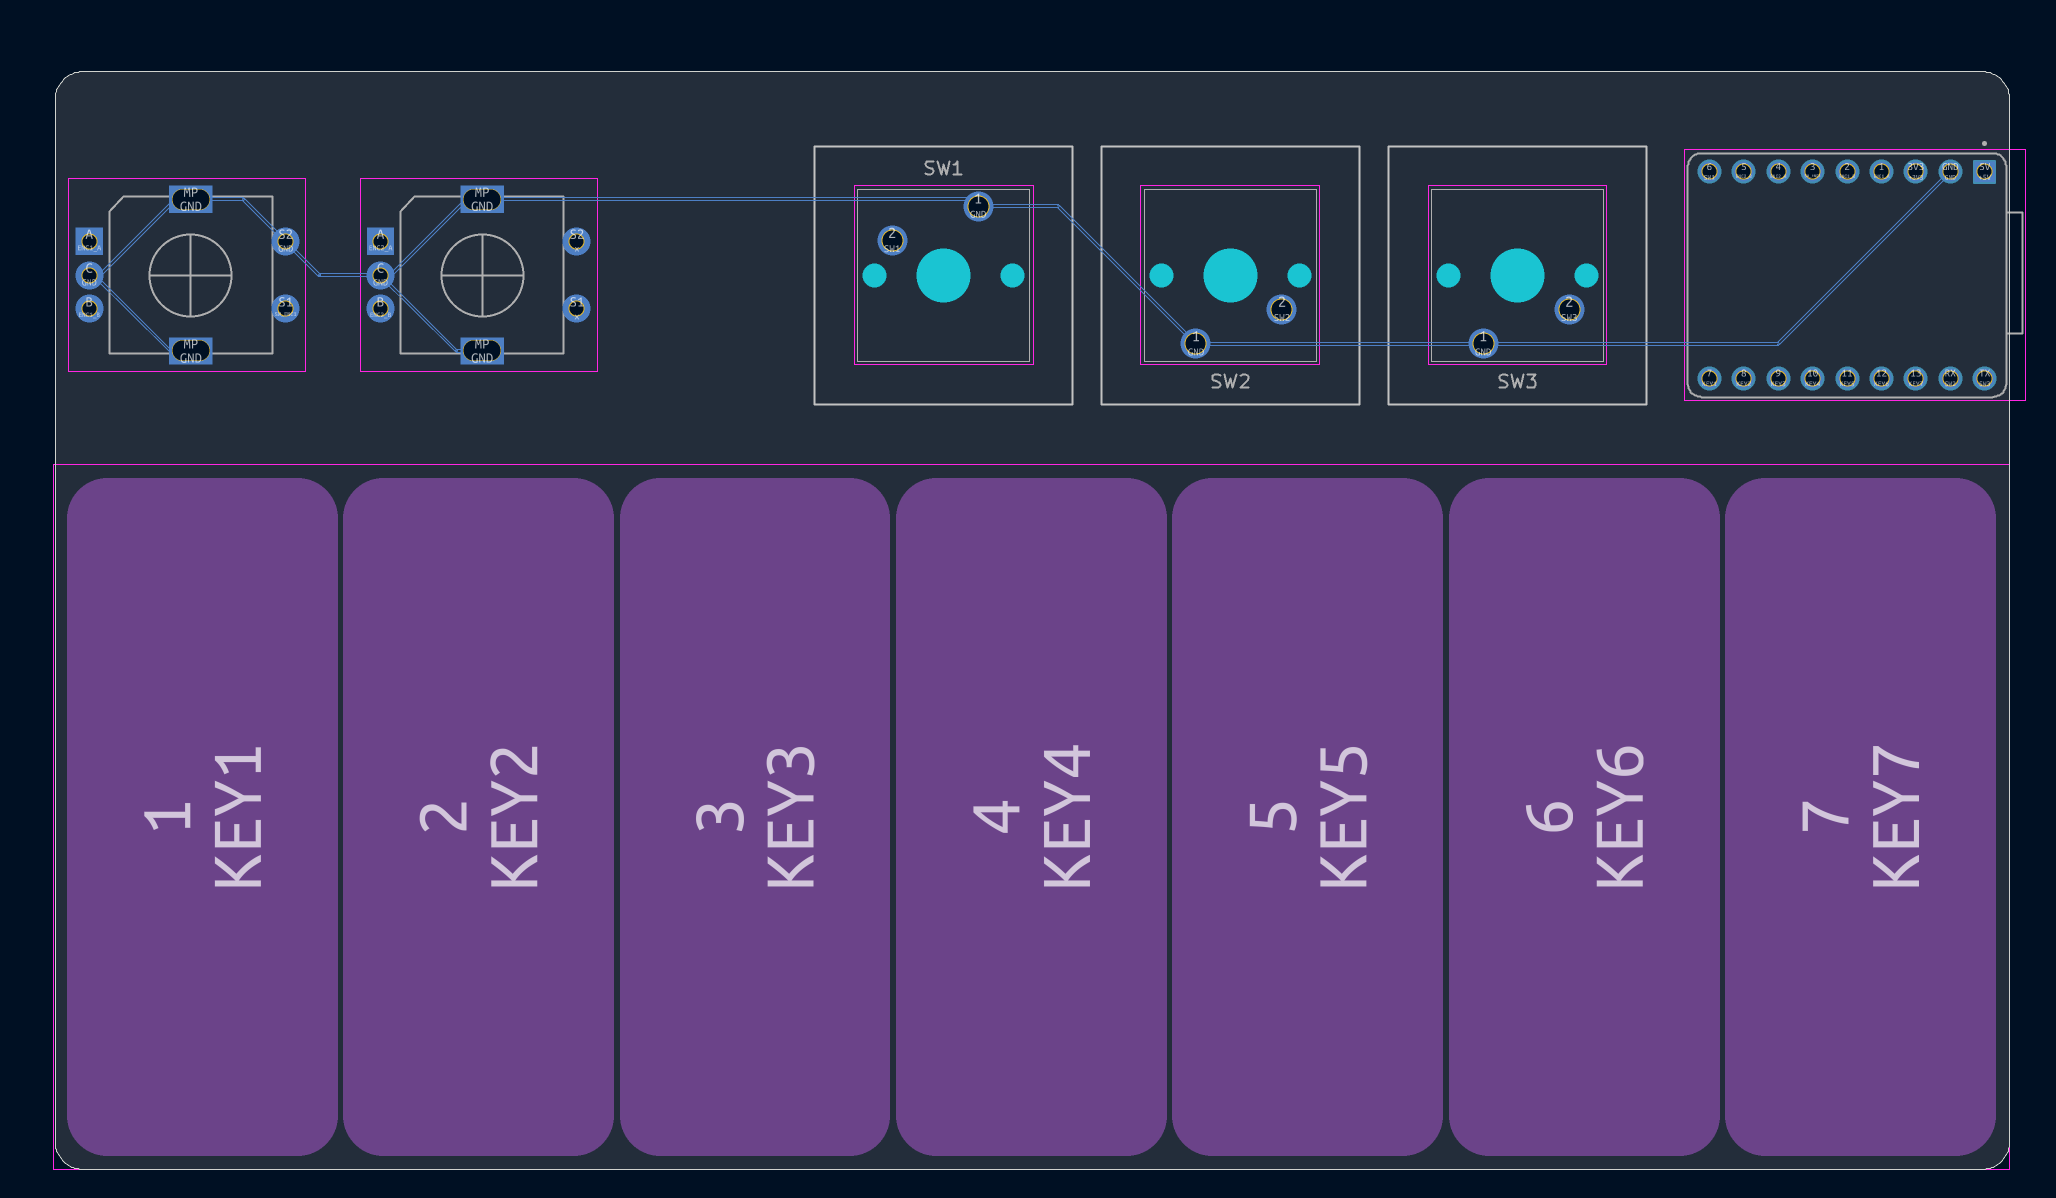
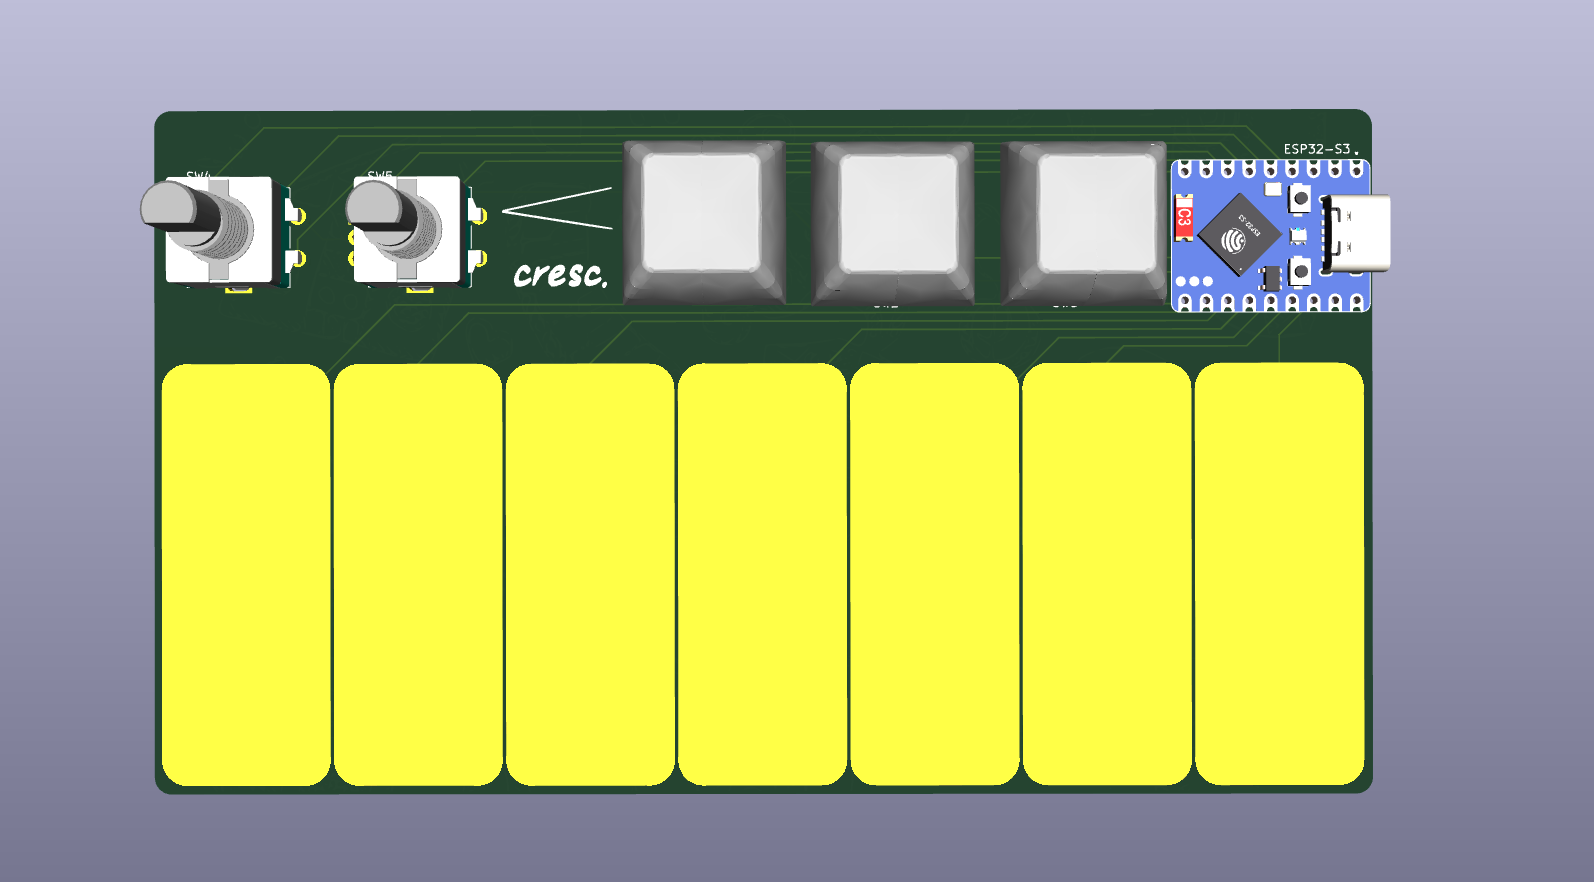 ^ The front side
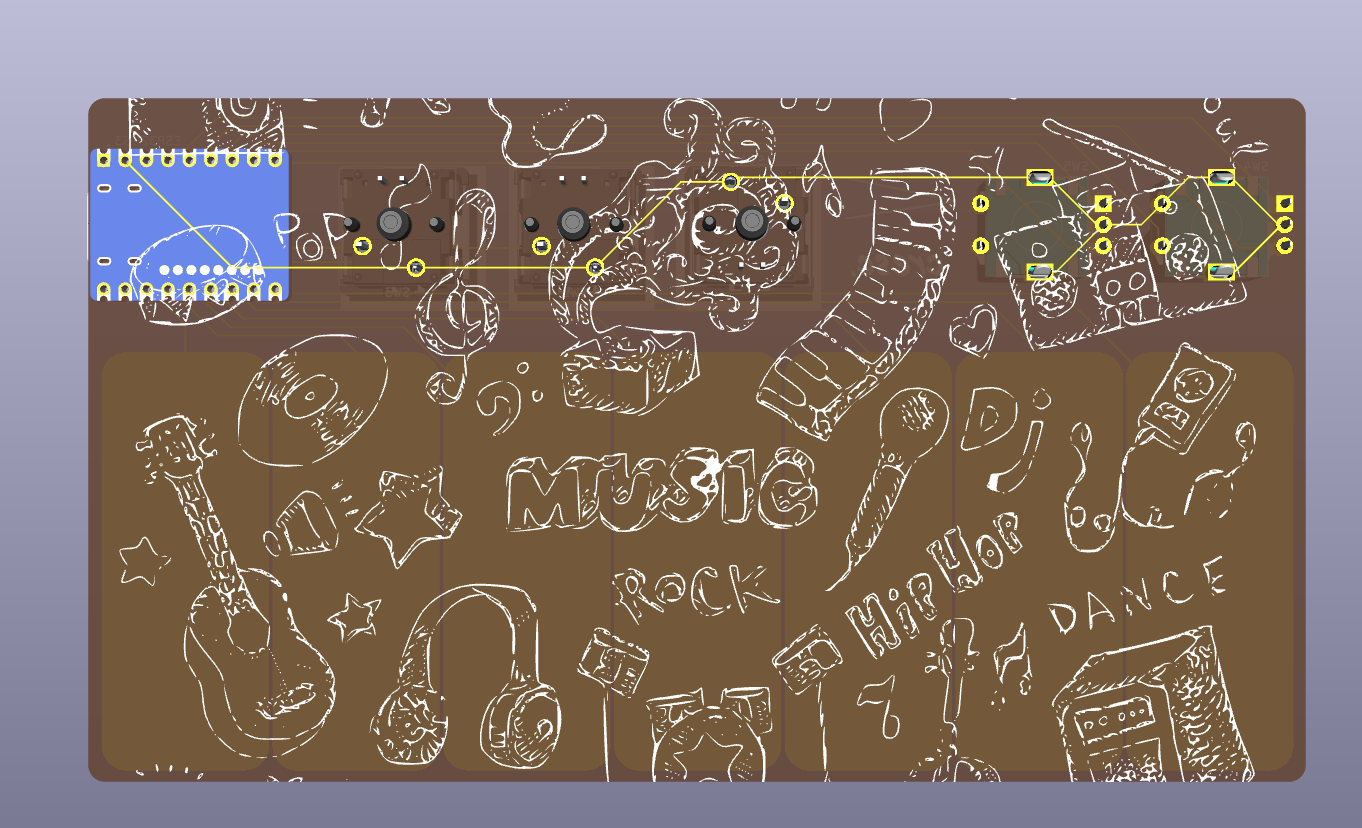 ^ And the back
This project would not have been possible without the constant support of the Halflife community, and the detailed guidance given in the MIDI-Keypad guide. I loved designing this project and I can't wait to build the PCB, and create my own music!
| Qty | Value | Footprint | References |
|---|---|---|---|
| 3 | SW_Push | Button_Switch_Keyboard:SW_Cherry_MX_1.00u_PCB | SW1, SW2, SW3 |
| 2 | LOGO | LOGO | G***, G*** |
| 2 | RotaryEncoder_Switch_MP | Rotary_Encoder:RotaryEncoder_Alps_EC11E-Switch_Vertical_H20mm | SW4, SW5 |
| 1 | Conn_01x07 | Capacitive Keys:7_Keys | J1 |
| 1 | Waveshare ESP32-S3-ZERO | Hackclub Footprints:Waveshare ESP32-S3-Zero | ESP32-S3 |


FrameworkComputer/ExpansionCards
Reference designs and documentation to create Expansion Cards for the Framework Laptop

VoronDesign/Voron-Hardware
Cool Hardware designed by the Voron Design group

hackclub/OnBoard
💡 Join 1,000 teenagers and make your first PCB with a $100 grant!


adamws/kicad-kbplacer
KiCad plugin for automatic keyboard's key placement and routing
It measures 144.3 × 81 mm and has 2 copper layers, 1.6 mm thick.
9 parts. The full list of its parts is on this page, with links to each part's symbol and footprint where PCBKit's library has them.
From the a-hungrybookworm/crescendo repository on GitHub, at the commit this page was made from: the board is PCB_Files/Crescendo.kicad_pcb and its schematic PCB_Files/Crescendo.kicad_sch. PCBKit opens the board in the browser, with nothing to install.
Its repository states no licence, so its author keeps all rights: ask a-hungrybookworm before reusing the design.