2 layers37 × 19 mm
Passive rpi hub75-adapter
hzeller/rpi-rgb-led-matrix
Controlling up to three chains of 64x64, 32x32, 16x32 or similar RGB LED displays using Raspberry Pi GPIO
2 parts4.4kGPL-2.0

 WingTangWong/ESP8266_Programming_D1_Mini_Pogo_Jig14
Programming jig for ESP-12 modules using Wemos D1 Mini ESP8266 Module and Pogo Pins
ESP12 Harness is an open-source printed circuit board by WingTangWong, from the WingTangWong/ESP8266_Programming_D1_Mini_Pogo_Jig repository on GitHub, published under the GPL-3.0 licence. It is a 2-layer board of 50 × 50 mm with 2 parts on 16 nets, routed with 169 tracks and 10 vias.
It belongs with the ESP8266 boards of this library.
This board makes use of a WemosD1Mini (ESP8266 version) board as a USB->SERIAL adapter to flash ESP-12 modules via POGO pins.
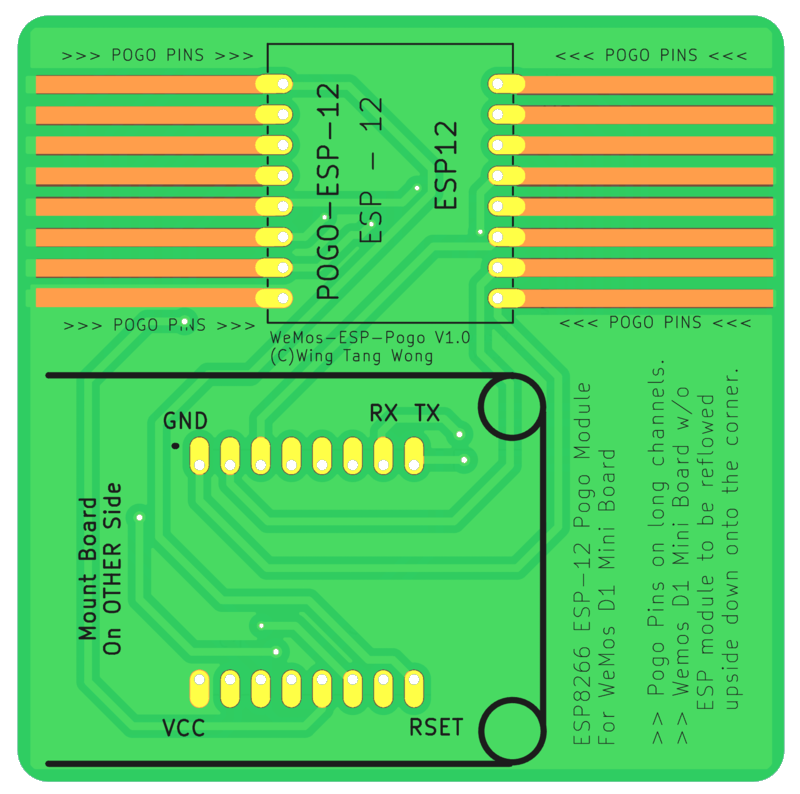
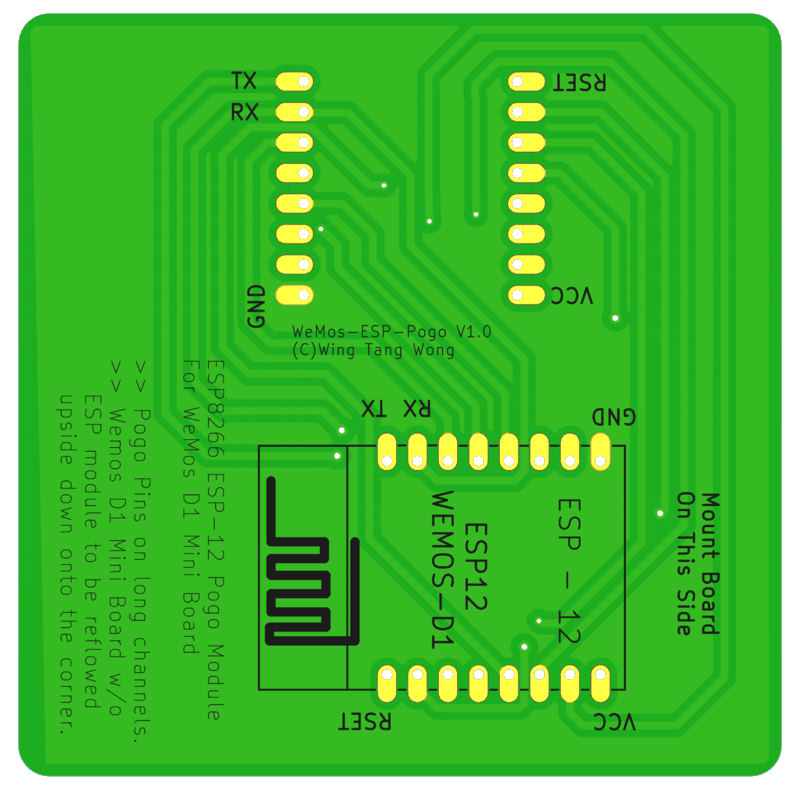
This is a board designed to take a WeMos D1 Mini board(with the ESP module removed) and use it as a USB interface with built-in reset/flash functionality for bare ESP8266 modules similar to the ESP-12 units.
The PCB was drawn up in Eagle and I have successfully gotten them manufactured through OshPark.
They are designed to be used with Pogo pins. I STRONGLY recommend the mushroom head type.
The D1 Mini board is to be mated to the PCB in a manner similar to ball grid array: add solder to the pads where the ESP module was to give it a bump.
Rest the board on the PCB within the outline with the bumps facing their matching set of pads and heat from below with a hot air gun. When the solder melts, the boards will come together. Presuming no bridges, you should be good to go.
| Qty | Value | Footprint | References |
|---|---|---|---|
| 2 | ESP12 | ESP12_Harness:ESP12 | POGO-ESP-12, WEMOS-D1 |
hzeller/rpi-rgb-led-matrix
Controlling up to three chains of 64x64, 32x32, 16x32 or similar RGB LED displays using Raspberry Pi GPIO


adamws/kicad-kbplacer
KiCad plugin for automatic keyboard's key placement and routing

Luos-io/luos_engine
Open-source and real-time orchestrator for cyber-physical-systems, to easily design, test and deploy embedded applications and digital twins.

NVNTLabs/switch2-SDEX2M2
Micro SD Express to M.2 NVME Adapter for Nintendo Switch 2

BlueSCSI/BlueSCSI-v2
BlueSCSI v2/Ultra - an open source, open hardware, SCSI emulator using the Pi Pico PR2040 and Pico 2 RP2350

ohmtech-rdi/eurorack-blocks
Software to Hardware Prototyping for Eurorack using C++, Max/Gen~ or Faust

It measures 50 × 50 mm and has 2 copper layers, 1.6 mm thick.
2 parts. The full list of its parts is on this page, with links to each part's symbol and footprint where PCBKit's library has them.
From the WingTangWong/ESP8266_Programming_D1_Mini_Pogo_Jig repository on GitHub, at the commit this page was made from: the board is KICAD/ESP12_Harness.kicad_pcb and its schematic KICAD/ESP12_Harness.kicad_sch. PCBKit opens the board in the browser, with nothing to install.
Its repository publishes it under the GPL-3.0 licence: you may reuse it on that licence's terms (keep the author's notice, and for a copyleft licence share your changes alike).