2 layers20.5 × 24.8 mm
 SabhyaAggarwal/SabhyaPad
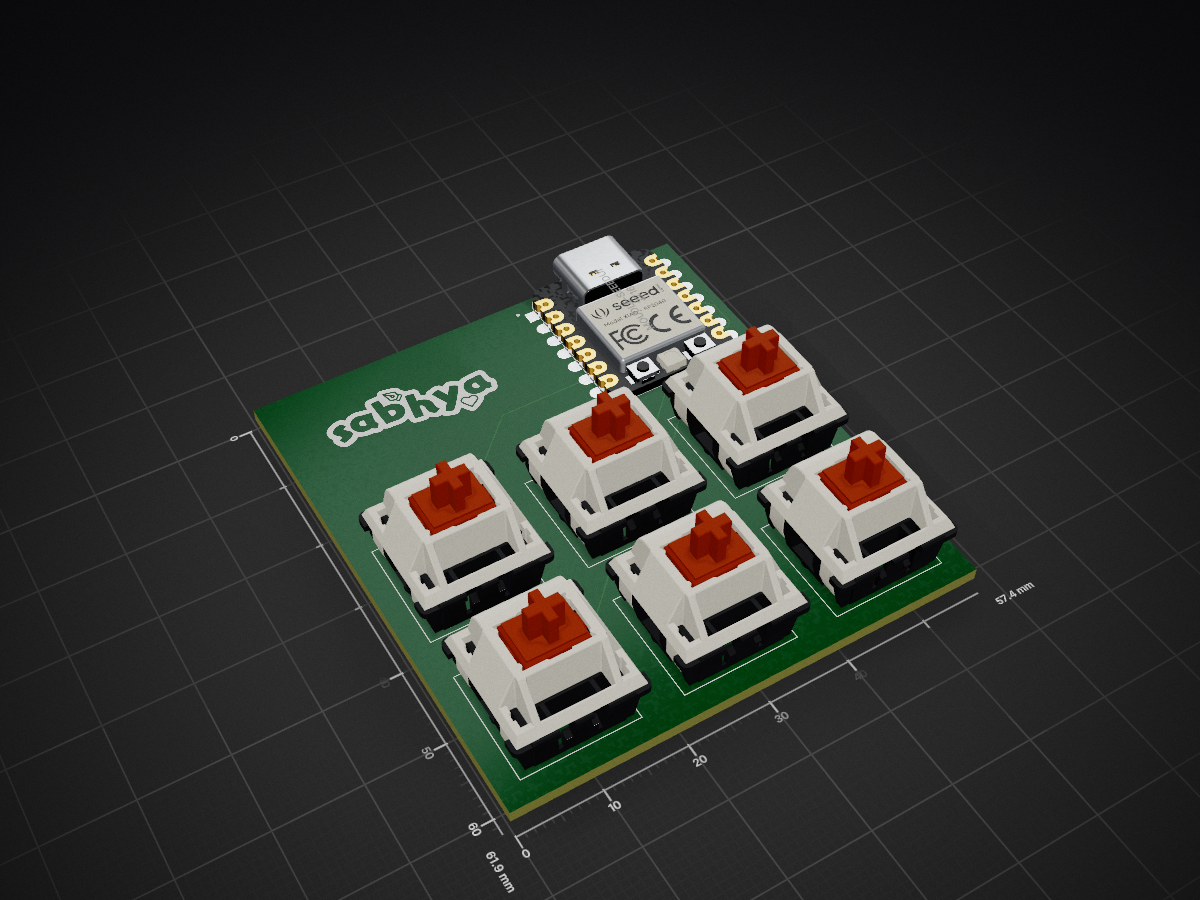
This is my own MacroPad, called SabhyaPad! It has 6 buttons that can easily be customized using QMK. Using it is really simple: just plug a USB-C cable into your computer, allow it to connect, and then start using it.
SabhyaPad is an open-source printed circuit board by SabhyaAggarwal, from the SabhyaAggarwal/SabhyaPad repository on GitHub. It is a 2-layer board of 57.3 × 61.8 mm with 8 parts on 14 nets, routed with 33 tracks and 0 vias.
Its parts include 6 switches and 1 IC. It belongs with the keyboards and input boards of this library.
This is my own MacroPad, called SabhyaPad! It has 6 buttons that can easily be customized using QMK. Using it is really simple: just plug a USB-C cable into your computer, allow it to connect, and then start using it.
I made this so that my life is easier. Currently, it is configured to do this...
| Item | Quantity | Remarks | Unit Price 1 (INR) | Order Quantity | Order Unit Price (INR) | Order Unit Price (Est. USD) | Link To Buy |
|---|---|---|---|---|---|---|---|
| Switches | 6 | Switches of MX style. | ₹93.18 | 6 | ₹93.18 | $1.00 | https://www.mouser.in/ProductDetail/CHERRY/MX1A-L1NN?qs=F5EMLAvA7IDlALNAurZTXA%3D%3D |
| Seeed Studio Xiao RP2040 | 1 | Main Chip. | ₹464.97 | 1 | ₹464.97 | $4.90 | https://www.mouser.in/ProductDetail/Seeed-Studio/102010630?qs=sqEgtWRSLJ0HHL%252BkmwiGyA%3D%3D |
| Blank DSA keycaps | 6 | Blank DSA keycaps of black colour(3d printed). | ₹2.13 | 6 | ₹12.75 | $0.13 | Own 3d printer or print-legion |
| PCB | 1 | Main PCB. | ₹1112.00 | 1 | ₹95.25 | $1.00 | allpcb.com |
| M3x16mm screws | 4 | Screws. | ₹12.27 | 4 | ₹49.09 | $0.51 | https://robokits.co.in/robot-parts/nut-bolts-standoffs/mushroom-head-bolts/m3-x-16-mm-ss-bolt-precision-stainless-steel-304-moq-25-pcs |
| M3 nuts | 4 | Nuts | ₹1.18 | 4 | ₹4.72 | $0.05 | https://robokits.co.in/robot-parts/nut-bolts-standoffs/nuts/m3-nuts-304-stainless-steel-moq-50-pcs |
This is the schematic of my PCB...
And this is what my PCB design looks like...
Please note that I will add USB-C port after I receive the PCB and can confirm the measurements
For assembly:
The SabhyaPad firmware is based on QMK Firmware and is located in:
FIRMWARE/sabhyapadInstall QMK MSYS from:
After installation, open QMK MSYS and verify it is installed correctly:
qmk --versionClone and set up QMK Firmware:
qmk setupNavigate to the keyboards directory:
cd qmk_firmware/keyboardsClone this repository:
git clone https://github.com/SabhyaAggarwal/SabhyaPad.gitReturn to the QMK root directory:
cd ../..Compile the firmware:
qmk compile -kb sabhyapad -km defaultOr:
make sabhyapad:defaultA successful build will generate:
sabhyapad_default.uf2Since SabhyaPad uses an RP2040 microcontroller, the firmware is generated in UF2 format.
sabhyapad_default.uf2onto the drive.
The keyboard will automatically reboot and start running the new firmware.
Pull the latest changes:
cd qmk_firmware/keyboards/SabhyaPad
git pull
Rebuild:
cd ../..
qmk compile -kb sabhyapad -km defaultCheck your QMK installation:
qmk doctorClean and rebuild:
qmk clean
qmk compile -kb sabhyapad -km default
List available keymaps:
qmk list-keymaps -kb sabhyapadqmk setup
cd qmk_firmware/keyboards
git clone https://github.com/SabhyaAggarwal/SabhyaPad.git
cd ../..
qmk compile -kb sabhyapad -km default| Qty | Value | Footprint | References |
|---|---|---|---|
| 6 | SW_Push | Button_Switch_Keyboard:SW_Cherry_MX_1.00u_PCB | SW1, SW2, SW3, SW4, SW5, SW6 |
| 1 | LOGO | footprints:Silkscreen | G*** |
| 1 | MOUDLE-SEEEDUINO-XIAO | footprints:XIAO-Generic-Hybrid-14P-2.54-21X17.8MM | U1 |

joeycastillo/Sensor-Watch
A board replacement for the classic Casio F-91W wristwatch

rusefi/rusefi
rusefi - GPL internal combustion engine control unit

hoglet67/RGBtoHDMI
Bare-metal Raspberry Pi project that provides pixel-perfect sampling of Retro Computer RGB/YUV video and conversion to HDMI

shanteacontrols/OpenDeck
A platform for building interactive control and sensing devices using MIDI and OSC built with Zephyr RTOS.

hackclub/OnBoard
💡 Join 1,000 teenagers and make your first PCB with a $100 grant!

dangiu/PicoMemcard
Emulating PSX Memory Card (or controller) using a Raspberry Pi Pico

OLIMEX/DIY-LAPTOP
Do It Yourself Open Source Hardware and Software Modular Hacker's Friendly Laptop
It measures 57.3 × 61.8 mm and has 2 copper layers, 1.6 mm thick.
8 parts. The full list of its parts is on this page, with links to each part's symbol and footprint where PCBKit's library has them.
From the SabhyaAggarwal/SabhyaPad repository on GitHub, at the commit this page was made from: the board is PCB/SabhyaPad.kicad_pcb and its schematic PCB/SabhyaPad.kicad_sch. PCBKit opens the board in the browser, with nothing to install.
Its repository states no licence, so its author keeps all rights: ask SabhyaAggarwal before reusing the design.