
2 layers83.8 × 68.6 mm
RG Led ring
RudgeLab/FluoPi
Code and teaching materials for UC/BackyardBrains raspberry pi "macro" scope.
32 parts26
 RudgeLab/FluoPi26
Code and teaching materials for UC/BackyardBrains raspberry pi "macro" scope.
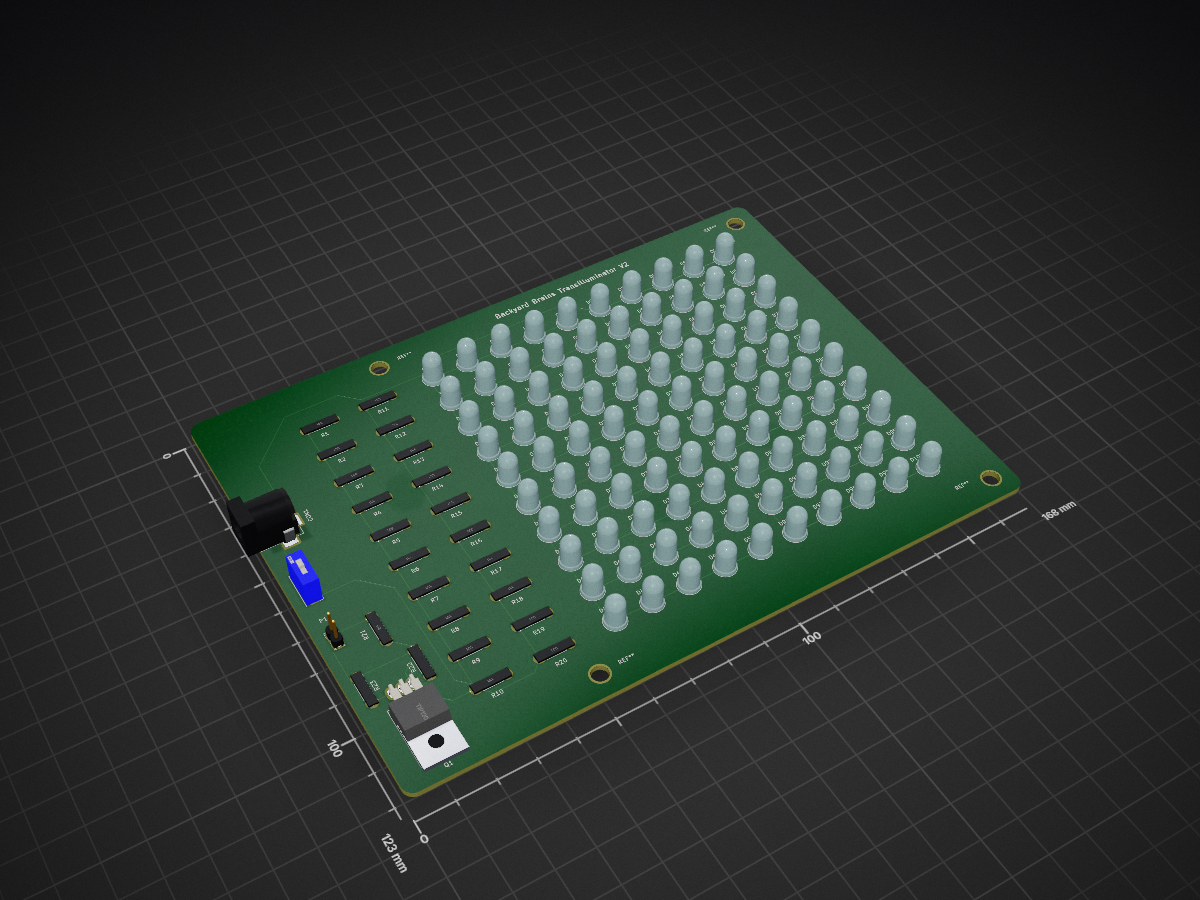
V2 - 2 is an open-source printed circuit board by RudgeLab, from the RudgeLab/FluoPi repository on GitHub. It is a 2-layer board of 168 × 123 mm with 131 parts on 105 nets, routed with 286 tracks and 0 vias.
It is built around the TIP120. Its parts include 100 diodes, 23 resistors, 2 connectors, 1 transistor and 1 switch.

Hardware design files, code and teaching materials for a low cost and open source fluorescent image registration station.
FluoPi is composed of a blue-light transilluminator, an amber acrylic filter and a raspberry camera contained in a black acrylic mainframe. All the hardware is controlled with a Raspberry pi small computer. With this equipment you are able to:
You can see the full project at OSF and a pre-print manuscript at Biorxiv and peer-reviewed article in PLoS
To assemble this device you need access to a laser cutter and a 3D printer. You also need a mouse, keyboard and a screen with HDMI (or hdmi to VGA adaptor) to connect with the Raspberry pi (you can also manage the equipment through SSH or using programs such as teamviewer)
All the installation instructions are available on the wiki page
Full documentation and assembly instructions can be found at Docubricks
The equipment has a manual switch and the camera can be controlled with camera module commands. The project includes some python codes (based on camera python module) to control the hardware:
Jupyter notebooks are included (Examples/ and Tutorials/) to demonstrate the analysis principles and the use of the fluopi module to analyse time-lapse image data. Sample image data is included in the relevant folders. You can start from these examples, switching the file paths to your data.
Universidad Catolica de Chile
This project is licensed under the MIT License - see the LICENSE.txt file for details. Hardware is lincesed under the CERN license.
Please follow updates, ask questions and check FAQs in this doc
Toby Wenzel for guidance on Docubricks documentation
Tom Baden and Andre Chagas for feedback and advice on camera
Bernardo Pollak for helping out with sequences
Douglas Densmore for the CIDAR MoClo Parts Kit
OpenPlant Fund and Fondecyt for providing financial support

| Qty | Value | Footprint | References |
|---|---|---|---|
| 100 | LED | LEDs:LED-5MM | D1, D2, D10, D11, D12, D13, D14, D15, D16, D17, D18, D19, D20, D21, D22, D100 +84 |
| 20 | 330 | Resistors_ThroughHole:Resistor_Horizontal_RM7mm | R1, R2, R3, R4, R5, R10, R11, R12, R13, R14, R15, R16, R17, R18, R19, R20 +4 |
| 2 | Np | Resistors_ThroughHole:Resistor_Horizontal_RM7mm | R22, R23 |
| 1 | 1k | Resistors_ThroughHole:Resistor_Horizontal_RM7mm | R21 |
| 1 | BARREL_JACK | Connect:BARREL_JACK | CON1 |
| 1 | CONN_01X02 | Pin_Headers:Pin_Header_Straight_1x02 | P1 |
| 1 | SPST | Buttons_Switches_ThroughHole:SW_DIP_x1_Slide | SW1 |
| 1 | TIP120 | TO_SOT_Packages_THT:TO-220_Neutral123_Horizontal | Q1 |
The 127 most common of 131 parts.
RudgeLab/FluoPi
Code and teaching materials for UC/BackyardBrains raspberry pi "macro" scope.

RudgeLab/FluoPi
Code and teaching materials for UC/BackyardBrains raspberry pi "macro" scope.

RudgeLab/FluoPi
Code and teaching materials for UC/BackyardBrains raspberry pi "macro" scope.


robsonsmartins/usbflashprog
A memory device programmer (Flash/EPROM/E2PROM) board and software, connected to PC by USB port.

dcpedit/mission-control
Modern replacement PCB for the IBM Model M 122

jones139/catocam
Uses a custom trained YoloV8 model on a Raspberry Pi to Detect Cats in CCTV images and Unleash a Cat Deterrent

dcpedit/taptap
TapTap is a solenoid breakout board for those who are interested in adding a solenoid to their existing project. All you need are the following components, and an extra data pin on your microcontroller.


alexose/synthwave
An open-source experiment in carbon removal based on the electrochemical pH swing of seawater.

JellyTitan/ErgoDonk
ErgoDox variant using standard SA keycaps, FDM case, and blackpill MCU
It measures 168 × 123 mm and has 2 copper layers, 1.6 mm thick.
131 parts, built around the TIP120. The full list of its parts is on this page, with links to each part's symbol and footprint where PCBKit's library has them.
From the RudgeLab/FluoPi repository on GitHub, at the commit this page was made from: the board is Hardware_design_files/PCB/V2 - 2 .kicad_pcb. PCBKit opens the board in the browser, with nothing to install.
Its repository states no licence, so its author keeps all rights: ask RudgeLab before reusing the design.