2 layers47.6 × 27.3 mm
 RetroStack/TRS-80-Model-I-Arduino-Library5
An Arduino Library for the TRS-80 Model 1
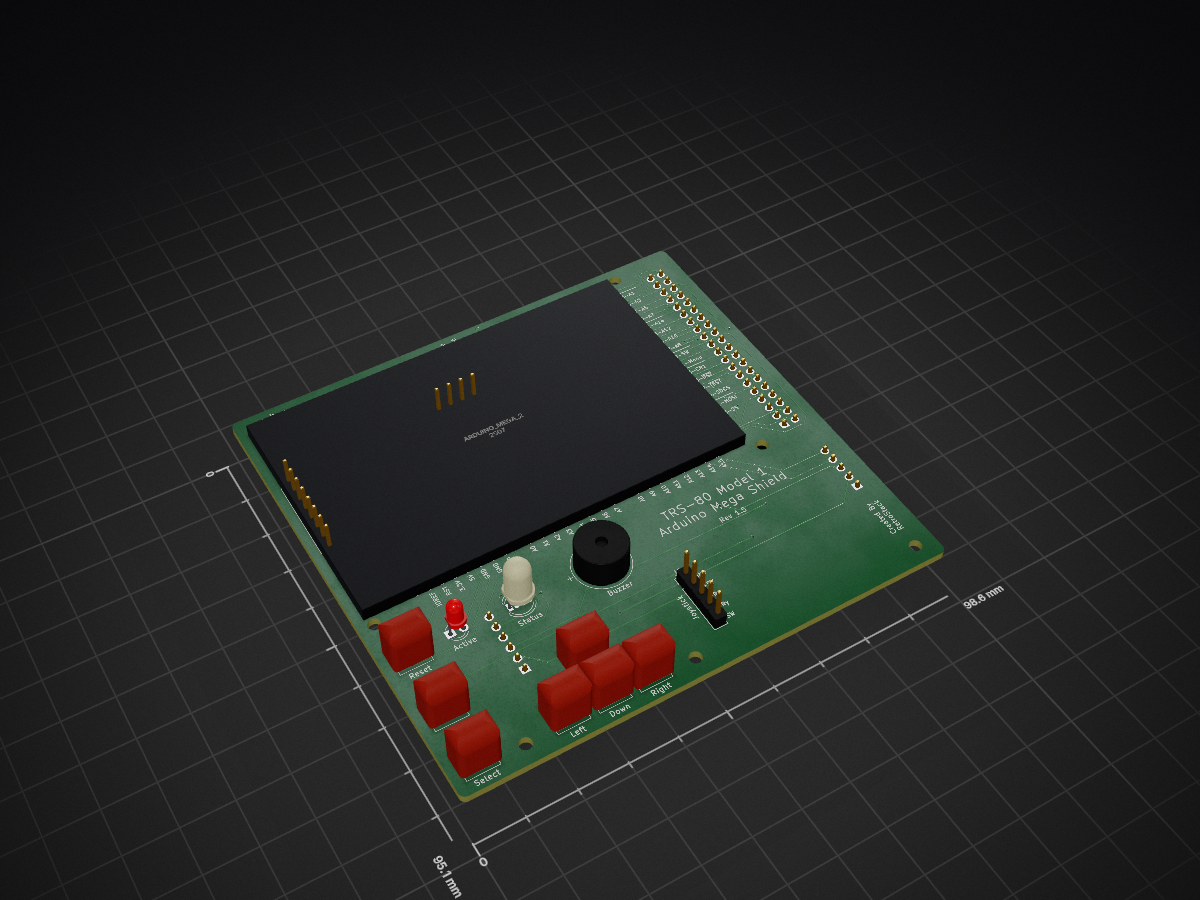
TRS80 Model I Arduino Mega Shield is an open-source printed circuit board by RetroStack, from the RetroStack/TRS-80-Model-I-Arduino-Library repository on GitHub, published under the MIT licence. It is a 2-layer board of 98.6 × 95.1 mm with 27 parts on 89 nets, routed with 618 tracks and 32 vias.
Its parts include 9 resistors, 7 switches, 6 connectors, 2 diodes and 1 IC. It belongs with the AVR (ATmega, ATtiny) boards of this library.
NOTE: There are still a lot of changes that are happening within this library. Use this only for testing. We will make breaking changes. A stable version will be released shortly before TA 2025.
Arduino library for interfacing with TRS-80 Model I hardware via the 40-pin edge connector. Control memory, video, keyboard, and bus signals to create ROM dumpers, RAM testers, and custom peripherals.
Hardware Required: Arduino Mega 2560 (only board with sufficient GPIO pins)
#include <M1Shield.h>
#include <Display_ST7789_320x240.h>  // Choose your display

Display_ST7789_320x240 displayProvider;

void setup() {
    M1Shield.begin(displayProvider);
}

void loop() {
    M1Shield.loop();
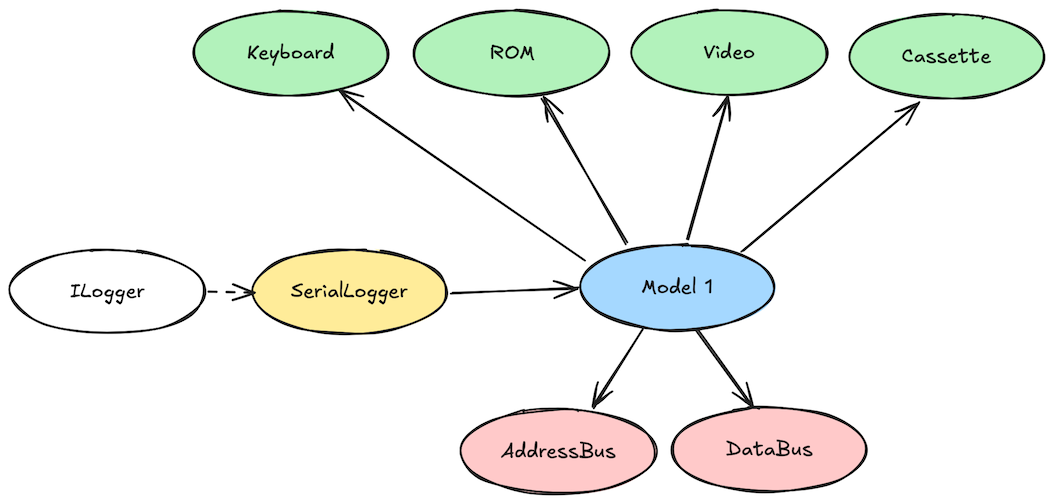
}#include <Model1.h>
void setup() {
Model1.begin();
Model1.activateTestSignal();
uint8_t data = Model1.readMemory(0x0000); // Read ROM
Model1.writeMemory(0x3C00, 0x41); // Write to video RAM
Model1.deactivateTestSignal();
}#include <ContentScreen.h>
class MyScreen : public ContentScreen {
public:
MyScreen() {
// Three ways to set titles/text - choose what fits your needs:
setTitle("Static Title"); // Simple C-string
setTitle(String("Score: ") + String(score)); // Dynamic Arduino String
setTitleF(F("Memory Efficient")); // Flash string (F-macro)
}
protected:
void _drawContent() override {
// Draw dynamic content easily
String playerName = "Alice";
drawText(10, 10, String("Player: ") + playerName, WHITE);
drawTextF(10, 30, F("Static text"), YELLOW); // Saves RAM
}
};Complete Examples Guide - Comprehensive examples with progressive learning paths
The examples folder contains over 40 examples organized by functionality:
All examples follow a Simple/Comprehensive pattern for progressive learning, with complete documentation and integration guidance.
M1Shield (Recommended): Clean, safe connection with built-in display and controls
Direct Wiring: Connect via jumper wires using our pin mapping guide
WARNING: See TEST Signal Fix for hardware reliability improvement
Complete Documentation - Detailed API reference and guides
For additional resources related to the TRS-80 Model 1, be sure to check out the central page for the TRS-80 Model 1 on RetroStack.
RetroStack is passionate about exploring and preserving the legacy of older computer systems. My work involves creating detailed documentation and videos to share the knowledge. I am also dedicated to reviving these classic systems by reimplementing them and offering replacement parts at no cost. If you're keen on supporting this unique project, I invite you to visit my Patreon page. Your support would be immensely valuable and greatly appreciated!
This project is licensed under the MIT License - see the LICENSE file for details.
| Qty | Value | Footprint | References |
|---|---|---|---|
| 5 | 2.2k | Resistor_THT:R_Axial_DIN0207_L6.3mm_D2.5mm_P10.16mm_Horizontal | R5, R6, R7, R8, R9 |
| 4 | 330 | Resistor_THT:R_Axial_DIN0207_L6.3mm_D2.5mm_P10.16mm_Horizontal | R1, R2, R3, R4 |
| 1 | 3.3k | Resistor_THT:R_Array_SIP6 | RN1 |
| 1 | Arduino_Mega_2560 | RetroStackLibrary:Arduino_Mega_2560 | U1 |
| 1 | Buzzer | RetroStackLibrary:Buzzer | BZ1 |
| 1 | Cassette Int. | Connector_PinHeader_2.54mm:PinHeader_1x05_P2.54mm_Vertical | J2 |
| 1 | Down | RetroStackLibrary:SW_SPST_Push | SW4 |
| 1 | Edge Connector IDC | Connector_IDC:IDC-Header_2x20_P2.54mm_Vertical | J1 |
| 1 | I2C | Connector_PinHeader_2.54mm:PinHeader_1x04_P2.54mm_Vertical | J5 |
| 1 | Joystick | Connector_PinHeader_2.54mm:PinHeader_1x05_P2.54mm_Vertical | J6 |
| 1 | LED | LED_THT:LED_D3.0mm | D1 |
| 1 | LED_ABGR | LED_THT:LED_D5.0mm-4_RGB | D2 |
| 1 | Left | RetroStackLibrary:SW_SPST_Push | SW2 |
| 1 | Menu | RetroStackLibrary:SW_SPST_Push | SW6 |
| 1 | Reset | RetroStackLibrary:SW_SPST_Push | SW1 |
| 1 | Right | RetroStackLibrary:SW_SPST_Push | SW3 |
| 1 | SD Card | Connector_PinHeader_2.54mm:PinHeader_1x06_P2.54mm_Vertical | J3 |
| 1 | SPI Disp. | Connector_PinHeader_2.54mm:PinHeader_1x08_P2.54mm_Vertical | J4 |
| 1 | Select | RetroStackLibrary:SW_SPST_Push | SW7 |
| 1 | Up | RetroStackLibrary:SW_SPST_Push | SW5 |

hackclub/OnBoard
💡 Join 1,000 teenagers and make your first PCB with a $100 grant!


CRImier/MyKiCad
My KiCad boards. Can't be bothered uploading individually anymore, so here you go.

pjgpetecodes/pico-streamdeck
This project is an OBS Controller using a Raspberry Pi Pico and CircuitPython.

freeDSP/freeDSP-aurora
freeDSP ADAU1452 with 8 analog input, 8 analog outputs, S/P-DIF I/O, ADAT I/O, USB Audio Class2, WiFi, Bluetooth

ugcs/ddc
Drone Show Software is software designed for drone shows, allowing flight path planning as well as control of dozens of drones simultaneously in a synchronized manner.
It measures 98.6 × 95.1 mm and has 2 copper layers, 1.6 mm thick.
27 parts. The full list of its parts is on this page, with links to each part's symbol and footprint where PCBKit's library has them.
From the RetroStack/TRS-80-Model-I-Arduino-Library repository on GitHub, at the commit this page was made from: the board is Shield/TRS80_Model_I_Arduino_Mega_Shield.kicad_pcb and its schematic Shield/TRS80_Model_I_Arduino_Mega_Shield.kicad_sch. PCBKit opens the board in the browser, with nothing to install.
Its repository publishes it under the MIT licence: you may reuse it on that licence's terms (keep the author's notice, and for a copyleft licence share your changes alike).