2 layers50 × 23.2 mm
Analog
hoglet67/RGBtoHDMI
Bare-metal Raspberry Pi project that provides pixel-perfect sampling of Retro Computer RGB/YUV video and conversion to HDMI
32 parts1kGPL-3.0

 Nadoooor/SnakeHome
A Snake-Styled Smart Home Local_Host Powerful System.
SnakeHome is an open-source printed circuit board by Nadoooor, from the Nadoooor/SnakeHome repository on GitHub, published under the MIT licence. It is a 2-layer board of 51.5 × 53.5 mm with 32 parts on 48 nets, routed with 261 tracks and 9 vias.
Its parts include 19 resistors, 7 ICs, 5 connectors and 1 diode.
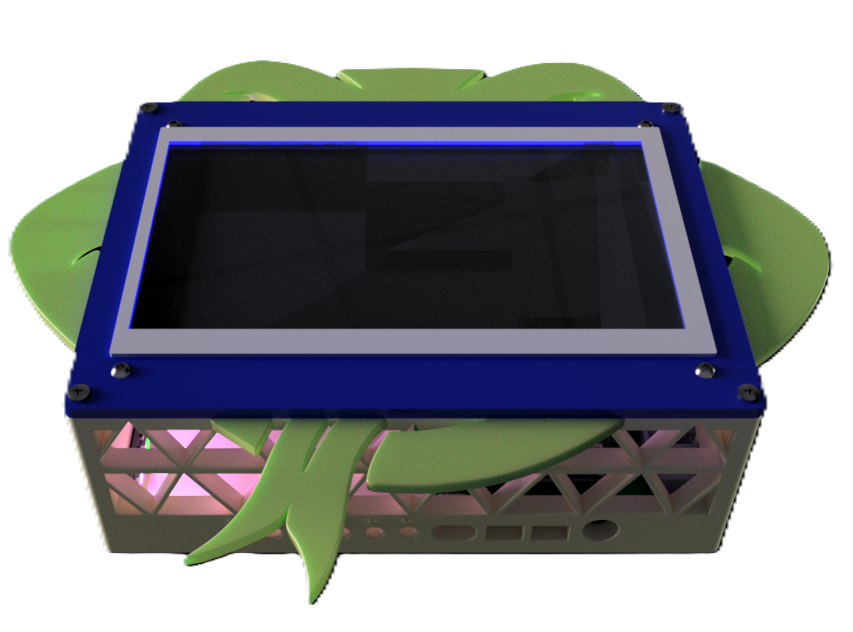
SnakeHome is a local-hosted powerful Snake-Styled automation system, based on HAOS and using wireless relays and some sensors. Hosted on a Raspi 4 and directly driving I2C sensors and Digital sensors, using the Raspi's GPIO.
I like that I can automate and smartly control my whole house, and also using my voice to control it. So, decided to make this project as i can host, control, automate, and integerate many things.
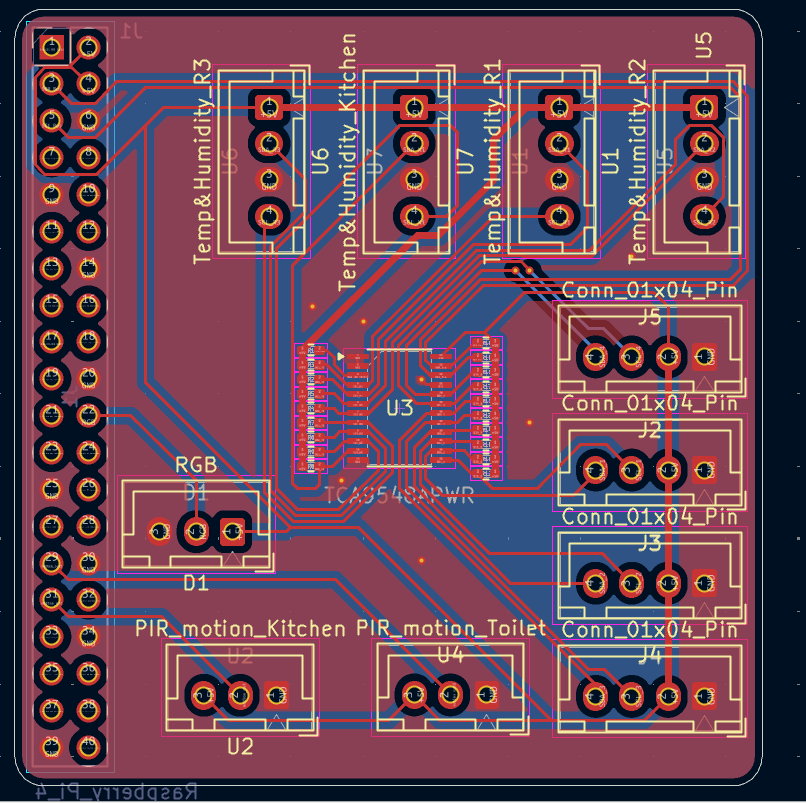
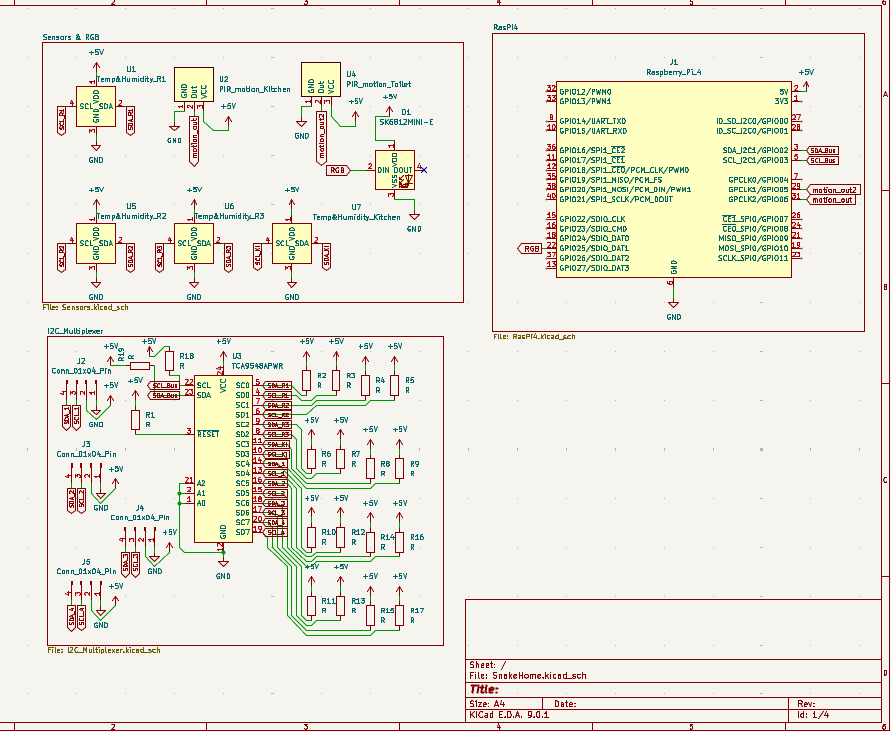
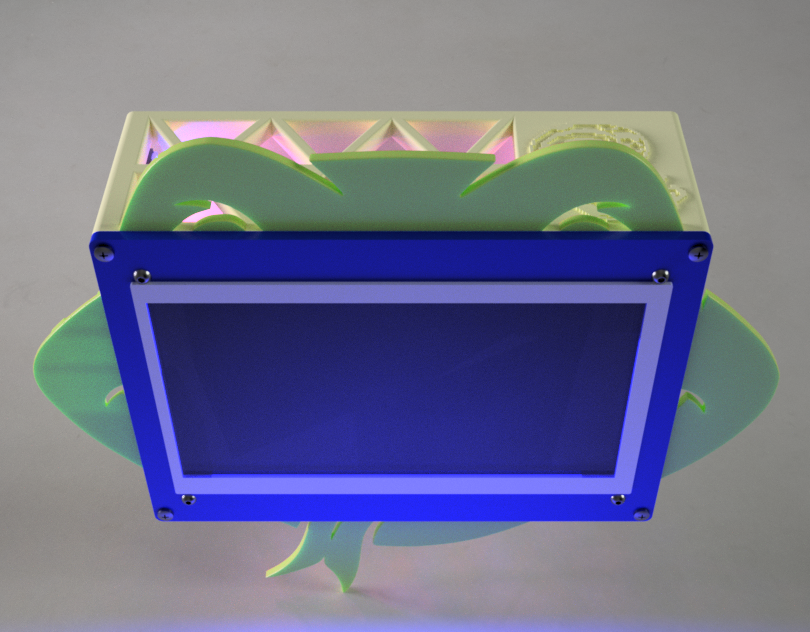
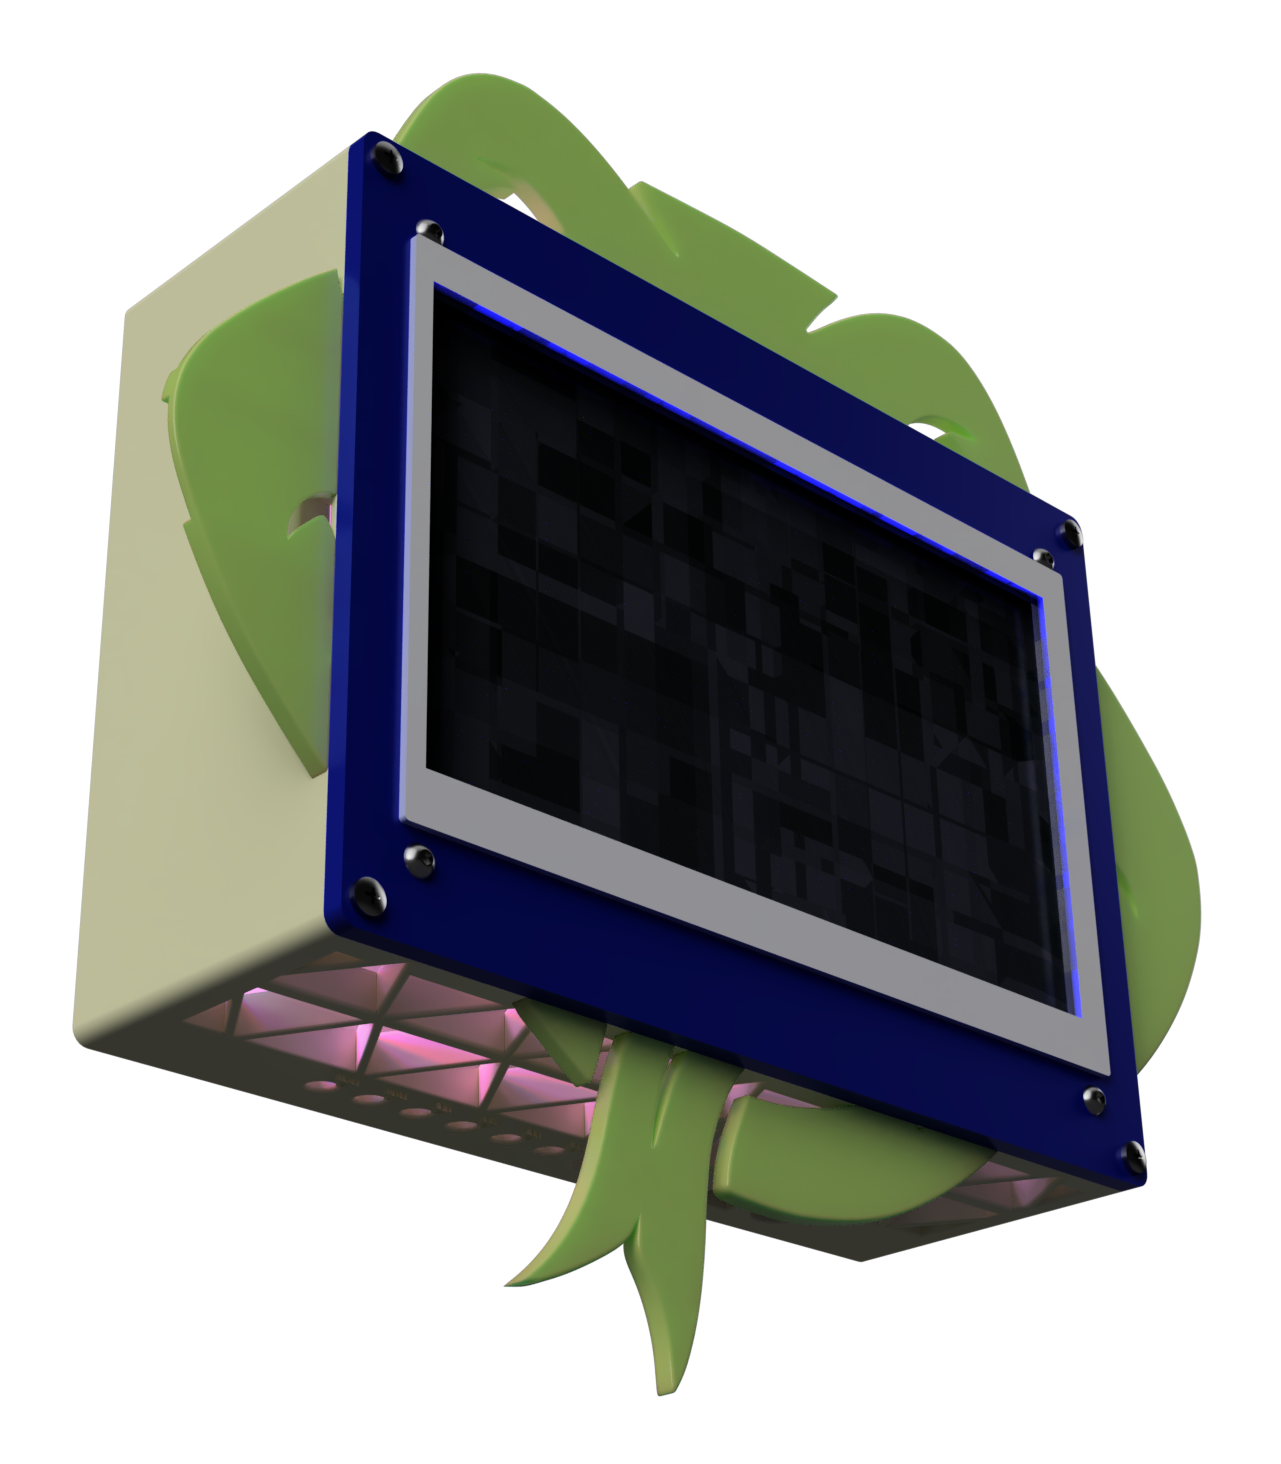
[!NOTE] Here you are the Fusion Assembly Link
| Item Name | Purchase Link | Quantity | Price per Unit | Total |
|---|---|---|---|---|
| LCD HDMI 7 inch 800x480 Capacitive Touch Screen | RAM-E Shop | 1 | $61.41 | $61.41 |
| Raspberry Pi 4 | Cytron | 1 | $100 | $100 |
| 4-Channel Wireless Relay Module ESP-12F (RM4W) | Fares PCB | 5 | $6.14 | $30.71 |
| AM-2320 Temperature & Humidity | RAM-E Shop | 4 | $3.58 | $14.32 |
| PIR Motion Sensor Module HC-SR501 | RAM-E Shop | 2 | $1.02 | $2.04 |
| TCA9548APWR I2C 8 channels bus multiplexer TSSOP24 | UGE-One | 1 | $1.74 | $1.74 |
| Chip Resistor SMD 10Ω ±1% 62.5mW ±100ppm/℃ 0402 | Maker's Electronics | 11 | $0.002 | $0.022 |
| B4B-XH-A JST XH Data Terminal Male 4 Pin Connector Header 2.5mm | Maker's Electronics | 5 | $0.012 | $0.06 |
| B3B-XH-A JST XH Data Terminal Male 3 Pin Connector Header 2.5mm | Maker's Electronics | 2 | $0.01 | $0.02 |
| Data Cable JST 3 Pin 2.54mm 26AWG 25cm One Side Terminal | Maker's Electronics | 2 | $0.17 | $0.34 |
| PHR-4 JST PH Connector Housing Female 4 Pin 2mm with 20cm Terminal Cable | Maker's Electronics | 5 | $0.10 | $0.50 |
| PCB (JLCPCB) | JLCPCB Cart | 5 | $0.40 | $2.00 |
| E-POST (JLCPCB) | JLCPCB Cart | 1 | $13.60 | $13.60 |
| 3D Prints | Local Vendor (Printfy-eg) | 1 | $33.80 | $33.80 |
| NeoPixel Stick 8-bit WS2812 5050 RGB LED Driver Development Board | RAM-E Shop | 3 | $1.00 | $3.00 |
| M3 & M2 Screws | UGE-One Search | 18 | $0.05 | $1.00 |
| M3 & M2 Inserts | UGE-One Search | 18 | $0.05 | $1.00 |
| USB Small Microphone | Aliexpress | 1 | $1.00 | $1.00 |
| TOTAL | ~~ | ~~ | ~~ | $266.56 (THE PI IS HELL) |
| Qty | Value | Footprint | References |
|---|---|---|---|
| 19 | R | Resistor_SMD:R_0402_1005Metric_Pad0.72x0.64mm_HandSolder | R1, R2, R3, R4, R5, R6, R10, R11, R12, R13, R14, R15, R16, R17, R18, R19 +3 |
| 4 | Conn_01x04_Pin | Connector_JST:JST_XH_B4B-XH-A_1x04_P2.50mm_Vertical | J2, J3, J4, J5 |
| 1 | PIR_motion_Kitchen | Connector_JST:JST_XH_B3B-XH-A_1x03_P2.50mm_Vertical | U2 |
| 1 | PIR_motion_Toilet | Connector_JST:JST_XH_B3B-XH-A_1x03_P2.50mm_Vertical | U4 |
| 1 | RGB | Connector_JST:JST_XH_B3B-XH-A_1x03_P2.50mm_Vertical | D1 |
| 1 | Raspberry_Pi_4 | Connector_PinSocket_2.54mm:PinSocket_2x20_P2.54mm_Vertical | J1 |
| 1 | TCA9548APWR | Package_SO:TSSOP-24_4.4x7.8mm_P0.65mm | U3 |
| 1 | Temp&Humidity_Kitchen | Connector_JST:JST_XH_B4B-XH-A_1x04_P2.50mm_Vertical | U7 |
| 1 | Temp&Humidity_R1 | Connector_JST:JST_XH_B4B-XH-A_1x04_P2.50mm_Vertical | U1 |
| 1 | Temp&Humidity_R2 | Connector_JST:JST_XH_B4B-XH-A_1x04_P2.50mm_Vertical | U5 |
| 1 | Temp&Humidity_R3 | Connector_JST:JST_XH_B4B-XH-A_1x04_P2.50mm_Vertical | U6 |
hoglet67/RGBtoHDMI
Bare-metal Raspberry Pi project that provides pixel-perfect sampling of Retro Computer RGB/YUV video and conversion to HDMI

hackclub/OnBoard
💡 Join 1,000 teenagers and make your first PCB with a $100 grant!


octosavvi/ESPKey
Wiegand data logger, replay device and micro door-controller

zmaker/arduino_cookbook
gli sketch del nuovo progetto Arduino Cookbook e dei video di YouTube

murexrobotics/electrical
Highly integrated electronics design and printed circuit boards (PCBs) for the MATE ROV Competition. Attempt the impossible.

swharden/AVR-projects
A collection of standalone AVR projects written in C

hardenedlinux/cheap-pcb
Cheap PCB: Better understanding the current status of hardware supply chain
It measures 51.5 × 53.5 mm and has 2 copper layers, 1.6 mm thick.
32 parts. The full list of its parts is on this page, with links to each part's symbol and footprint where PCBKit's library has them.
From the Nadoooor/SnakeHome repository on GitHub, at the commit this page was made from: the board is PCB/SnakeHome.kicad_pcb and its schematic PCB/I2C_Multiplexer.kicad_sch. PCBKit opens the board in the browser, with nothing to install.
Its repository publishes it under the MIT licence: you may reuse it on that licence's terms (keep the author's notice, and for a copyleft licence share your changes alike).