2 layers43.9 × 27.7 mm

 Milk-Cool/OpenVocakey2
An open-source ESP32-based vocal synthesis keyboard
OpenVocakey is an open-source printed circuit board by Milk-Cool, from the Milk-Cool/OpenVocakey repository on GitHub, published under the MIT licence. It is a 2-layer board of 171.5 × 99.1 mm with 19 parts on 32 nets, routed with 187 tracks and 0 vias.
Its parts include 13 switches and 6 connectors.
An open-source ESP32-based vocal synthesis keyboard
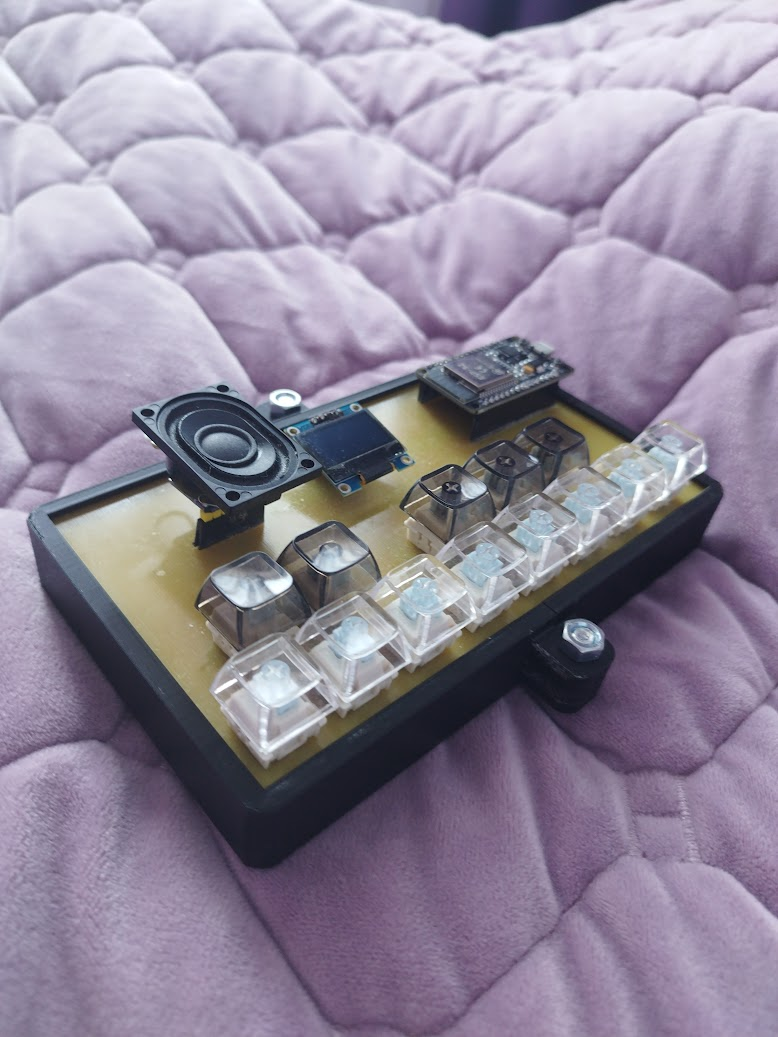
This is exactly what it sounds like -- a DIY open-source keyboard capable of producing human-like speech in the form of singing. Yes, just like VOCALOID -- except it is live, so it would be closer to Pocket Miku or the VOCALOID Keytar.
It uses espeak-ng at its core, with the wrapper being BackgroundAudio and the wrapper wrapper being tts.cpp. This means that the voices are actually very customizable! You can use formant settings to adjust the voice to your liking and then upload it to the device.
You can buy a Cardputer if you wanna check the project out, or make a keyboard of your own with the provided gerber and KiCad files. Then, you can upload songs and files using the online tool (works best with Chromium-based browsers).
A song is just a text file containing Japanese characters (hiragana or katakana but NOT kanji), with each syllable on its own line, for example:
き
ら
き
ら
ひ
か
る
You can also add ending syllables after a base syllable, separated by a comma (will not be stretched):
こ,いNote: you can input more than one syllable on one line, but then the vowel stretch won't work properly.
This is just an espeak-ng voice, but without the pitch and language fields (those are added automatically). See the documentation for espeak-ng for specific instructions on how to create a voice.
If you decided to make your own keyboard, first of all, you'd have to order a two-layer PCB. This is because one of the traces (yes, just one!) is on the other side of the PCB. Then, once it arrives, you have to solder MX-Cherry style keyboard switches into the holes on the bottom of the board (and add keycaps to your liking) and solder on female 2.54mm headers everywhere else. Then, you can insert a 30-pin ESP32-WROOM board into the double headers (with the USB port facing outwards), an i2c SSD1306 display into the middle headers (facing inwards) and a MAX98357a i2s audio amplifier into the remaining headers (facing outwards; don't forget to connect a speaker!!). Also don't forget to solder on the 10K resistors for pull-up below the ESP32. Then you can print out the case (case/), slide the board inside and screw it down on the sides with M6x20 bolts. Then you'd have to upload the firmware to the ESP32 and you're done!!
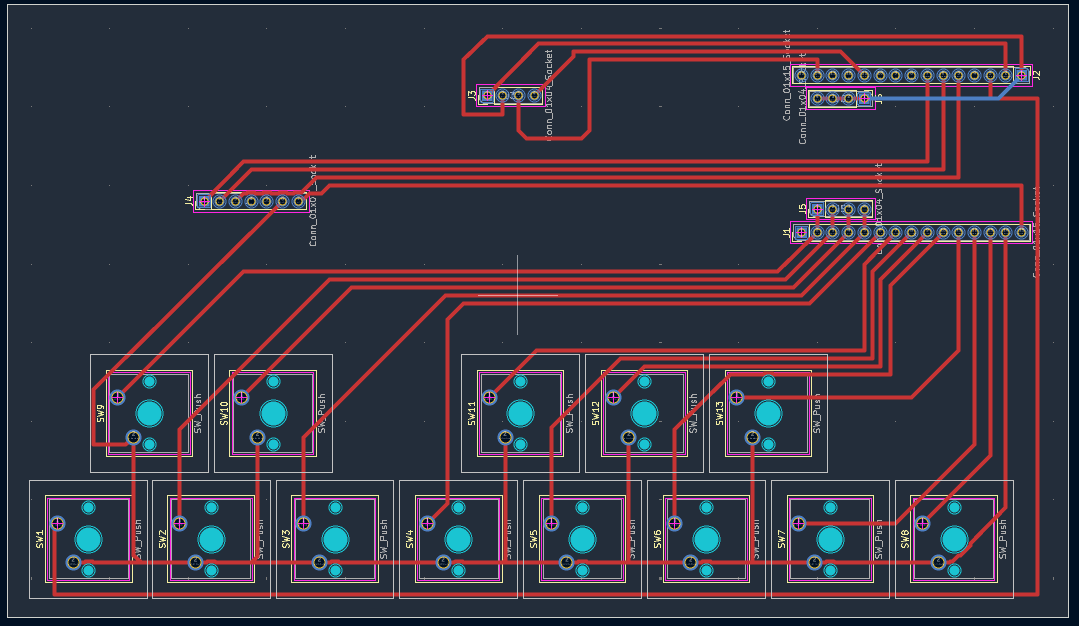
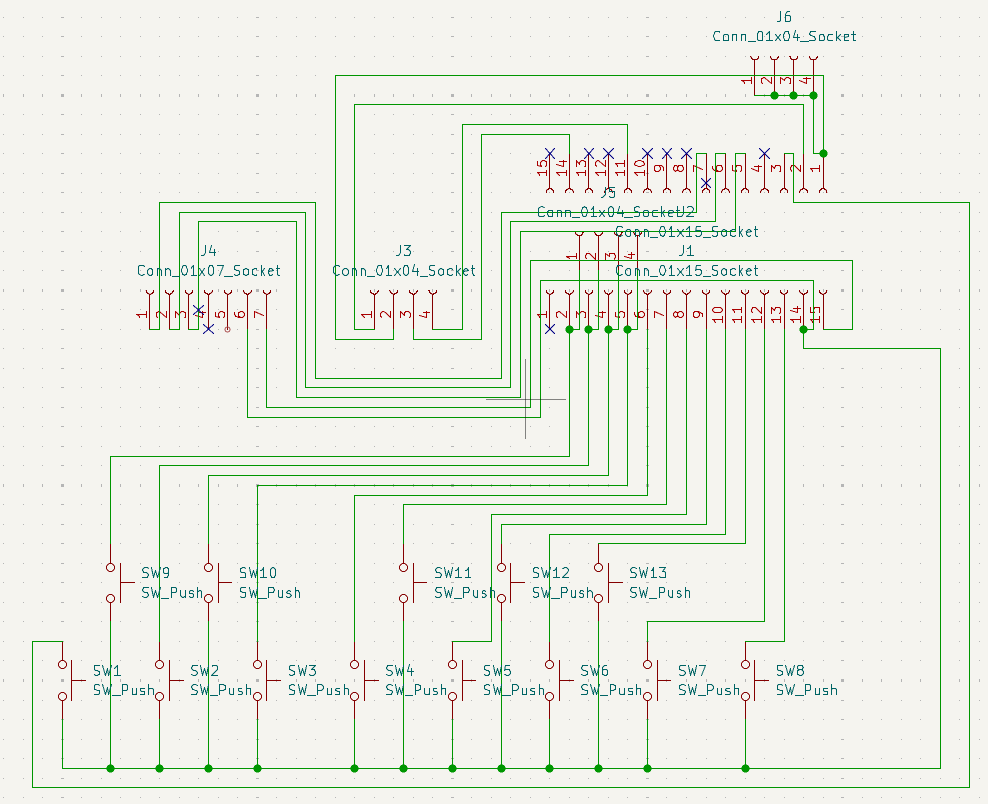
Note: see
bom.csvfor the Bill of Materials.
You can press BOOT/G0 on your board to enter the menu. From there, you can press the two leftmost white buttons to move left or right, and the rightmost two white buttons for cancelling and confirming your actions (e. g. entering a submenu and then confirming the volume change using the rightmost button). You can also press G0 again to leave the menu.
Go on, play around with the menus and see what you can customize!!
Note: most settings are discarded upon reboot.
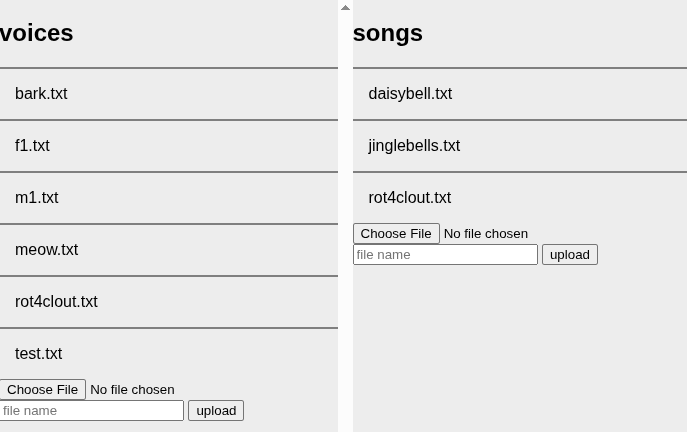
You can use the online tool to manage the files on your OpenVocakey. First, click "Connect" in the corner and select your board. Then, you can download the already existing files by clicking on them, or upload new files by first selecting the file, then giving it a name and then clicking "upload".
Note: that WILL overwrite the file! Be careful.
I was always fascinated by vocaloids and the two aforementioned products in paticular, hence I decided to make this. Those can be hard to get and rather unaffordable, especially in non-first-world countries, therefore I think people might find this useful.
| Qty | Value | Footprint | References |
|---|---|---|---|
| 13 | SW_Push | Button_Switch_Keyboard:SW_Cherry_MX_1.00u_PCB | SW1, SW2, SW3, SW4, SW5, SW6, SW7, SW8, SW9, SW10, SW11, SW12, SW13 |
| 3 | Conn_01x04_Socket | Connector_PinHeader_2.54mm:PinHeader_1x04_P2.54mm_Vertical | J3, J5, J6 |
| 2 | Conn_01x15_Socket | Connector_PinHeader_2.54mm:PinHeader_1x15_P2.54mm_Vertical | J1, J2 |
| 1 | Conn_01x07_Socket | Connector_PinHeader_2.54mm:PinHeader_1x07_P2.54mm_Vertical | J4 |

hackclub/OnBoard
💡 Join 1,000 teenagers and make your first PCB with a $100 grant!

polpo/picogus
Emulation of ISA sound cards and CD-ROM on Raspberry Pi Pico (GUS, SB/Adlib, MPU-401, Tandy, CMS, Panasonic CD-ROM) with USB mouse/joystick support


nkitanov/iaq_board
IAQ Board is a DIY (Do-It-Yourself) device for measuring internal air quality


Ardumower/ardumower
Develop an open source robotic lawn mower (HW+SW reference platform)

zmaker/arduino_cookbook
gli sketch del nuovo progetto Arduino Cookbook e dei video di YouTube
It measures 171.5 × 99.1 mm and has 2 copper layers, 1.6 mm thick.
19 parts. The full list of its parts is on this page, with links to each part's symbol and footprint where PCBKit's library has them.
From the Milk-Cool/OpenVocakey repository on GitHub, at the commit this page was made from: the board is kicad/board/board.kicad_pcb and its schematic kicad/board/board.kicad_sch. PCBKit opens the board in the browser, with nothing to install.
Its repository publishes it under the MIT licence: you may reuse it on that licence's terms (keep the author's notice, and for a copyleft licence share your changes alike).