Skip to the content
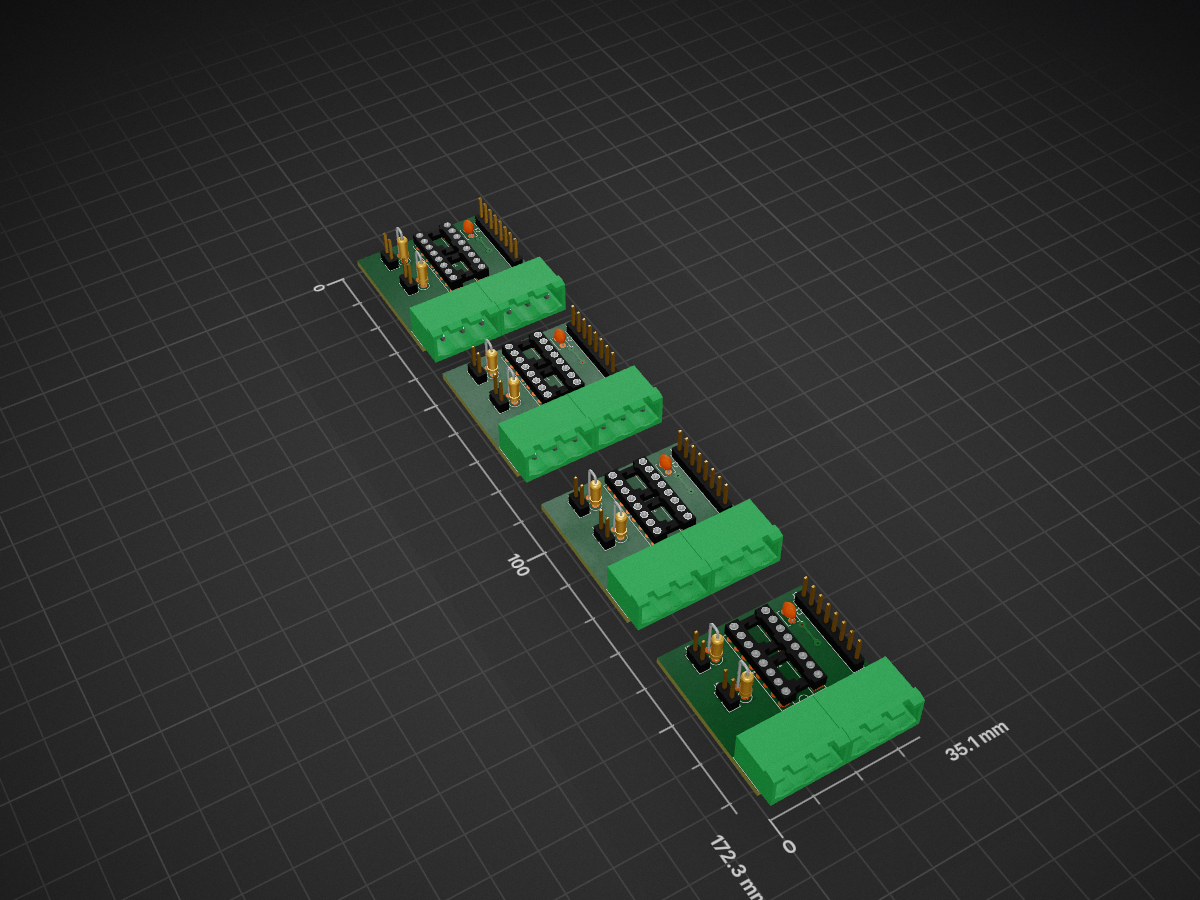
2 layers35.1 × 172.3 mmPiggyBackRS485, the printed circuit board in 3D

"Anyone who has brought up CP/M on a homebuilt computer has felt this moment of elation. A myriad of connections are properly closed; bits are flying at lightning speeds over busses and through circuits and program logic, to produce a single prompt". Gary Kildall

Size
35.1 × 172.3 mm
Copper layers
2
Thickness
1.6 mm
Parts
40
Nets
15
Pads
160
Tracks, vias
396, 16
Pours
8
Routed
Yes
KiCad
KiCad 6 (file 20211014)
Created
24 Sep 2020
Updated
17 Jan 2025

Overview

PiggyBackRS485 is an open-source printed circuit board by KALTCHUK, from the KALTCHUK/Z80_Modular_Computer repository on GitHub. It is a 2-layer board of 35.1 × 172.3 mm with 40 parts on 15 nets, routed with 396 tracks and 16 vias.

It is built around the SN75176AP. Its parts include 20 connectors, 8 resistors, 8 ICs and 4 capacitors.

Main components

1

README

readme.md

Proton - Z80 Modular Computer

Licence

This project is made public under the terms of the strongly-reciprocal variant of the CERN Open Hardware Licence version 2. By using any part of this project you abide to this licence.

Overview

Two years ago I was searching for some ICs in my component drawers and came across a Z80 CPU and an Intel 8251 USART. I had an instant flashback and remembered my first contact with a microprocessor back in 1982. It was a Z80. After a few minutes of nostalgia I decided to make good use of these components and build a computer.

Of course I couldn't avoid thinking about this "new project" with my Systems Engineer mindset. So, I established a few initial goals:

  • This project is a hobby, so it has to be fun.
  • It should use mainly technologies available in the 1980's.
  • The computer has to run commercial software.
  • The architecture should be modular allowing for new cards with specific functions.
  • It also has to be a hardware/software development platform for students, hobbyists and enthusiasts.

After some research I decided to design the hardware fully compatible with CP/M 2.2.

One and a half years later, I finally had my wire wrapped computer running CP/M. I could write programs using WordStar and compile them with BDS C compiler, Microsoft Basic compiler or SLR Z80 macro assembler. It was fun, exciting and challenging. After that, I decided it was time to turn the prototype into a finished product.

It's gratifying to see that in two years, alone, I was able to transform an idea into a commercial product.

The content of this repo is a small portion of the knowledge gathered during these two years developing the Proton Z80 Modular Computer. Most of the information and results are in my logbook - a notebook (paper, not a computer), where I write everything before executing. During this period, I was the system engineer, hardware engineer, software engineer and project manager. Why did it take me so long to complete this project? Because it's a weekend hobby and also because sometimes I had to wait many weeks to receive some components and PCBs.

Ricardo Kaltchuk

Ashdod - IL, october 2021.

About the final product.

Is it perfect? No. Is it state of the art? No. Does I meet the initial goal? Yes. Am I happy with it? For sure!

Github directories

All directory names are self-explanatory and you'll find a readme file inside each one with some additional info.

What's most important

Well, if you want to build your own Proton Z80 Modular Computer, you'll need to check at least these directories:

  • CPM build,
  • CPM software,
  • KiCAD files,
  • Monitor build,
  • System manuals (Proton and Monitor) and
  • pics.

You want your own Proton? So follow these steps:

  1. Order the PCBs. You can order from PCBway and JLC PCB with the codes in the Proton Manual.
  2. Buy the components according to the bill of materials in the Proton Manual.
  3. Assemble the cards.
  4. Download the software from Github.
  5. Burn the EEPROM and microcontrollers.
  6. Configure the jumpers on the cards according to instructions in the Proton Manual.
  7. Assemble the rack (optional) and insert the cards.

Ready to start! Now you can transfer all the CP/M software from your computer to the Proton.

In the Proton User's Manual there's a section called "Building Procedure" which describes in details all the steps listed above. I suggest you read ALL the manual before starting.
Parts

40
QtyValueFootprintReferences
8150Resistor_THT:R_Axial_DIN0207_L6.3mm_D2.5mm_P2.54mm_VerticalR1, R1, R1, R1, R2, R2, R2, R2
8SN75176APPackage_DIP:DIP-8_W7.62mm_Socket_LongPadsU1, U1, U1, U1, U2, U2, U2, U2
8terminalConnector_PinHeader_2.54mm:PinHeader_1x02_P2.54mm_VerticalJ2, J2, J2, J2, J5, J5, J5, J5
4100nFCapacitor_THT:C_Disc_D3.8mm_W2.6mm_P2.50mmC1, C1, C1, C1
4Conn_01x08Connector_PinHeader_2.54mm:PinHeader_1x08_P2.54mm_VerticalJ3, J3, J3, J3
4RS485 (net0)Connector_Phoenix_MSTB:PhoenixContact_MSTBA_2,5_3-G-5,08_1x03_P5.08mm_HorizontalJ1, J1, J1, J1
4RS485 (net1)Connector_Phoenix_MSTB:PhoenixContact_MSTBA_2,5_3-G-5,08_1x03_P5.08mm_HorizontalJ4, J4, J4, J4

More from KALTCHUK/Z80_Modular_Computer

2
  • 2 layers100 × 70 mmDI-08 ext, the printed circuit board in 3D

    DI-08 ext

    KALTCHUK/Z80_Modular_Computer

    "Anyone who has brought up CP/M on a homebuilt computer has felt this moment of elation. A myriad of connections are properly closed; bits are flying at lightning speeds over busses and through circuits and program…

    37 parts94
  • 2 layers100 × 70 mmDI-08, the printed circuit board in 3D

    DI-08

    KALTCHUK/Z80_Modular_Computer

    "Anyone who has brought up CP/M on a homebuilt computer has felt this moment of elation. A myriad of connections are properly closed; bits are flying at lightning speeds over busses and through circuits and program…

    22 parts94

Similar boards

  • 2 layers55.2 × 71.8 mmNabu keyboard usb, the printed circuit board in 3D

    Nabu keyboard usb

    thorpej/nabu-keyboard-usb

    Adapter to connect to a NABU PC keyboard via USB

    20 parts8BSD-2-Clause
  • 2 layers58.1 × 50.5 mmArduino hub 12 pcb, the printed circuit board in 3D

    Arduino hub 12 pcb

    VirtualConcrete/HUB12Controller

    The board is a simple Arduino Nano --> HUB12 adapter with DMX input using the SN75176 differential bus transciver. XLR 3 pin is used for DMX input. The power supply is +5V via screw terminals.

    7 parts2
  • 2 layers131.8 × 51.8 mmBridge, the printed circuit board in 3D

    Bridge

    nichtrami/led_tube

    A LED Tube that works wireless and runs on a ESP32 with Arduino Framework

    17 parts1Apache-2.0
  • 2 layers46 × 183.2 mmDmx to pwm, the printed circuit board in 3D

    Dmx to pwm

    TDSOJohn/Lasers

    This repo contains the schematics and software for the monochrome laser bars used by VirtualConcrete.

    68 parts1
  • 2 layers68.3 × 90 mmModuleController old, the printed circuit board in 3D

    ModuleController old

    dennis9819/split-flap-controller

    Sourcecode and Schematics for the controller of my split-flap display

    25 partsAGPL-3.0
  • 2 layers170 × 55 mmProtector de Tesoro, the printed circuit board in 3D

    Protector de Tesoro

    edgranzella/Protector-de-Tesoro

    Este repositorio contiene el diseño de hardware y la placa de circuito impreso (PCB) desarrollado en KiCad para el módulo central del Protector de Tesoro.

    88 parts
  • 2 layers170 × 55 mmPTuP 2026, the printed circuit board in 3D

    PTuP 2026

    edgranzella/PTuP_2026

    Este repositorio almacena el diseño de circuito impreso (PCB) desarrollado en KiCad para la plataforma PTuP versión 2026.

    89 parts
  • 2 layers170 × 55 mmPTuP 2026 displayLCD, the printed circuit board in 3D

    PTuP 2026 displayLCD

    edgranzella/PTuP_2026_displayLCD

    Este repositorio contiene la variante de hardware desarrollada en KiCad del sistema PTuP 2026, la cual integra una interfaz HMI local basada en un Display LCD (caracteres 16x2 / 20x4 o gráfico) para visualización de…

    90 parts

Questions

How big is the PiggyBackRS485 PCB?

It measures 35.1 × 172.3 mm and has 2 copper layers, 1.6 mm thick.

What parts does the PiggyBackRS485 use?

40 parts, built around the SN75176AP. The full list of its parts is on this page, with links to each part's symbol and footprint where PCBKit's library has them.

Where can I download the PiggyBackRS485 KiCad files?

From the KALTCHUK/Z80_Modular_Computer repository on GitHub, at the commit this page was made from: the board is KiCAD files/Proton cards/RS485/PiggyBackRS485/PiggyBackRS485.kicad_pcb. PCBKit opens the board in the browser, with nothing to install.

Can I use the PiggyBackRS485 design in my own project?

Its repository states no licence, so its author keeps all rights: ask KALTCHUK before reusing the design.