
2 layers213 × 65.1 mm
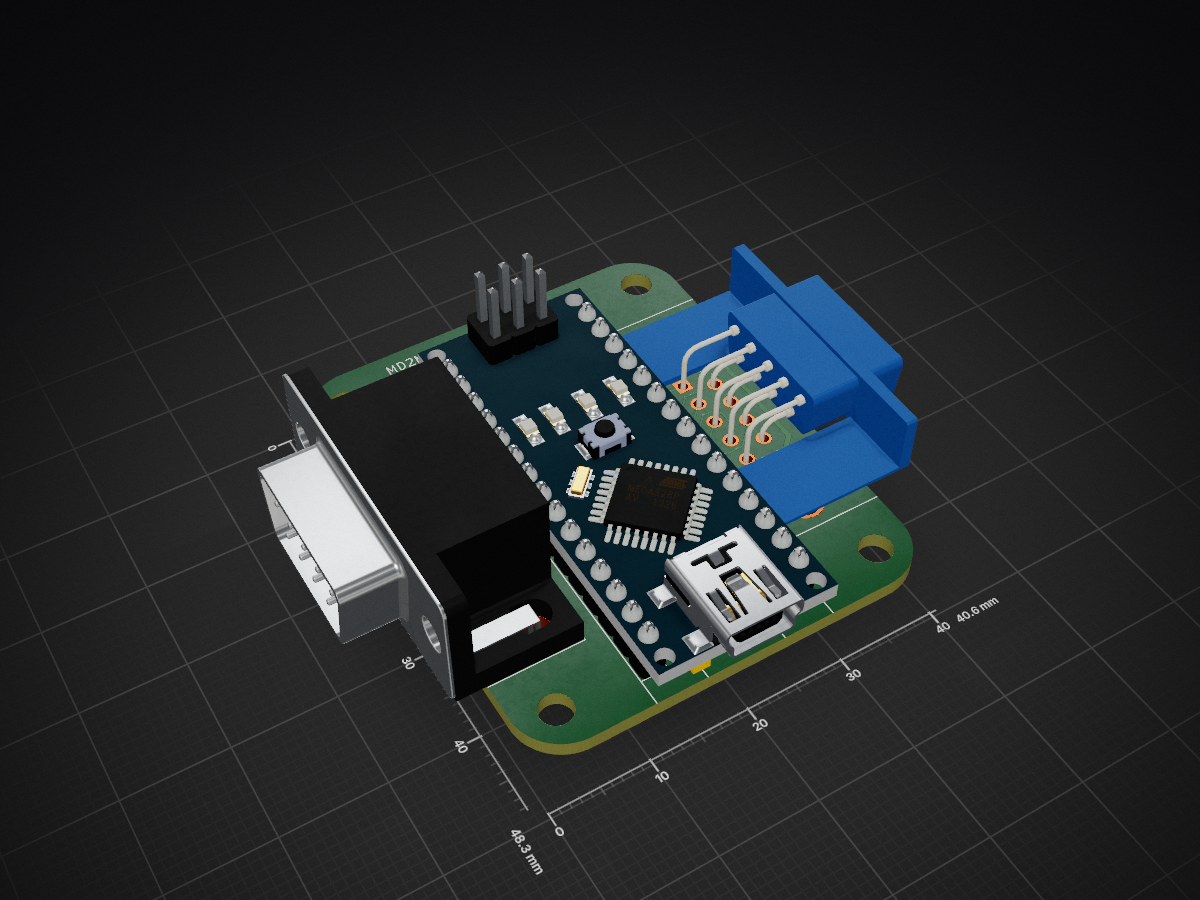
 DigitalSpacemen/MD2MSX4
MD2MSX is a joystick adapter to connect a Mega Drive / Genesis controller to an MSX computer.
MD2MSX is an open-source printed circuit board by DigitalSpacemen, from the DigitalSpacemen/MD2MSX repository on GitHub. It is a 2-layer board of 40.6 × 48.3 mm with 9 parts on 33 nets, routed with 80 tracks and 0 vias.
It is built around the BAT85. Its parts include 2 diodes and 2 connectors. It belongs with the retro computing and games and keyboards and input boards and the AVR (ATmega, ATtiny) boards of this library.
MD2MSX is a joystick adapter to connect a Mega Drive / Genesis controller to an MSX computer. Software that works with the JoyMega adapter should also work with the MD2MSX.
This is a hardware project by retro computing enthusiasts. We are not experts. USE AT YOUR OWN RISK! Please make sure to read the Usage Notes first.
The JoyMega works great with official controllers. However, many 3rd-party controllers don't implement the controller protocol very accurately. Here's some examples of possible issues:
Please check our Controller Notes for more detailed information.
Our proposed solution places an Arduino inbetween the controller and the MSX. This Arduino robustly reads the controller on the input side. On the output side, it implements the controller protocol more accurately than the 3rd-party controllers. We designed a simple PCB for this purpose with two DB-9 (or DE-9) ports and header pins to plug in an Arduino Nano. MD2MSX also implements the JoyMega pin mapping and select signal inversion. MD2MSX should be connected to the MSX directly; do not connect it to the JoyMega.
MD2MSX with a cable soldered directly to the board in place of the 2nd DB-9 port.
Apart from the MD2MSX PCB you need the following components:
For the hardware, the KiCad design files can be found in the hardware/ directory. KiCad is used to produce Gerber files for upload to your favourite PCB manufacturer.
The firmware resides in firmware/ and is compiled with PlatformIO.
Do not connect the MD2MSX to both an MSX computer and USB at the same time, even if only one of the devices is powered on!
If you're planning to use a wireless receiver, the current draw may exceed the 50mA rating of the MSX joystick port. Make sure your particular MSX computer can handle this.
If you build it without the cable directly attached, you would either need to obtain a straight-through DB-9 to DB-9 cable, or figure out a way to plug the board directly into the MSX computer. The latter may prove to be difficult.
Ensure the cable going to the MSX computer has a sufficient gauge for the current needed by the Arduino and the controller, especially if you're planning to use a wireless receiver. If you do end up using a cable with thin wires, we recommend making the cable as short as possible.
| Qty | Value | Footprint | References |
|---|---|---|---|
| 4 | MountingHole | MountingHole:MountingHole_3.2mm_M3 | H1, H2, H3, H4 |
| 2 | BAT85 | Diode_THT:D_DO-35_SOD27_P7.62mm_Horizontal | D1, D2 |
| 1 | Arduino_Nano_v3.x | Module:Arduino_Nano | A1 |
| 1 | DE9_Plug_MountingHoles | Connector_Dsub:DSUB-9_Male_Horizontal_P2.77x2.84mm_EdgePinOffset7.70mm_Housed_MountingHolesOffset9.12mm | J2 |
| 1 | DE9_Receptacle_MountingHoles | Connector_Dsub:DSUB-9_Female_Horizontal_P2.77x2.84mm_EdgePinOffset7.70mm_Housed_MountingHolesOffset9.12mm | J1 |

matthewcieplak/super-sixteen
Code and schematics for the Super Sixteen Eurorack sequencer

mobilinkd/NucleoTNC
The Nucleo TNC is a breadboard implementation of the Mobilinkd TNC3 using a STM32L432KC Nucleo32 board. This TNC faithfully implements the audio section and EEPROM storage of the TNC3.


famicomical/MB9X-UART
In-system Serial Programming Adapter for Fujitsu F2MC-16LX microcontrollers
It measures 40.6 × 48.3 mm and has 2 copper layers, 1.6 mm thick.
9 parts, built around the BAT85. The full list of its parts is on this page, with links to each part's symbol and footprint where PCBKit's library has them.
From the DigitalSpacemen/MD2MSX repository on GitHub, at the commit this page was made from: the board is hardware/1.3/MD2MSX.kicad_pcb and its schematic hardware/1.3/MD2MSX.kicad_sch. PCBKit opens the board in the browser, with nothing to install.
Its repository states no licence, so its author keeps all rights: ask DigitalSpacemen before reusing the design.