2 layers225 × 63.5 mm

 CoryPearl/evil_ducky
A easy to use usb-c device that preteneds to be a keyboard when plugged into a computer
Evil ducky is an open-source printed circuit board by CoryPearl, from the CoryPearl/evil_ducky repository on GitHub. It is a 2-layer board of 15 × 37 mm with 28 parts on 66 nets, routed with 346 tracks and 47 vias.
It is built around the RP2040, W25Q32JVSSIQ and TLV75533PDBVR-MS, with the TPD2EUSB30DRTR, ABM8-272-T3 and JS102011SAQN among its other parts. Its parts include 13 capacitors, 7 resistors, 4 ICs, 1 diode and 1 connector. It belongs with the keyboards and input boards and the RP2040 boards of this library.


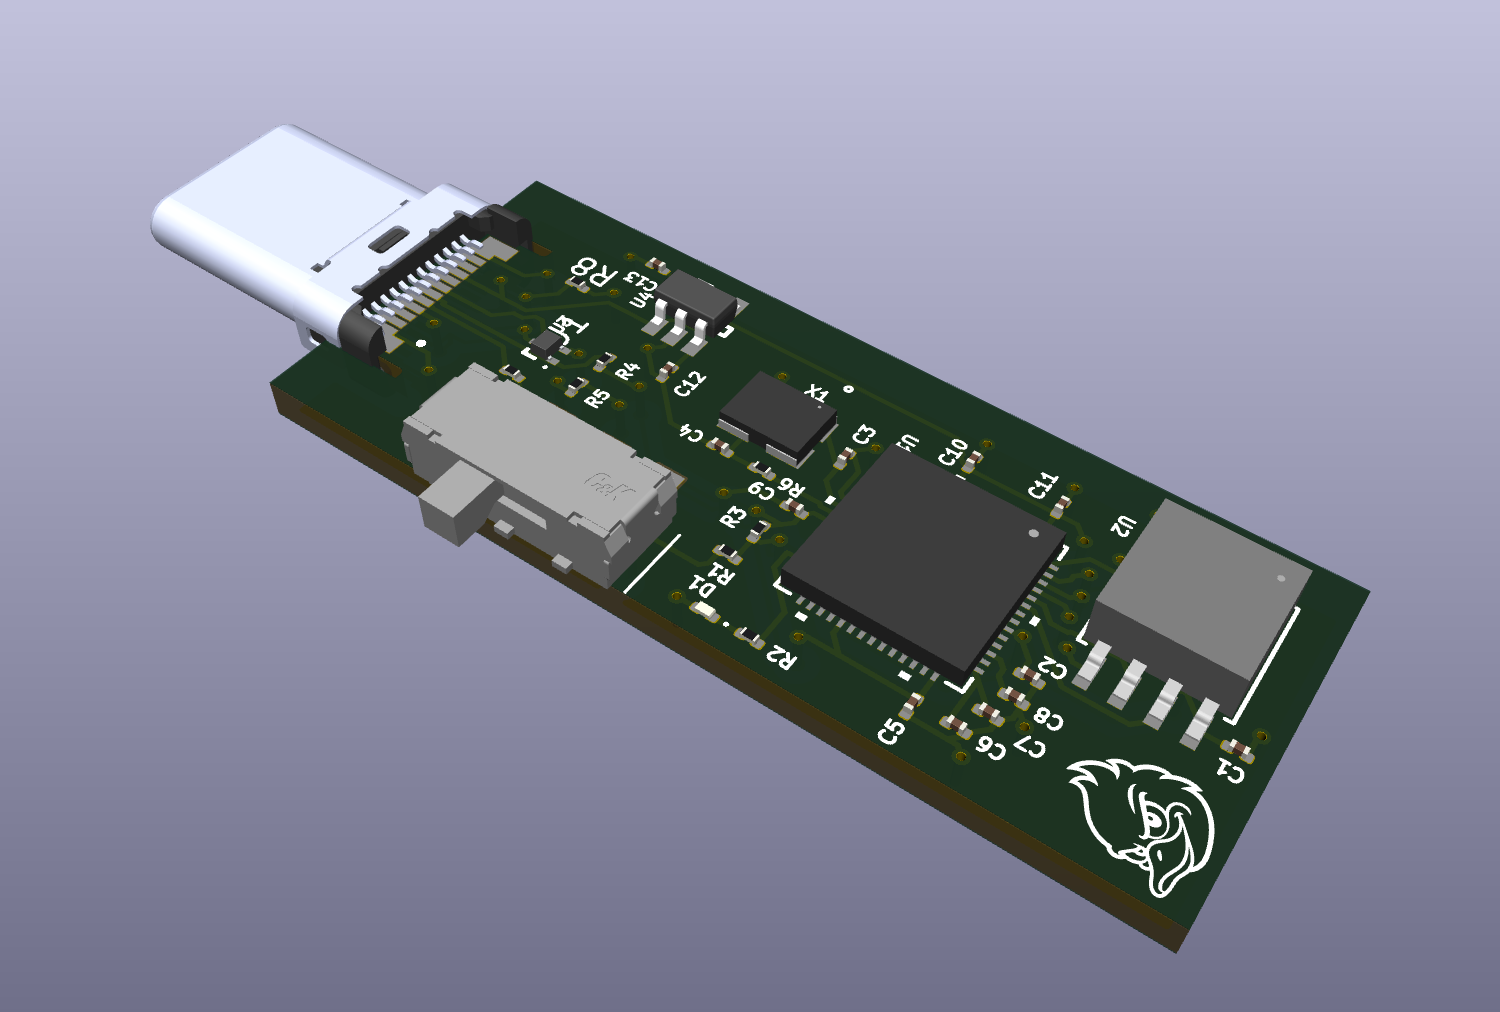
Evil Ducky is a compact USB-C HID automation board based on the RP2040. It appears to the host as a USB HID device and can send keyboard and mouse actions from a small text script embedded into the firmware.
hardware/evil_ducky_pcb/ - KiCad project for the custom RP2040 PCB.firmware/dev_hid_composite/ - Raspberry Pi Pico SDK firmware using TinyUSB.firmware/dev_hid_composite/main.evil_ducky - the automation script that gets embedded at build time.The board design includes:
The KiCad project and custom footprints live in hardware/evil_ducky_pcb/.
The firmware is a Pico SDK C project that uses TinyUSB to expose HID reports for keyboard and mouse support. During the CMake build, tools/embed_script.py converts main.evil_ducky into a generated C header, so changing the script currently requires rebuilding and reflashing the board.
At runtime, the board waits for USB HID to become ready, delays briefly for host setup, runs the embedded script once, and then leaves the status LED on if the script completed successfully. A fast blink indicates script failure.
Edit firmware/dev_hid_composite/main.evil_ducky:
# Lines starting with # are comments
WAIT 1000
PRESS SPACE
HOLD TAB
WAIT 500
RELEASE TAB
MOVE 50 50
Supported commands:
WAIT <milliseconds>PRESS <key>HOLD <key>RELEASE <key>MOVE <x> <y>Keys can be letters, digits, common names like SPACE, TAB, ENTER, arrow keys, F1 through F12, modifiers like CTRL, SHIFT, ALT, GUI, or raw HID usages such as 0x2C.
firmware/dev_hid_composite/ in VS Code with the Raspberry Pi Pico extension, or build it with the Pico SDK CMake toolchain.UPLOAD and connect it over USB-C..uf2 file to the RPI-RP2 drive.RUN, and reconnect it.PICO_FLASH_SIZE_BYTES=4194304).TinyUSB Device.| Qty | Value | Footprint | References |
|---|---|---|---|
| 7 | 100 nF | Capacitor_SMD:C_0201_0603Metric | C1, C2, C5, C6, C9, C10, C11 |
| 2 | 1 kΩ | Resistor_SMD:R_0201_0603Metric | R1, R6 |
| 2 | 1 uF | Capacitor_SMD:C_0201_0603Metric | C7, C8 |
| 2 | 15 pF | Capacitor_SMD:C_0201_0603Metric | C3, C4 |
| 2 | 27 Ω | Resistor_SMD:R_0201_0603Metric | R4, R5 |
| 2 | 4.7 uF | Capacitor_SMD:C_0201_0603Metric | C12, C13 |
| 1 | 10 kΩ | Resistor_SMD:R_0201_0603Metric | R3 |
| 1 | 5.1 kΩ | Resistor_SMD:R_0201_0603Metric | R7 |
| 1 | 680 Ω | Resistor_SMD:R_0201_0603Metric | R2 |
| 1 | ABM8-272-T3 | evil_ducky:Crystal_SMD_ABM8-272-T3 | X1 |
| 1 | JS102011SAQN | evil_ducky:SW_SPDT_CK_JS102011SAQN | S1 |
| 1 | LED_R | LED_SMD:LED_0201_0603Metric | D1 |
| 1 | RP2040 | evil_ducky:QFN-56-1EP_7x7mm_P0.4mm_RP2040 | U1 |
| 1 | TLV75533PDBVR | evil_ducky:SOT-23-5_TLV75533 | U4 |
| 1 | TPD2EUSB30DRTR | evil_ducky:DRT-3_TPD2EUSB30 | U3 |
| 1 | UP31-CV-G-CM | evil_ducky:USB_C_Plug_SameSky_UP31-CV-G-CM | J1 |
| 1 | W25Q32JVSSIQ | evil_ducky:SOIC-8_5.3x5.3mm_P1.27mm_W25Q32JVSSIQ | U2 |

EdmundLimBoEn/gps-maidenhead-device
Open-source portable GNSS Maidenhead grid locator with a 16x2 LCD

gonewx/quadcuber
本目录是 A1 电子源目录。打开 quadcuber.kicadpro,包含原生可编辑原理图和四层 PCB、本地符号/封装库。本设计为单块PCB,RP2040、QSPI Flash、晶振、USB-C、驱动和电源均直接焊接在板上;A0的Pico H插装已移除。马达使用EV3裸插座。接线定义仍从 ../wiring/spec.py 导入,固件未改动,也没有把 R/L 固件描述成已支持四臂控制。

techmannih/pd1180-epr
PD1180-EPR — NEMA 34 Smart Motor-Mounted Stepper Controller with USB-C PD 3.1 EPR

Matrixite/MatrixDrive
MatrixDrive is a USB-loadable Mega Drive/Genesis cartridge

FugLong/OpenChord
An open-source music device for portable, expressive, and extensible audio creation.


It measures 15 × 37 mm and has 2 copper layers, 1.6 mm thick.
28 parts, built around the RP2040, W25Q32JVSSIQ, TLV75533PDBVR-MS and TPD2EUSB30DRTR. The full list of its parts is on this page, with links to each part's symbol and footprint where PCBKit's library has them.
From the CoryPearl/evil_ducky repository on GitHub, at the commit this page was made from: the board is hardware/evil_ducky_pcb/evil_ducky.kicad_pcb and its schematic hardware/evil_ducky_pcb/evil_ducky.kicad_sch. PCBKit opens the board in the browser, with nothing to install.
Its repository states no licence, so its author keeps all rights: ask CoryPearl before reusing the design.