2 layers77.5 × 52.1 mm
FM radio atmega 8
411568/Atmega8_FM_radio
Simple FM radio based on Atmega8 and TEA5767 module
19 parts3MIT

 411568/Atmega8_FM_radio3
Simple FM radio based on Atmega8 and TEA5767 module
Display and controls board is an open-source printed circuit board by 411568, from the 411568/Atmega8_FM_radio repository on GitHub, published under the MIT licence. It is a 2-layer board of 320 × 81.3 mm with 103 parts on 103 nets.
It is built around the TLC5916IN, LTV-847 and BC547. Its parts include 80 diodes, 6 switches, 4 resistors, 3 transistors and 2 ICs. It belongs with the lEDs and displays boards of this library.


This project is a revision of one of my old designs, created a long long time ago when atmel atmega chips where still dirty cheap.
It contains two seperate boards:
My FM radio is based on the TEA7567 module, that is connected to an Atmega8A-PU microconotroller via I2C. Then it's output goes to the connector, then on the main panel passes through a logarithmic potentiometer for volume control and comes back to the PAM8302 D-class amplifier module. I chose it because it works well with my speaker, which is the one used in the original Unitra radio (it is probably over 40 years old and still works very well).
The schematic and PCB were both designed using KiCAD 6.0
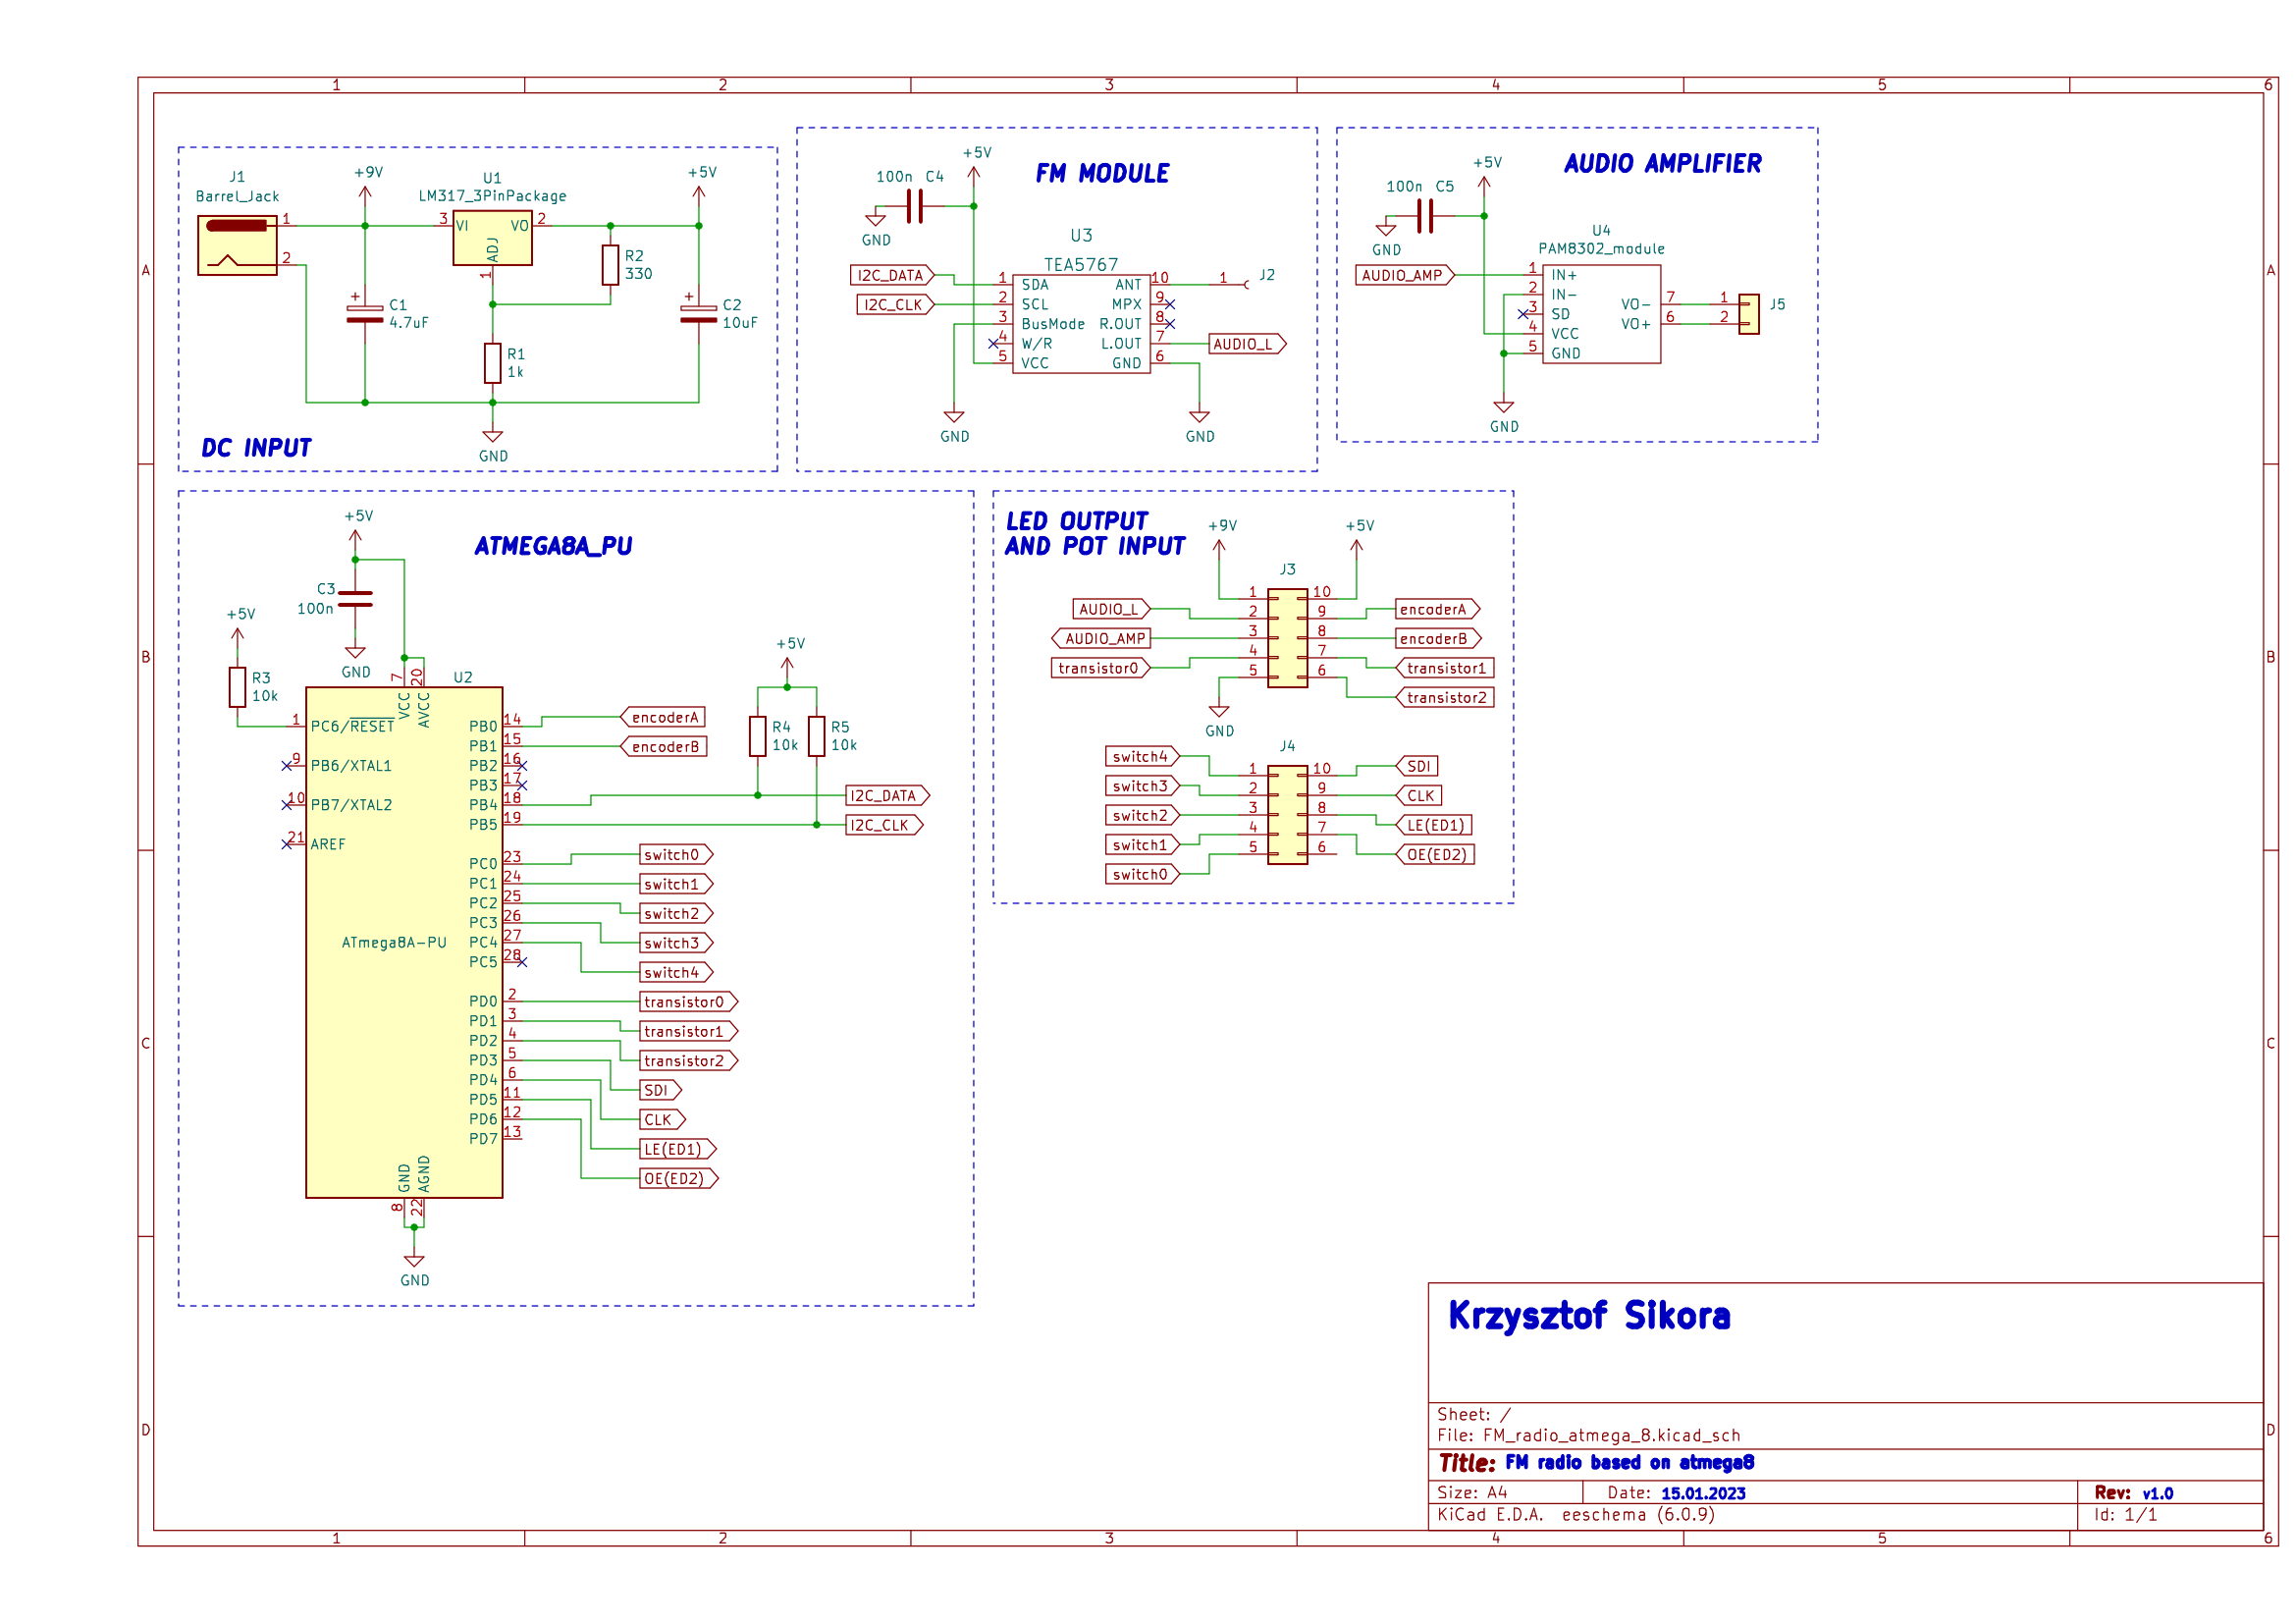
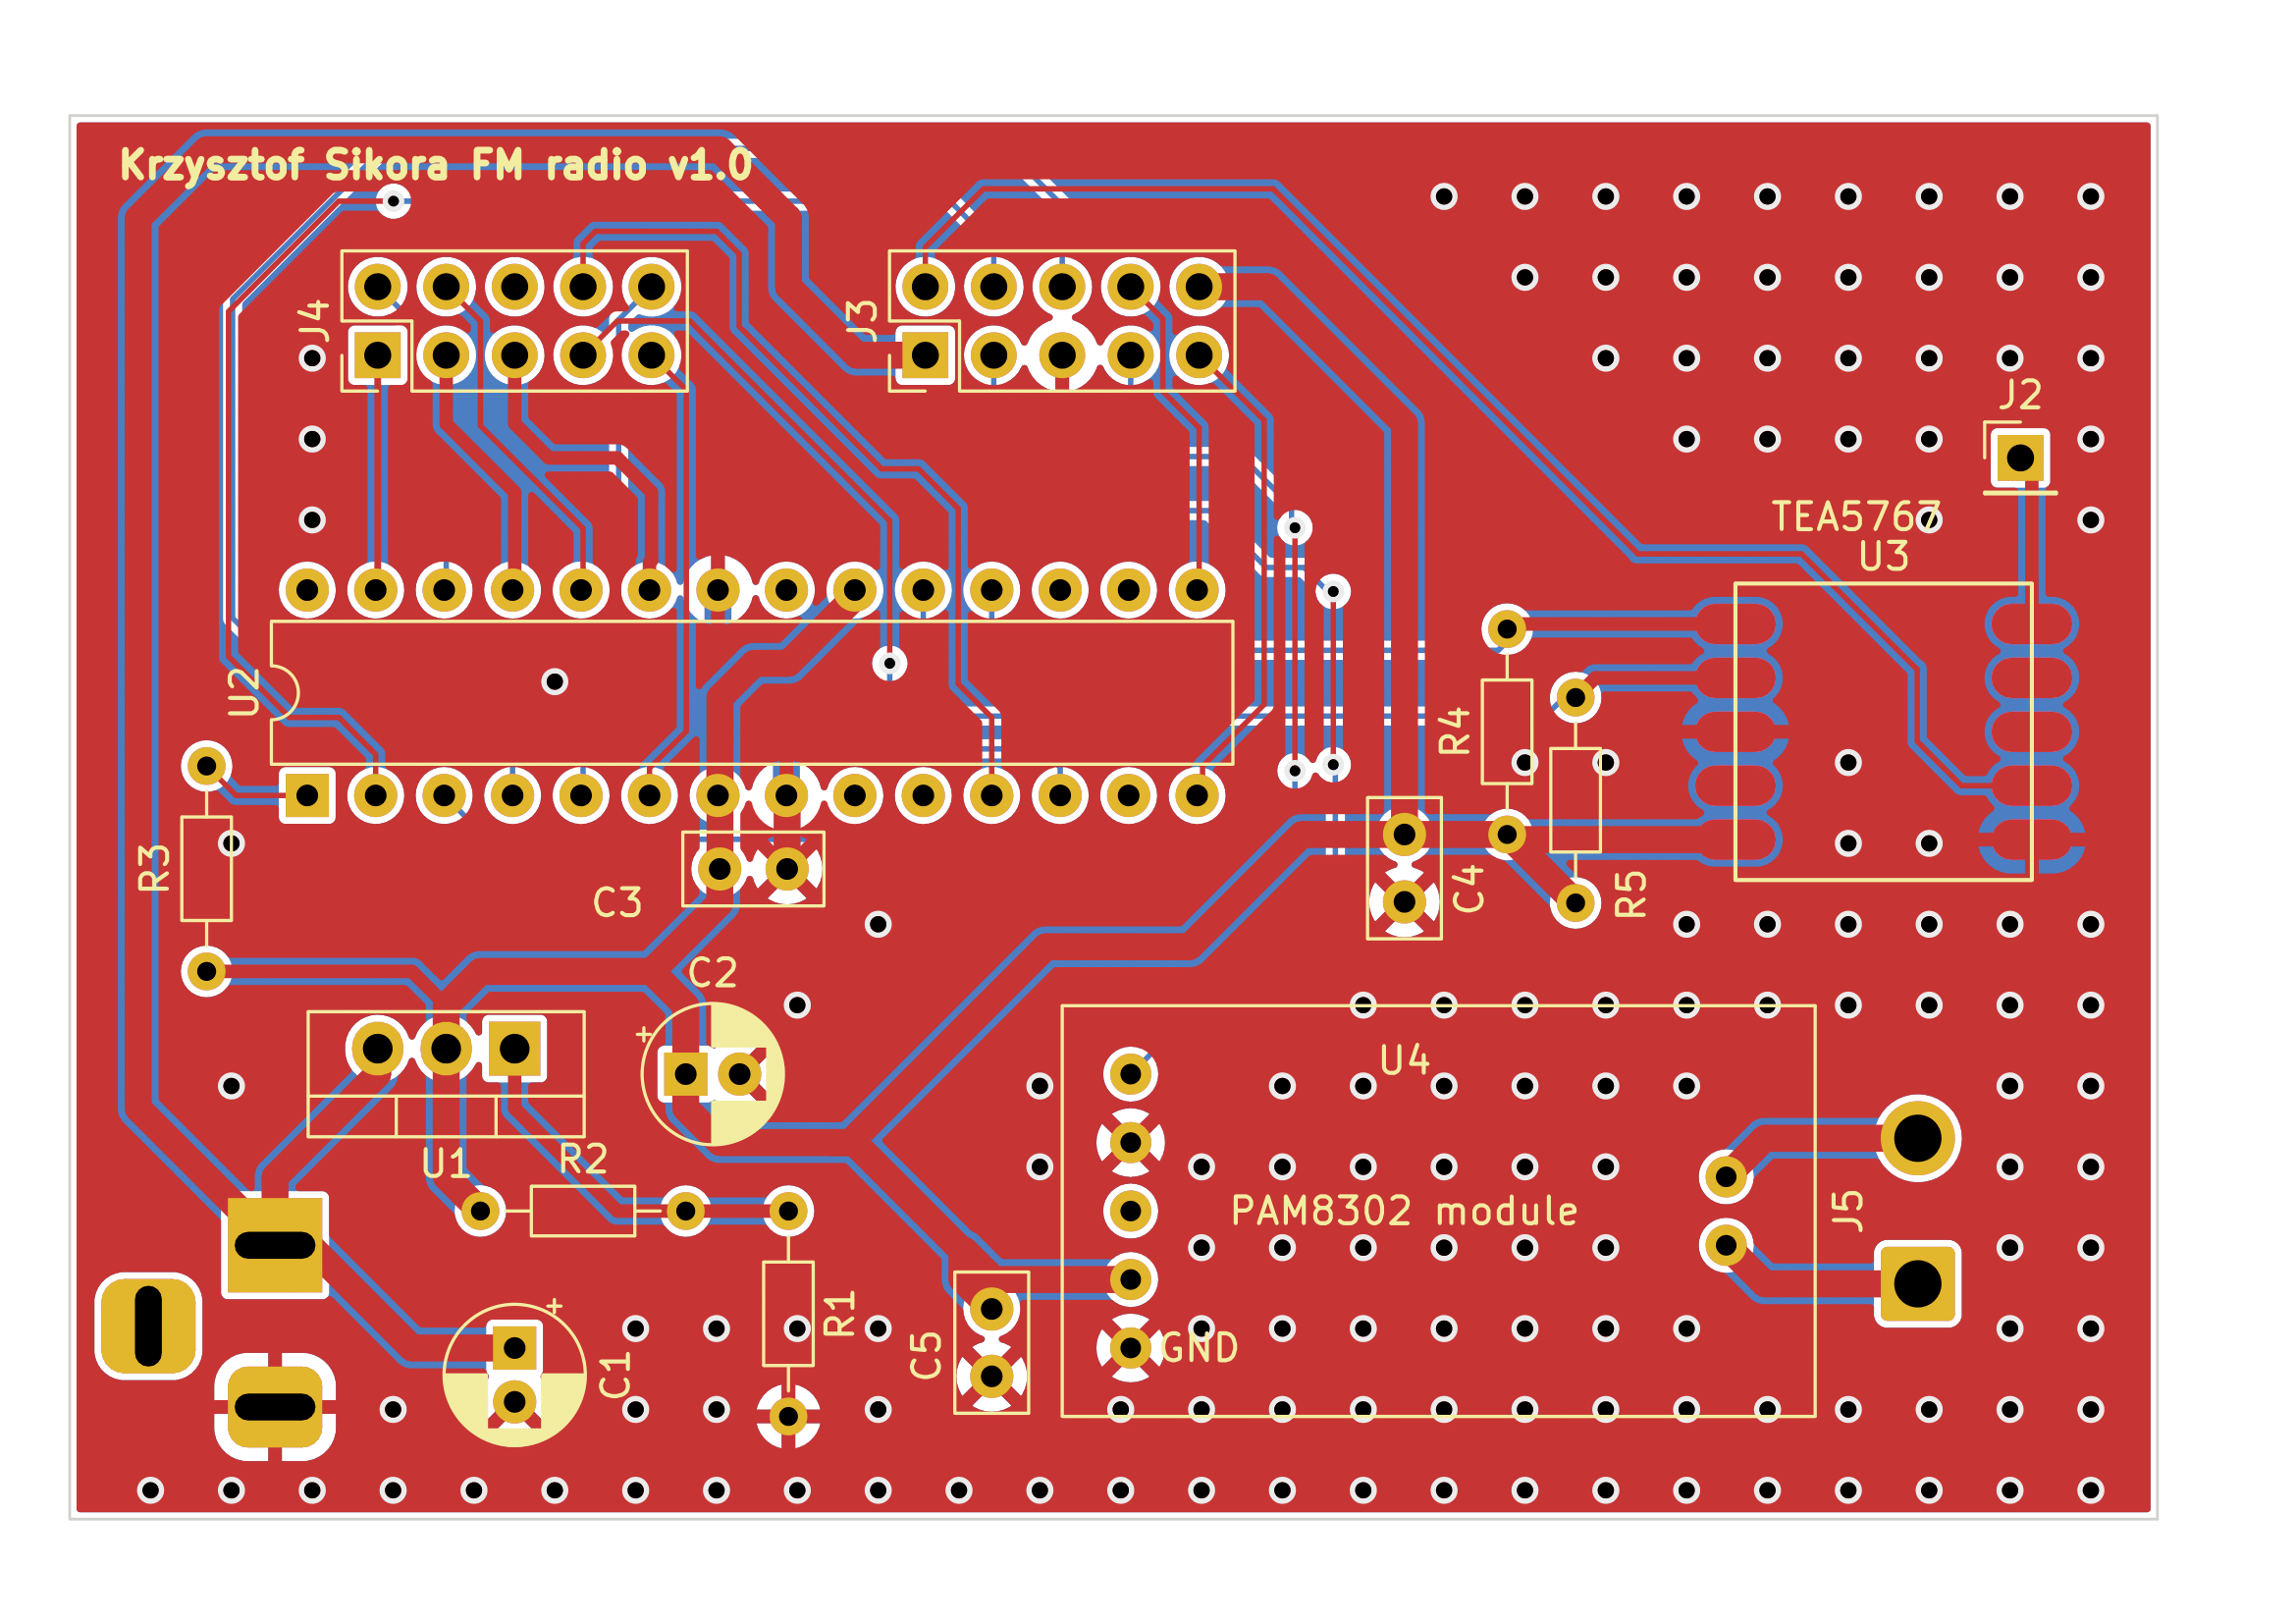
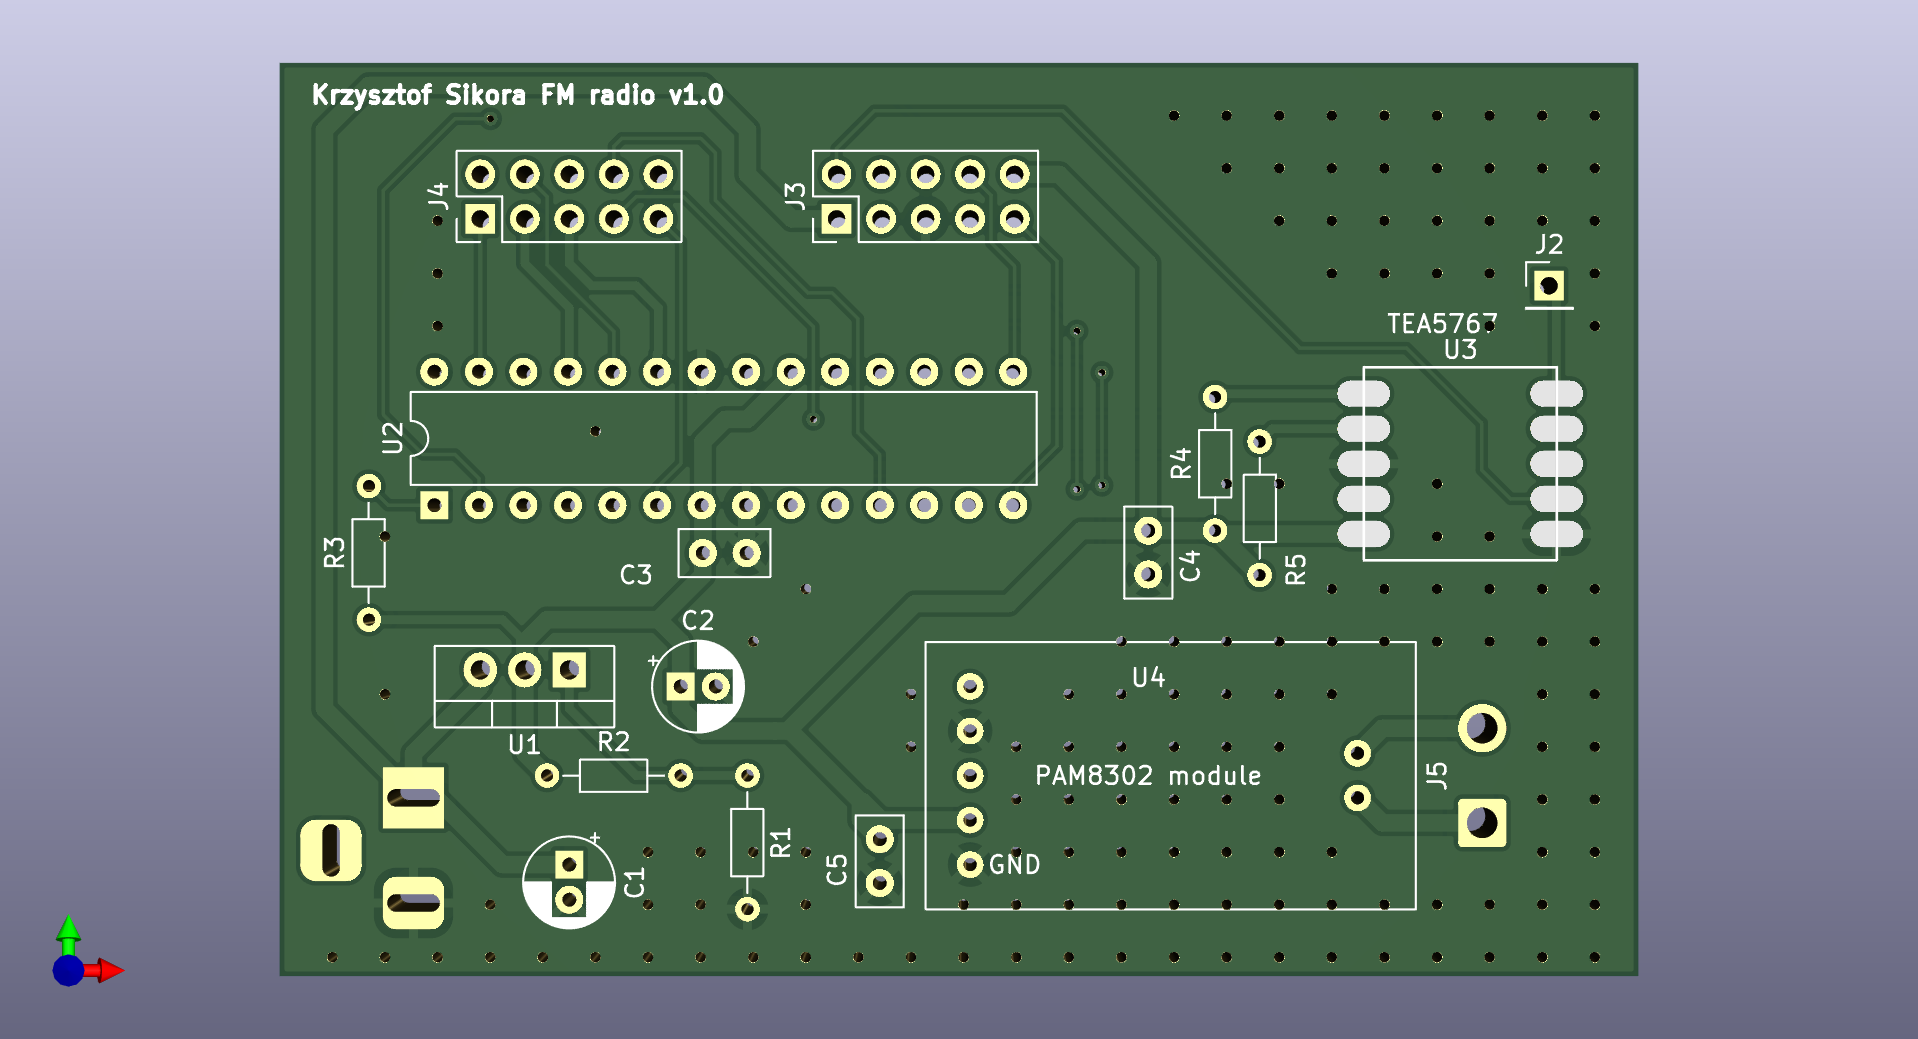
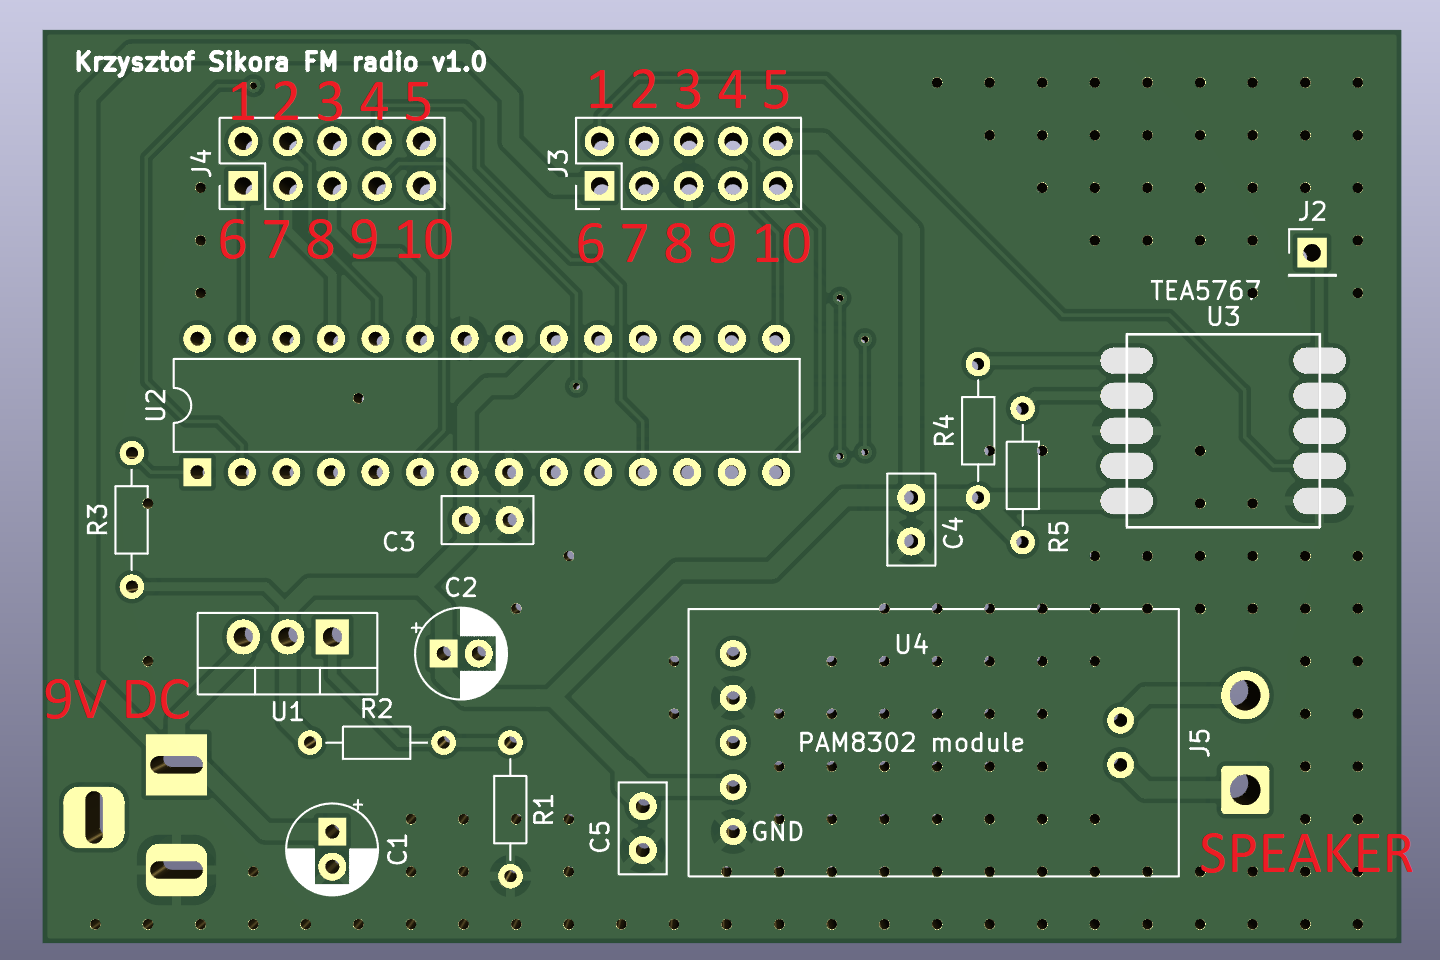
In the image above you can see the 9V DC input jack location, the speaker output connector and two pin headers (IDC connectors).
J4 connector pinout (all of these are generic GPIO pins of the Atmega8):
J3 connector pinout:
The code is split into several files, you can find them all on my github.
Main function for the tea5767 is the send_freq function that tells the module to set a certain frequency:
void send_freq()
{
	unsigned char frequencyH;
	unsigned char frequencyL;
	unsigned int frequencyB;

	frequencyB = 4 * (frequency * 1000000 + 225000) / 32768;
	frequencyH = frequencyB >> 8;
	frequencyL = frequencyB & 0xFF;

    //data transmition
    I2C_Start();
	I2C_Write(TEA5767_ADDRESS_W);
	I2C_Write(frequencyH);
	I2C_Write(frequencyL);
	I2C_Write(0xB0);
	I2C_Write(0x10);
	I2C_Write(0x00);
    I2C_Stop();

    _delay_ms(10);
}
and the search function:
void search(uint8_t direction)
{
	unsigned char frequencyH;
	unsigned char frequencyL;
	unsigned int frequencyB;
    double temp = 88.0;

    if(direction == 1)
    {
        temp = frequency + 0.1;
    }
    else
    {
        temp = frequency - 0.1;
    }

	frequencyB = 4 * (temp * 1000000 + 225000) / 32768;
	frequencyH = frequencyB >> 8;
	frequencyL = frequencyB & 0xFF;

    I2C_Start();
	I2C_Write(TEA5767_ADDRESS_W); //send address for writing
	I2C_Write(frequencyH |= 0b01000000); //search mode
I2C_Write(frequencyL);You can find what the specific bytes being sent to the module mean in its datasheet.
In the main program loop we check the encoder status:
if(val != val_tmp)
{
    if( (val == 3 && val_tmp == 1) || (val == 0 && val_tmp == 2) )
    {
        if(frequency < 108.0)
        {
            frequency += 1.0;
            send_freq();
            display(frequency); //display the current frequency
            search(1); //search up from the set freq
        }
    }
    else if( (val == 2 && val_tmp == 0) || (val == 1 && val_tmp == 3) )
    {
        if(frequency > 88.0)
        {
            frequency -= 1.0;
            send_freq();
            display(frequency); //display the current frequency
            search(0); //search down from the set freq
        }
    }
}
and change the frequency by 1Hz, then search up from that frequency to fine tune the radio automatically.
In addition to that there are also button inputs:
if(bit_is_clear(button_1_port, button_1_pin))
{
    _delay_ms(15); //debounce
    if(bit_is_clear(button_1_port, button_1_pin))
    {
        search(1);
        _delay_ms(500);
        read_freq();
        display(frequency); //display the current frequency
    }
}
after pressing the button, the module starts an up search from the current frequency. Same aplies to the search down. You can also change the frequency to one from the predefined tabel by pressing button number 4 or 5.
As it was just a revision of an older schematic, I did not bother to try and redesign it with newer uC etc. I just used the parts from the previous version (soldered onto a prototype board) or those I had lying around. Because of that the design may look a bit peculiar and I decided not to make a BOM file for it. Let me just list them in here for you:
This board is used as my front panel for controls and displaying the current frequency etc.
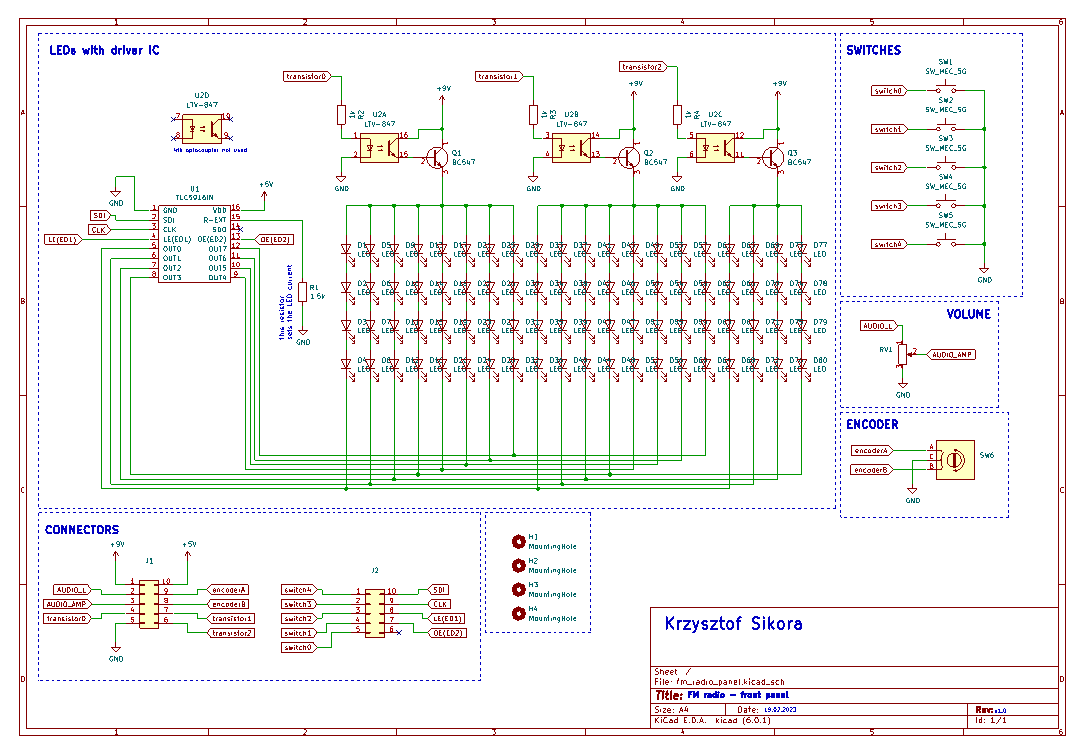
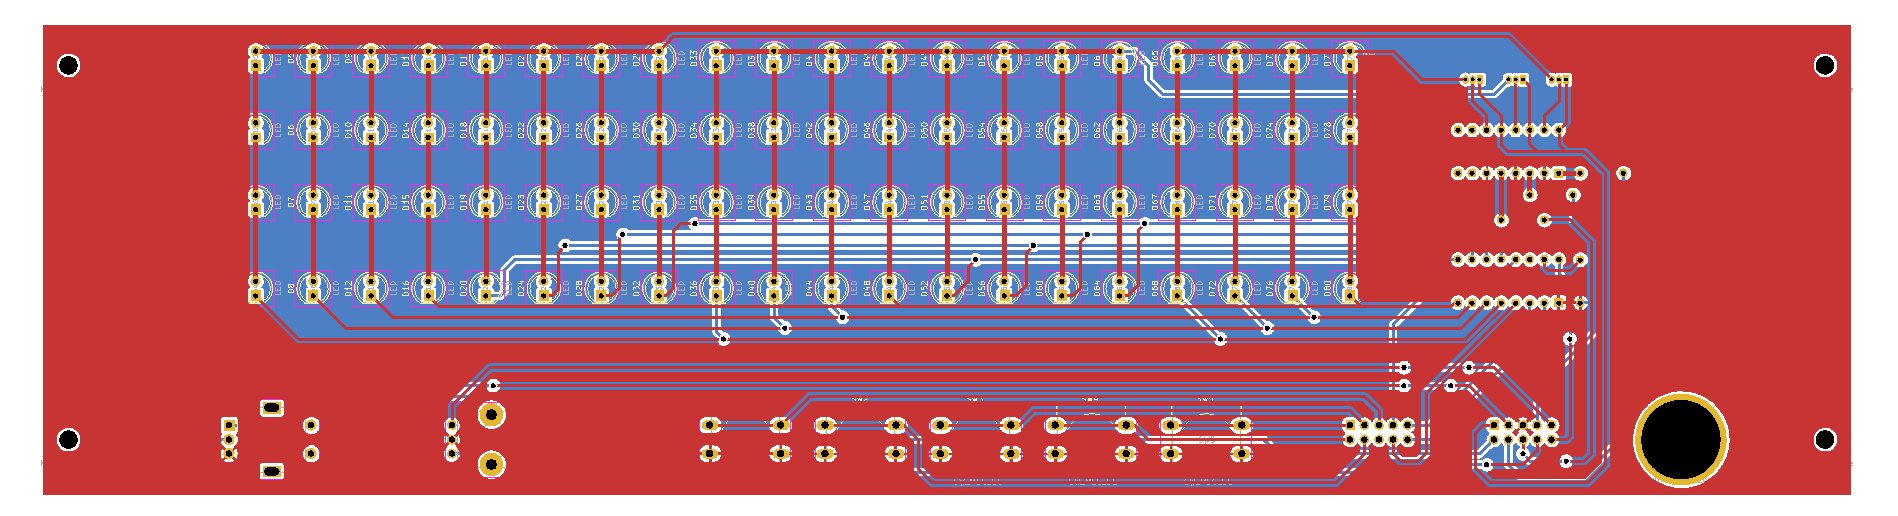
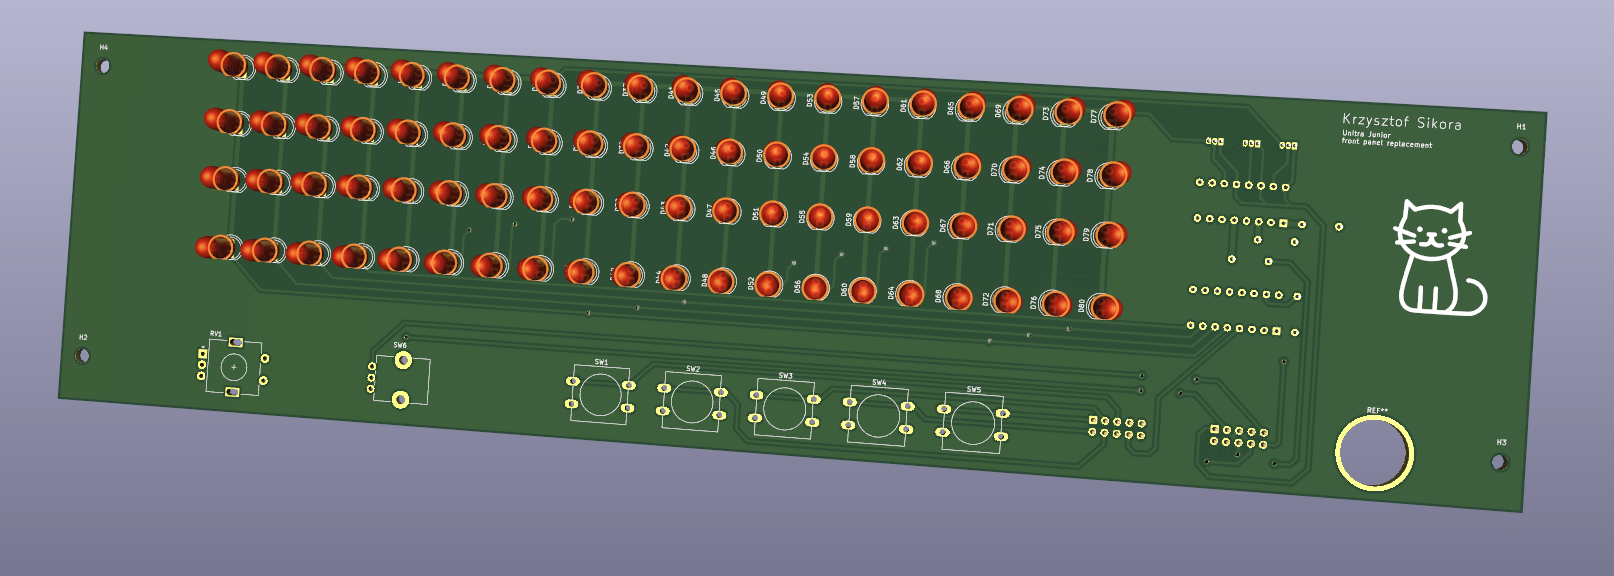
This project is licensed under the MIT License.
If you have any questions about the project feel free to contact us via email: krzysieksikora717@gmail.com
| Qty | Value | Footprint | References |
|---|---|---|---|
| 80 | LED | LED_THT:LED_D5.0mm | D1, D2, D10, D11, D12, D13, D14, D15, D16, D17, D18, D19, D20, D21, D22, D23 +64 |
| 5 | SW_MEC_5G | Button_Switch_THT:SW_PUSH-12mm | SW1, SW2, SW3, SW4, SW5 |
| 4 | MountingHole | MountingHole:MountingHole_3.2mm_M3 | H1, H2, H3, H4 |
| 3 | 1k | Resistor_THT:R_Axial_DIN0207_L6.3mm_D2.5mm_P7.62mm_Horizontal | R2, R3, R4 |
| 3 | BC547 | Package_TO_SOT_THT:TO-92_Inline | Q1, Q2, Q3 |
| 2 | Conn_02x05_Counter_Clockwise | Connector_IDC:IDC-Header_2x05_P2.54mm_Vertical | J1, J2 |
| 1 | 1.5k | Resistor_THT:R_Axial_DIN0207_L6.3mm_D2.5mm_P7.62mm_Horizontal | R1 |
| 1 | LTV-847 | Package_DIP:DIP-16_W7.62mm | U2 |
| 1 | R_Potentiometer | Rotary_Encoder:RotaryEncoder_Alps_EC11E-Switch_Vertical_H20mm | RV1 |
| 1 | RotaryEncoder | Potentiometer_THT:Potentiometer_Alps_RK09K_Single_Vertical | SW6 |
| 1 | TLC5916IN | Package_DIP:DIP-16_W7.62mm | U1 |
The 102 most common of 103 parts.
411568/Atmega8_FM_radio
Simple FM radio based on Atmega8 and TEA5767 module


javierveras/projectav-telemetry-pdb-2026
Our power distribution and telemetry system's hardware, firmware, and technical documentation.


xx0x/sw63
Sci-fi inspired electronic watch. MK4 currently in the development (out in 2026).

chrisgian05/Digital_LED_clock
A 6-digit 7-segment clock (HH:MM:SS) built around an ATmega328P, an external RTC, and a constant-current LED driver — split across two custom PCBs I designed in KiCad.

It measures 320 × 81.3 mm and has 2 copper layers, 1.6 mm thick.
103 parts, built around the TLC5916IN, LTV-847 and BC547. The full list of its parts is on this page, with links to each part's symbol and footprint where PCBKit's library has them.
From the 411568/Atmega8_FM_radio repository on GitHub, at the commit this page was made from: the board is display_and_controls_board/backup.kicad_pcb and its schematic display_and_controls_board/fm_radio_panel.kicad_sch. PCBKit opens the board in the browser, with nothing to install.
Its repository publishes it under the MIT licence: you may reuse it on that licence's terms (keep the author's notice, and for a copyleft licence share your changes alike).